Whether you’ve bought one yourself or been given one as a gift, almost every gardener has tried their hand at orchid care at some point.
For many, that process does not end well. The plant often dies off after the flowering season or simply refuses to flower again.
(If that’s the case for you, you need to read our guide to getting your orchid to bloom again and again.)
But, for a lucky few with the right conditions and knowledge, the plant grows so well for so long that it eventually outgrows the pot. Or, they’ve managed to keep it going for so long in the same pot that the soil begins to break down, requiring a repotting anyway.
If you want your orchid to continue to thrive and produce the stunning flowers they are known for year after year, regular repotting every few years is a necessity.
Luckily, unlike some other elements of orchid care, it’s not a difficult task.
Follow these simple steps to have your orchid happy in a new home in no time.
When To Repot Orchids
Knowing the right time to repot your plants is essential to keeping your plant alive. Too often, overzealous plant parents repot far too early, fearing the consequences if the plant gets a little rootbound. Others forget to repot at all, believing continuing green leaves are a sign that all is well below the soil.
Like any other plant, it’s important to repot your orchids at the right time and only when necessary. This will typically be every 1-3 years, depending on when you bought your orchid and how long it’s been in the same pot.
There are a few signs that indicate your plant needs repotting.
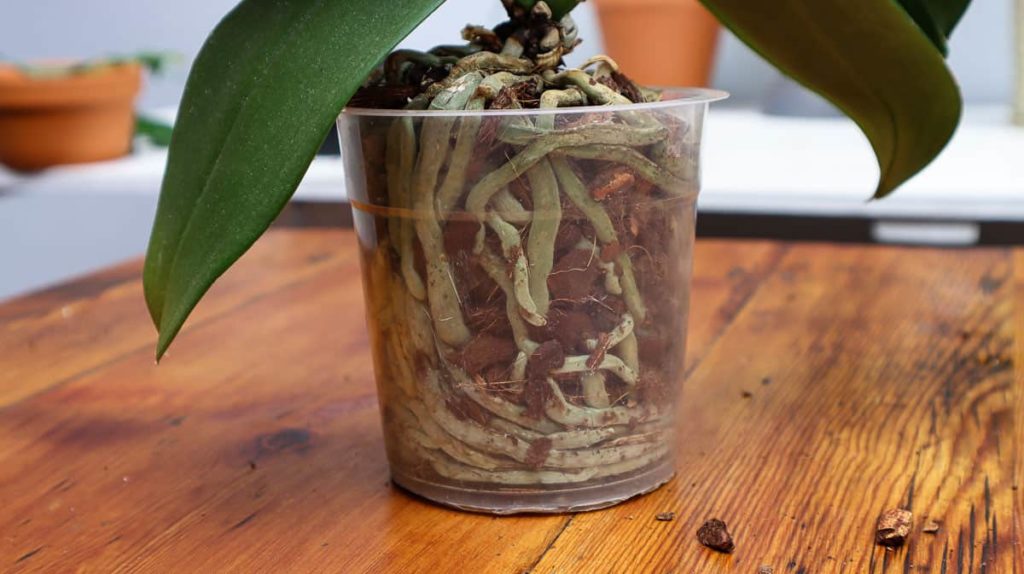
Look out for white roots emerging from the container out the bottom or sides. This means the roots have nowhere else to go and need a new pot with more space to expand.
Degraded soil is another sign to keep an eye out for. Orchids grow in extremely loose, well-draining soil with plenty of bark. Over time, the components of this soil begin to disintegrate into smaller particles. As they compact, they limit the amount of air reaching the roots and influence drainage, leading to potential problems with root rot.
Most orchids can be repotted any time of year, but after flowering is best to avoid damaging the blooms. This also allows the plant to focus on growing new roots rather than maintaining existing flowers.
For orchids with pseudobulbs like cattleyas, you’ll need to wait until the plant has finished flowering as this is when new root growth will occur.
How To Repot Orchids
Choose A New Pot
The first step in the process is finding a new pot. Unfortunately, this isn’t as simple as picking up any old plastic pot and repotting.
Orchids grow best in specific pots that provide plenty of airflow and drainage for healthy roots. Specialized orchid pots typically have holes along the side of the pot as well as on the bottom to deliver more oxygen around the plant. However, other well-draining plants that draw moisture away from the roots (such as terracotta) are also suitable.
If your orchid has outgrown its pot, choose a new one or two sizes up at most. Anything larger will hold on to too much moisture and won’t provide the cramped conditions these plants prefer.
If you’re only repotting for a soil refresh, you can use the same pot, especially if you have a Phalaenopsis orchid. However, since repotting is only done every few years, it’s far easier to choose a slightly bigger pot now than to have to repot sooner than usual when the roots run out of space.
Sterilize Your Tools
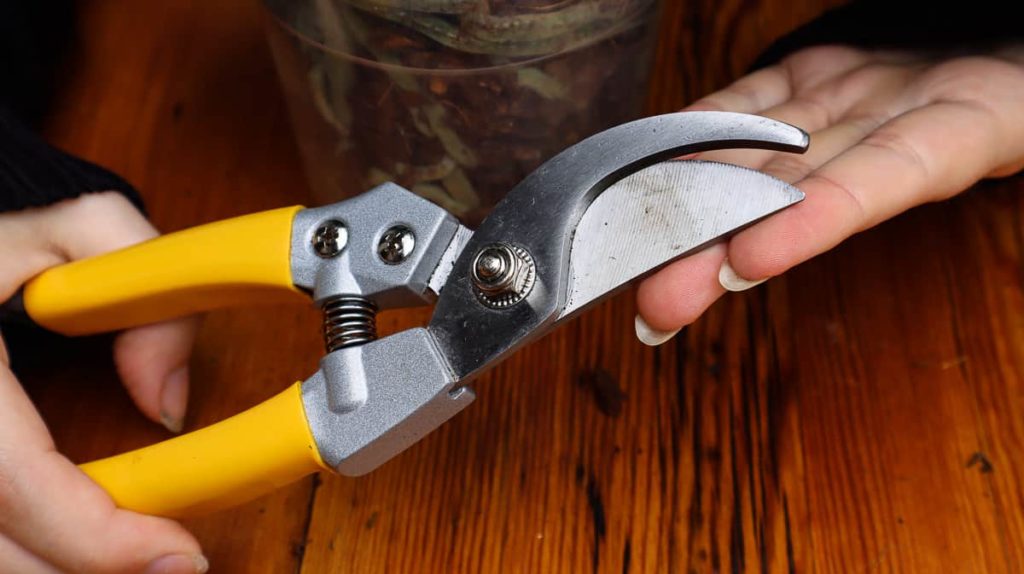
With your new pot on hand, all you need is a pair of sharp scissors or shears and you’ll have all the tools you need to get started. But, before you do, there is a crucial step you cannot miss out on – sterilizing your tools.
Orchids are sensitive to bacteria and other sneaky germs that hide in your tools, ready to cause havoc. Using any dirty tools around orchids can result in later problems with the roots that are impossible to fix. It may be a tedious task, and certainly less exciting than other gardening activities, but it is important for the health of your plants.
Sterilize both your shears and the new pot in a diluted solution of 5% bleach and water to kill any harmful bacteria. Remember to wash your hands before handling the roots too to avoid the same issue.
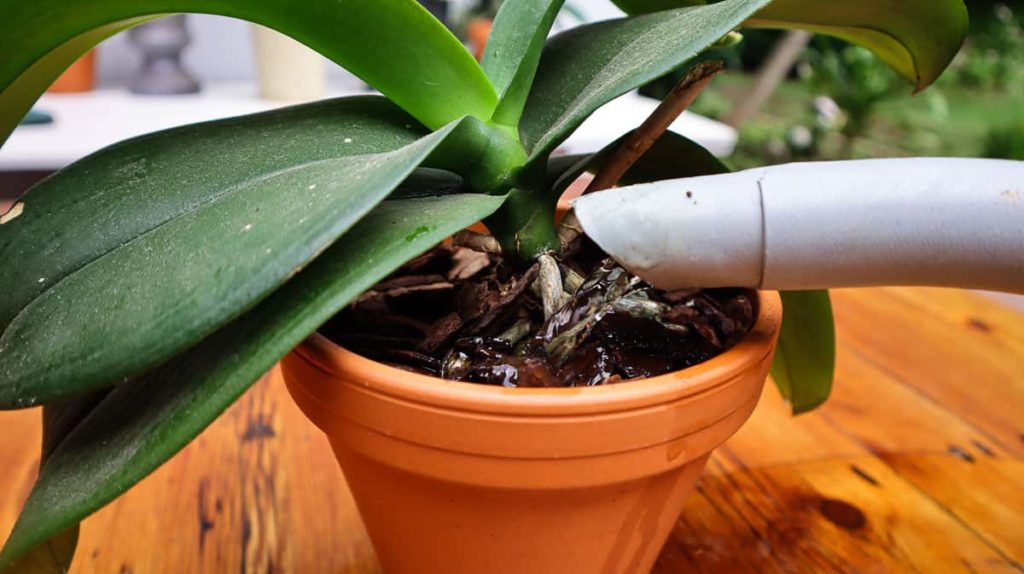
Water The Plant
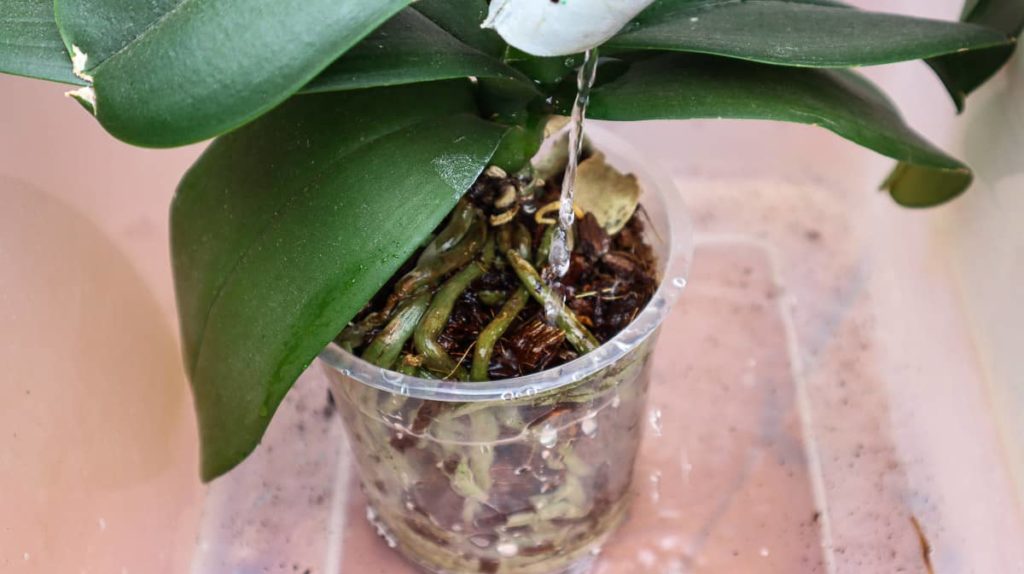
When repotting houseplants, it’s usually best not to water the plant for several days to allow the soil to dry out. This makes removing the plant and the soil as well as repotting far easier. However, that is not the case with orchids.
Since orchid roots remain dry for long periods, they can become brittle and difficult to maneuver. When you’re planning on handling these roots and fitting them into a new pot, brittle roots is something you want to avoid.
Before you repot, soak the roots in water for around 10 minutes to ensure they are well hydrated. Hydrated roots are easier to move around without damage. This also helps you identify any brown damaged roots, as healthy roots will turn white or green when well-watered.
Cut Off The Flower Spikes
Removing the flower spike is an optional step (depending on when you’re repotting), but can be a helpful one. For starters, it is quite difficult to keep the delicate flowers on the stem during the process of repotting. Those that do remain on the stem are likely to fall off anyway as a result of the shock of transplanting and the change in conditions.
But, there is a more important reason to remove the flower spike – energy.
When an orchid flowers, it directs all the energy it makes to keeping those flowers going. This leaves little for root growth and health. By removing the flower spike, all the energy the plant would have spent on the flowers is redirected to growing new roots and keeping the plant healthy, preventing transplant shock and encouraging your plant to fill out the new space in the pot.
Repotting doesn’t have to come at the expense of your precious flowers though. If you can, wait until the orchid has finished flowering to remove the spike and repot. Removing the spike at this point is a necessity anyway, and allows you to enjoy the blooms fully while they are still around.
If your orchid desperately needs repotting but is in the middle of flowering, you can keep the flowers on the plant. Be sure to repot as carefully and gently as possible and to limit root damage and keep those flowers going after repotting.
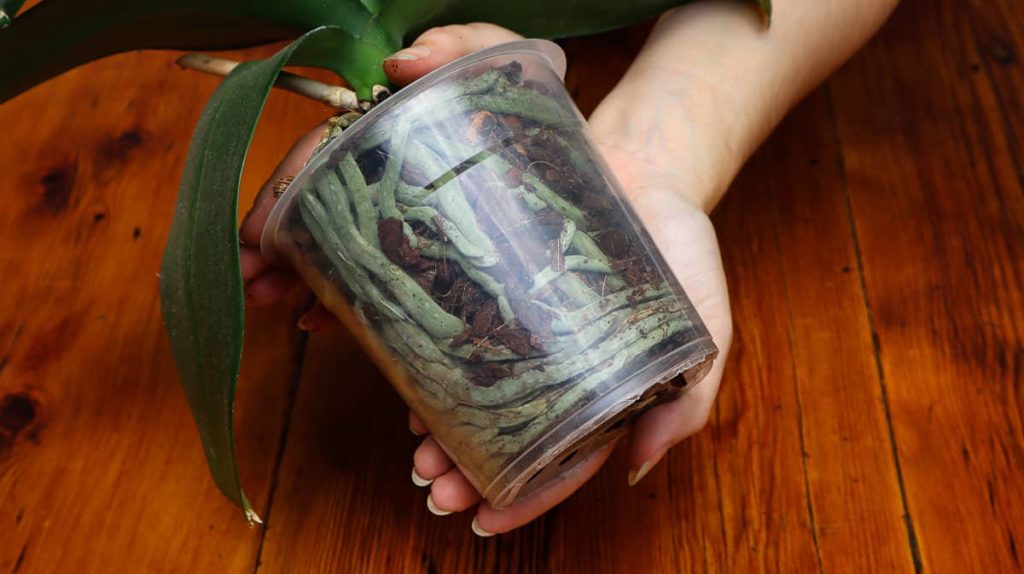
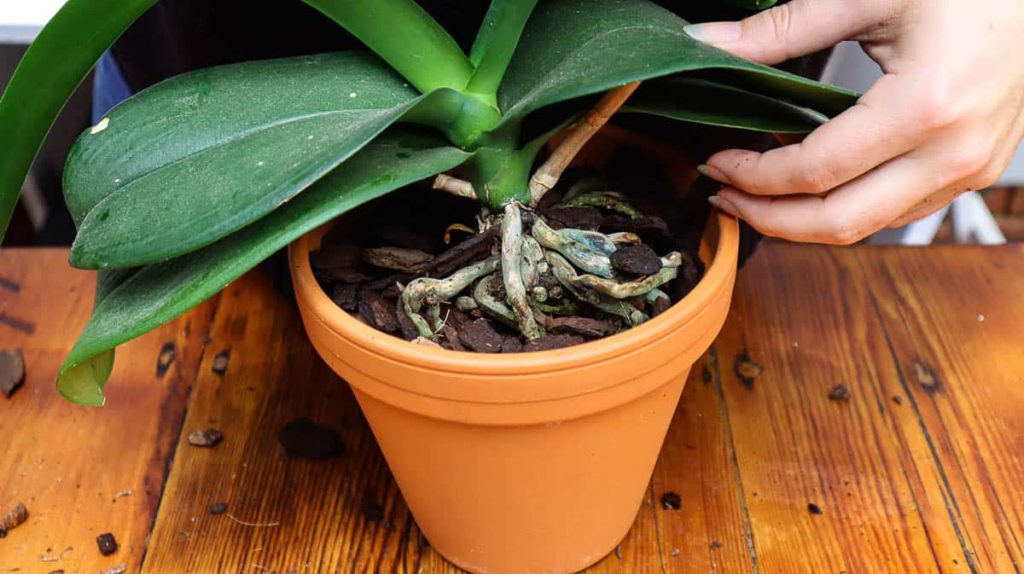
Remove The Plant
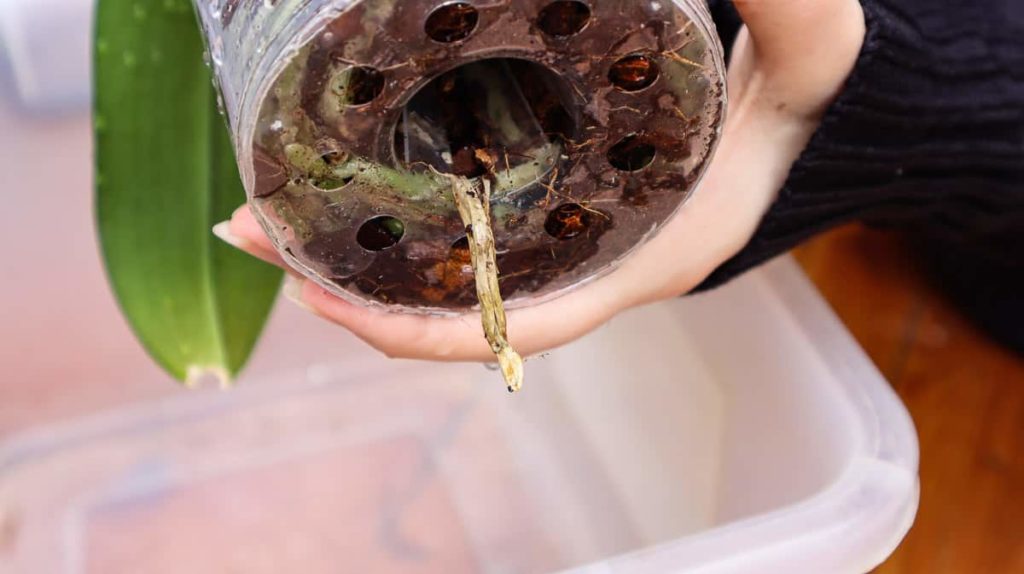
After all the preparation, you are finally ready to repot. Start by removing the plant from its existing pot, taking care not to damage any roots. If it is resistant to being removed, squeeze the sides of the pot gently to release the medium and roots from the sides of the pot. Alternatively, you can run a clean, disinfected knife around the rim of the pot to loosen it.
When lifting the plant out of the pot, hold it at the base. Don’t pull from the foliage or flower stalk as this can damage the center of the plant. Turn the pot on its side and pull slowly to make the process easier.
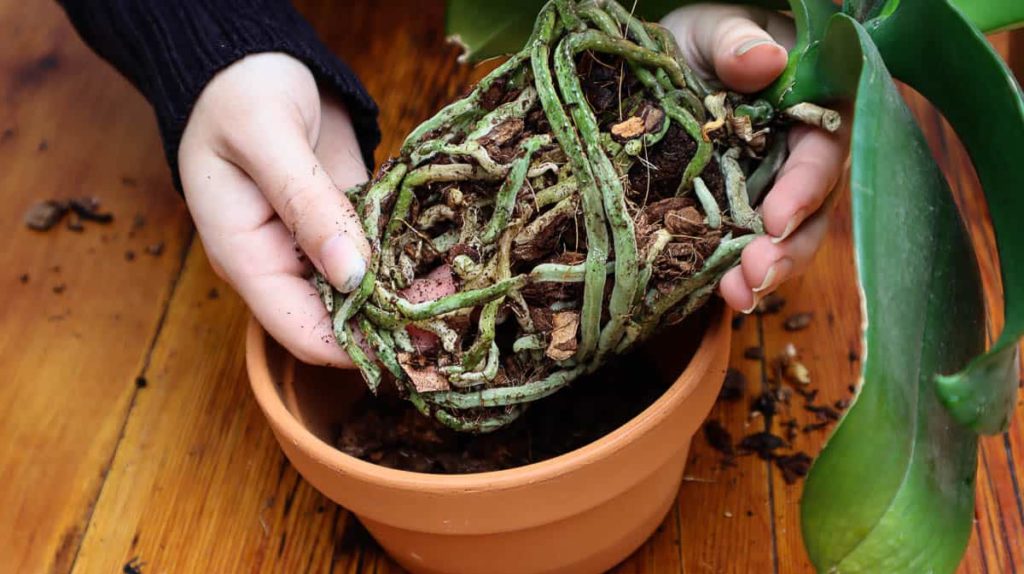
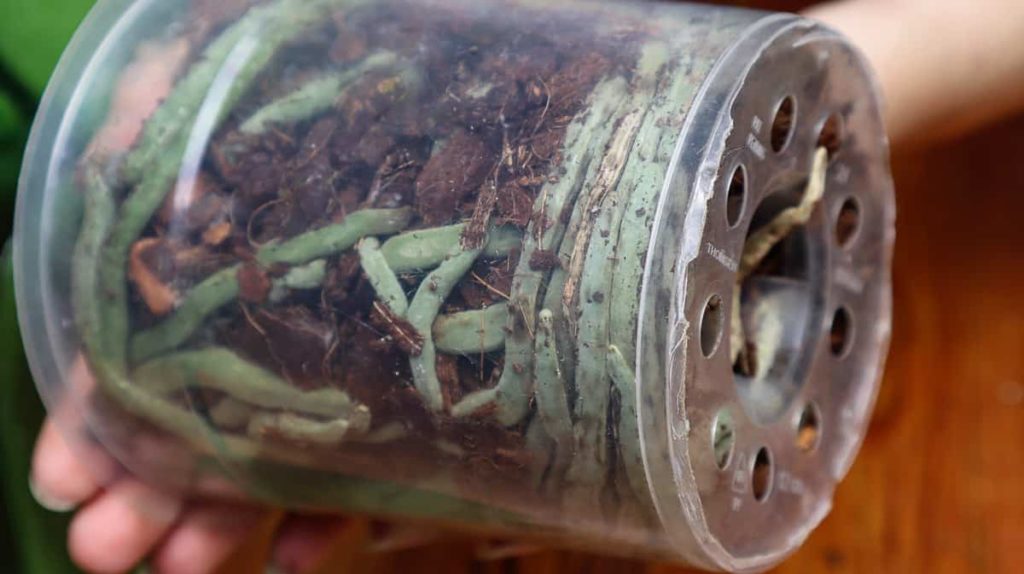
Once out of the pot, gently shake off any potting medium around the roots. Any remaining mix can be rinsed off with water and removed by hand. The roots should be completely free of any soil before repotting.
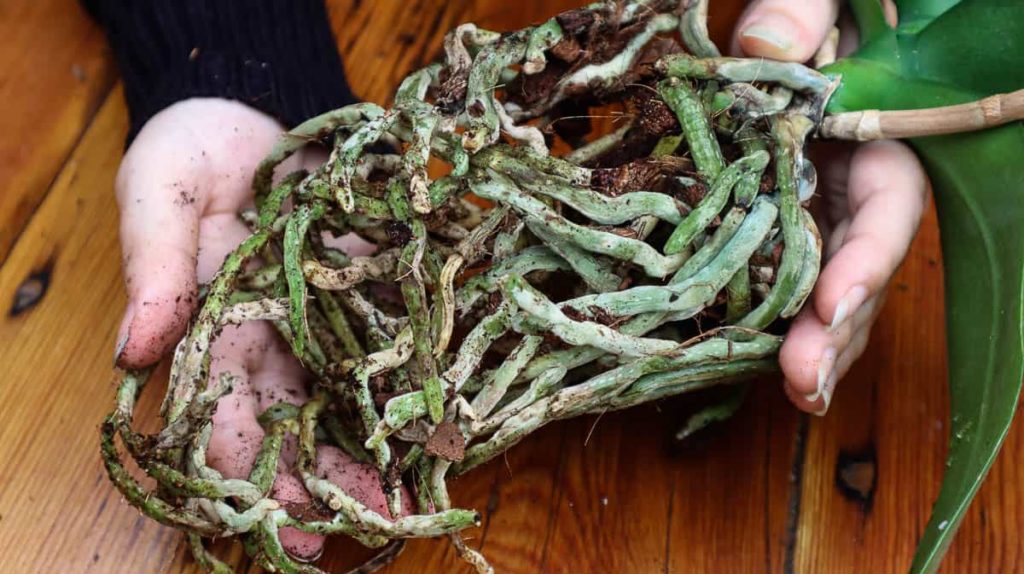
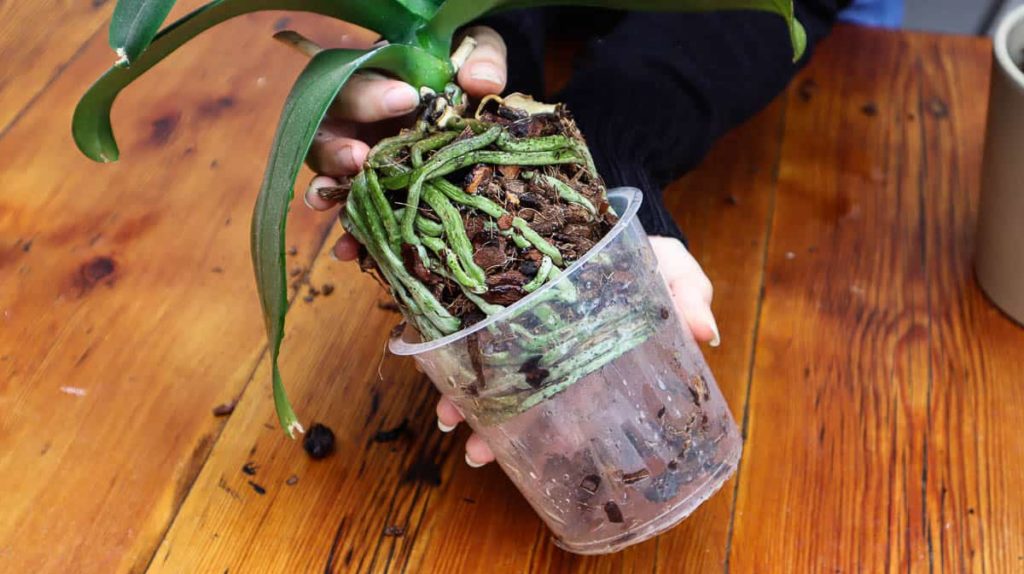
Trim The Roots
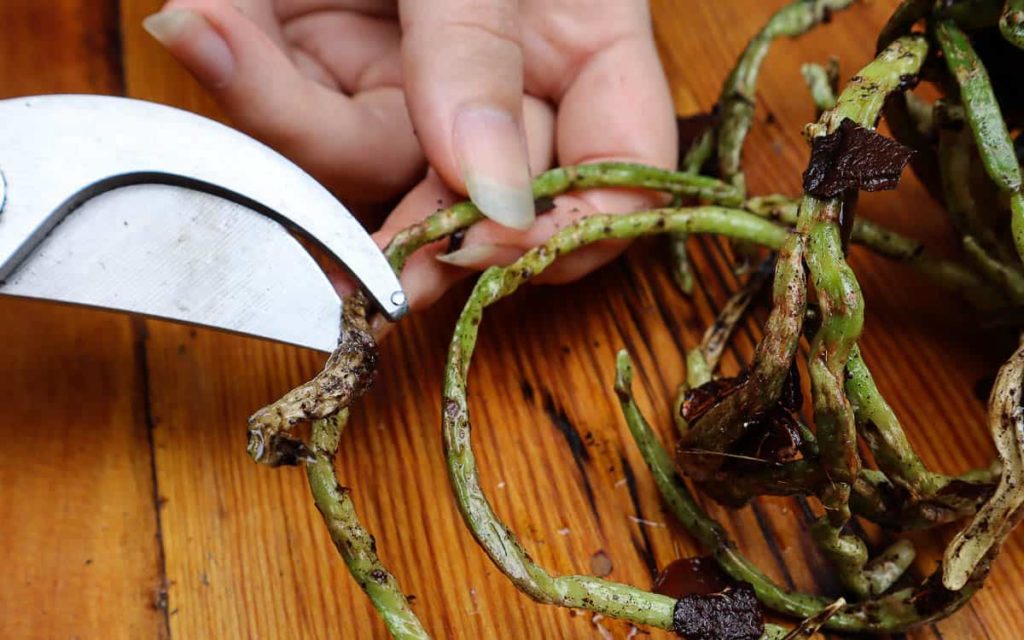
With the roots clearly visible from all sides, this is the prime opportunity to check your orchid’s root health. Due to improper care or age, some roots become damaged or die off. It’s vital to remove these to give the plant the best chance of survival and growth in the new pot.
With your disinfected shears or scissors, trim any dead, damaged, or mushy roots up to the healthy growth. Healthy roots will be thick and white or green while dead roots will be thin and brown or yellow. You can also remove any yellowing or damaged leaves at the same time.
Repot The Plant
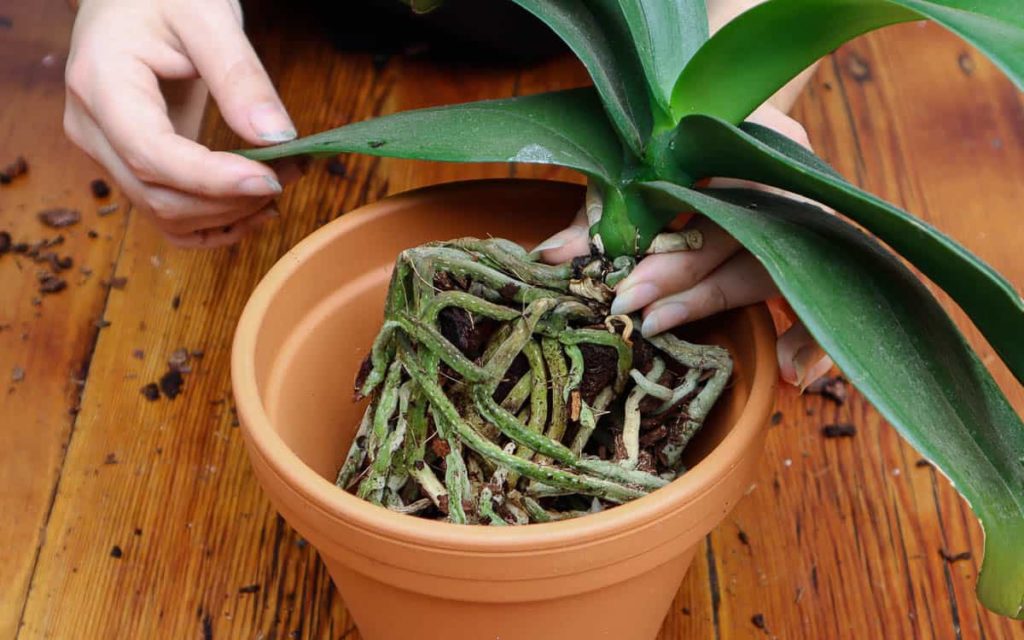
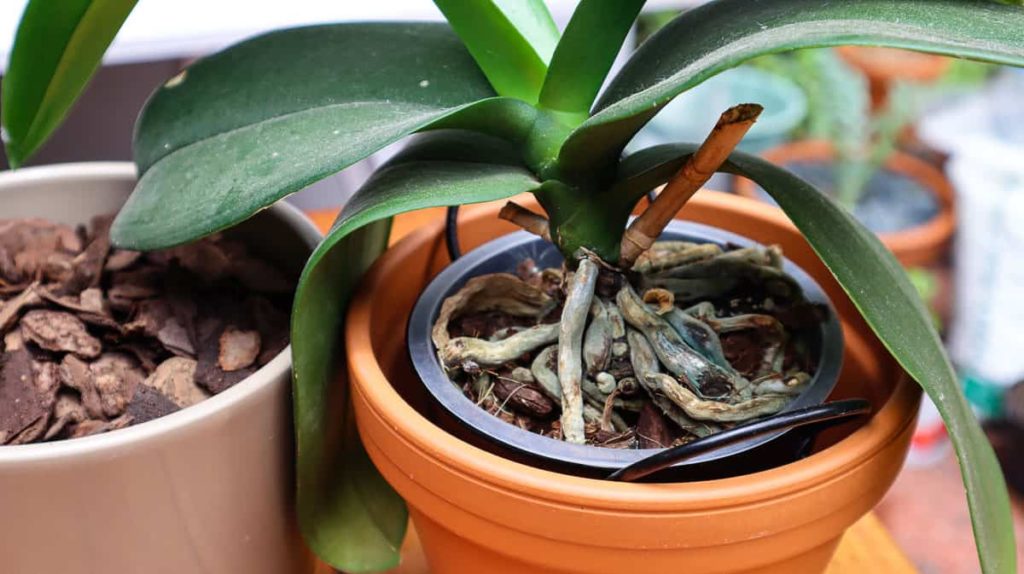
Gather the plant and your new pot for repotting. Place a layer of soil in the bottom of the pot, with the thickness of the layer depending on the size of your plant and the height of the pot. You can measure the size of the layer by holding the plant inside the pot just below the rim and measuring the space between the roots and the bottom of the pot.
Collect the roots together and place them on top of this soil layer. Depending on the size of the plant, you may need to hold it in place while you fill in the rest of the soil. Ensure the base of the plant is level and positioned at the soil line to stop any soil mix collecting around the leaves and resulting in rotting.
When the plant is level and secured, fill in any gaps with soil mix. When repotting orchids, it’s vital to use specialized orchid potting mix and not regular potting soil. Potting soil holds on to far too much water for these epiphytic plants and will cause the roots to rot.
Orchid potting mix is made up mostly of bark and other well-draining materials that ensure the roots get plenty of oxygen and aren’t sitting in water. Orchid potting mix will be available at your local nursery or online.
With dense roots and a chunky potting mix, filling the pot with soil isn’t as easy and as it sounds. Holding the plant in place, you will need to push the soil into the gaps by hand to surround the roots. This can be done with long tweezers or chopsticks. Be careful not to push the pieces too far to prevent damage to the roots.
After Care
Fill the pot with soil until it reaches just below the rim of the pot. If the plant isn’t anchored in place due to damaged roots, you can add a stake to the pot now to keep it upright. Orchids in flower should also be staked now to keep the flower stalks upright.
Water the plant well and return it to its original home. It should live happily in the new pot for a few years before you need to start the process all over again.