
Preparing roses for the winter season during fall can be a tedious job, so it’s no wonder that it sometimes becomes the object of procrastination even for experienced gardeners.
After investing so much time and energy in growing roses over the spring and summer months (fertilizing, deadheading, training), putting our roses to bed definitely feels bittersweet.

The consolation (or motivation) is that the fall rose care will be rewarded tenfold next year in the garden. Here are a few essential fall jobs for roses that will help you enjoy lovely blooms next year.
1. Stop fertilizing your roses.
If you’ve been fertilizing your roses, now’s the time to stop. As tempted as we may be to continue fertilizing roses for as long as we see blooms on the plant, fertilizing past late summer to early fall is not a good idea.
As a general rule of thumb, you should stop fertilizing at least eight weeks before your first expected frost.
Fertilizing later into the fall encourages new growth that will be very vulnerable when the temperatures drop. Allow the plant to rest and prepare for winter.

2. Stop deadheading your roses.
That sounds counterintuitive, I know. Especially since deadheading is one of the main gardening jobs you have to do for roses all summer long. But remember that the purpose of deadheading is to encourage plants to set out more flowers in order to extend the blooming season.
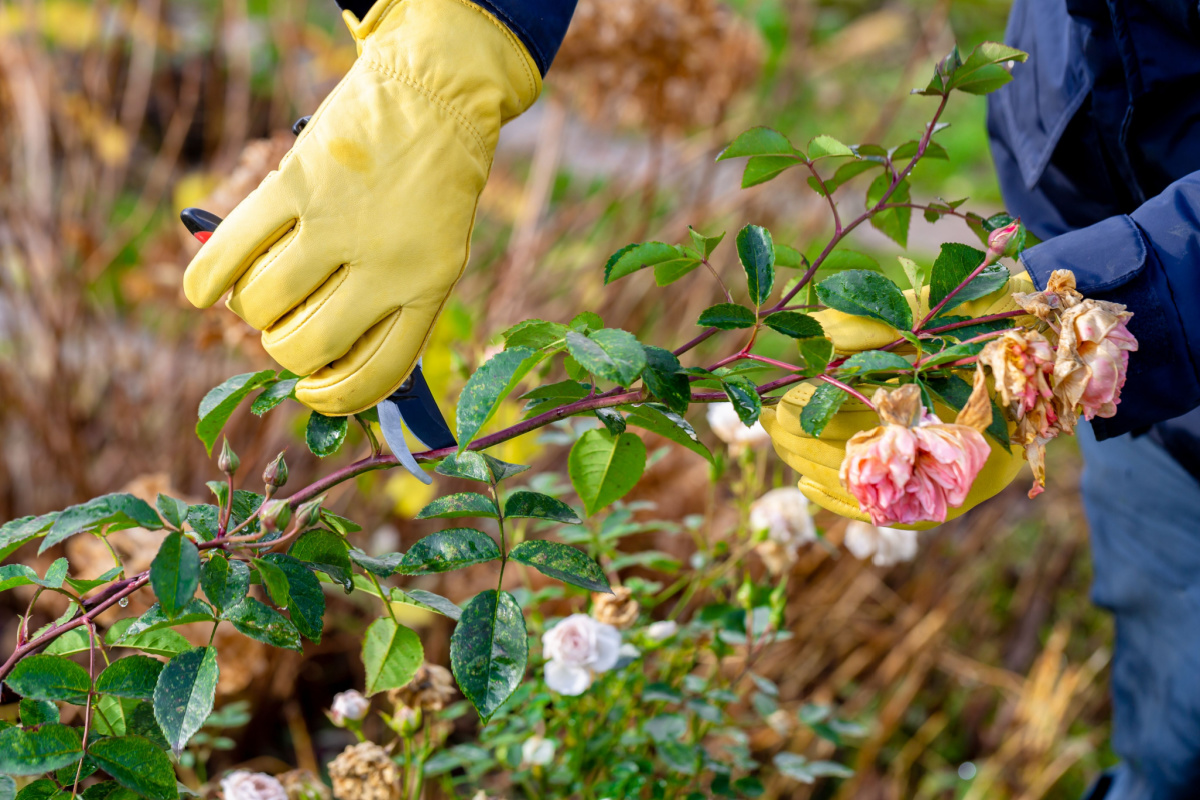
Starting in October, you’ll want to do the opposite: your goal should be to encourage roses to enter their period of dormancy. Cutting a few rose flowers for arrangements should be fine, but try to allow most of your rose flowers to set hips (the fruit of the rose) as a signal to the plant that it’s the end of the growing season. That being said, if there are buds that haven’t opened, you can remove them.

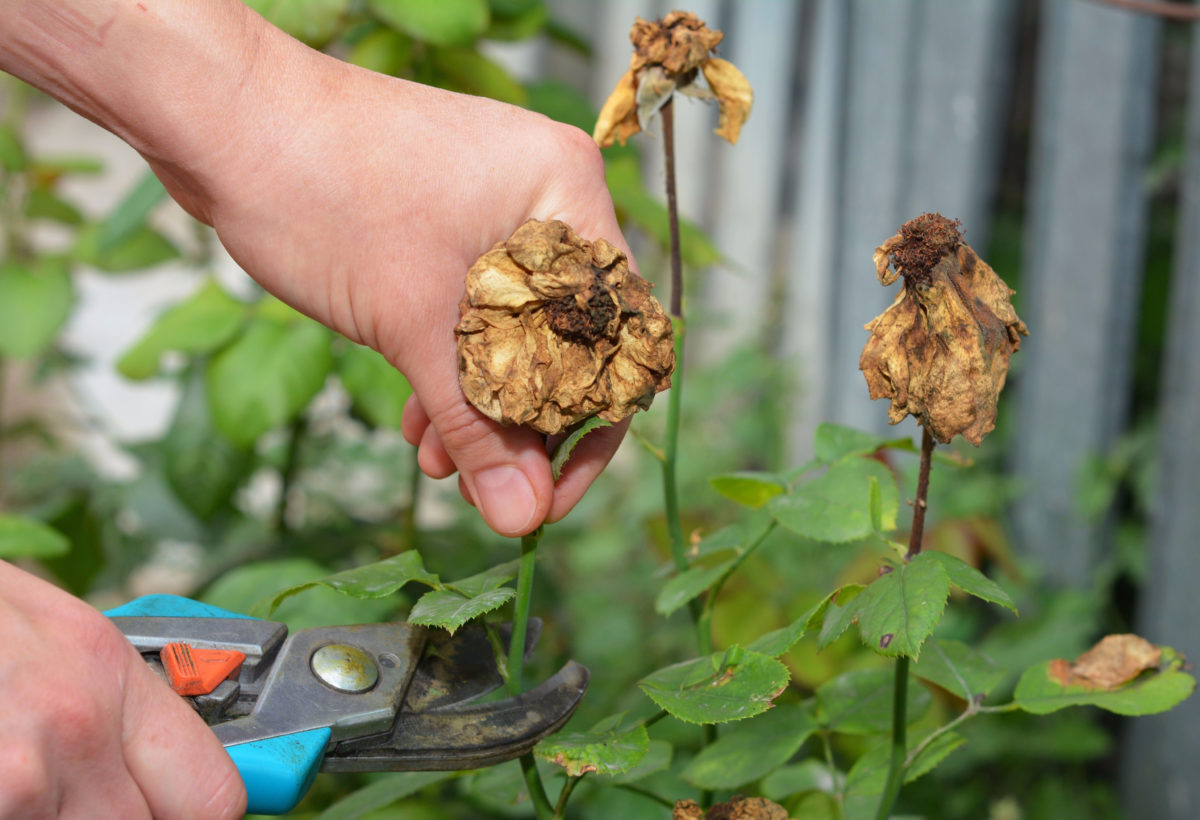
3. Lightly prune dead, diseased and damaged canes.
If you want to do any hard pruning, you should wait until spring (although keep in mind that not all roses benefit from a hard prune). This is because hard pruning (cutting the plant down to the base) will likely encourage new growth, which is the last thing you want before the temperatures drop.
But you still need to do some light pruning of your roses in the fall to remove dead, diseased and damaged stems.
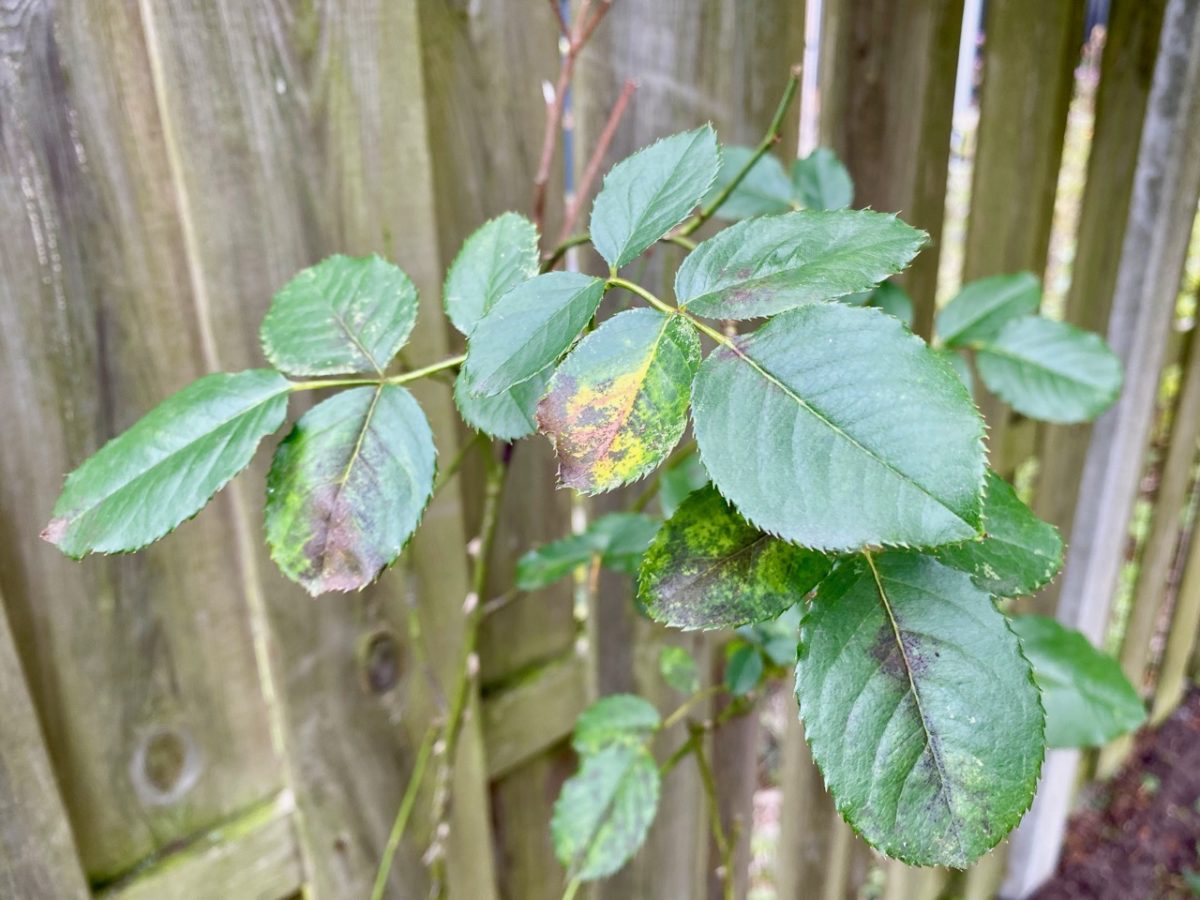
Start by removing the canes that may have broken during the season. Then cut back the canes that show signs of blackspot or mildew. This is mandatory, as blackspot will overwinter on canes or in foliage debris and will come back stronger next year.
Lastly, remove the canes that look brown and shriveled. These stems have dried up and will no longer put out any new growth.
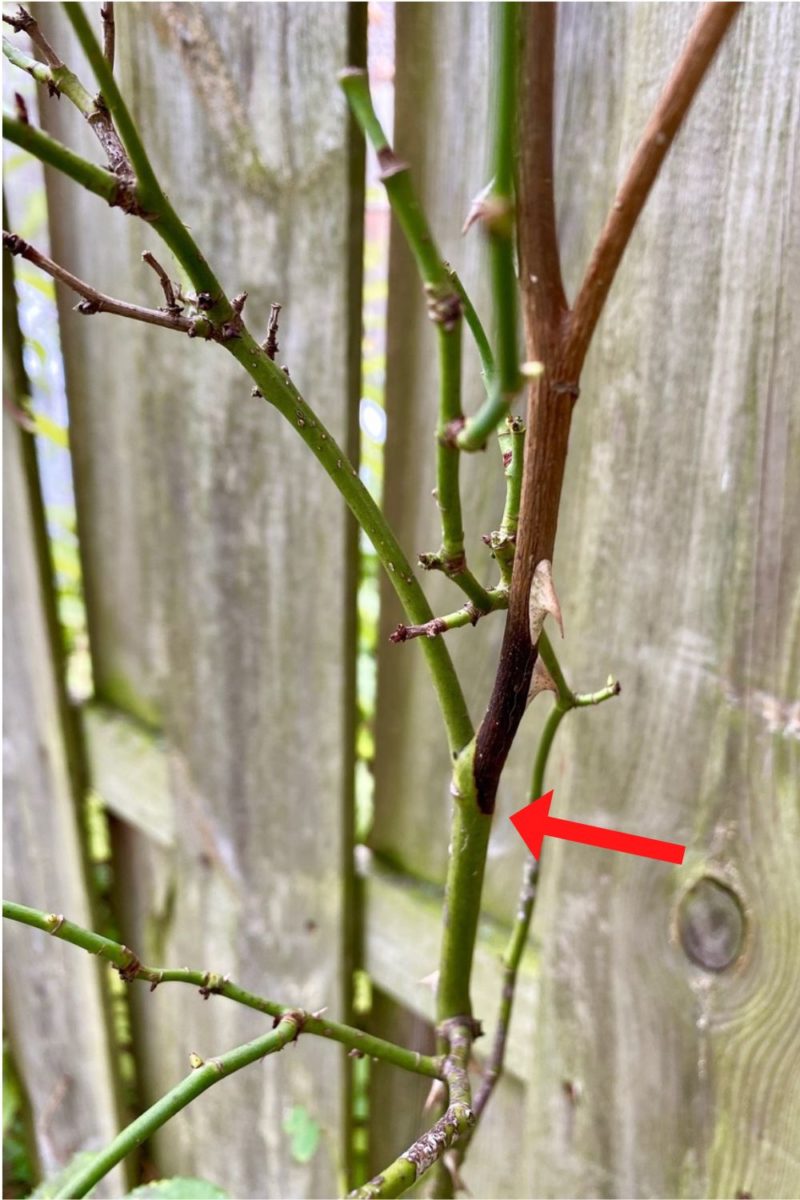
The best method to prune roses, whether in the fall or in spring, is by making clean 45-degree angled cuts (diagonally across the cane) using sharp gardening shears. The cleaner the cut, the better.
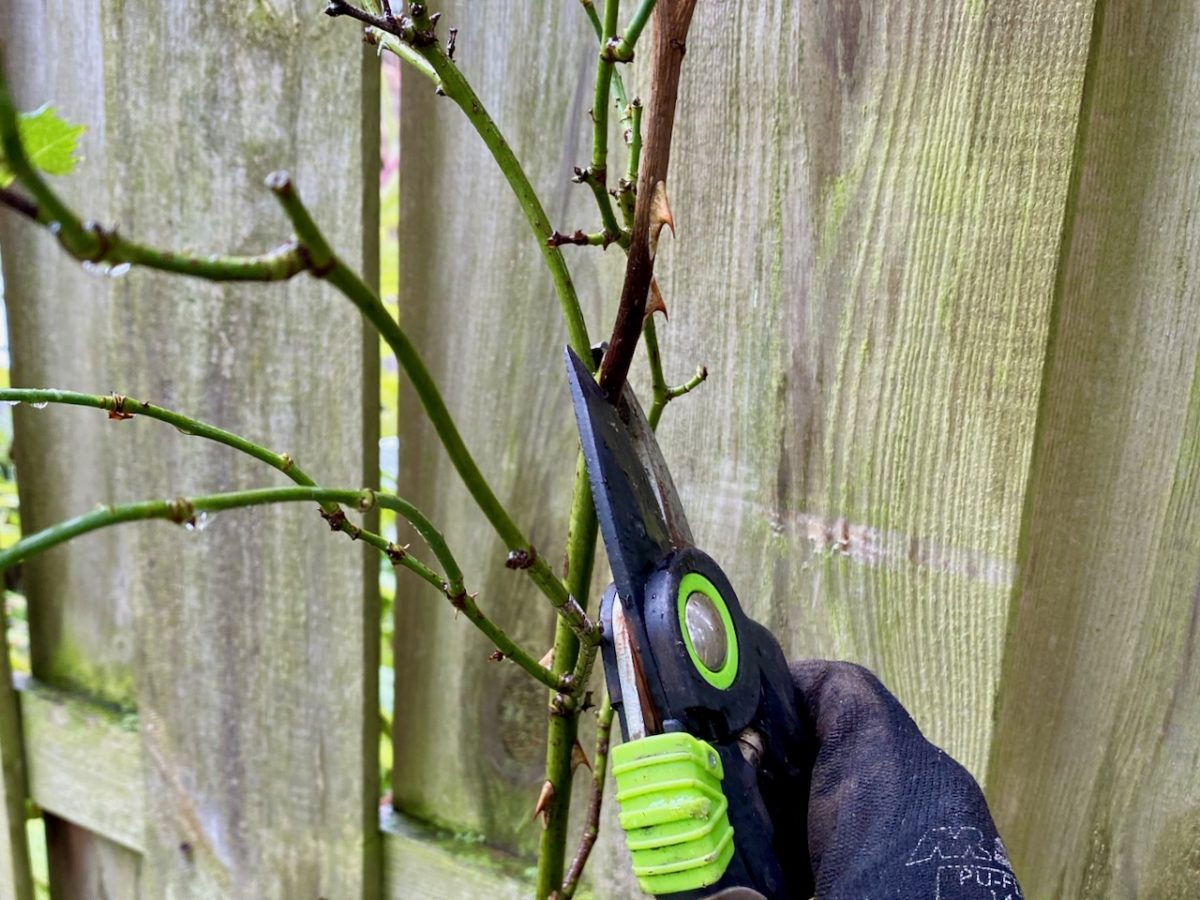
4. Trim one third off the remaining canes.
Roses start losing their leaves from the bottom up, so by November you’re left with top-heavy branches that act as a sort of wind sails that cause the plant to sway in the wind. This may potentially lead to the plant succumbing to the elements and snapping. In some areas, winter gales can be strong enough to uproot young roses.

If you can, step out on a windy day and observe how the rose is moving. Then take off the chunk that is swaying heavily in the wind. This often results in the so-called “one-third prune” because you’ll be pruning off the top third of the canes.
If you can spot any new buds swelling up, cut the cane at an angle about half an inch above an outward-facing bud. For most roses, buds will be more visible in spring than in the fall, so the advice not to prune hard still applies.
5. Clean and remove diseased foliage.
Again, our purpose here is to sanitize the roses as much as possible to prevent fungal reinfection next year.
Remove the foliage debris that has accumulated around the base of your rose plants and dispose of it with your household waste. As tempting as it may be, don’t add any diseased leaves to your compost pile because very few backyard compost heaps get hot enough to kill fungal spores.
6. Protect the roots and crown of the roses.
Most grandiflora, floribunda and hybrid tea roses require protection during the winter months. This advice applies even if your winters aren’t very cold.
In fact, what damages roses and other woody perennials during the winter months is the fluctuation in temperature between below and above freezing, rather than prolonged periods of cold weather.
If you can, you should allow your roses to experience a few nights of below-freezing temperatures to ensure dormancy before you tuck them in for the winter. If you apply the protective cover too early, while the soil is still warm, you risk trapping the heat in the soil. This, in turn, encourages your rose plant to keep growing. Again, this is not something you want to encourage before winter.
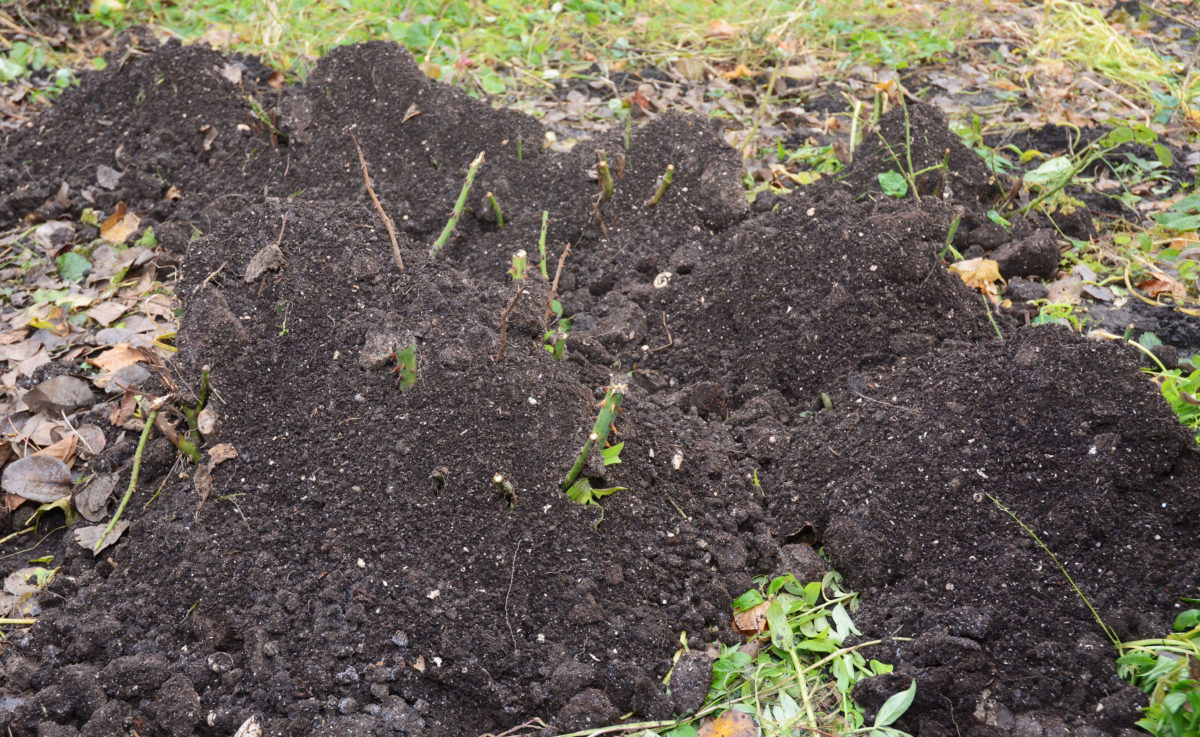
Start by adding a layer of nutritious compost followed by a layer of mulch at the base of your rose plants. This will act as insulation, moisture retention and a barrier to prevent fungal spores from being stirred back up.
Then continue the mounding (also called hilling) around the crown by adding layers of loose aerated mulch such as dead leaves, straw, bark, pine cones or pine needles. Avoid taking soil from around the base of the plant to build your mound though.

The general height recommendation for the mound is around ten inches (25 cm), give or take a few inches depending on the age of your plant (younger ones need more protection), the rose variety you’re growing and how cold your winters get.
You can use burlap sacks, tomato cages or a wire mesh to keep the mound contained. You can also buy “winter rose collars” that wrap around the mound to keep it from tumbling down in the rain.

Remember that you’ll need to remove this mound in early spring, so while you want to make it a solid structure, don’t make it too hard on yourself. As the weather warms up, remove the mounded mulch gradually to protect any new buds that may have formed under the protective layer.
7. Keep watering your roses, if needed.
This depends on the amount of precipitation you’re experiencing during fall. But if you notice that the rain isn’t doing it, it’s generally a good idea to keep watering your roses. This is especially important if you’re experiencing a warm September or strong winds that tend to desiccate plants.
Plants can be weakened by drought even in the winter, so it’s important to do whatever it takes to minimize stress for your roses.

Can I transplant my roses in the fall?
Yes, you can. When the roses go dormant (usually in late October), you can dig them out and transplant them to a more suitable location. Prune them as described above before you transplant in order to make the relocation easier.
Once you’ve replanted them, make sure you water them thoroughly and mound them as described above. Newly transplanted rose roots are even more sensitive to temperature fluctuations, so tuck them in for the winter.
As with any other plants, the main piece of advice when it comes to overwintering roses comes even before you place your rose in the ground. No matter how alluring some rose varieties may be when we’re browsing through fall catalogs or at the gardening center, if they’re not suitable for your climate and hardiness zone, they’re not worth the trouble.