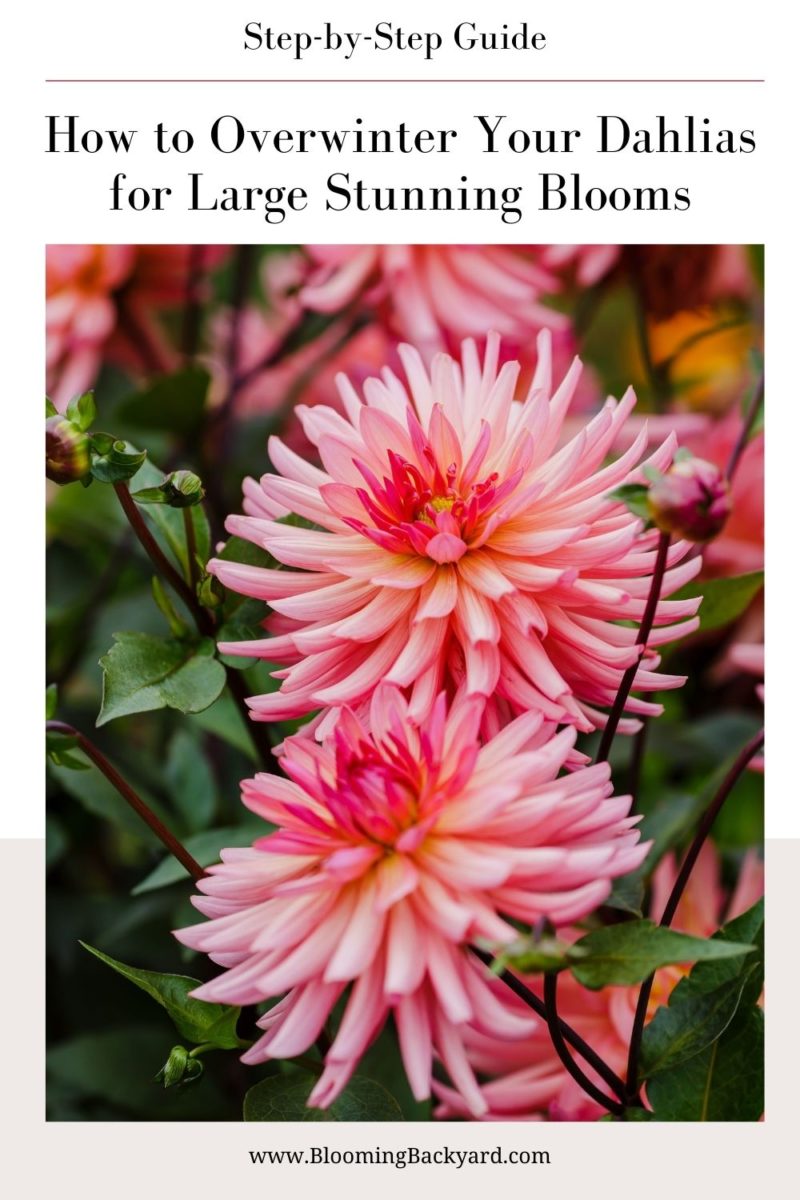
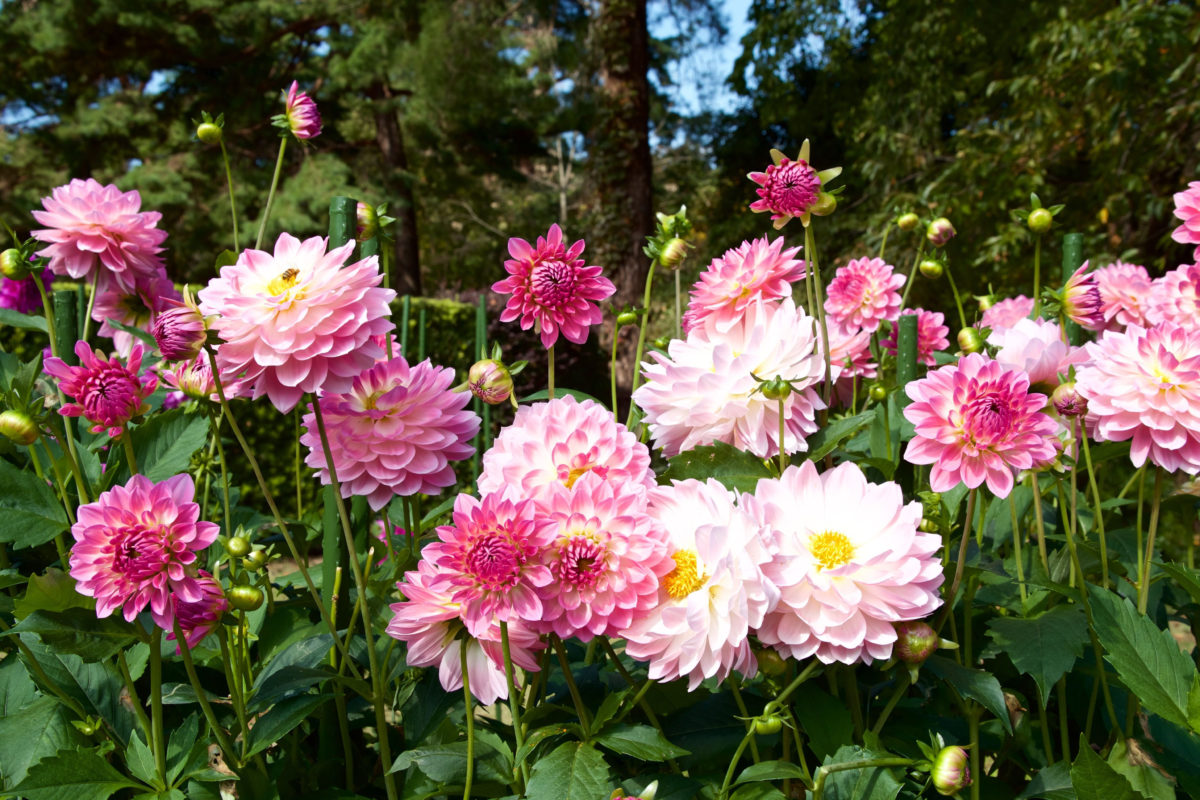
Dahlias are the darlings of the flower garden and for good reason. They put out gorgeous boisterous blooms every year, but there sure is a price to pay in exchange for their early stunning display.
So after you planted the tubers in spring and gushed over them in the summer, there’s one extra gardening job to do in the fall: preparing your dahlias to overwinter.
Can I leave my dahlias in the ground over winter?
You can, if you want them to turn into nice compost. Ok, maybe that’s not what you wanted to hear, but that’s what will likely happen if you don’t dig out your dahlia tubers before the ground freezes through.
True, some gardeners in warmer climates may be able to get away with leaving the tubers in the ground during winter. However, keep in mind that the dahlia tuber is what’s called a “tender bulb” and will not overwinter well in below-freezing ground temperatures.
Other tender bulbs (although technically some are corms or rhizomes) include calla lilies, crocosmia, gladiolus and tuberosa. The tubers of these plants cannot handle variations in temperature and will most likely turn into a mushy unviable mass if left in the ground.
That being said, don’t be in any hurry to dig them out either. Leaving the tubers in the ground as long as possible at the end of the growing season will allow them ample time to cure well and store up more energy for next year.
Here’s a detailed guide on how to overwinter your dahlias.
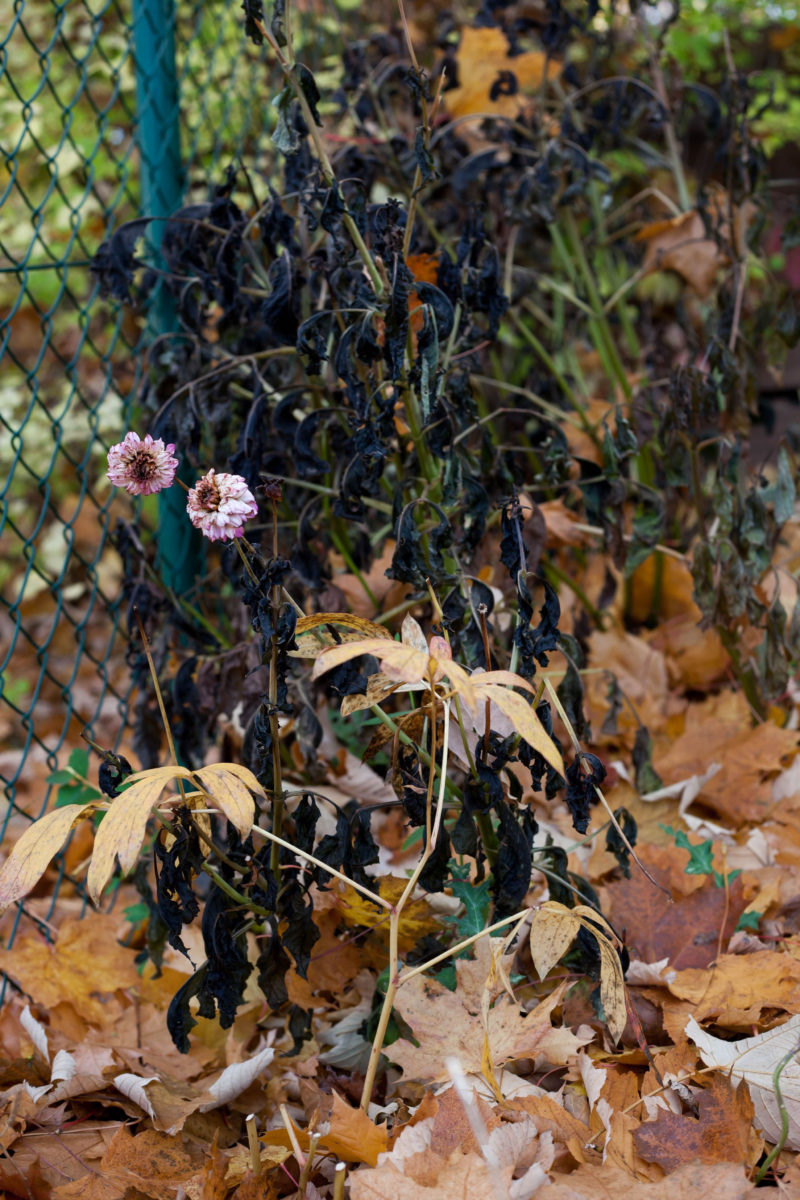
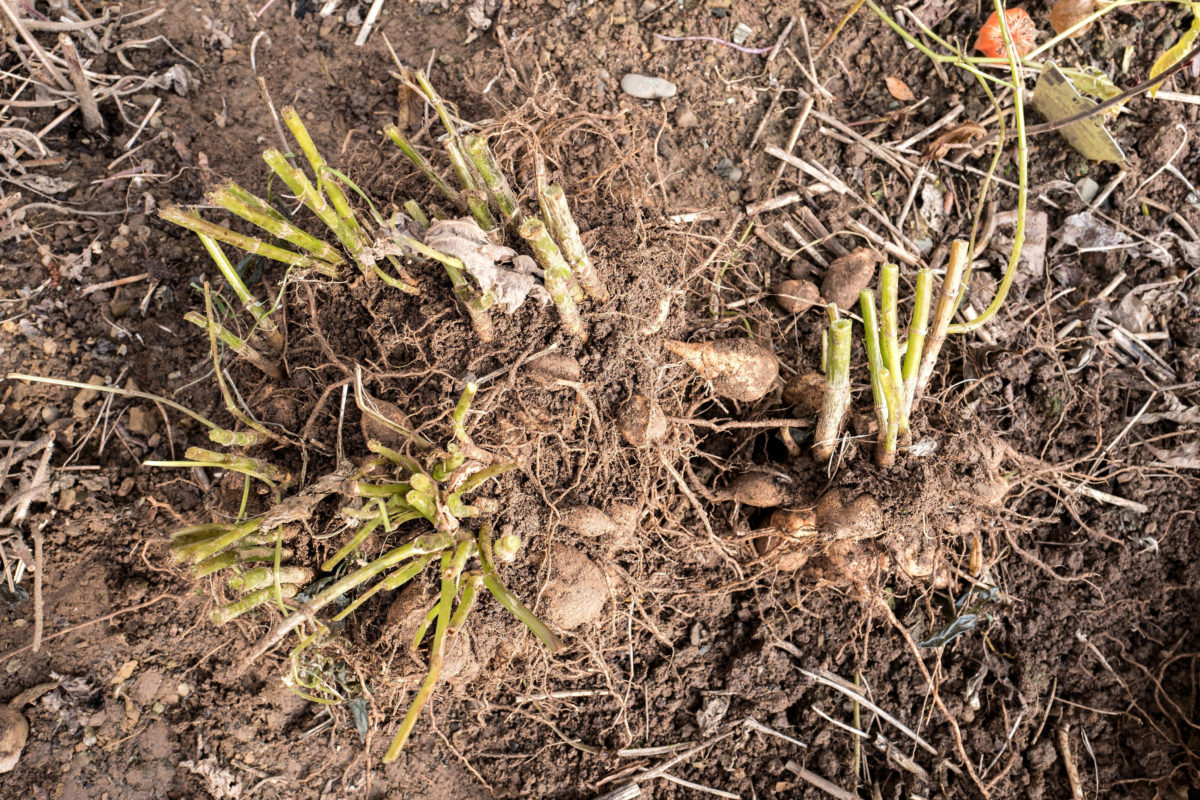
Step 1: Remove the dahlia tops after the first frost.
As usual in gardening, we work with nature’s timing. So you should wait until the first hard frost before you dig out your dahlia tubers.
The advice of the experts from the American Dahlia Society goes even further. You can leave the tubers in the ground even if you’re experiencing a few episodes of light frost because tubers continue to mature underground. At this point, you may be able to buy yourself a few weeks until the first hard freeze kills all the foliage. Once this happens, it’s time to dig out the tubers.
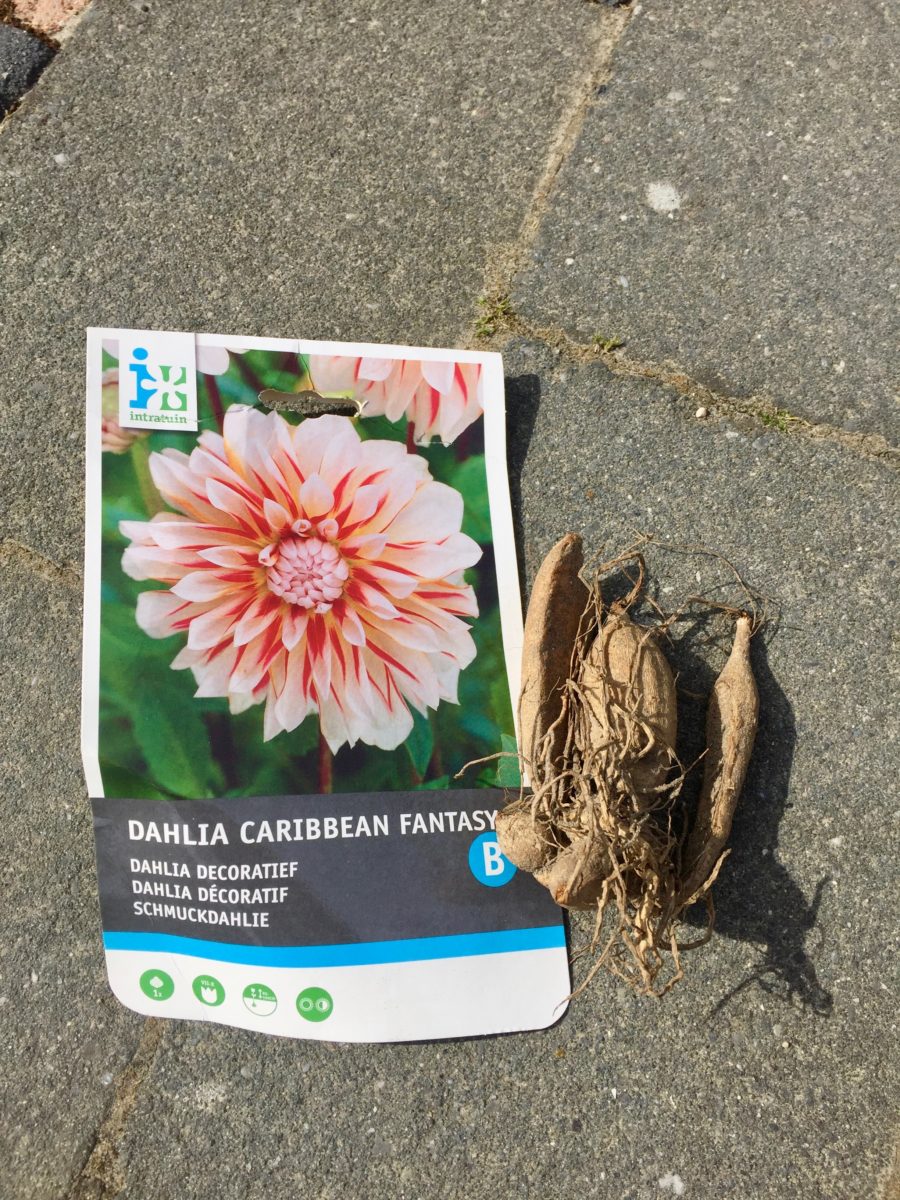
If you’re growing more than one variety of dahlia, now is the perfect time to label them. I know it’s tempting to think that you’ll just rely on your memory, but I guarantee it won’t be so easy to distinguish between clumps of tubers once you dig them out and dry them out.
The best way to label the tubers is by attaching one or more name tags to the stems. You’ll transfer this tag to the paper bag or cardboard storage box later.

Then chop off the dead foliage, leaving about eight inches of stem attached to the tuber. Some people prefer to chop it down lower, but I think the eight inches acts as a handle that makes handling them easier. It also makes it easier to hang them to dry, if you choose to store them that way (more on that later).
Once you’ve removed the dead parts, you have two options:
Option 1: Leave the tubers in the ground to force their “eyes.”
What kind of horror show are we talking about here? The tuber eyes are small protuberances that will turn into sprouts. Next spring, these sprouts will grow into beautiful dahlia plants. The theory is that leaving the tubers in the ground without the foliage forces the plant to start growing again. Having the eyes clearly visible in the fall makes it easier to divide them at this point.
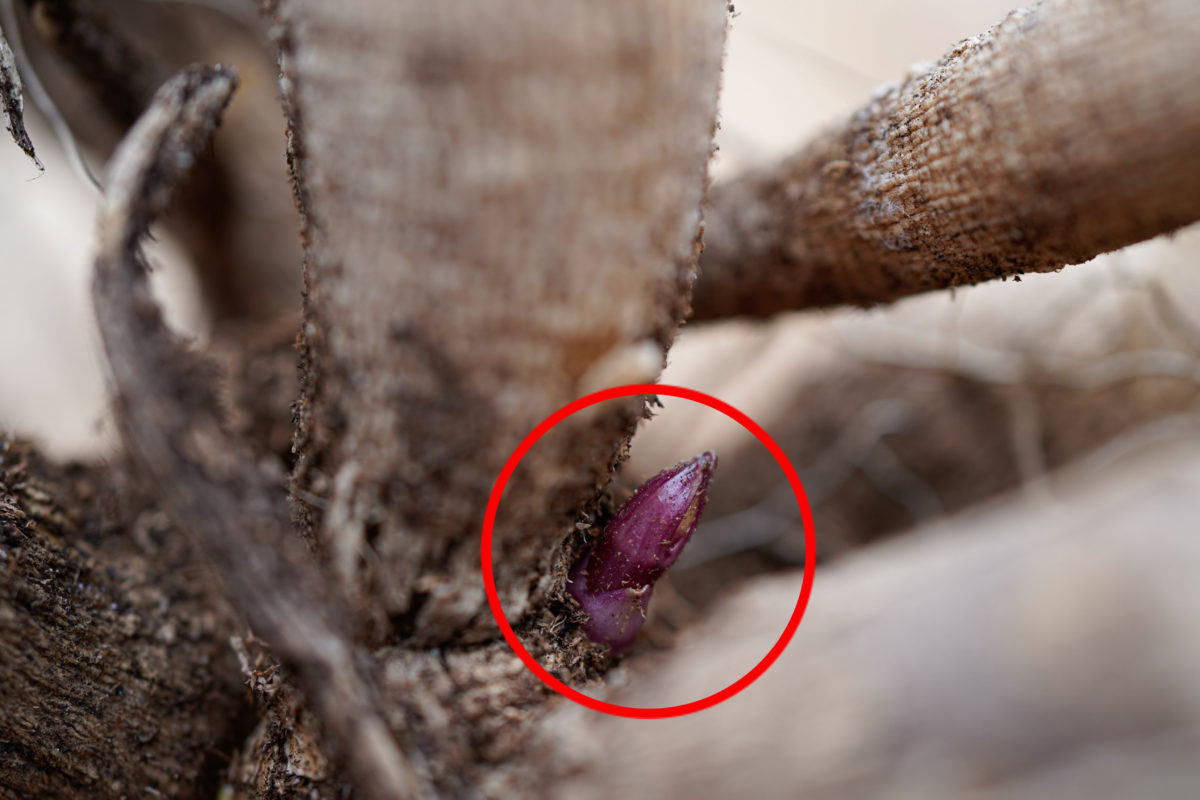
If you choose this option, always cover the exposed stalks with aluminum foil or upside-down yogurt jars to protect the hollow stalks from rain. If you don’t, they’ll basically act as pipes that collect the rainwater and conduct it to the core of the tuber below ground. This may cause rot and decay in the tuber really fast. Around ten days to two weeks should be a long enough wait for the eyes to develop.
Option 2: Lift the tubers from the ground as soon as you’ve removed the foliage. This brings us to the next step.
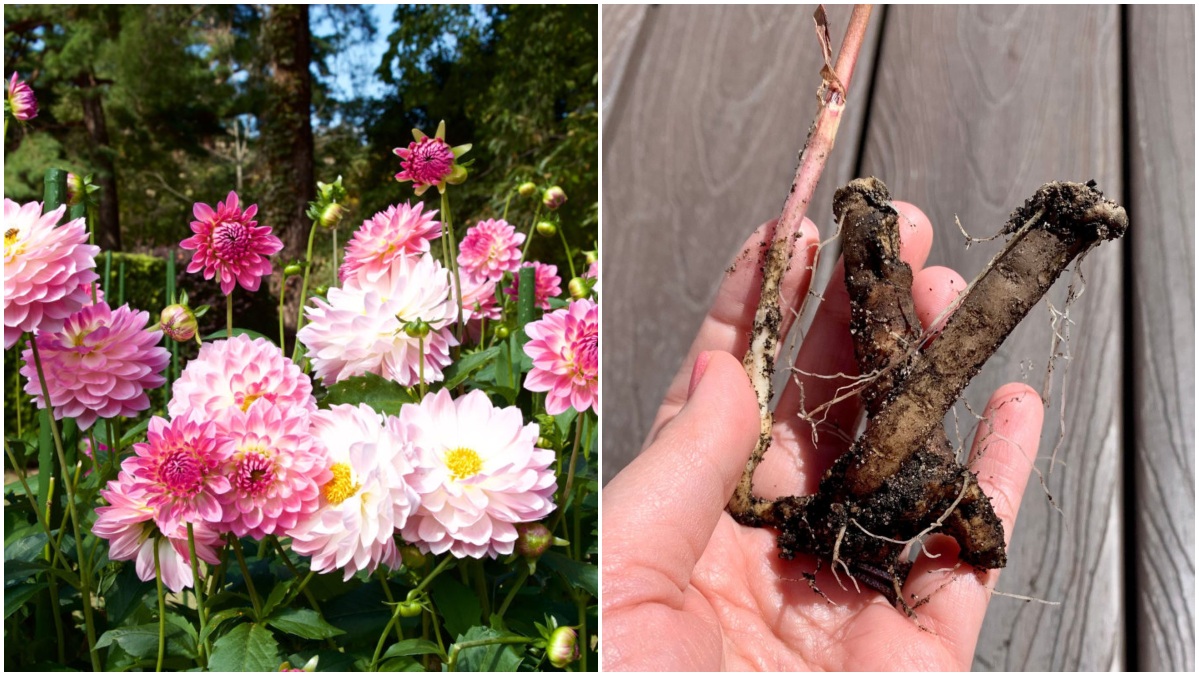
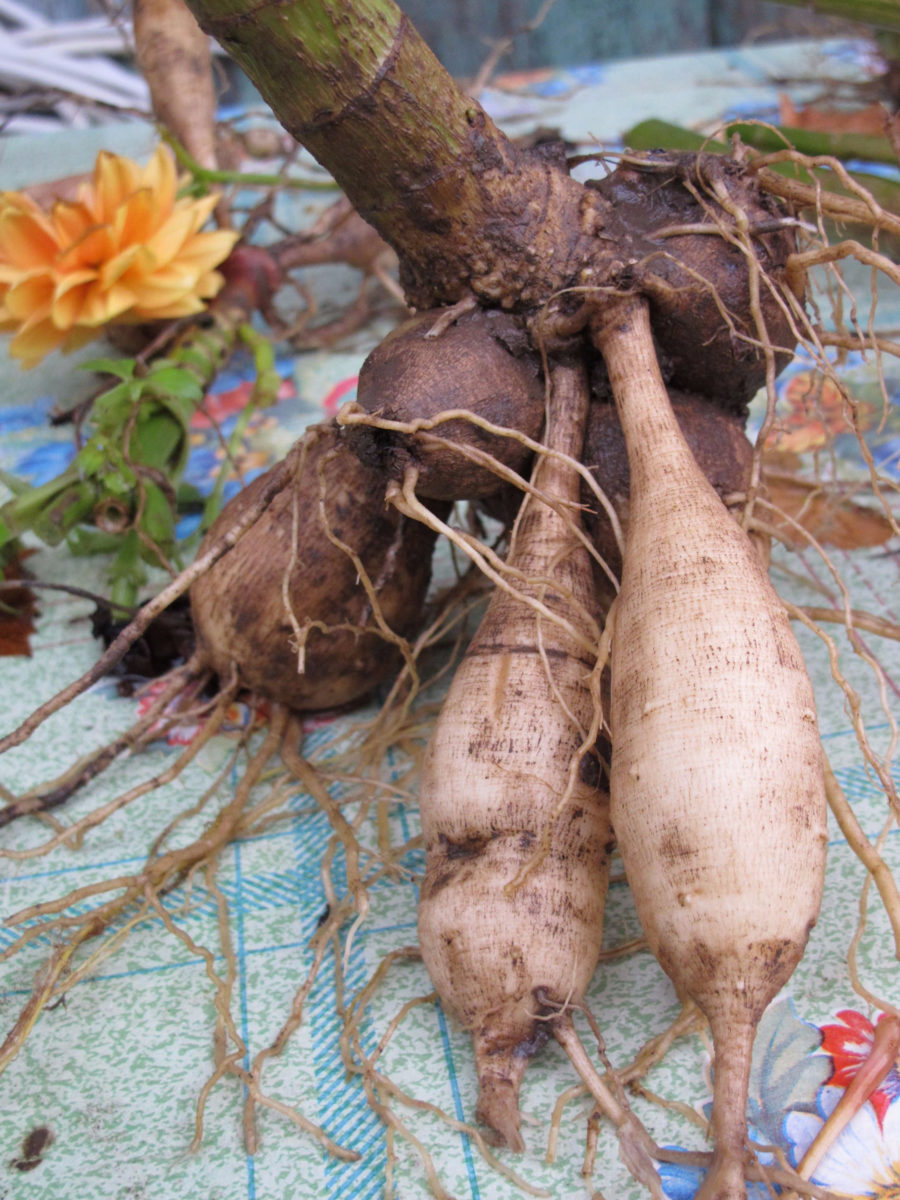
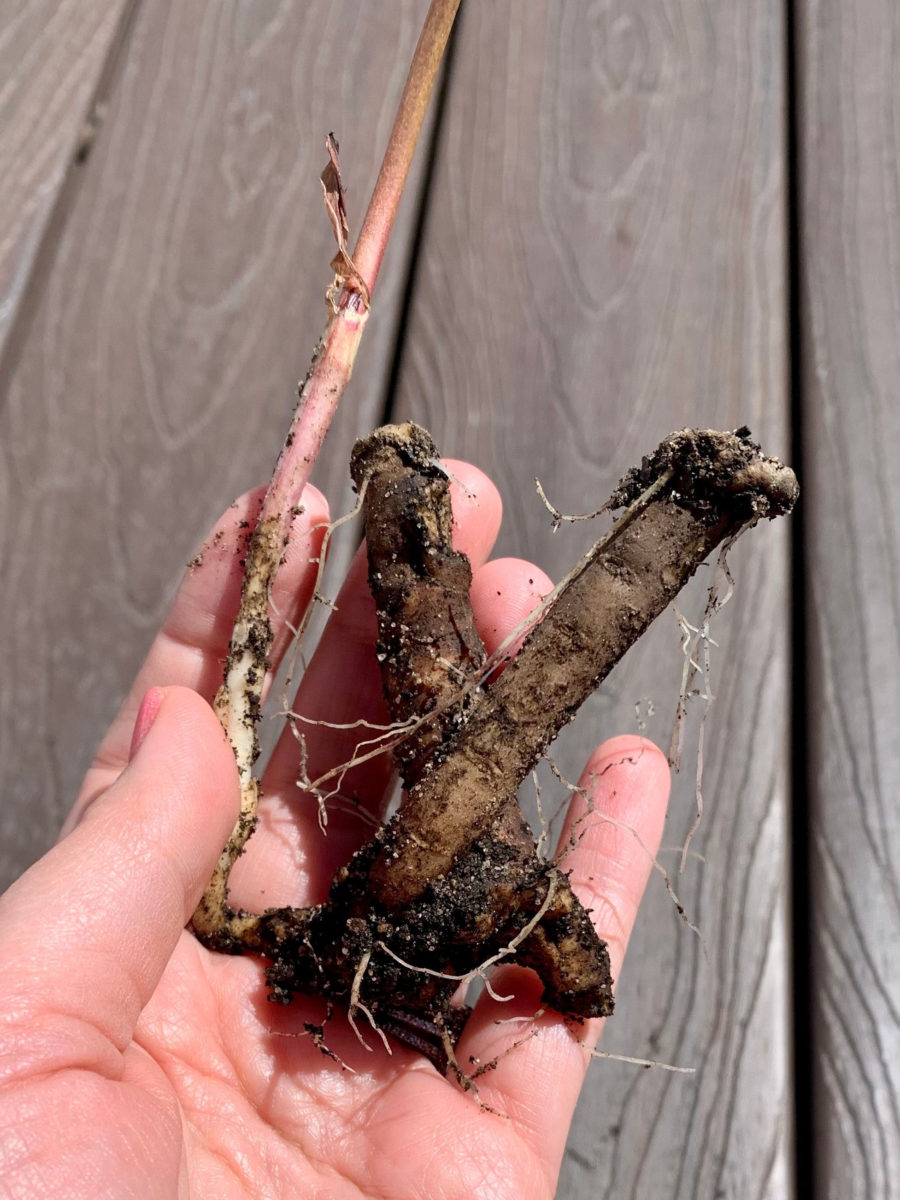
Step 2: Lift the dahlia tubers and tidy them up.
Notice that I didn’t say “dig out” the tubers because digging should be minimal. Don’t yank out the tubers either, or you’ll risk damaging any of the eyes that may have formed.
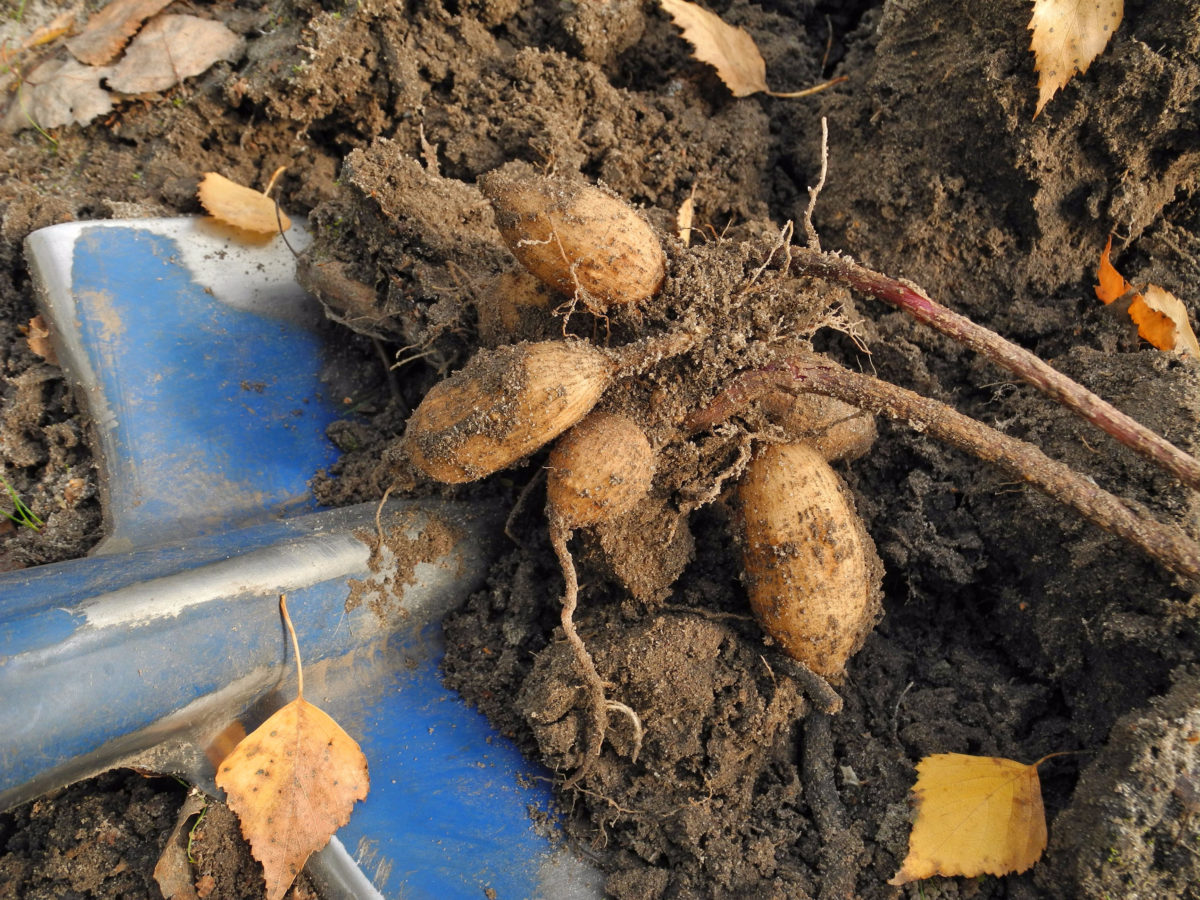
Instead, use a spade to cut a square around the clump, then use the same spade for leverage to gently lift the tubers out of the ground. You may encounter some root resistance. It’s ok to tear out the roots at this point, since their job for the season is done.
If you lifted them out of dry soil, the tubers should be relatively clean. Just brush them gently to loosen up and remove the dirt. If you were digging them out of wet sticky soil, you should let them dry for a day before you attempt to tidy them up.
Step 3: Divide the dahlia tubers.
Dividing tubers in the fall is a matter of personal preference. Some gardeners prefer to skip this step now and do the division in spring, right before they replant the tubers for the new growing season. The advantage of waiting until spring is that the tuber eyes are larger and easier to spot.
I prefer to divide my dahlias in the fall for two reasons. The main reason has to do with avoiding the “spring overwhelm season” so common in gardening. I feel like I can take my time with bulb and tuber care in the fall, since there are fewer gardening jobs to do once the frost has set in. I do most of my pruning in the spring anyway.
However, because I grow most of my garden from seed/bulb/tuber, I get very busy in the spring with seed starting, up-potting, repotting, transplanting and propagating. Dividiing my dahlia tubers in the fall is just a way to help future-me stay on top of gardening chores next year.
The second reason why I prefer fall division is that it makes the tubers easier to dry properly before being put into storage; they can also be stored neater and take up less space.
Here’s how to divide your dahlia tubers.
Start by finding the eyes on each tuber in the clump. (This shouldn’t be a problem if you followed Option 1 in Step 1 above, since the eyes should already be clearly visible.)
Always look for the eyes at the top of the tuber, around the crown – the area where the stalks were growing. Eyes don’t grow along the body of the tuber or around the roots, so that’s the first clue to make it easier to find them.

Use your fingers to feel for tiny bumps under the surface. Sometimes, they’re visible too. However, some tubers won’t have any eyes, while others will have multiple eyes. You want more of the latter. In some dahlia varieties, the eyes protrude more than in others, so if you’re not sure, you can wait until spring to divide them.

Cut the tubers off the main clump making sure that each tuber has at least one eye, preferably more. You can also divide the clumps into smaller groups and keep three tubers together.
Remember those name tags that you attached to the stems? Make sure to still keep individual tubers well organized at this stage.
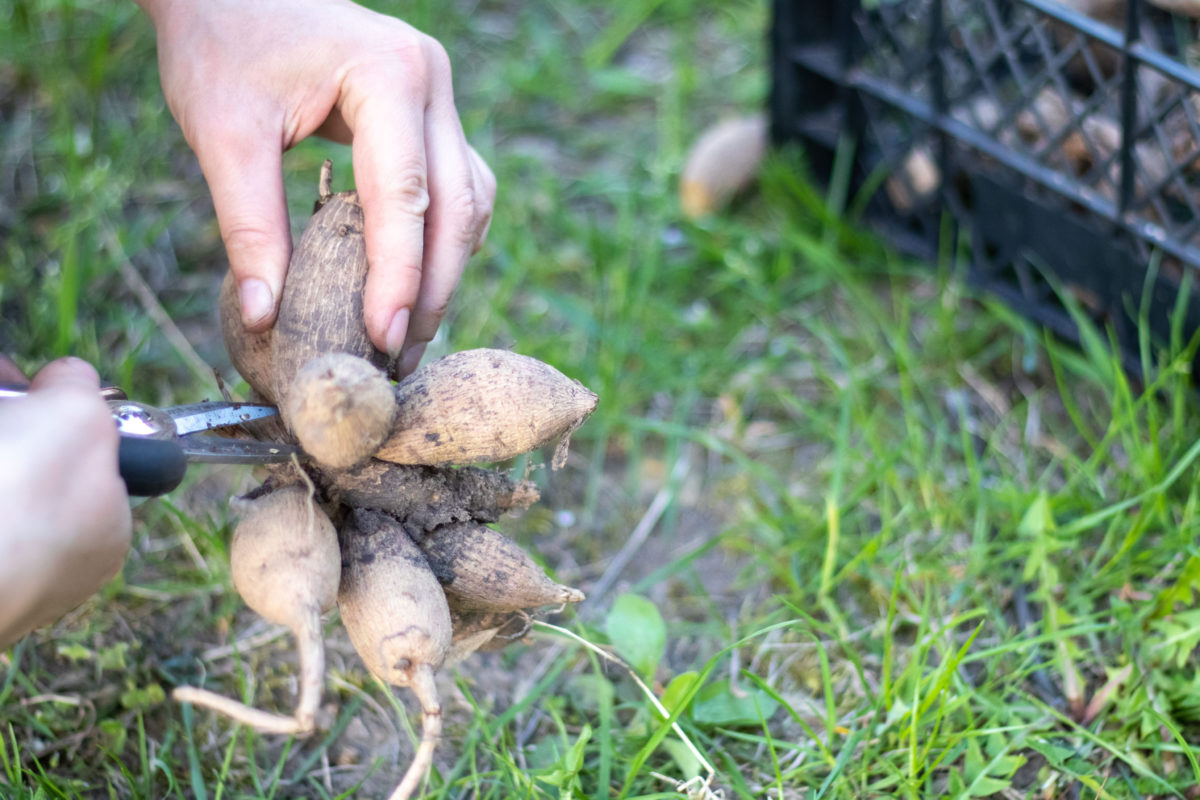
It’s ok if tubers break, as long as they have an eye on them. You’ll just need to allow the broken tubers to scab over longer and then you can store them.
At this point, you can discard any tubers that show signs of rot. You could attempt to save them by cutting off the rotting parts, but I find the risk of the rot spreading to other healthy tubers not worth this extra step.
You can get rid of the “mother tuber” – the center one that has already produced all the young tubers throughout the season. The “mother tuber” did her duty, so now’s her time to rest in the compost pile. You can also get rid of any tubers that don’t have eyes on them, although I prefer to do this in the spring, before I plant them, just in case the eyes are too small to see with the naked … eye.
Can I just skip the dahlia tuber division altogether?
If this is your first time around the dahlia merry-go-round, you may be tempted to ask why bother with dividing dahlia tubers in the first place. Can’t we just plant the clump back in as-is in the spring? (Don’t laugh; I heard this question asked of a Master Gardener at a workshop.)
You absolutely should not skip the dahlia tuber division step, whether you do it in the spring or in the fall. If you want vigorous, strong blooms, that is. If you leave the tubers clumped together, they will be too crowded and will compete with each other for space come spring. Think of it as the botanical version of sibling rivalry.
So even though you may get sprouts and eventually blooms, the stems will be spindly and the flowers will not grow as large. And since the tubers are already overcrowded, they won’t multiply during the summer. And who doesn’t want more dahlias for free?
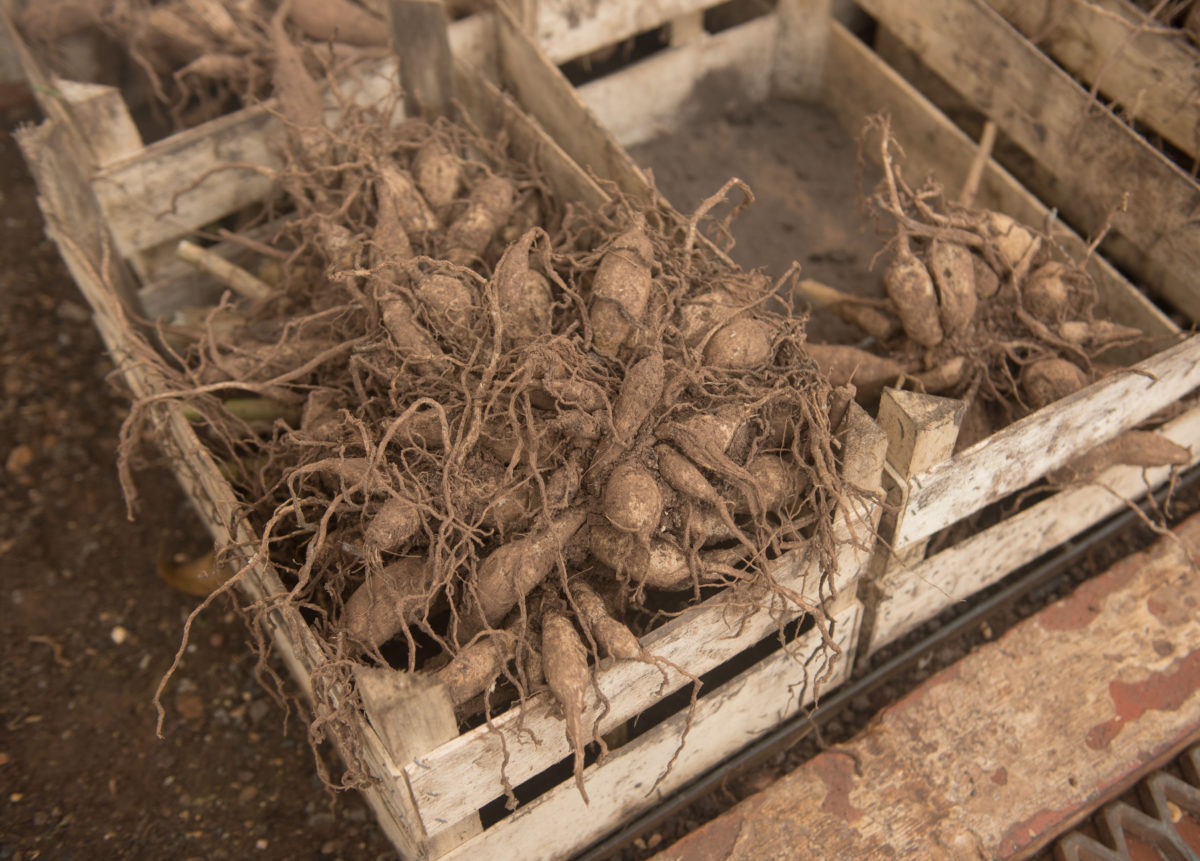
Step 4: Dry the dahlia tubers and clean them again.
Now that you have individual tubers ready for storage, it’s time to clean them up again. Gently brush off the remaining soil, if any, with a paintbrush. Remove the feeder roots and the remaining stalks. You can also hose down the tubers, as long as you promise to be patient enough to let them dry properly before storage.
Then lay them out flat to dry or hang them up to dry in a shady, dry spot with good airflow. A porch, a gazebo or even a garage are good places to dry your tubers. You’ll know they’re ready for storage when the skin gets wrinkly, similar to that of a ginger root that’s starting to dry up. For some people, that takes about five days, although in my wet climate I found that tubers take at least ten days to properly cure.
Again, patience is a virtue. The better you cure dahlia tubers, the more likely they are to store well over the winter months.
Step 5: Store the dahlia tubers.
Always store tubers in a cool, dark and dry location.
The first thing to keep in mind at this stage is storing dahlia tubers at the right temperature – between 32 and 55F (so above freezing, but below 13C). Don’t store them in a room where temperatures go below freezing in the winter. Similarly, if the storage area gets too warm, the tubers will start to sprout and develop feeder roots prematurely. Ideally, you want this to happen as close to the planting time as possible.
The second thing to keep in mind is humidity. You should store the tubers in a way that won’t get too dry, but that will allow some exchange of moisture between the storage container and the tubers themselves. This means that, for example, just a cardboard box will cause the tubers to shrivel up, but a cardboard box filled with newspaper clumps is a perfect choice.
A few things you can use as a storage container include plastic and wood crates, paper bags, cardboard boxes, baskets and hessian sacks. As a storage medium, look for wood shavings, pet bedding, clumps of newspaper or butcher’s paper or reuse some packing peanuts. Some gardeners recommend using vermiculite, but I found that this option tends to stir up too much dust indoors when I check the tubers. Generally, I prefer to avoid using vermiculite by itself – that is, not mixed in a potting medium.
This brings us to the final step (yes, there’s one more).
Step 6: Check the dahlia tubers once a month.
Ah, you thought storing them would be the last step, didn’t you? Not so fast. All your work will have been in vain if you don’t take the time for a few quick inspections while the tubers are in storage. You should check the tubers periodically – I try to do it once a month – to see how well they keep.
Remove and discard any tubers that show signs of mold, rot, disease or any other type of damage. You can also discard tubers that have shriveled out (they’ll feel hollow to the touch) and the ones that have just turned into papery husks at this point. There is no chance they’ll grow any sprouts.
Some rotten tubers may be salvageable if the rot is at the root end (as opposed to the crown end). You can cut off the rot, allow the cut to scab over, and only then place the tuber back in the box with the others.
Overwintering dahlia tubers may sound like a complicated process, but I promise it’s not. Once you get the hang of it, it will go very fast. And I think the dahlia blooms you’ll get next year (and the money you’re saving by storing your own tubers) are definitely worth the effort.