Fiddle Leaf Figs are such popular houseplants, it’s hard not to want more of them.
Luckily, by propagating, you can have as many as you can fit in your home without the added cost. Due to their fussy nature over conditions and change, they are not the easiest plants to propagate. But, in this case, the reward is well worth the effort.
Can You Propagate From A Single Leaf?
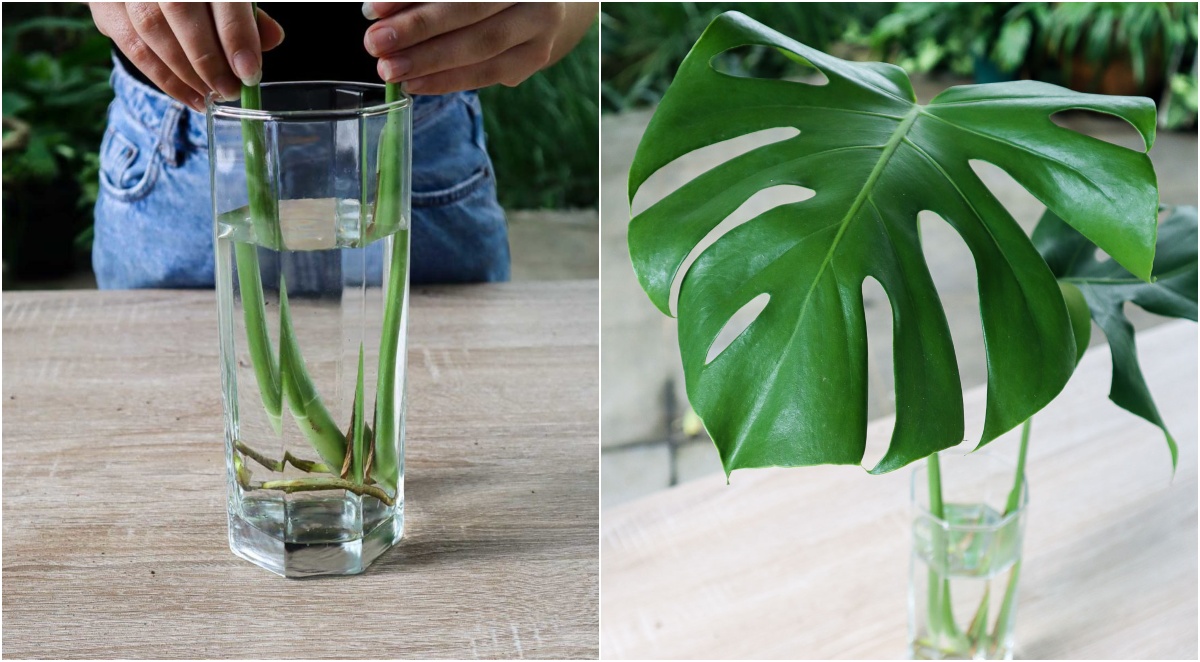
You may have seen images of individual Ficus lyrata leaves in water online, with long and healthy roots that seemingly indicate successful propagation. As easy as this method may seem, it unfortunately won’t lead to a fully-fledged Fiddle Leaf Fig in the long term.
Individual leaves don’t contain the right tissues to produce new branches. Connected to a node previously, they can still produce roots, but these roots will only keep the leaf alive in the short term, not growing any larger or turning into a full plant.
If you’re looking for an interesting feature for your windowsill, this method certainly works. It’s also easy to do and easy to care for.

Simply remove a leaf from the main branch with a piece of the node intact and rest it in a glass of room temperature water. Keep most of the leaf out of the water to prevent rotting, only leaving the bottom section of the petiole in the water.
If you’re looking to grow an entirely new Fiddle Leaf Fig, you’re far better off propagating from stem or branch cuttings.
How To Propagate From Stem Cutting
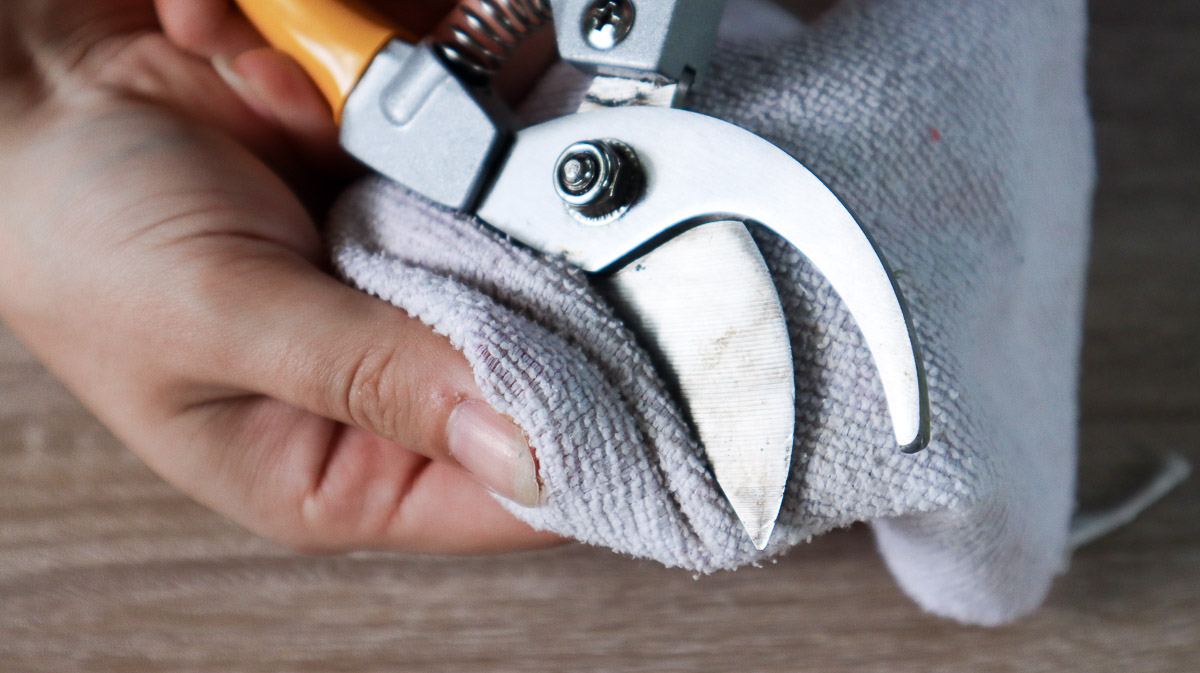
Clean And Sharpen Your Tools
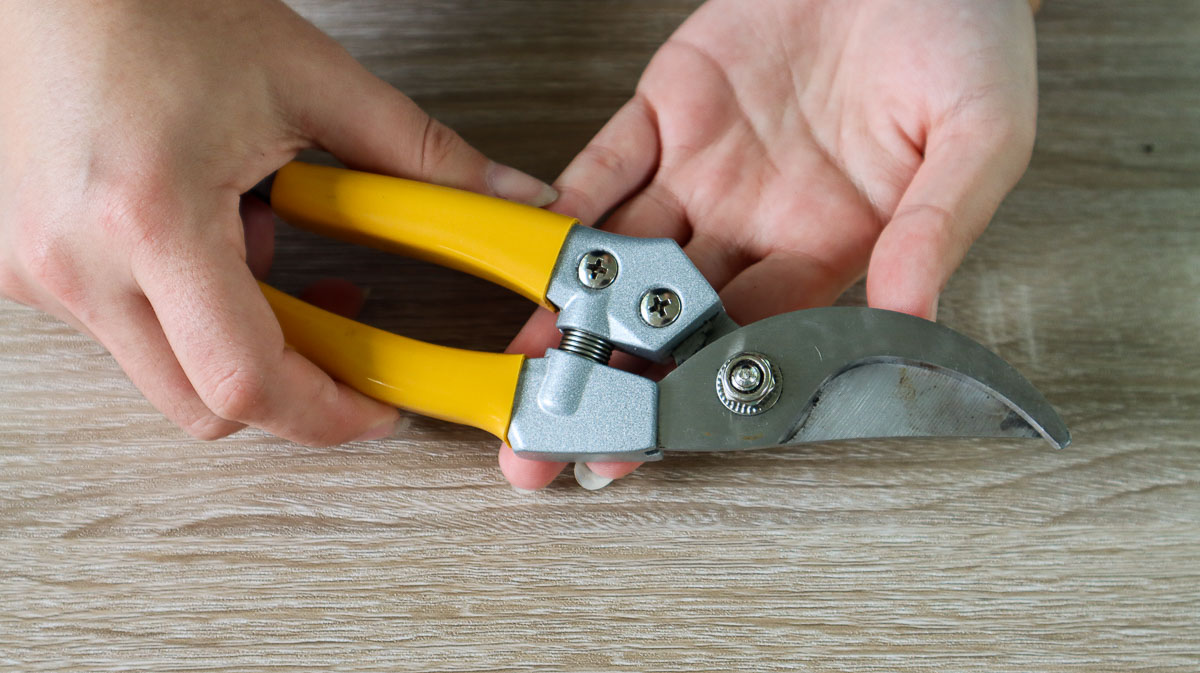
When dealing with soft stems, scissors are usually enough to do the cutting. But when it comes to thick Fiddle Leaf branches, the right tools are essential to your success.
Start with strong and sharp pruning shears. If they haven’t been sharpened in a while, now is the ideal time.
While you’re sharpening, make sure you clean them thoroughly too. Use a 5% bleach solution to disinfect them or regular soap and water if they were cleaned previously. Tools can harbor harmful bacteria, so this preventative clean stops the potential spread of disease.
For those recycling a pot, take this opportunity to scrub the pot clean too. Soil-borne pests and diseases can stick around in any debris, establishing themselves in the new and healthy soil and ruining your chances of successful propagation.
Choose A Branch

Propagation is best done in spring or early summer before the weather heats up too much. This takes advantage of the growing season, allowing you to choose a branch with some new green growth. These branches are easier to root and are more likely to produce new growth.
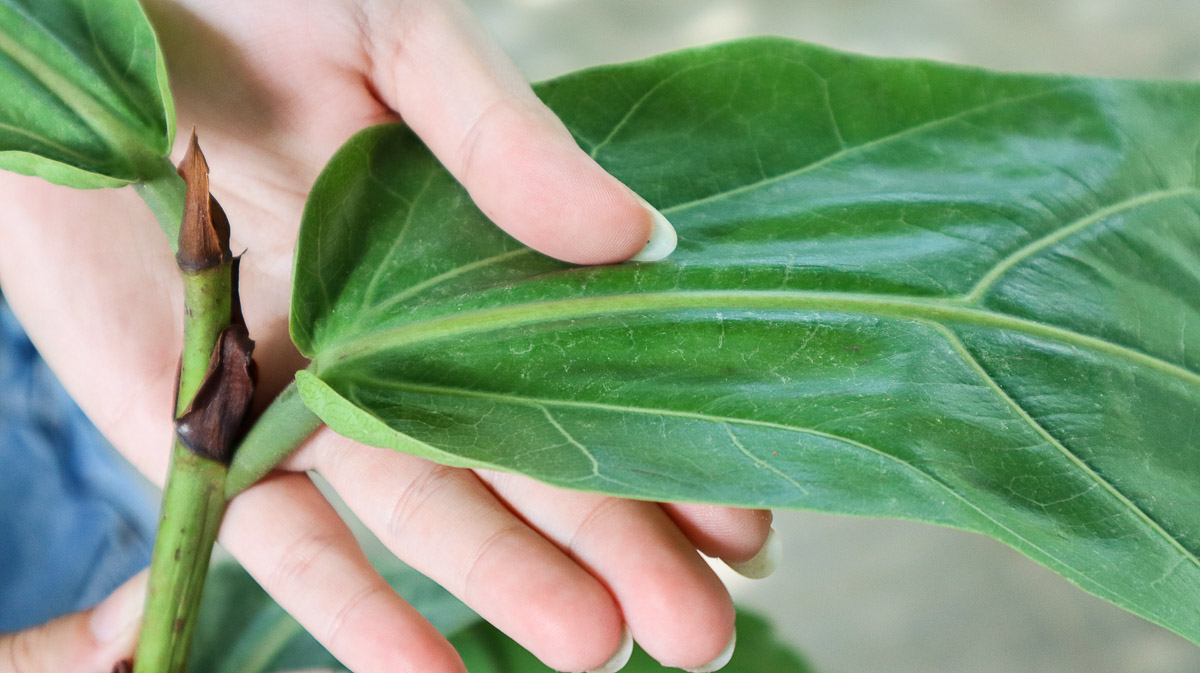
You should start with a large and established plant to avoid any shock in the parent plant. Choose a healthy branch with plenty of dense leaf growth and no signs of disease. It should also have several sets of leaves from the tip down – the more nodes, the better.
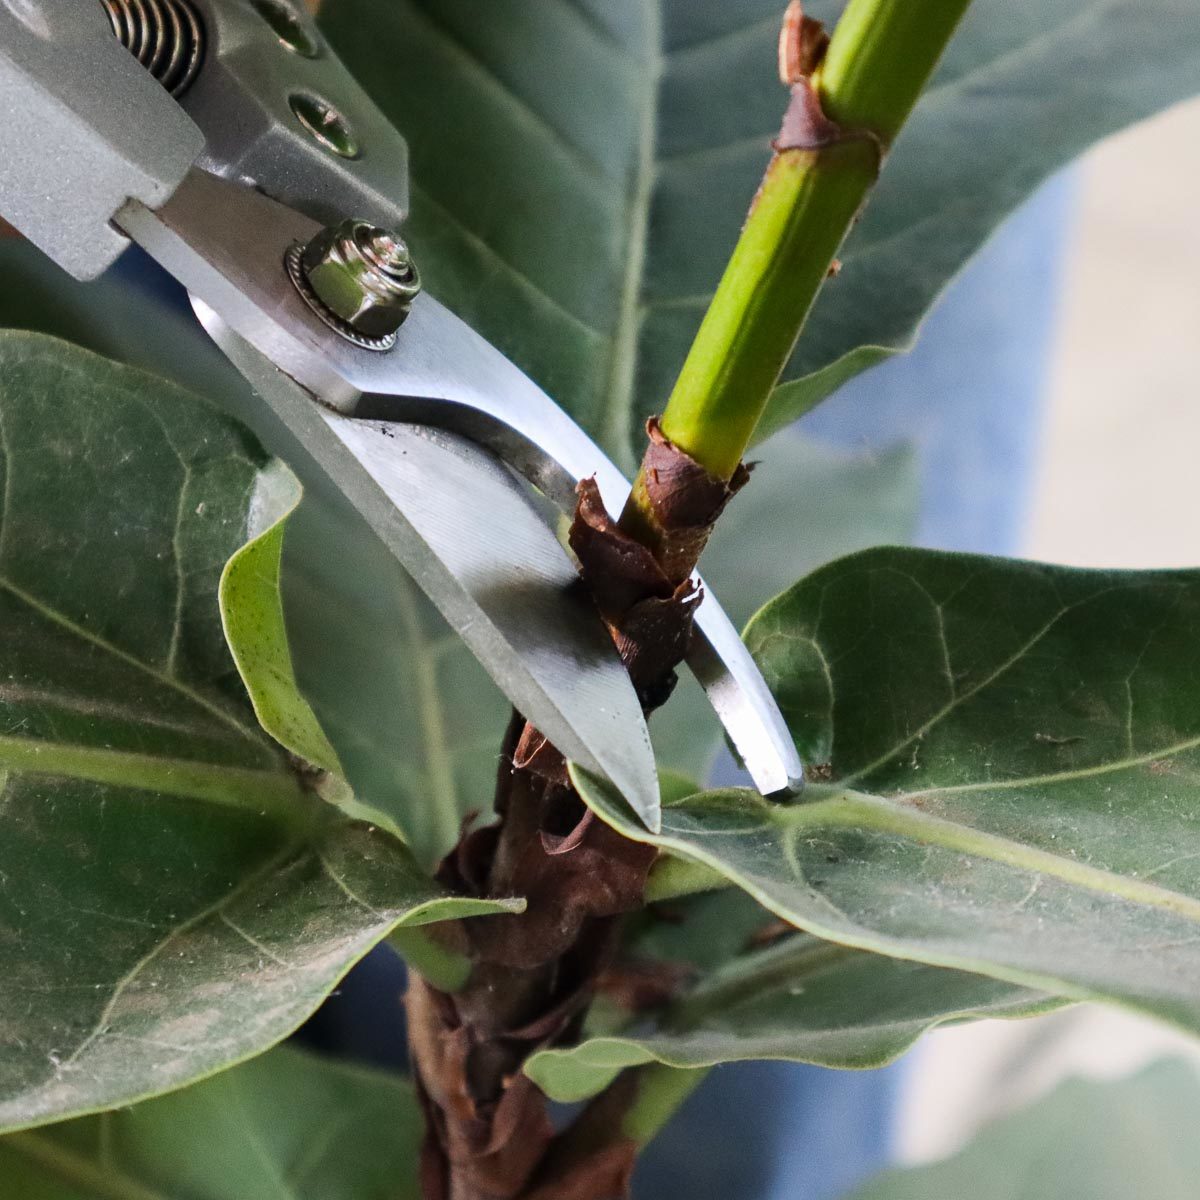
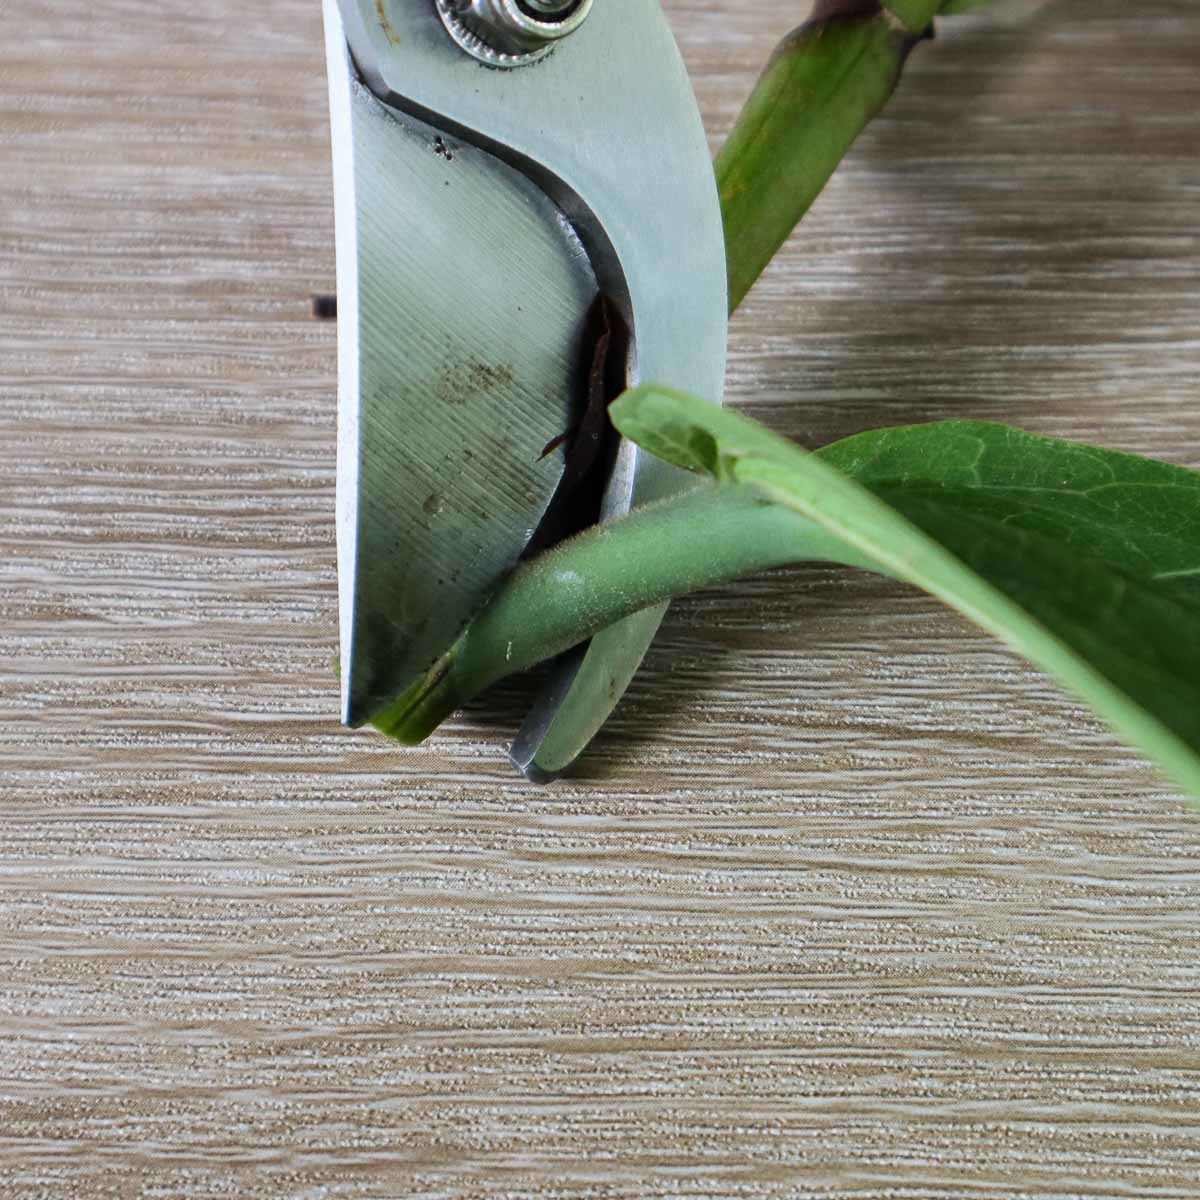
Grab your pruning shears and cut the branch about 10 inches down. Cut just above a node to promote new growth as you would when pruning.
Try to make as clean a cut as possible. The branch will take a while to heal and remains more vulnerable to pests and diseases at that time. The smoother the cut, the quicker the plant will recover.
Trim The Steam And Remove The Leaves
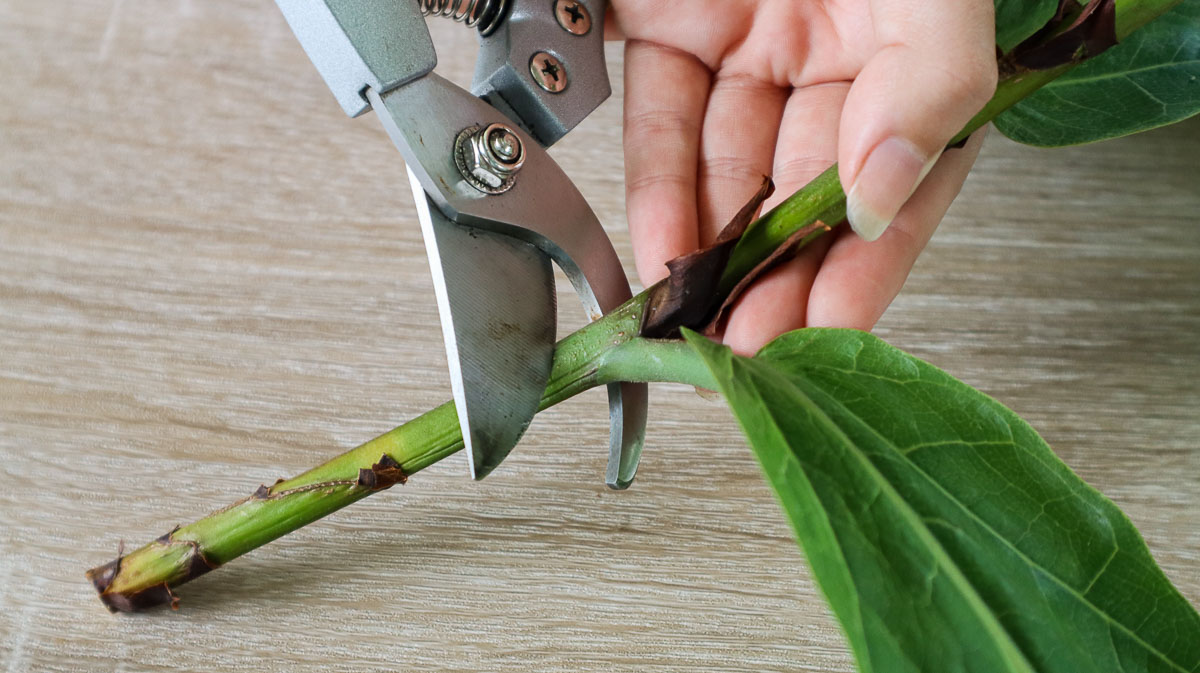
As you cut above a node on the plant to ensure it grows back successfully, you will need to trim the branch to right below the lowest node for successful rooting. Cut off that section with your shears at an angle.
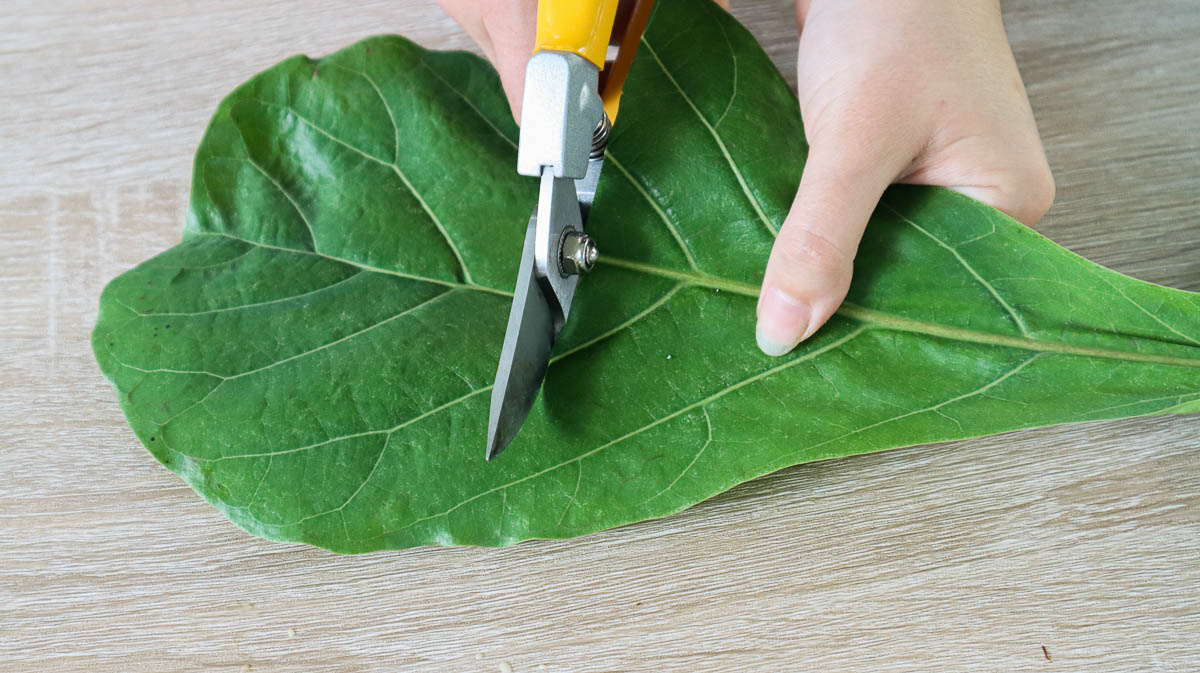
As the bottom half of the cutting will be buried beneath the soil, you need to remove some of the large leaves on the cutting. This will also give the plant more energy to put into root growth rather than leaf maintenance.
Simply trim or pull off the leaves on the bottom half of the cutting. There should be one or two leaves left on the top to keep the plant happy, but not so many that the cutting struggles to develop roots.
The next step is optional, but can go a long way in the quick rooting and growth of the cutting. Take the top few leaves and cut them in half horizontally. This reduces the amount of moisture the leaves require to stay green and healthy, directing energy and resources toward root growth.
Cutting the leaves in half isn’t as aesthetically pleasing, but it does increase your chances of success. The choice is up to you.
Rooting
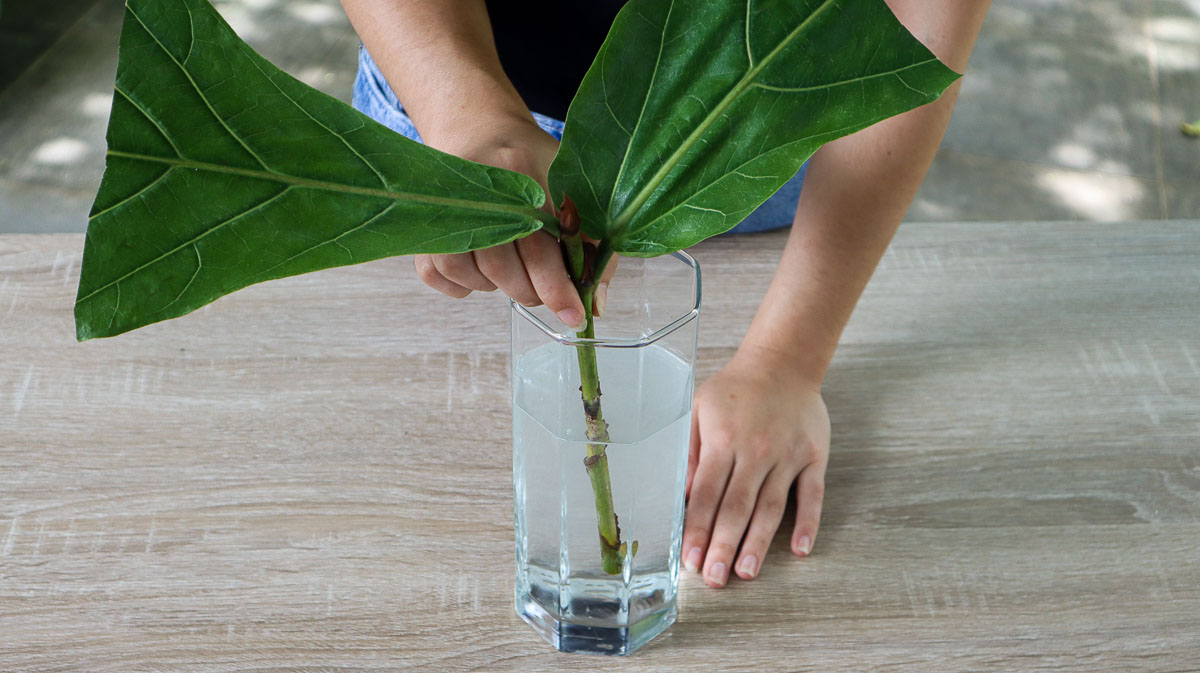
Root In Water
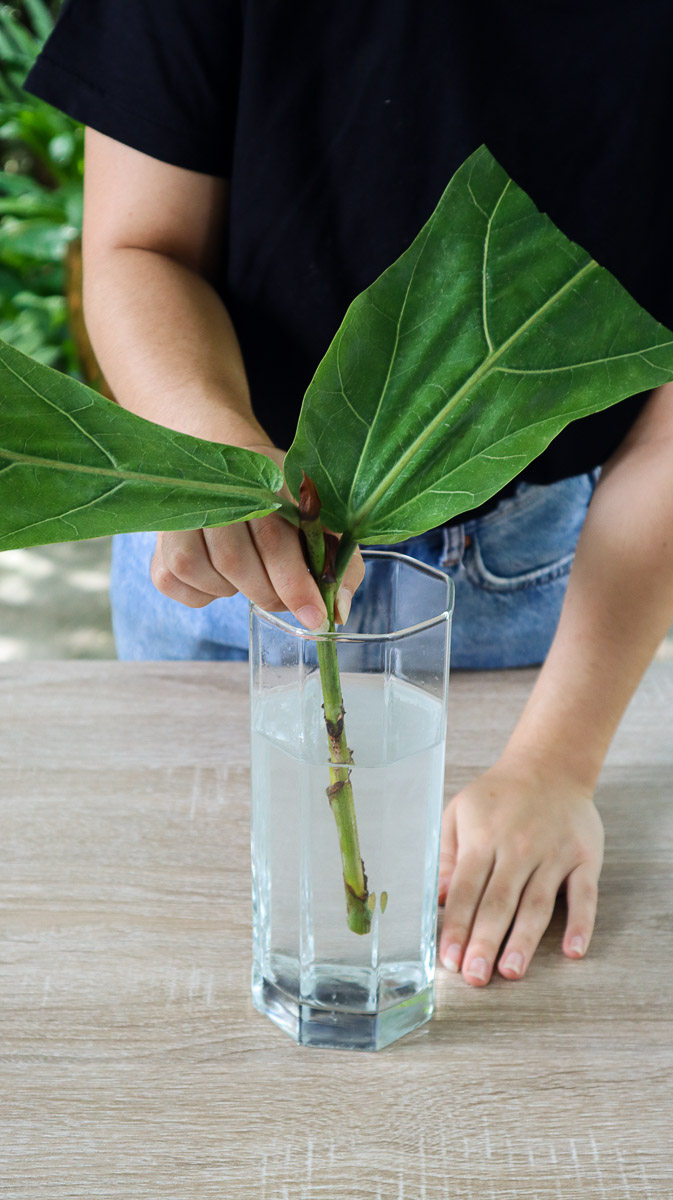
The easiest rooting method is simply in a glass of water. Ensure the glass is tall enough to accommodate the cutting without tipping over.
Filtered or distilled water is preferred as the chemicals in tap water can inhibit growth. You can also use recycled rainwater. Pop the branch inside the glass until the bottom half is covered, leaving the top half and the leaves out of the water.
Place the glass in a warm area away from direct sunlight. Make sure it remains clean and oxygenated by changing it every couple of days. You can also clean the glass in between water changes if needed to prevent bacterial growth.
Root In Soil
While rooting in water is quicker to do and easier to monitor, rooting in soil will yield the strongest roots, limiting transplant shock later on. As the branches are woody, it is also far more reliable than rooting in water.
Start by preparing an airy and well-draining soil mix. A combination of coconut coir (or peat moss), perlite and sand drains well and provides the least resistance to new root growth. Fill a medium-sized pot with this soil mix and water to pre-moisten.
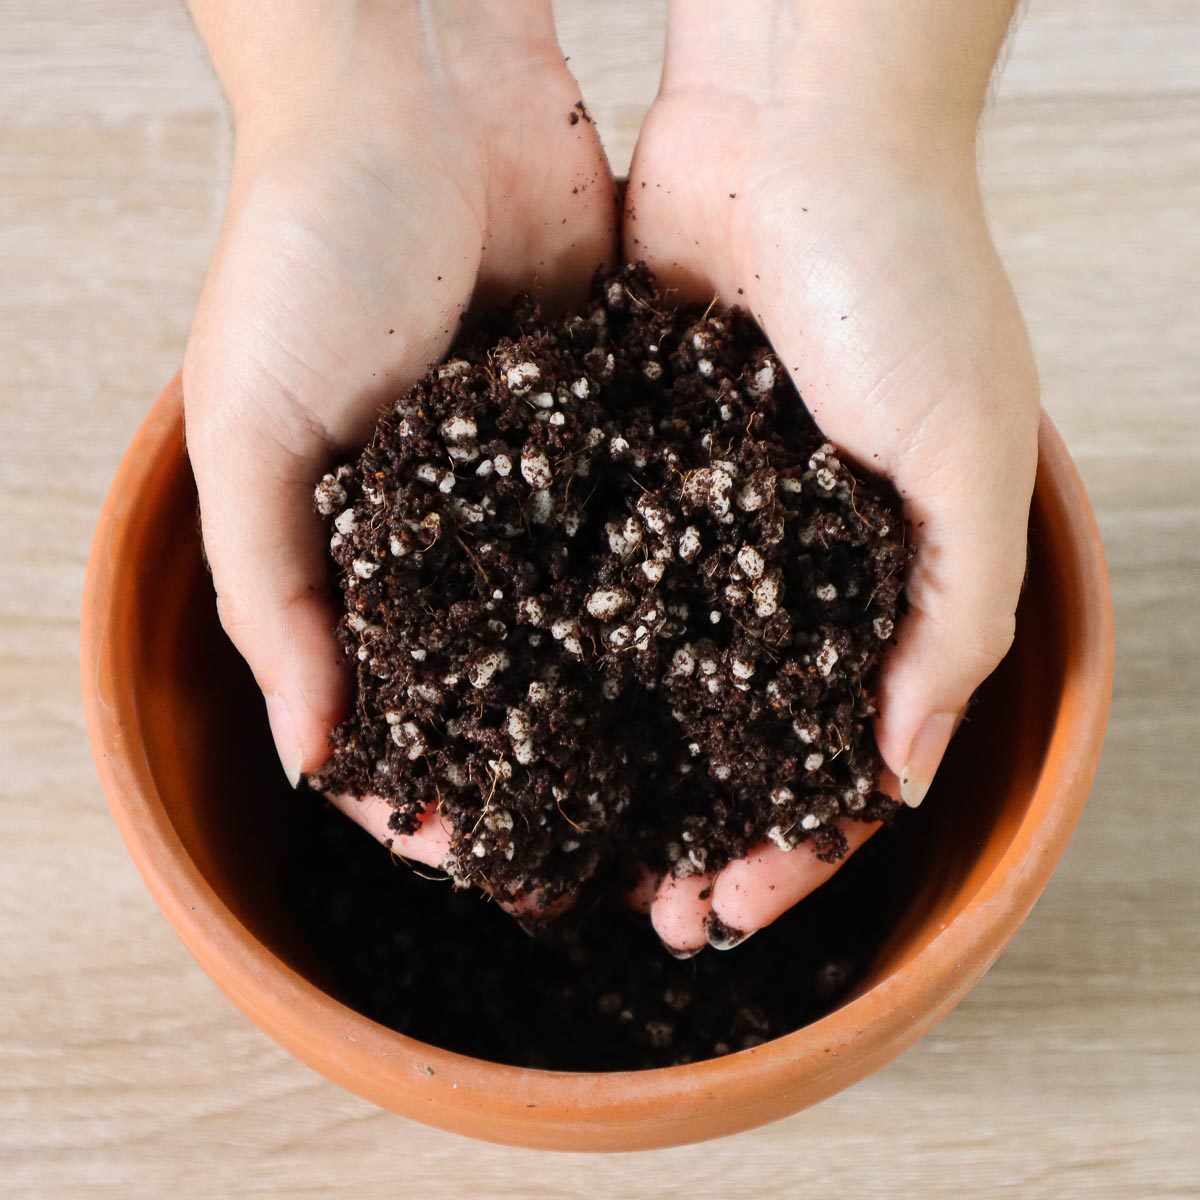
Make a hole in the soil with your finger or a dowel. Dip the end of the cutting in rooting hormone to stimulate root growth and place in the hole, avoiding the sides to keep as much of the rooting hormone on the end as possible.
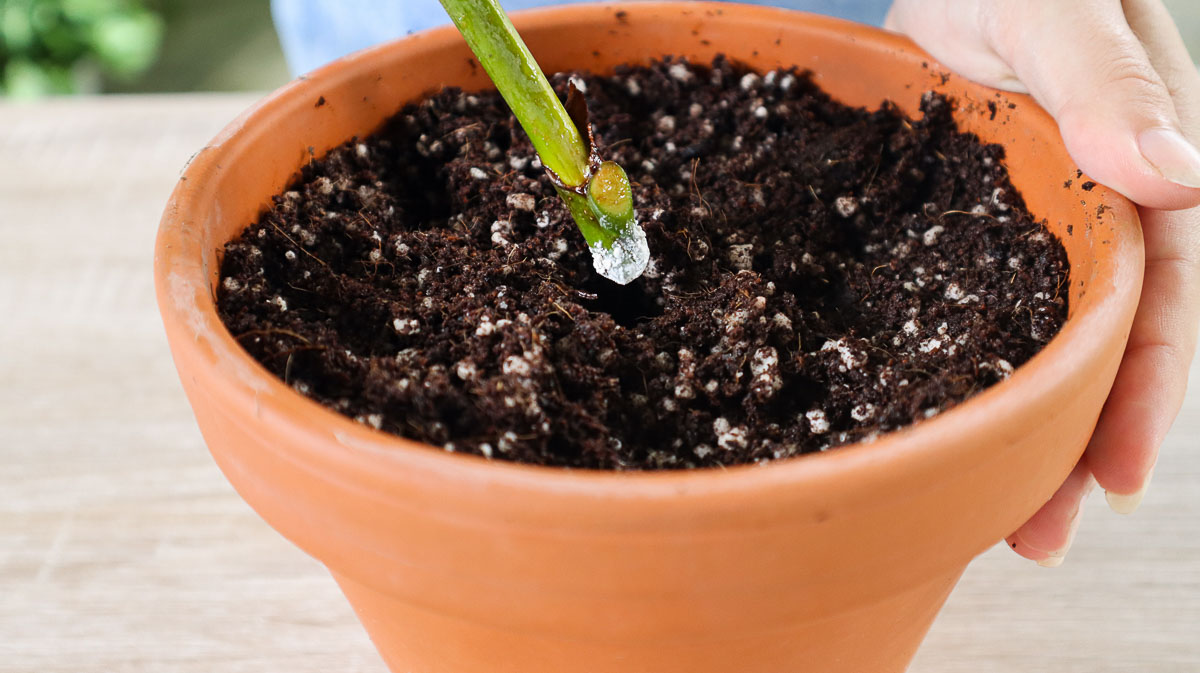
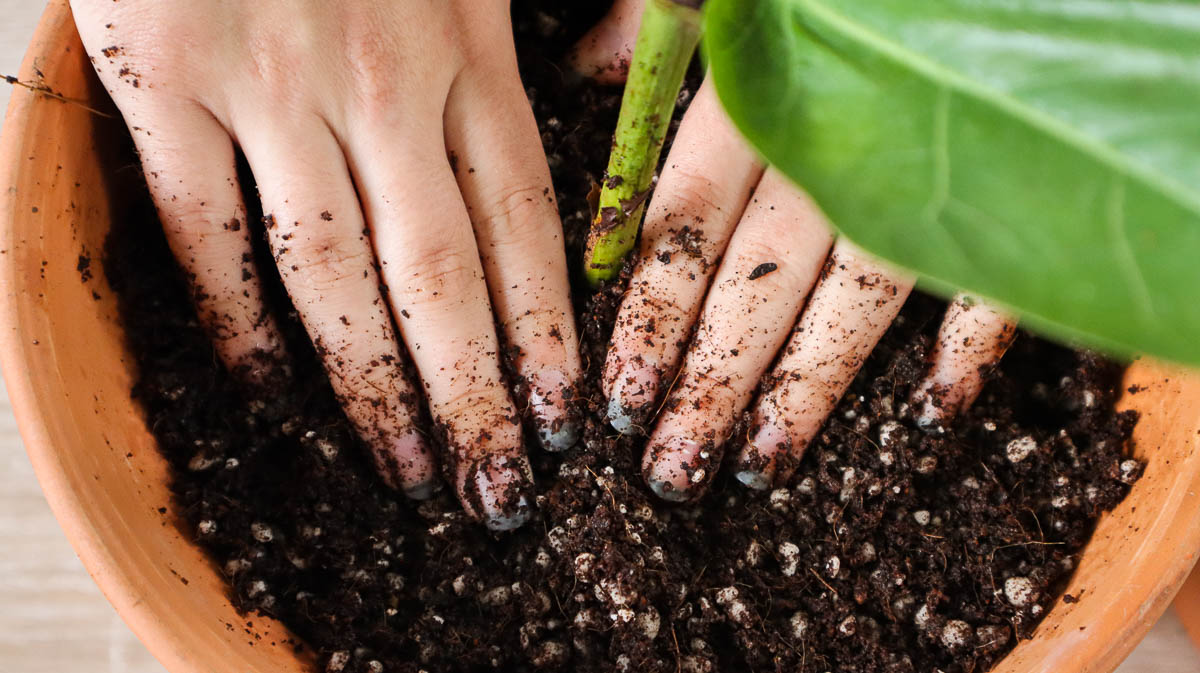
Once buried halfway down in the soil, press around the cutting to secure in place. Place the pot in a warm and humid spot away from direct light. If you don’t have an area with sufficiently high humidity, place a clear plastic bag around the pot to retain moisture and improve conditions
Keep the soil evenly moist under roots develop. Don’t add too much water as this can quickly rot the stem.
Transplanting
Within a few weeks, you’ll notice root growth or new green growth developing along the cutting if your efforts were successful. Once the roots are a few inches long, you’re ready to transplant.
Choose a large pot and fill it with a specialized houseplant soil mix. You can also mix your own by adding two parts potting soil to one part perlite and one part coconut coir. Transplant the cutting to the new pot and water thoroughly.
Check for signs of transplant shock within the first few weeks of transplanting. As Fiddle Leaf Figs are not fans of change, keep them in the same area until they are well established before moving to the perfect spot in your home.