We are elbow-deep in the bulb-planting season and my friends are starting to doubt my honesty when I say “sorry, I can’t this weekend; I’m planting bulbs.” But that’s October for me.
We’ve already talked about tulips, daffodils and general bulb planting tips. So I decided to continue the series by writing about some bulb planting tools that you might find useful.
For most of us, a trowel is enough to dig a hole, drop a bulb in and cover it back up. But I find that the older I get (I do mean ‘wiser’), the more aware I become of not straining my body while I garden. I want to be able to garden into my old age, so I have to make some adjustments to how much strain I put on my joints and muscles. And sometimes, that translates into getting tools that are specifically designed for the job. In this case, bulb planting.
Let’s have a look at a few tools that will make bulb planting easier. I am by no means saying that you have to go out and buy all these tools before you start planting your spring bulbs. But if the usage scenario applies to you, maybe consider getting a couple of high-quality tools that will make your gardening life easier.
1. High-quality bulbs
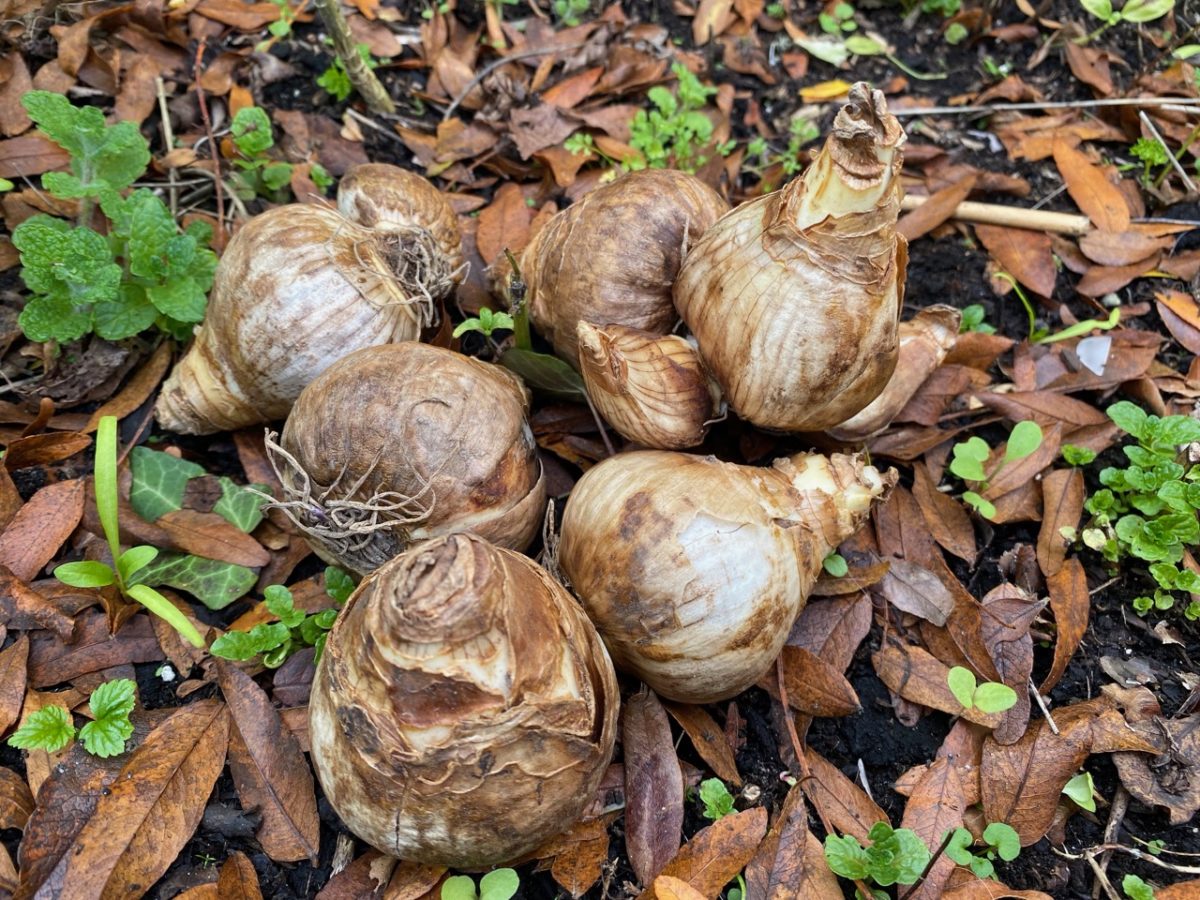
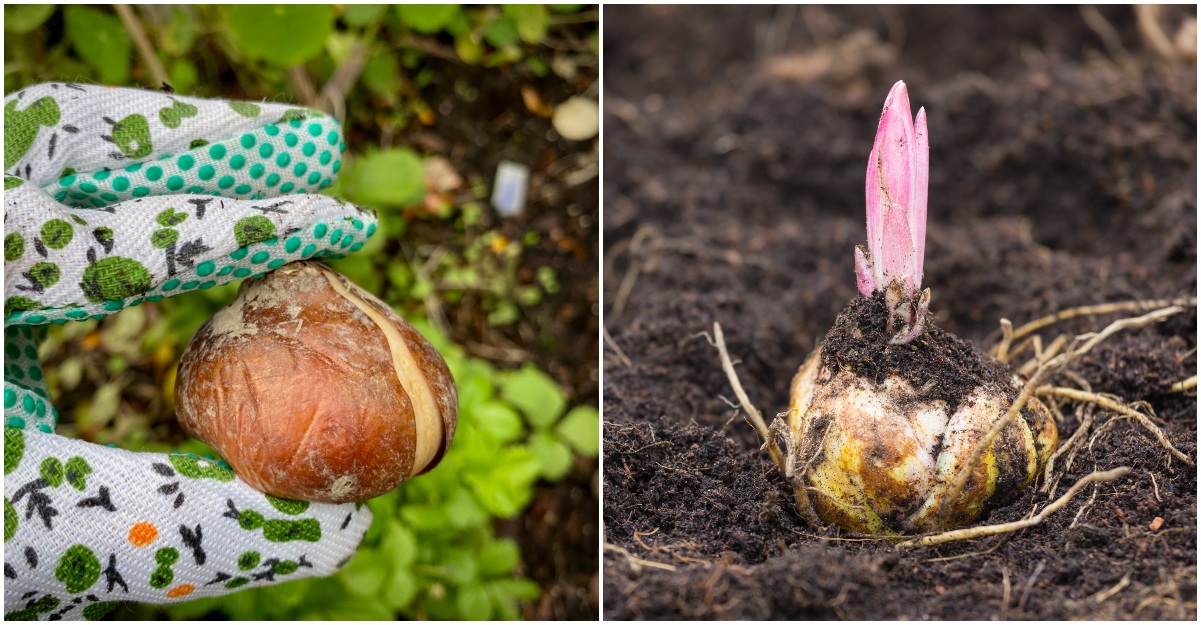
As I was drafting this article, I went back and forth in my mind on whether I should include such an obvious statement. A friend helped me make up my mind to include this bit of advice with one simple question: Do you think I should plant these bulbs?
In her case, “these bulbs” were a shell, quite literally, of what they used to be. By the time she’d found the box of bulbs in her shed, they were papery, shriveled up and definitely not viable anymore. Some of the bulbs were so desiccated that it was hard to distinguish what spring bloom they were supposed to harbor inside.
It is possible to save your bulbs properly to replant. (I talk about a few tips in this article.) But if you’re starting from scratch, or simply want to add more varieties to your collection, it’s important that you choose quality bulbs from reputable suppliers.
Here are a few established online bulb vendors in the United States.
2. Dibber
What is it?
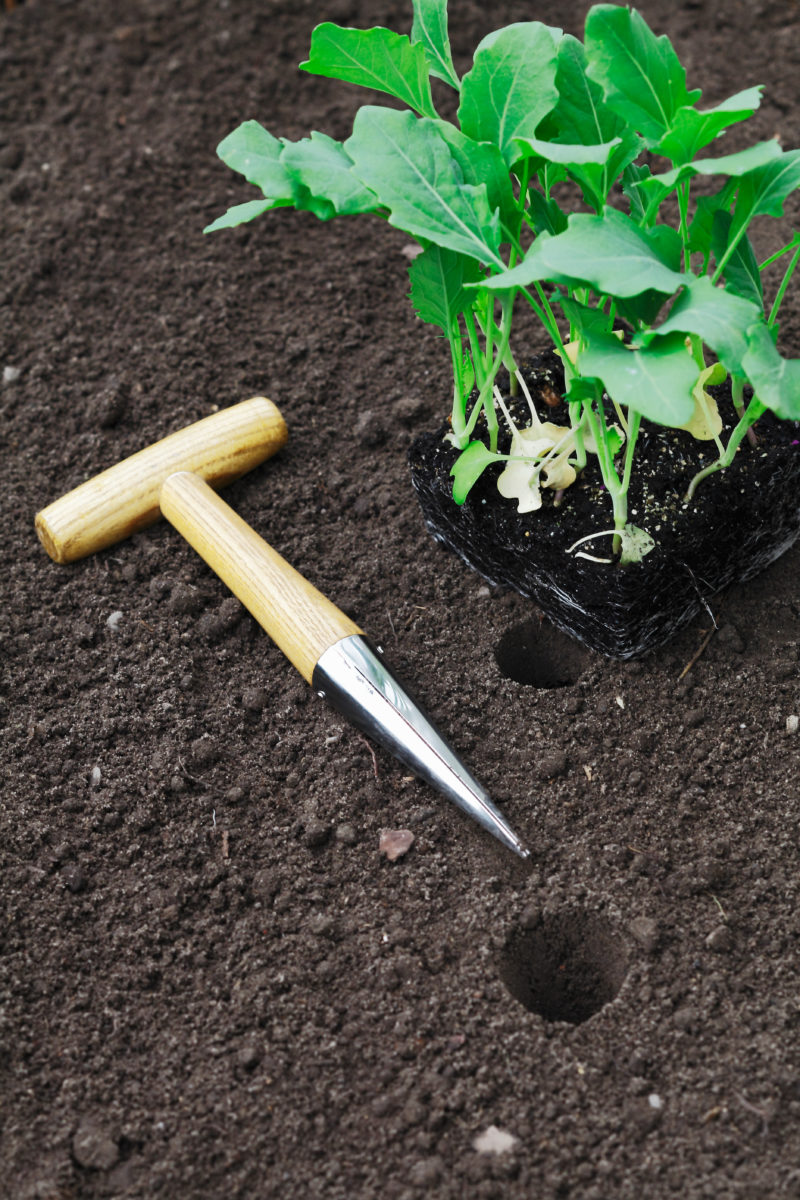
A dibber is a bulb-planting tool that looks like a spike. I imagine if Dracula was landscaping his spring garden, the dibber would be his gardening tool of choice.
Dibbers can be made entirely of wood or a combination of stainless steel and wood. I’ve also seen dibbers made of plastic. I wouldn’t recommend any gardening tools made of plastic (save for a watering can, maybe) since plastic tools aren’t as durable as metal and wood. Plastic gets brittle fast, especially if you leave it out in the sun. Most dibbers come with a depth guide etched into the part that goes in the ground.
This is a good choice if:
Dibbers come in handy if you’re not planting a lot of bulbs. Depending on what soil you’re digging into, you still need to apply a bit of force to get the dibber in the ground. It’s easier on your wrists if you get a dibber that has either a T-shaped handle or a D-shaped handle.
The nice thing about dibbers is that their use isn’t restricted to bulbs. They’re excellent for planting seeds (just don’t dig as deep) and plant plugs.
Buy it
This is a high quality dibber with depth guide and copper plating.
3. Hand bulb planter
What is it?
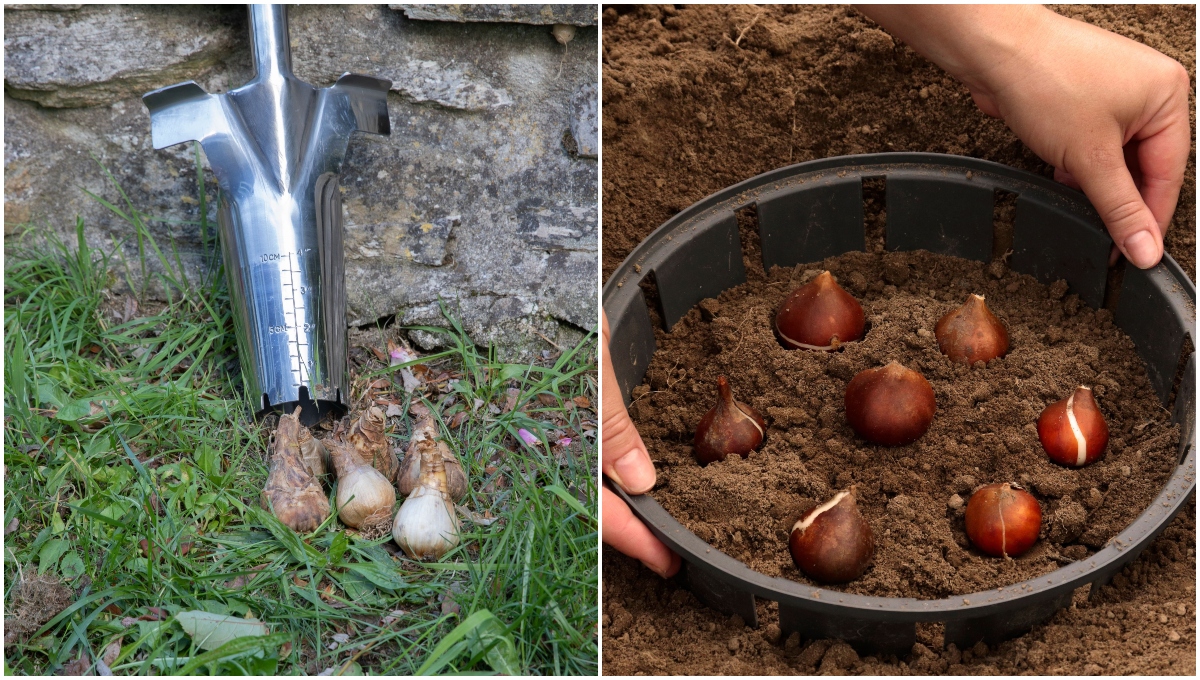
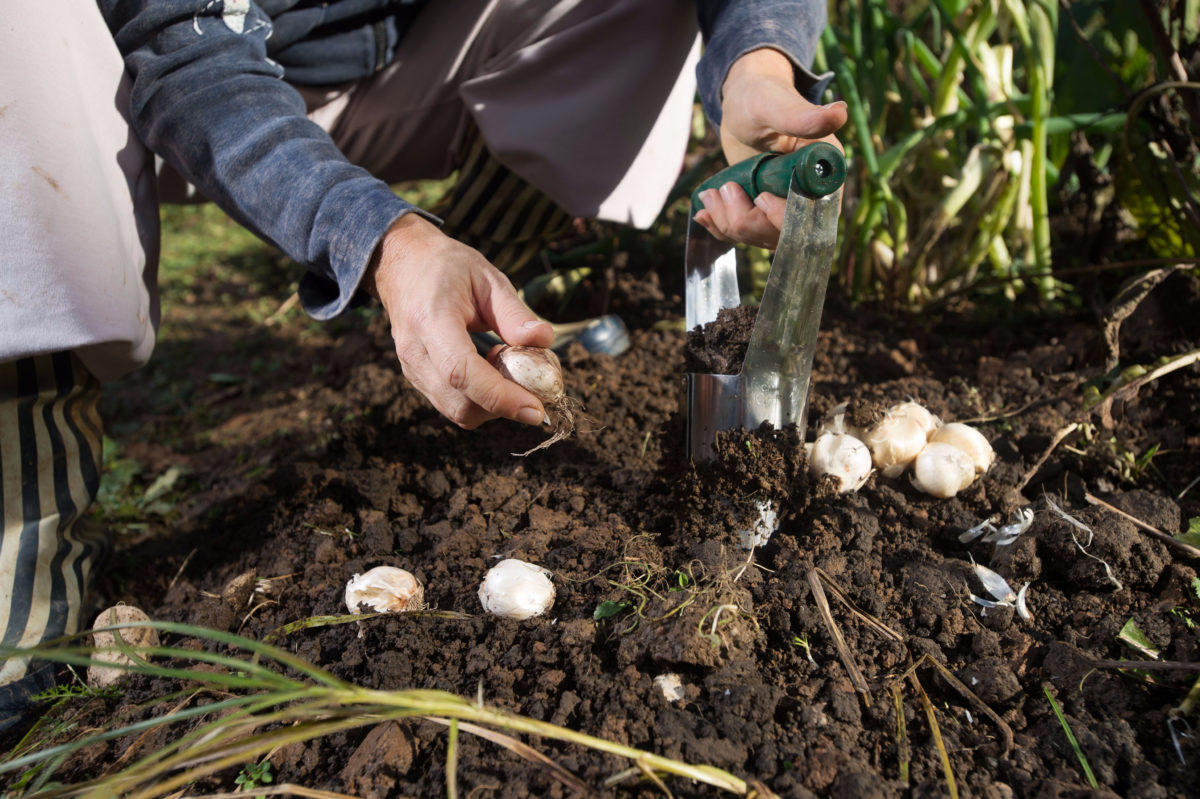
A hand bulb planter is the short-handled version of a bulb planter. It has a handle (usually made of wood) that attaches to a bucket-like steel structure that tapers down and ends in a sharp or serrated edge.
You simply push the steel part into your soil, twist it and pull it back up. As you’re making the hole, you’re also removing the soil on top – the dirt stays in the bulb planter.
Just drop either a large bulb or a couple of smaller bulbs (such as crocuses or snowdrops) into the hold and use the soil you removed to cover up the bulbs. Some planters come with a release button for the soil, but most basic ones just require a tap on the side or poking the soil from the top for release.
This is a good choice if:
This is an excellent tool to help you speed up bulb planting. Compared to using a trowel, using a bulb planter helps you improve precision and fit more bulbs into a small area.
Buy it
This is a quality bulb planter with automatic soil release.
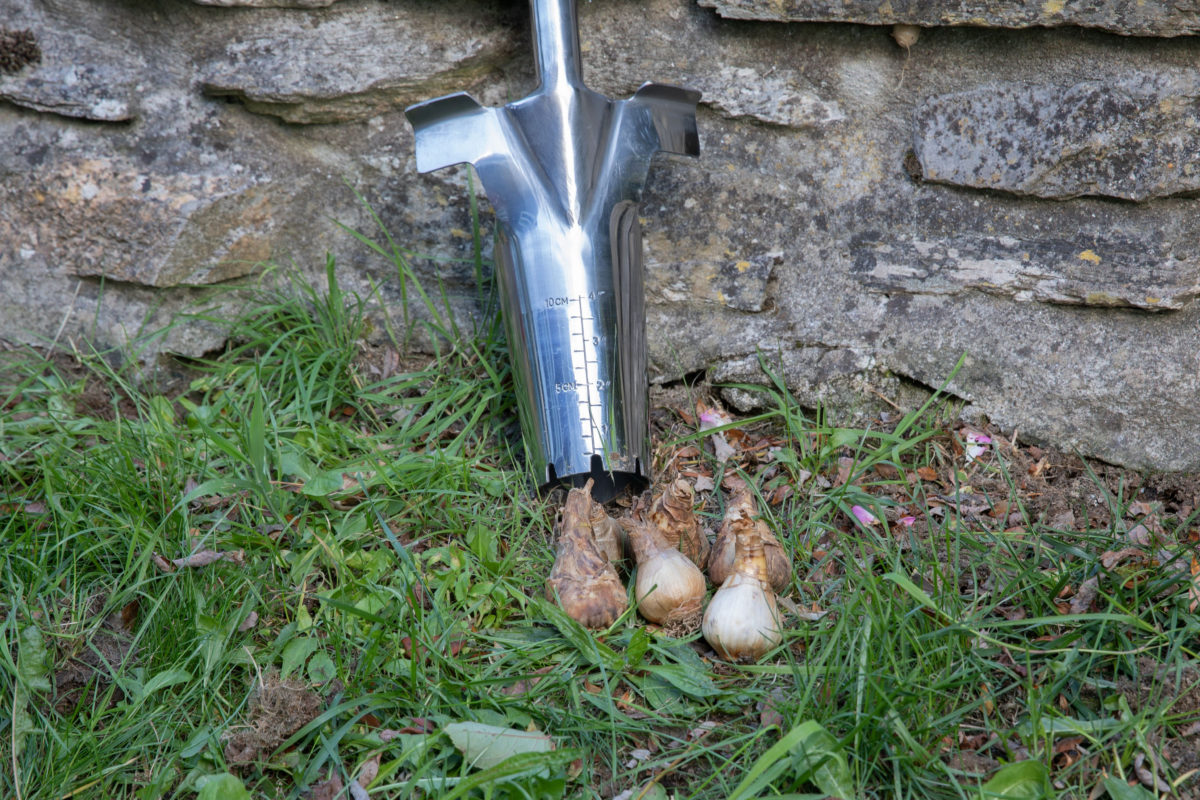
4. Standing bulb planter
What is it?
A standing (or long-handled) planter is the taller version of the handheld tool. You use it much as you’d use a shovel, except instead of a shovel end it has a bulb planter end. Most are made out of carbon steel or stainless steel with a metal or wood handle. Some have an angled blade to allow for easier soil penetration.
Two details that I think are important in a standing planter are a T-shaped handle (to allow you to distribute weight evenly when you dig) and tread edge wings (to use foot power when you dig).
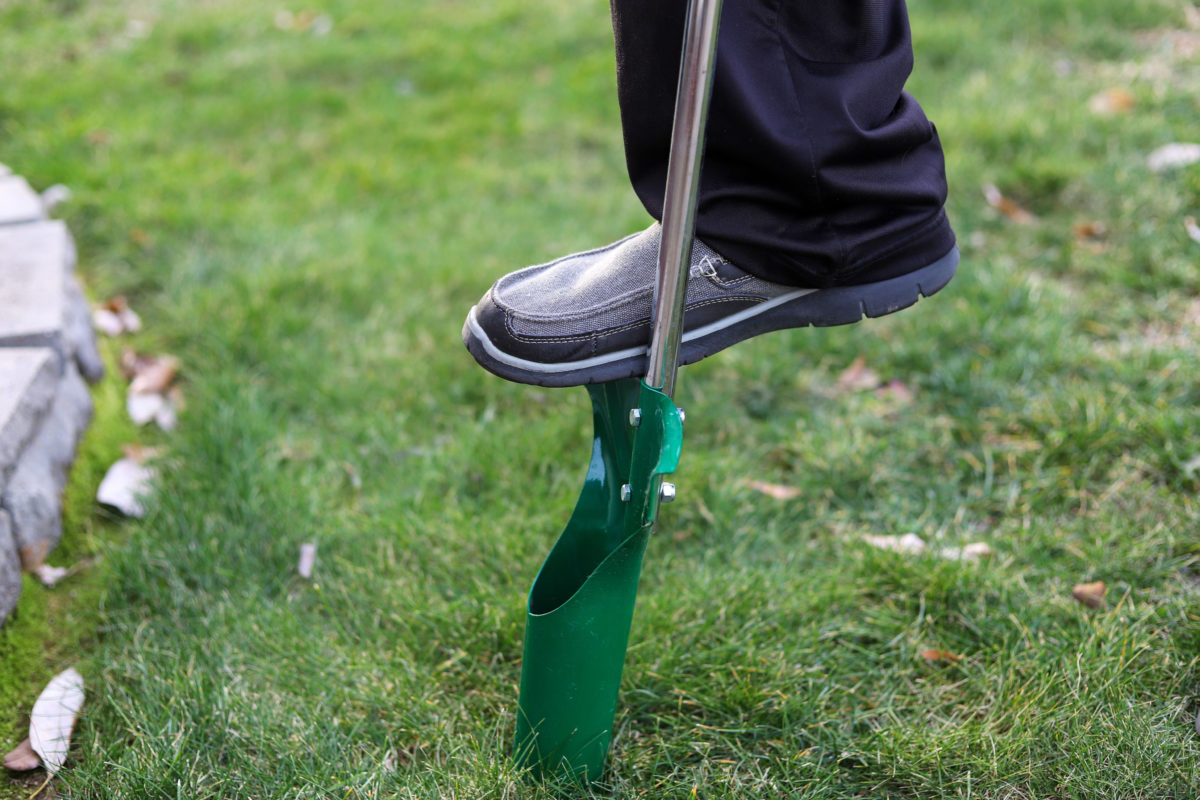
This is a good choice if:
A standing bulb planter will make gardening easier on your wrists, your back and your knees since you don’t have to crouch on your knees to dig. A good way to do it is to dig all the holes at once and then crouch down and drop all the bulbs at once. You will need a bit of strength when you’re using your foot to push the planter into the ground though.
This a good choice planter if you’re naturalizing scattered bulbs in your lawn.
You can use this planter for other crops too, such as potatoes or onion sets.
Buy it
This is a well-reviewed long handled bulb planter with all the features required.
5. Drill bulb planter.
What is it?
Also called an auger (read like ogre, think of it as Shrek’s tool of choice), this is a drill attachment for digging into the ground fast and deep. The auger is just the attachment part, so only buy it if you already have a cordless drill. Always check the safety precautions in your drill’s instruction manual before you add new attachments and wear safety gear (goggles, gloves and boots) when you’re operating this tool.
Augers come in different sizes, both in terms of height and borehole diameter. You can also opt for a tall auger that will allow you to stand while you dig.
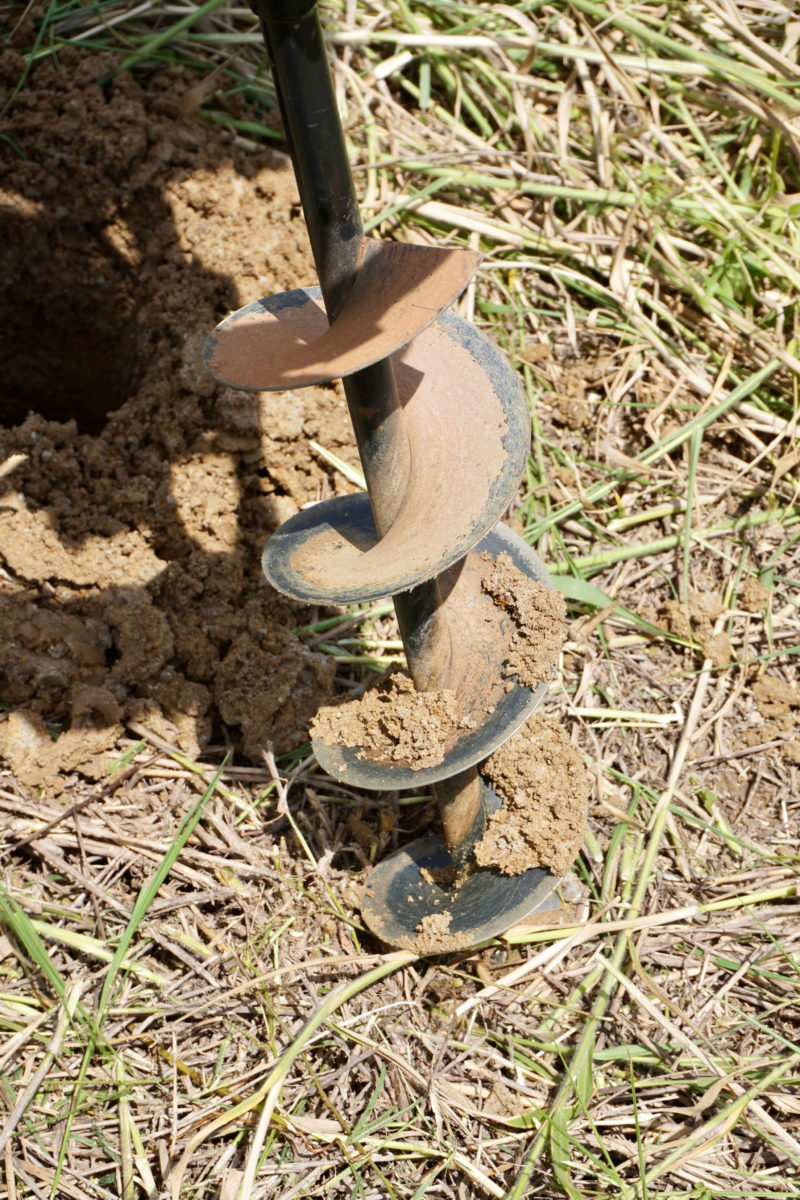
This is a good choice if:
An auger is basically like a motorized version of the long-handled bulbs planter, so this tool will come in handy if you’re planting in drifts or planting hundreds of bulbs.
This tool makes it easier to dig in compacted or heavy soil. It’s also a good tool to have if you’re planning on planting bulbs under trees because digging with an auger will make it easier to plant in an area with a lot of roots. But please make sure you’re protecting your wrists when you encounter root resistance. Also, because of the weight of the drill, you might want to wear some wrist protectors if you’re planting a lot of bulbs.
Buy it
Here’s an auger drill bit for sale in various sizes on Amazon.
6. Kneeling cushion
What is it?
When I’m planting things in the garden, I’m either crouching or kneeling. So using a kneeling cushion is always a good idea, whether I’m seeding, planting or weeding.
Kneeling cushions are usually thicker than kneeling mats, but it’s up to you which one you choose. A cushion is better if you’re placing it on a hard walkway, while a mat is better suited for placing on soft ground. I was already using a retired yoga mat, so the kneeling cushion was a much-needed upgrade.
Cushions come in a variety of sizes and colors, but I’d recommend getting a larger one that you don’t have to move too much as you rotate around. The pads are usually made out of foam or natural rubber (the more durable and sustainable option).
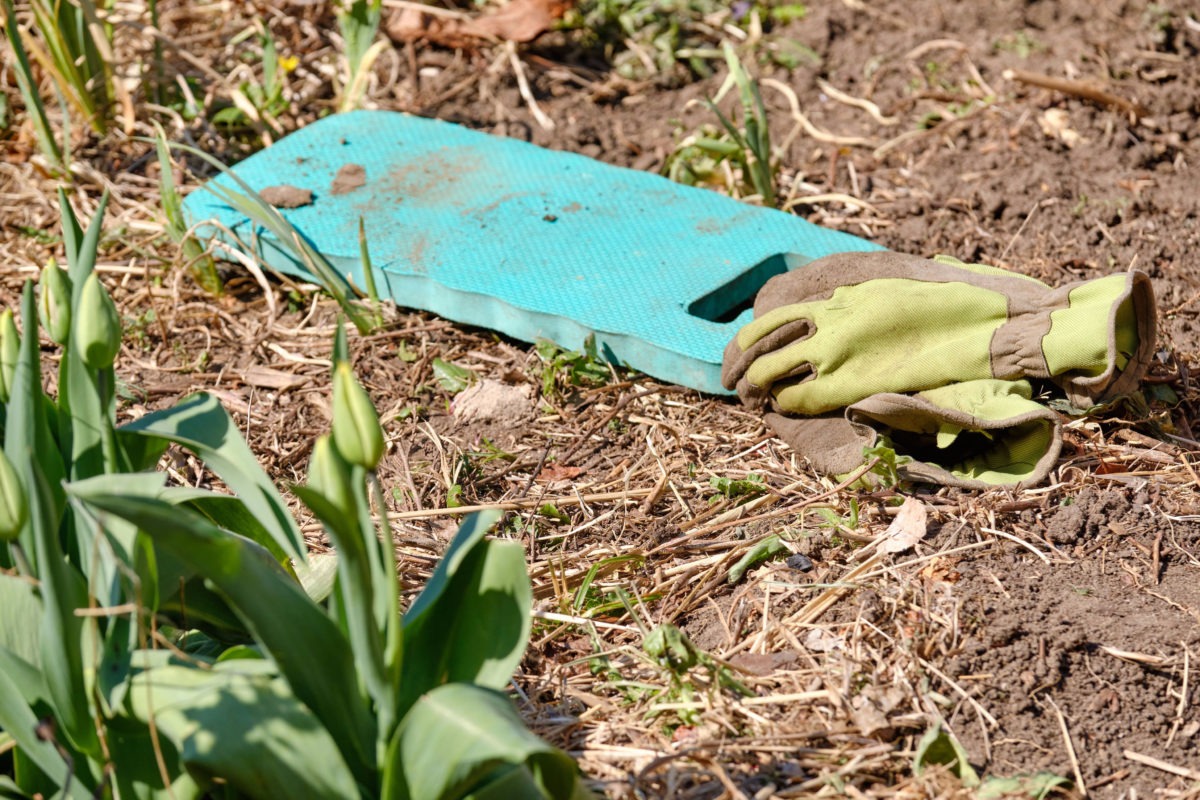
This is a good choice if:
Using a kneeling cushion in the garden is a good choice for everyone, no matter your age. Most cushions of them come with a handle so you can easily move them around and make kneeling comfortable wherever you’re planting your bulbs. They also come in handy if you’re gardening on soil that’s rocky, gravelly or has other debris that might scrape your knees.
Buy it
You can’t go wrong with this affordable but high quality kneeling pad available in various colors.
7. Bulb planting baskets
What is it?
Bulb baskets come in two varieties: with or without a lid. If you’re having to share your bulbs with squirrels, mice and voles, you’ll definitely want to buy the lidded baskets. If you can find them I recommend metal baskets (some vendors might sell them as “mesh bulb cages”) over plastic ones because they last longer and won’t break if you use them for years in the wet soil.
Here are two ways to use a bulb basket:
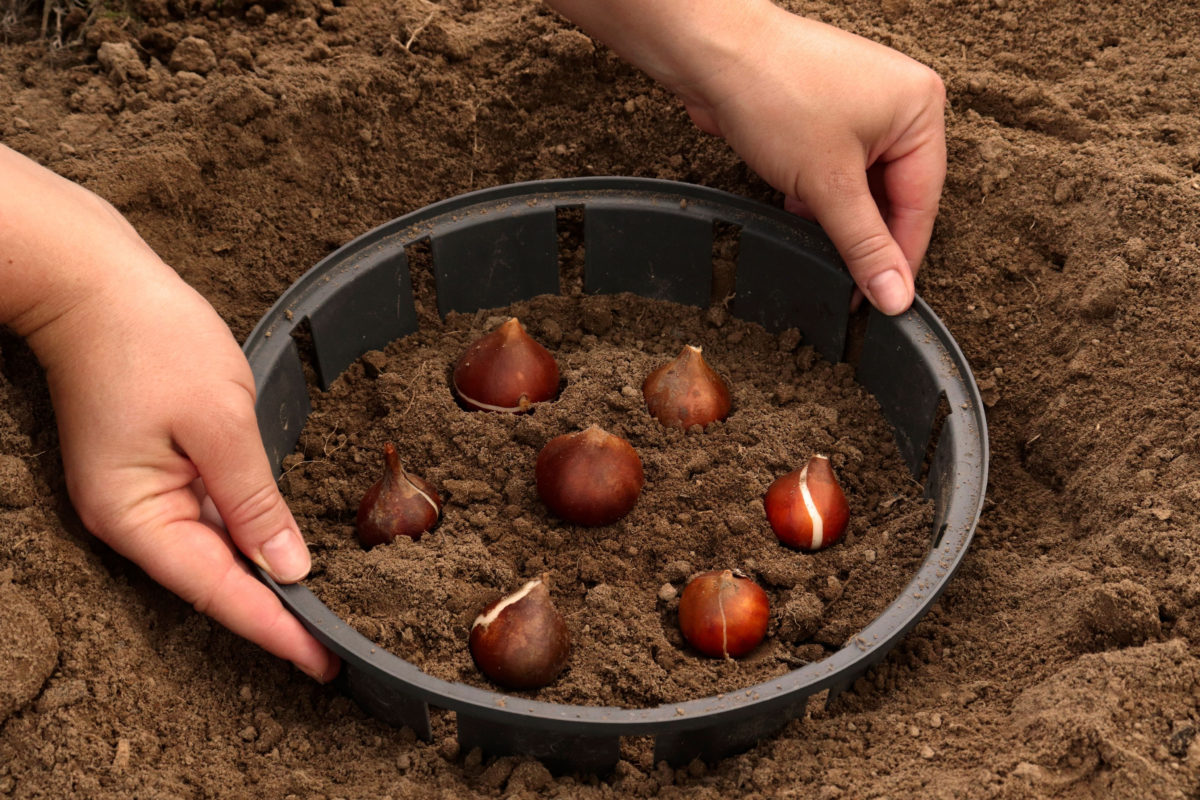
Method 1: Open the basket and add a layer of soil into the bottom part, then place your bulbs on top of the soil. Dig a hole a bit deeper than the height of the basket, then place the basket in the soil. Place the lid on the basket, then cover up everything with soil until you can’t see the basket structure anymore.
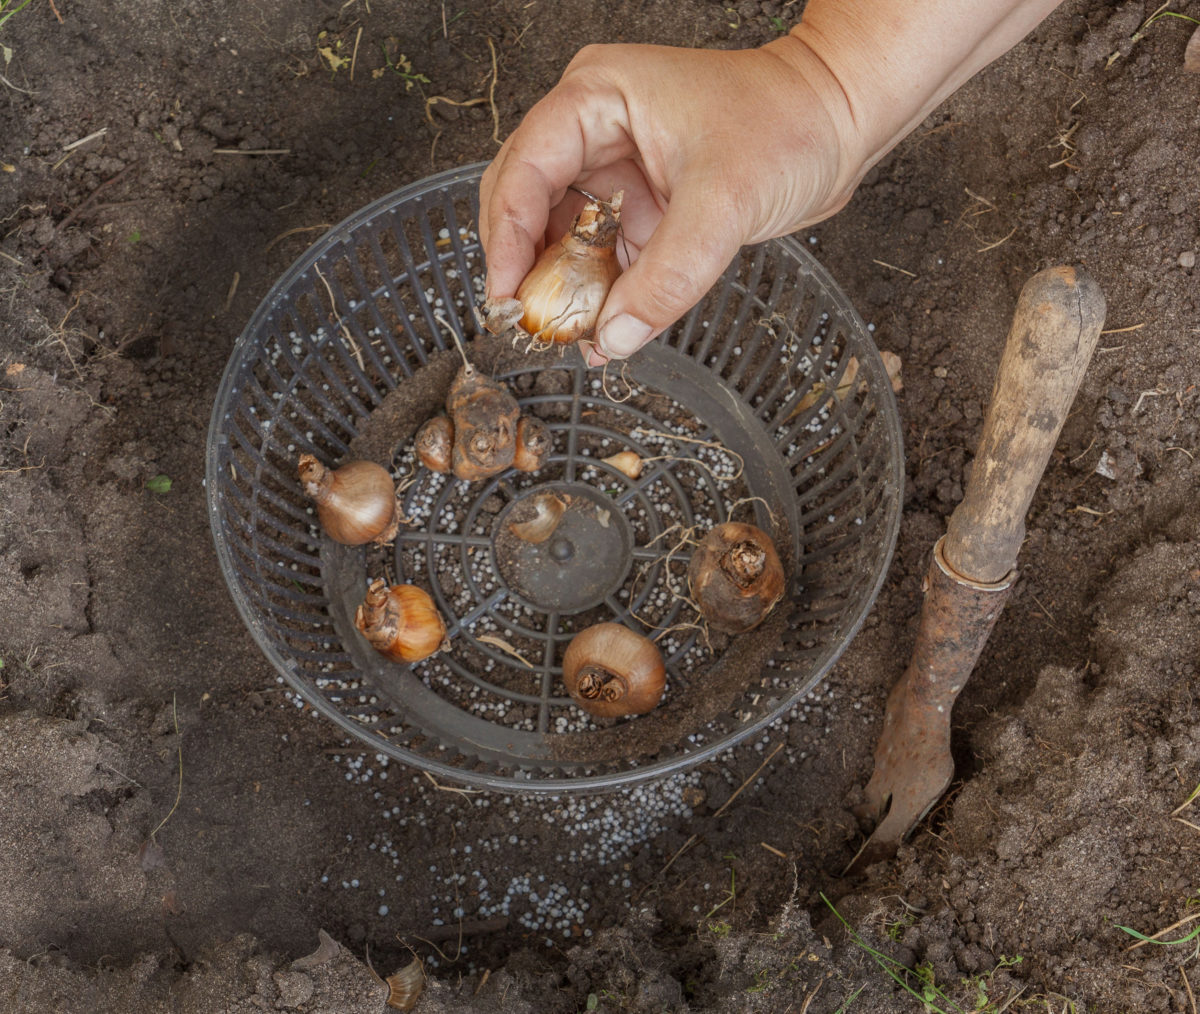
Method 2: Simply dig a hole for the basket, place the bulbs at the bottom of the basket, put the lid on, then cover everything up with soil.
Both methods work, depending on how deep a basket you’re getting and the size of the bulbs you’re planting. Remember that bulbs should be planted about three times their height, so make sure you don’t plant small bulbs too deeply when you’re using a basket.
This is a good choice if:
Bulb baskets serve two functions: to protect your bulbs from becoming snacks for pesky critters and to help you plant a grouping of bulbs and make it easier to lift them for storage. Obviously, the first function works better if you get a bulb basket with a lid.
If you don’t have a rodent problem, you can just use the baskets as an easy way to create bulb arrangements that you can just lift up in one fell swoop without having to dig around to retrieve every bulb once the foliage has died back.
Buy it
Here’s a pack of three 26cm bulb baskets or here are some larger 30cm baskets.
Is there a tool that I don’t need for bulb planting?
Admittedly, I talked about a lot of tools in this article. My goal was not to overwhelm you and definitely not to encourage mindless consumption. In fact, the opposite is my intention. I want our readers to know what tools are available on the market and be able to figure out which one would fit their gardening scenario without having to try them all. Buying gardening tools and supplies can get pretty expensive. I don’t know about you, but I’d rather save my gardening budget for the actual bulbs and plants.
Speaking of saving money, and saving yourself the trouble, here is one bulb planting tool that I would not recommend for bulb planting: bulb fertilizer.
Yes, I may be swimming against the current here when a majority of gardening guides encourage gardeners to fertilize bulbs.

But as long as you’ve improved your soil with good compost when you’ve planted your bulbs (more details in this post), using a fertilizer is not necessary.
On the contrary, it can do more harm to the bulb by “burning” it if it’s used incorrectly. Fertilizer can also cause the stem of the plant to grow tall and spindly and encourage the development of foliage to the detriment of the blooms.
A bulb has the magical quality of being a garden in its own right. A bulb contains everything it needs to produce a bloom without any external help or nudging.
A few reminders on how to care for your bulb planting tools.
Keep them clean: Once you’re done planting your bulbs, clean up the tools and remove any dirt or debris. Yes, even if you plan on using it again the next day.
Keep them dry: Wipe the tools dry or let them dry in the sun, then store them under cover in a place that doesn’t get rained on and doesn’t collect dew moisture.
Keep them rust-free: Stick to a yearly cleaning routine to check your bulb planting tools for rust. If your tools have rusted, you can use aluminum foil and vinegar to remove them. Or have a look at this tutorial and follow Lindsay’s method for tool cleaning.
Buying just a couple of high-quality tools and putting some time and effort into their maintenance is the most sustainable option, both for your garden and your wallet.