As the saying goes, two things in life are certain, though allow me to choose not to list them here. But as a gardener, I’d like to petition to add one more item to the list of certainties: you’re always learning new things, often in troubleshooting mode.
And sometimes even the easiest of steps – such as planting a seed – require a bit of extra knowledge to get it just right.
When it comes to starting plants from seed, I’ve made my share of mistakes. I’ve wasted my time on very old seeds. I’ve also overwatered my seeds to the point of no return (that’s mushy mold, if you’re wondering). And to counteract that tendency, I’ve underwatered seeds to the point where germination just stopped. In an attempt to be thrifty, I’ve also used the wrong containers, that either held too much moisture or no moisture at all.
Every single time I made a seed-starting mistake, I knew where I had gone wrong, either during or after the fact. But what was really frustrating was when I thought I was doing everything right, but the seeds just wouldn’t sprout.
A few years ago this happened with four types of flowers and herbs that I was planting: sage, echinacea, verbena and lavender. I knew some of these plants would take longer to sprout, but not seeing signs of life for over six weeks left me scratching my head in disbelief.
My first instinct was to blame the seed supplier. I grabbed the seed packets to get their info and write them an email (just asking for advice, not the mean customer service type of email). And what do you know: I had missed something. All the packets of seeds that didn’t sprout required either fall planting or cold stratification. Big oops!
What does seed stratification mean?
Simply put, stratification refers to prechilling your seeds before you put them in the ground.
If you think of planting seeds as Step 1 of starting a garden from scratch, then seed stratification is Step 0. You do have to take this extra step when you’re starting your seeds indoors in the spring because stratification helps improve germination rates.
And when you’re only starting a few seeds of each plant – like I was in my aha! year that I described above – stratification can make the difference between getting some seedlings started and getting none at all.
Stratification occurs naturally in our gardens.
If there’s one thing to remember about indoor stratification, it is that we’re doing it in order to mimic natural processes.
Some seeds contain what’s called germination inhibitors. These seal the seed from the time it dries and falls in the fall until it’s time to sprout up again in spring.
Inhibitors such as naturally-occuring wax, oils or hormones allow the seeds to remain dormant until the time is right to open up. These substances act as a defense mechanism that prevents a seed that has fallen in September, let’s say, to sprout up soon after, right before the start of the cold season.
Seeds know that the best time to break dormancy is after they’ve gone through a cold spell (often a freeze). But what happens when we collect the seeds in the fall and bring them indoors for storage? The seeds are no longer exposed to one or more cycles of freezing and thawing. So they’re missing that natural trigger that signals it’s time for germination.
The same is true for the seeds that we buy in neat little paper packages from seed suppliers. And without this treatment, some seeds will simply not germinate, or they will germinate very poorly.
This is when we have to step in and do nature’s work if we want nature’s results.
How do you stratify seeds?
There are several methods to stratify seeds, some messier than others. I’ll show you what works for me. And perhaps just as important, I’ll tell you what didn’t work.
In order of complexity, from the laziest method to the most inconvenient, at least for me, here are six ways you can put seeds through the process of stratification.
1. The dry stratification method.
Pros: It’s a super easy “set it and forget it” method.
Cons: It may not be appropriate for all seeds. Some seeds may need moist stratification.
This is the absolute easiest way you can do it. Simply stick the pack of seeds in the fridge and forget about it for about a month. Different seeds have different stratification requirements, so some might need moist stratification to germinate. But if dry stratification is all you can do at this point, it’s better than nothing.
The problem with this method is that you might risk the out-of-sight, out-of-mind effect. So placing the seed bags on the condiment shelves on the side of the door is the easiest way to keep them top of mind. However, in my house we scrounge for snacks so many times a day, that the seeds were constantly exposed to the temperature fluctuations that come with opening and closing the door so often.
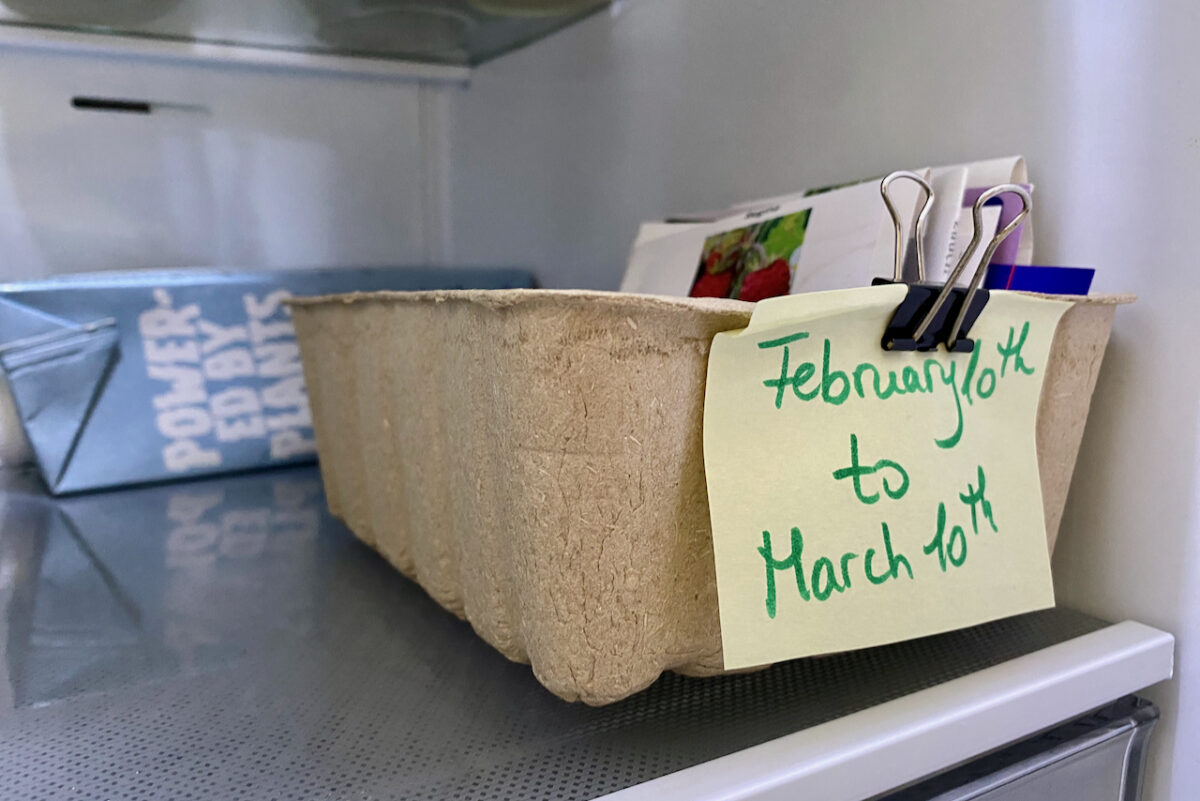
So now I prefer to stick my seeds all the way in the back of the fridge to prevent this problem. I corral all the seed packets in a cardboard tray and add a label with a few reminders:
- plant (for seeds that I collected myself)
- In the fridge since [DATE]
- In the fridge until [DATE] – when I need to take them out, based on the information on the seed package.
I also place a note on the outside of the fridge to remind me that there are seeds chilling out in there. There may or may not be a warning to other family members to leave the seeds in the fridge when they unload groceries.
2. The paper towel method.
Pros: It’s easy and uses materials you already have.
Cons: You need to remember to check it every couple of days. You need to have pots ready for transplant.
The paper towel method is the easiest one for seeds that require not only cold, but also moist stratification. Again, we’re mimicking the cold season that brings both bitter cold and snow melt. The germination inhibitors that we were talking about above are soluble in water, but since they’re meant to withstand months of dampness, a simple overnight soaking might not be enough for some seeds.
Here’s how to stratify seeds with this method.
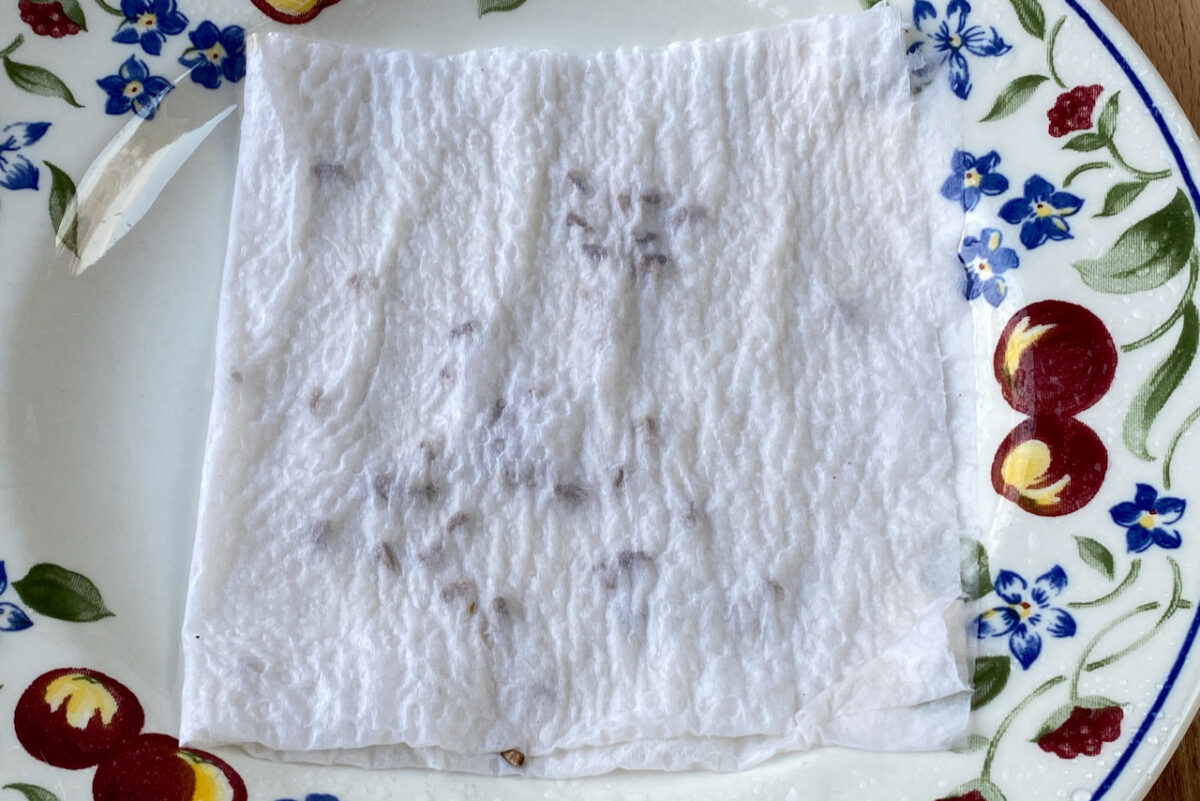
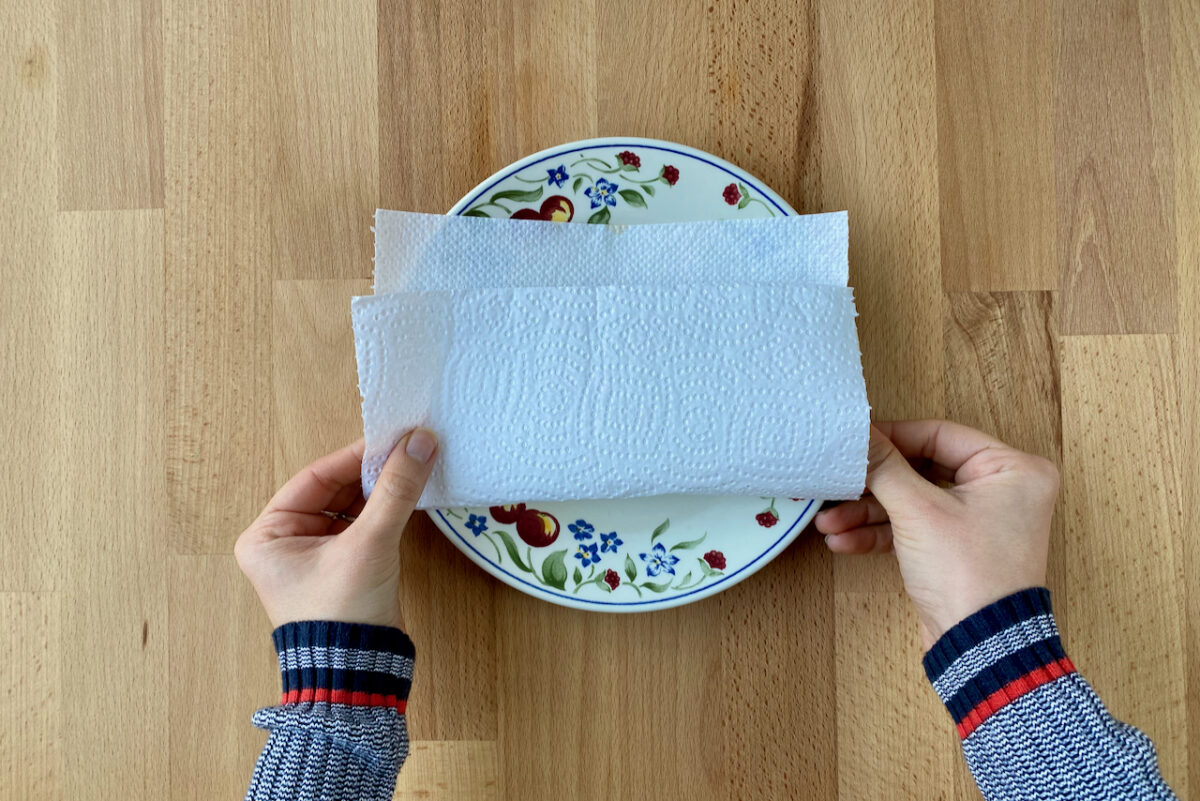
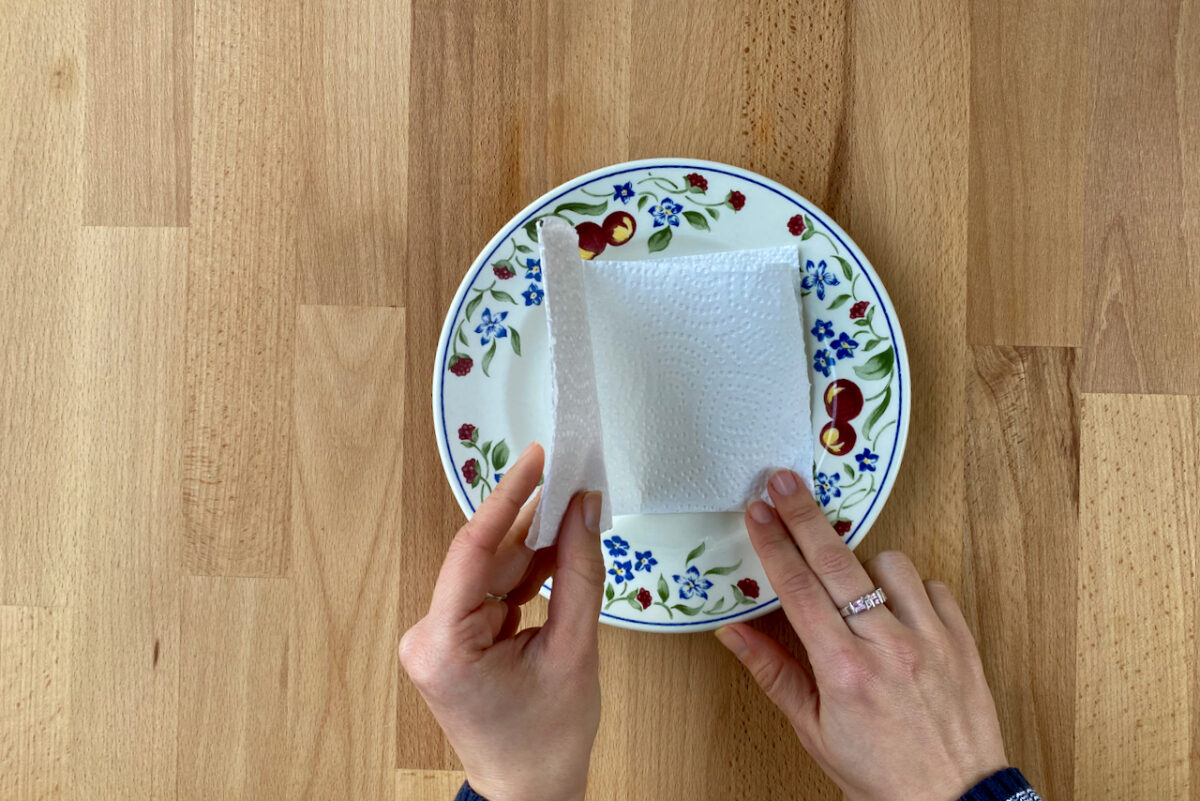
Take a paper towel and fold it in half, then fold it again. Open it up once.
Sprinkle your seeds on one half of the towel.
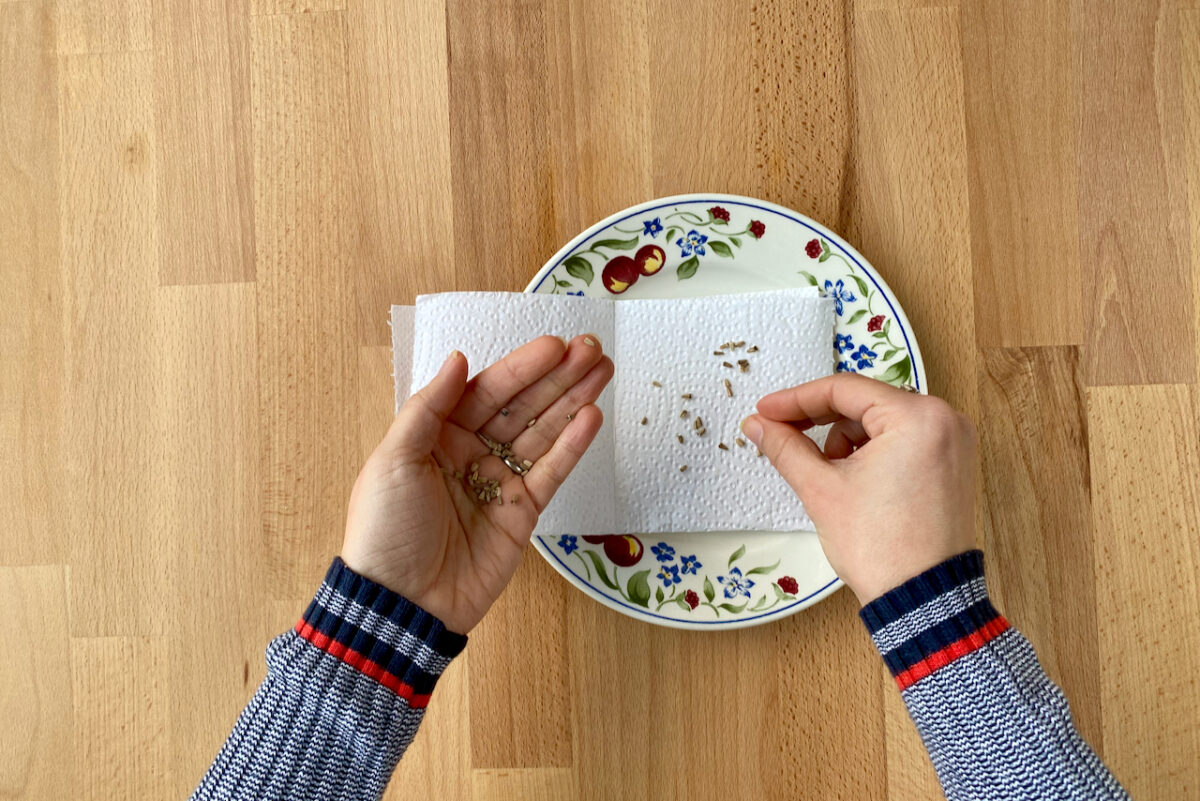
Spritz some water on the seeds to moisten them.
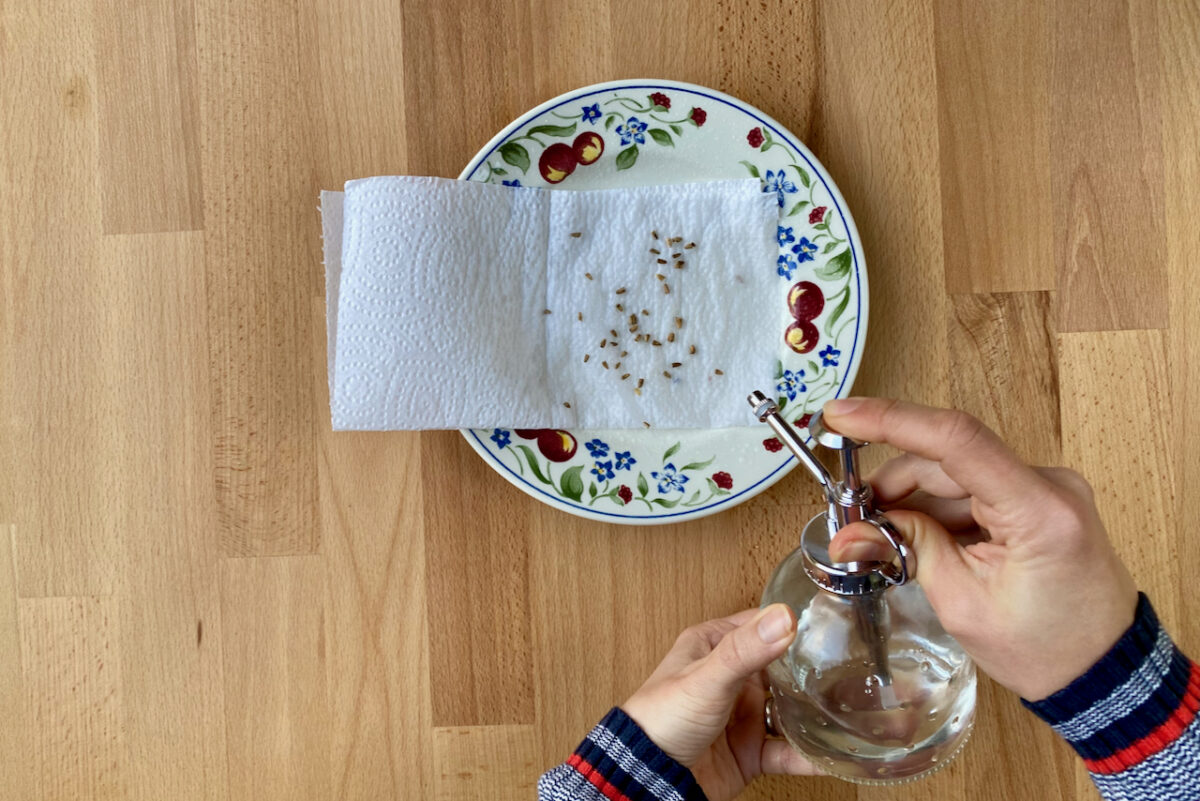
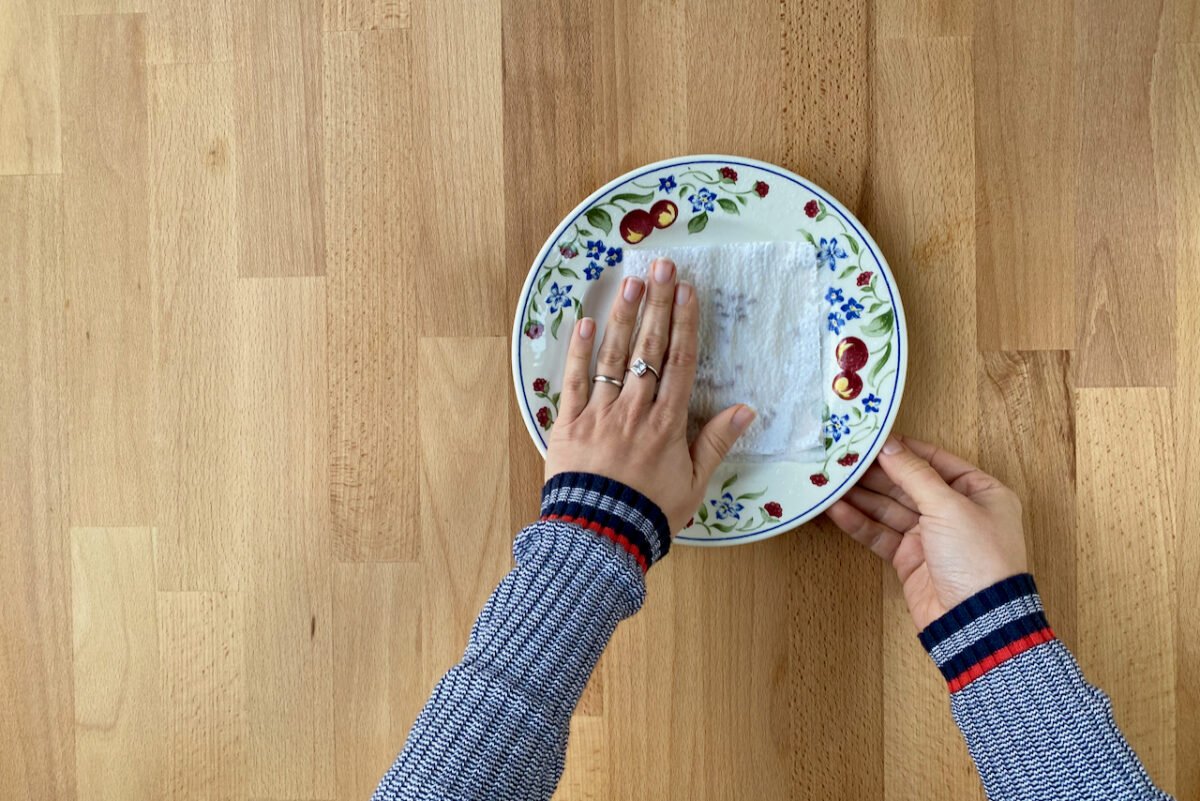
Fold the open half of the paper towel over the seeds to cover them.
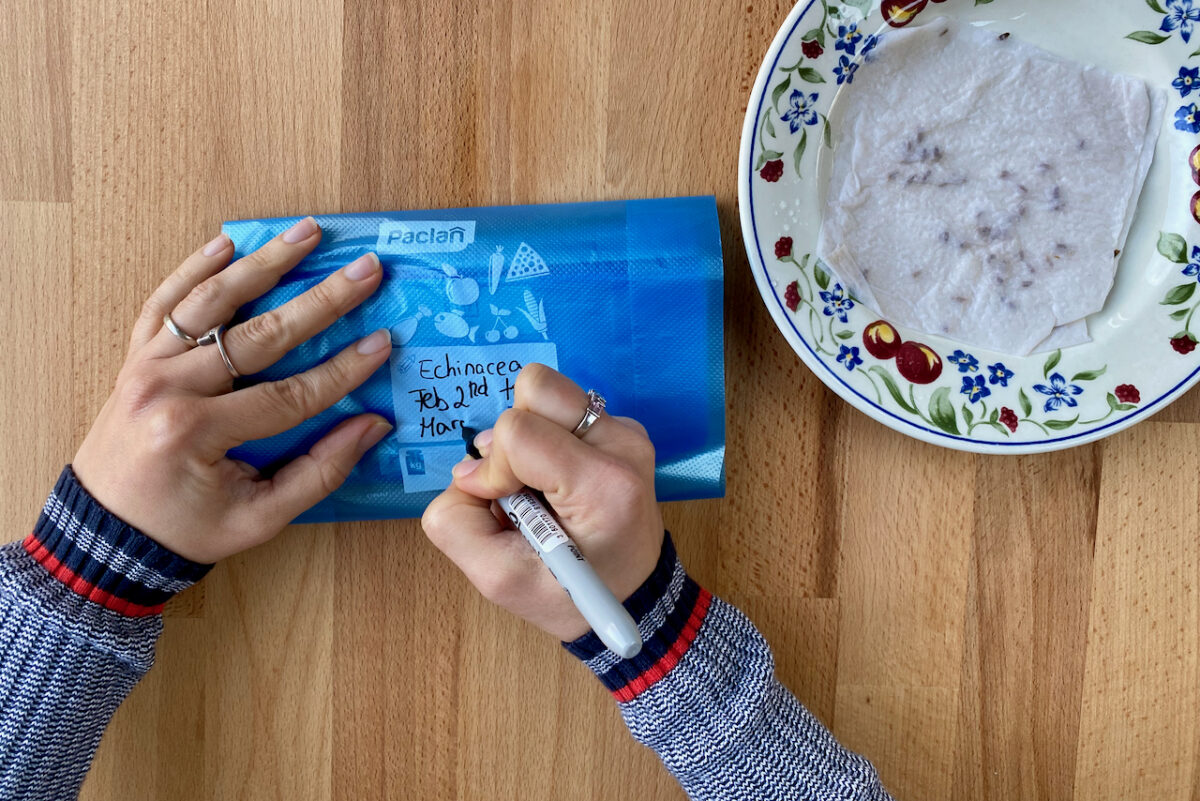
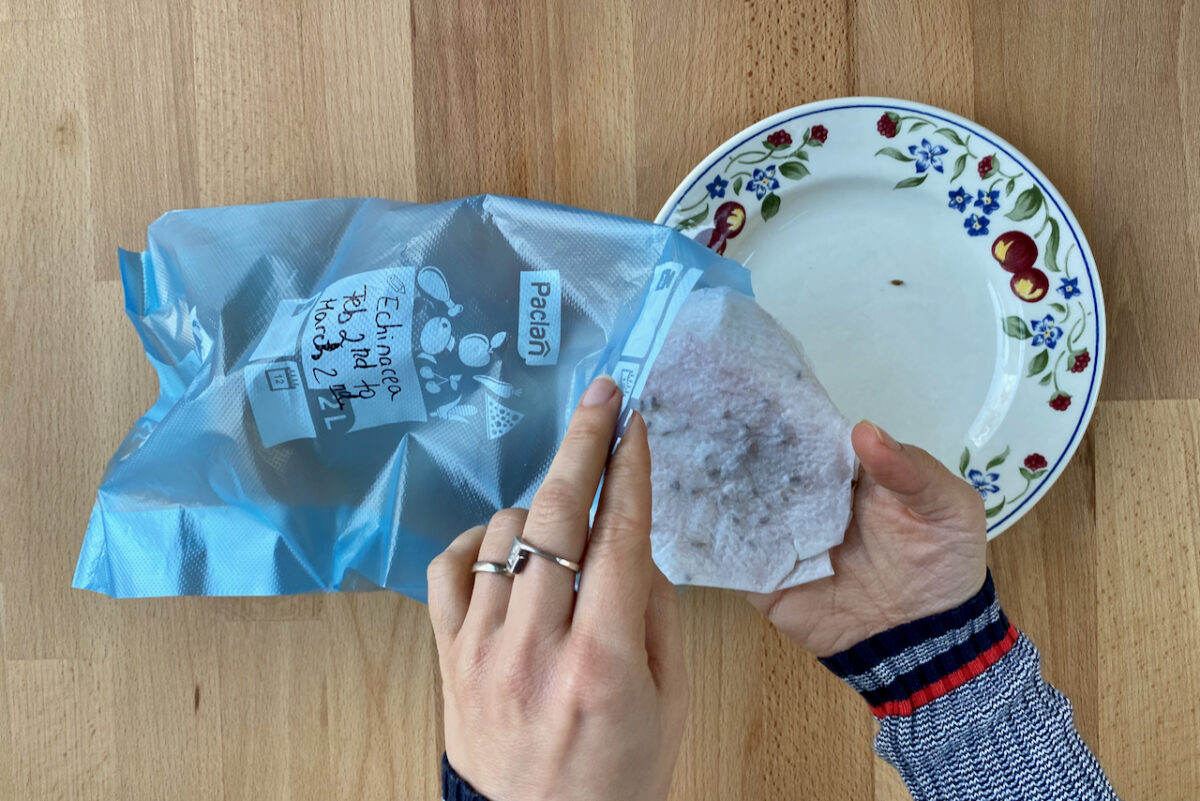
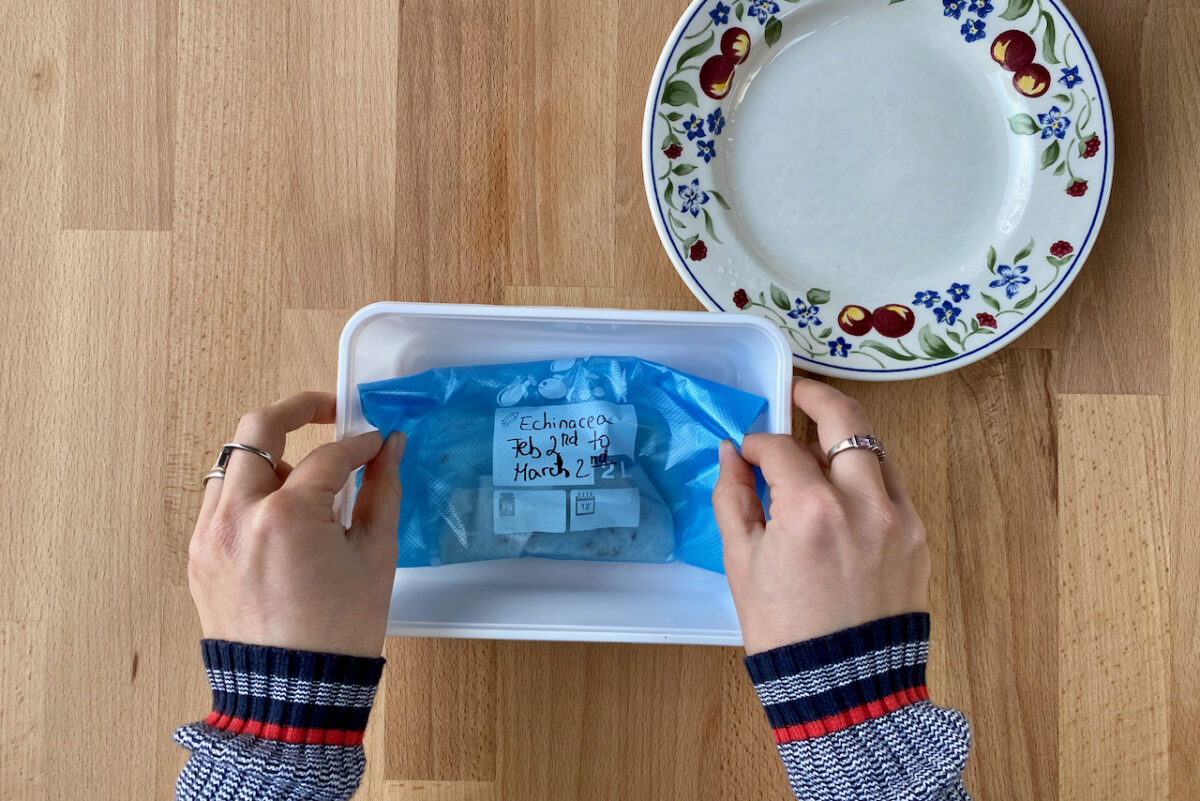
Then place everything in a plastic bag to prevent the paper towel from drying out too fast. You can also stack several paper towels full of seeds in a plastic tupperware. Place everything in the fridge.
The first time I attempted this method, I used a sealable bag. Let’s just say it was a mess and it didn’t work very well for me. The sealed bag retained too much moisture which led to slime and mold buildup around the seeds. So if you use a sealed bag, either don’t seal it all the way, or poke some aeration holes in it. I now use (and re-use) semi-perforated freezer bags that I just fold over without sealing.
The same advice applies – don’t seal it all the way – if you’re using a tupperware container to hold all the paper towels.
I take out the seeds every couple of days to check on their status. If any of the seeds are starting to germinate, I have some small pots ready to transplant the seeds straight into the soil. For the smaller seeds that are tricky to lift, I use a pair of tweezers to grab them. But you can also scoop them up using a popsicle stick or chopsticks.
A lesson I learned the hard way is not to procrastinate too long on transplanting the seeds that have sprouted. Otherwise, the roots of the seed will get stuck to the paper towel or, worse, start growing through it. If that happens and you can’t peel them off without damaging them, just cut the paper towel around the root and plant as-is.
Another reason to check often is to see if the paper towel is still damp. If it’s drying out, I spray a bit of room-temperature water on it. It’s really important to make sure the seeds get constant moisture. If the seeds start absorbing moisture, then they dry out, chances are they’ll no longer be viable.
3. The coffee filter method.
Pros: It’s easy if you already have coffee filters. It takes up less space than the paper towel method.
Cons: You still need to remember to check it every couple of days. It might be a bit hard to peek into coffee filters to check the seeds.
For this method, we’re using the same principles and steps we use for the paper towel method. Except instead of a paper towel, we use paper coffee filters.
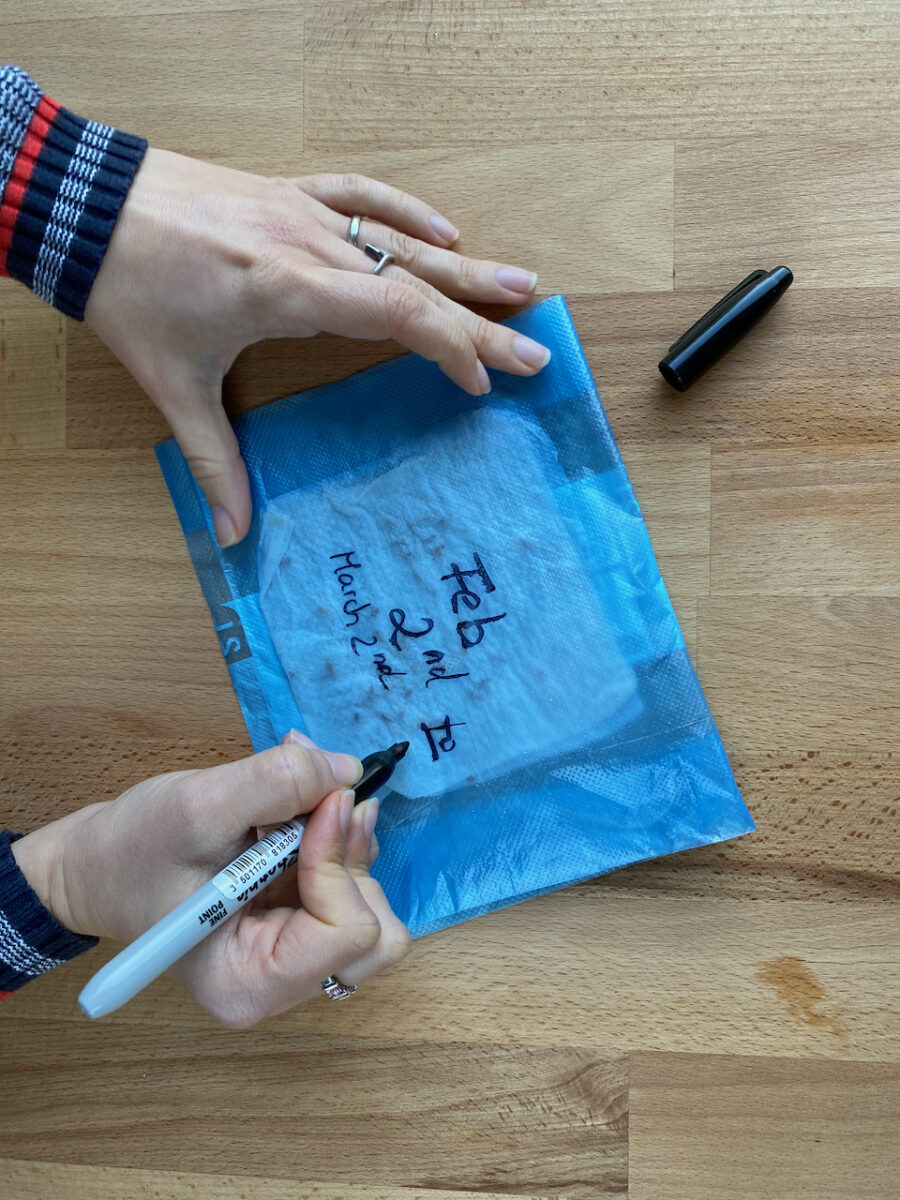
Before you start, use a pencil to label the filter with the name of the seed you’re starting and the date and the number of days it needs to stratify.
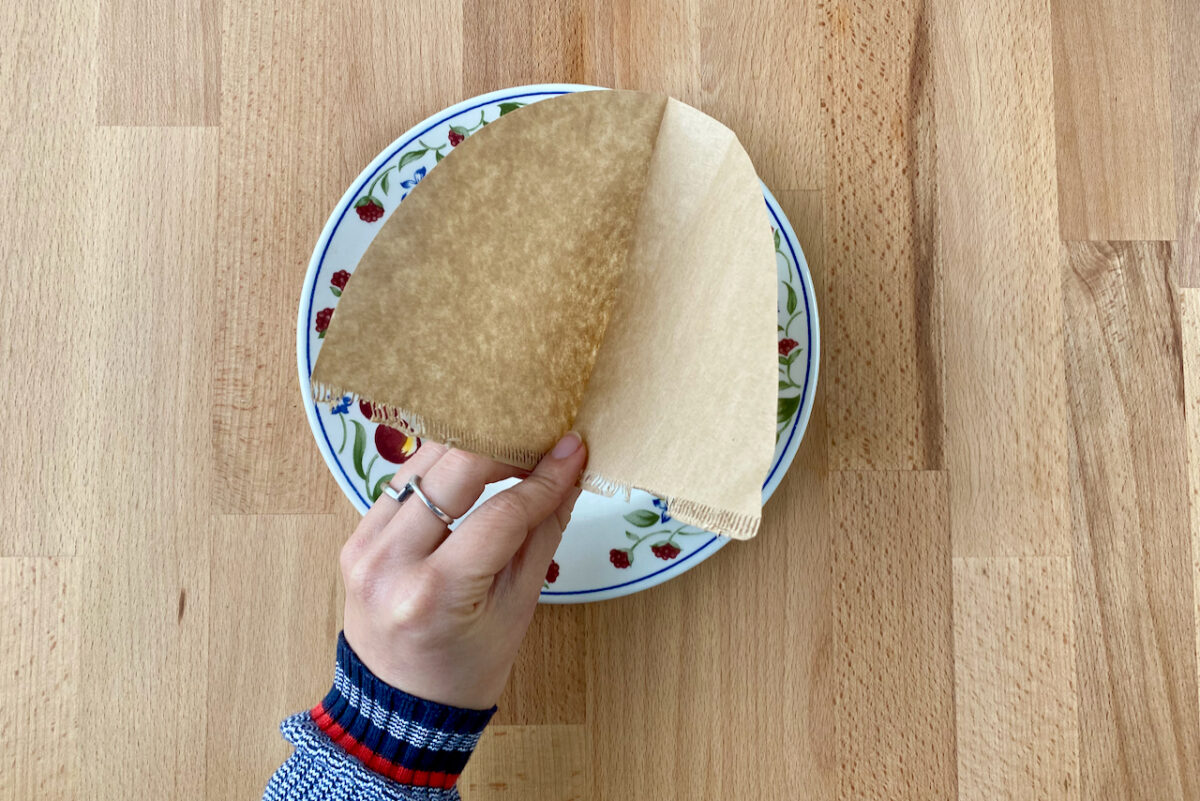
Then open up the filter pouch by ripping open one of the side seams. The best method is to moisten the filter now in order to help the seeds stick in place.
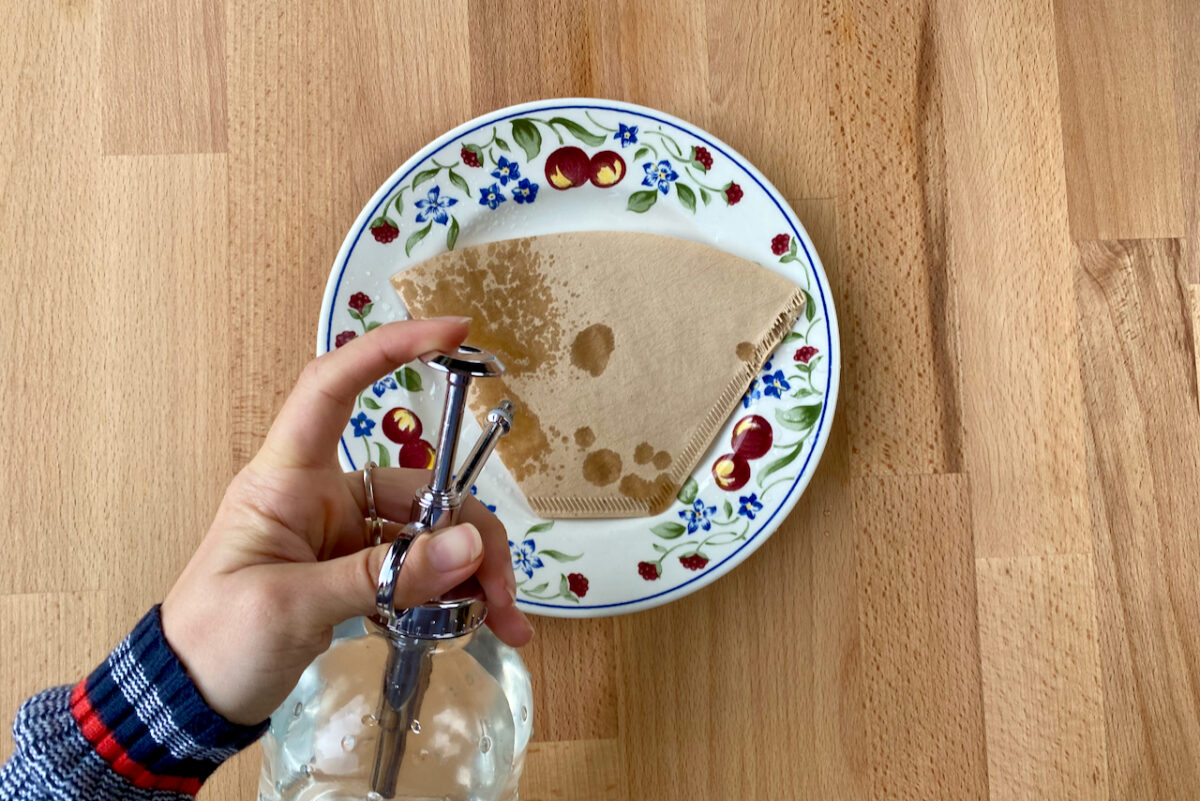
Then sprinkle the seeds inside the pocket you’ve created and close it back up.
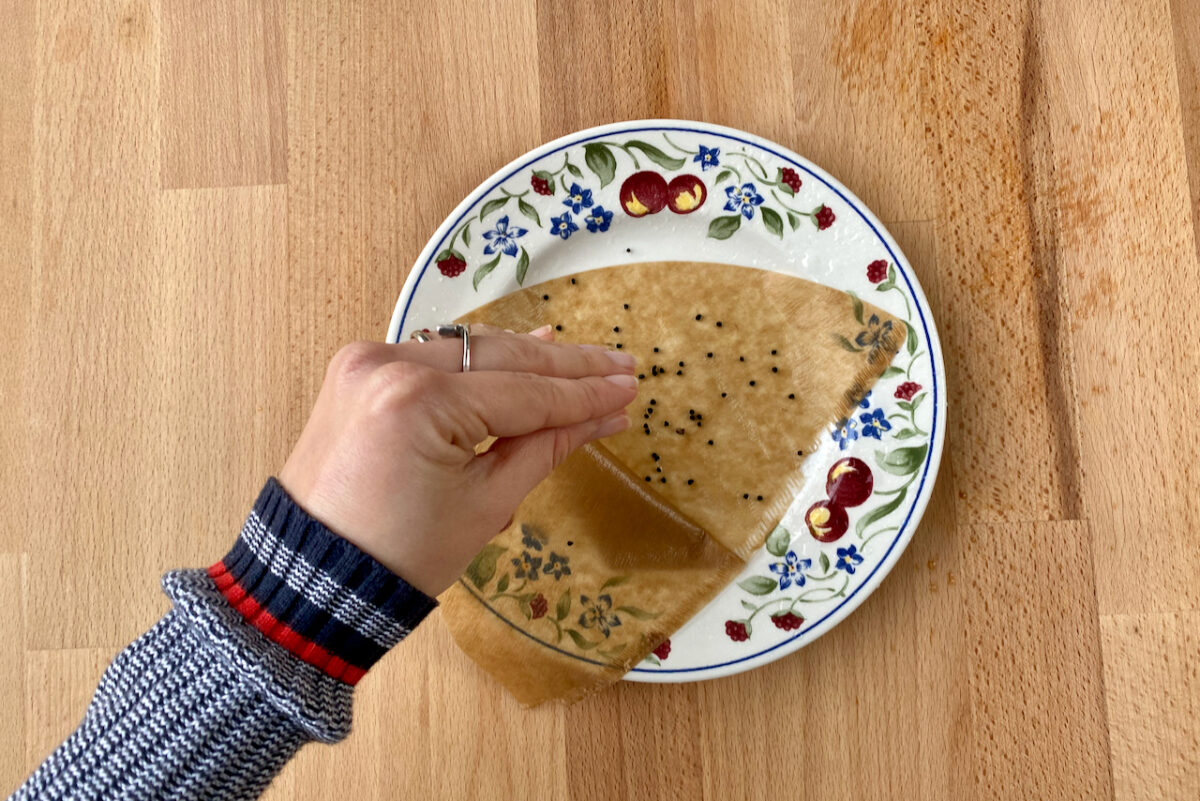
Because filters are also prone to fast drying, we still need to place them in a plastic bag or a tupperware container before we place them in the fridge.
I found this method takes up less space than bulky paper towels. The downside is that the coffee filters need to be moistened more often. But the advantage is that roots don’t stick to filters as easily as they do to paper towels.
Another bonus point for this method is that you can compost the coffee filters once you’re done. Some people compost paper towels, but I usually avoid adding bleached paper to my compost.
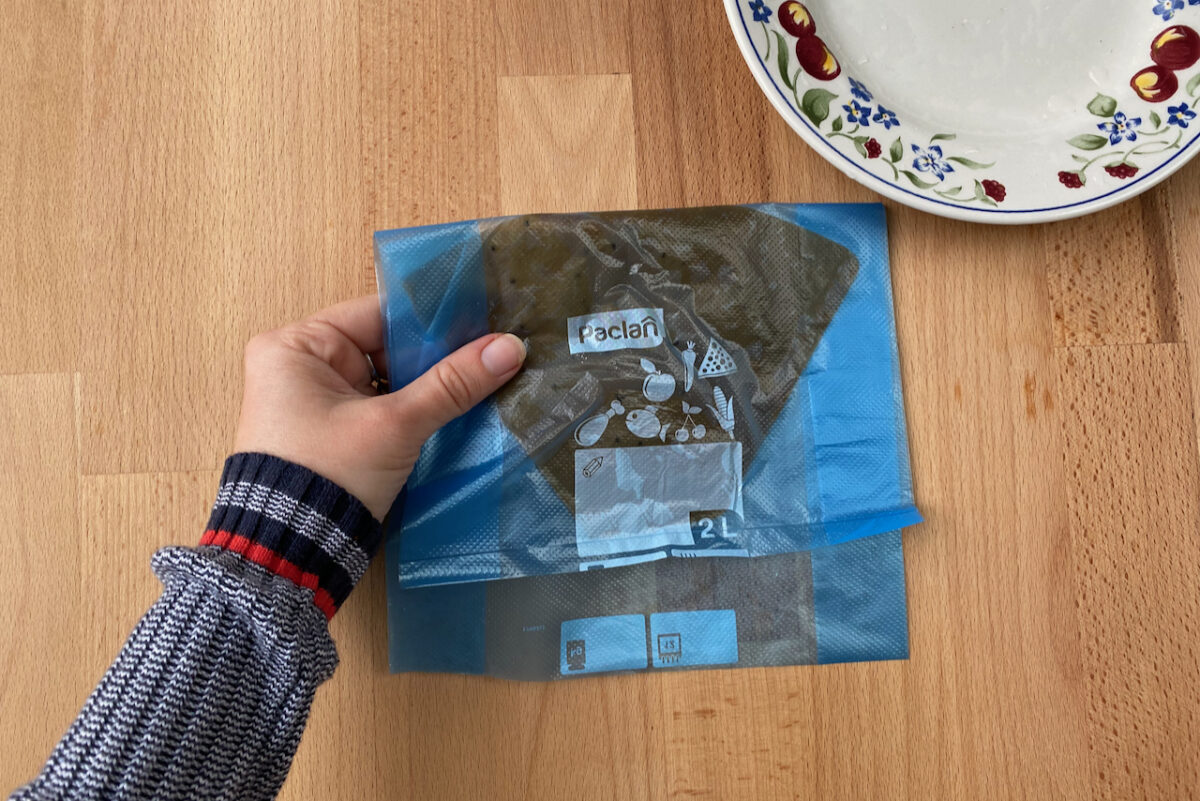
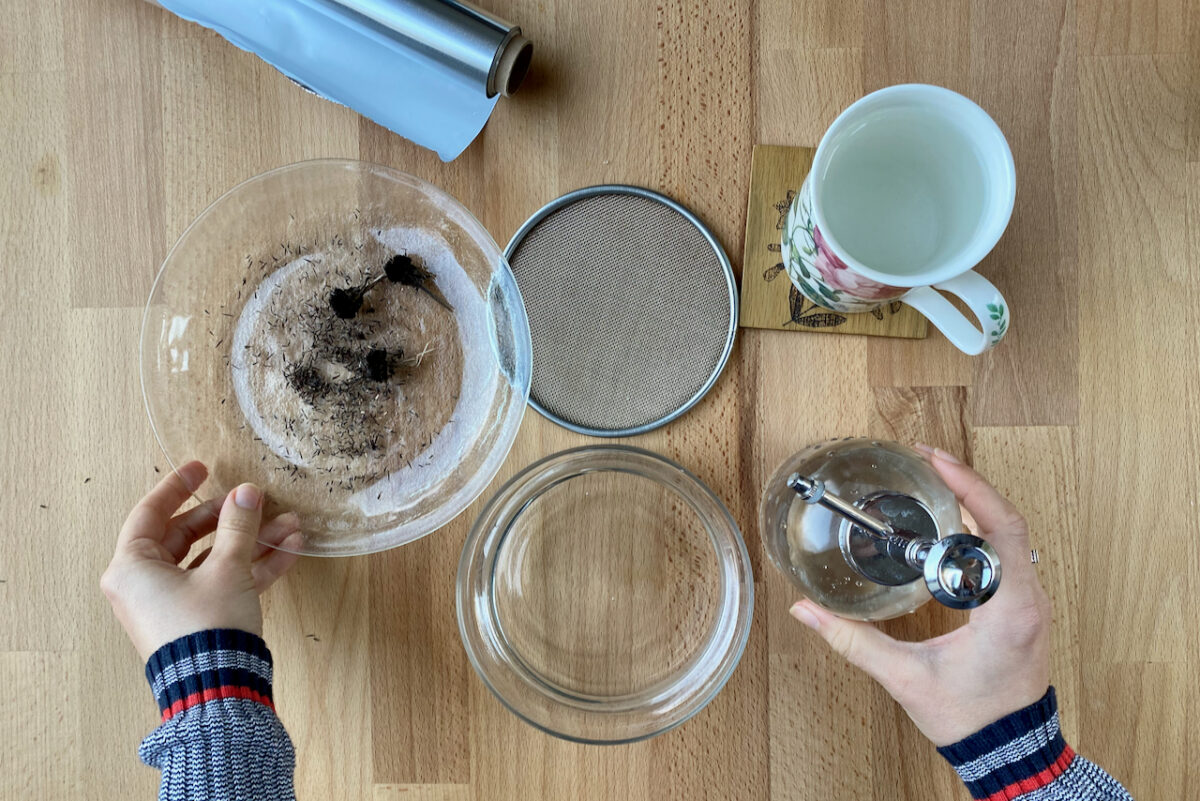
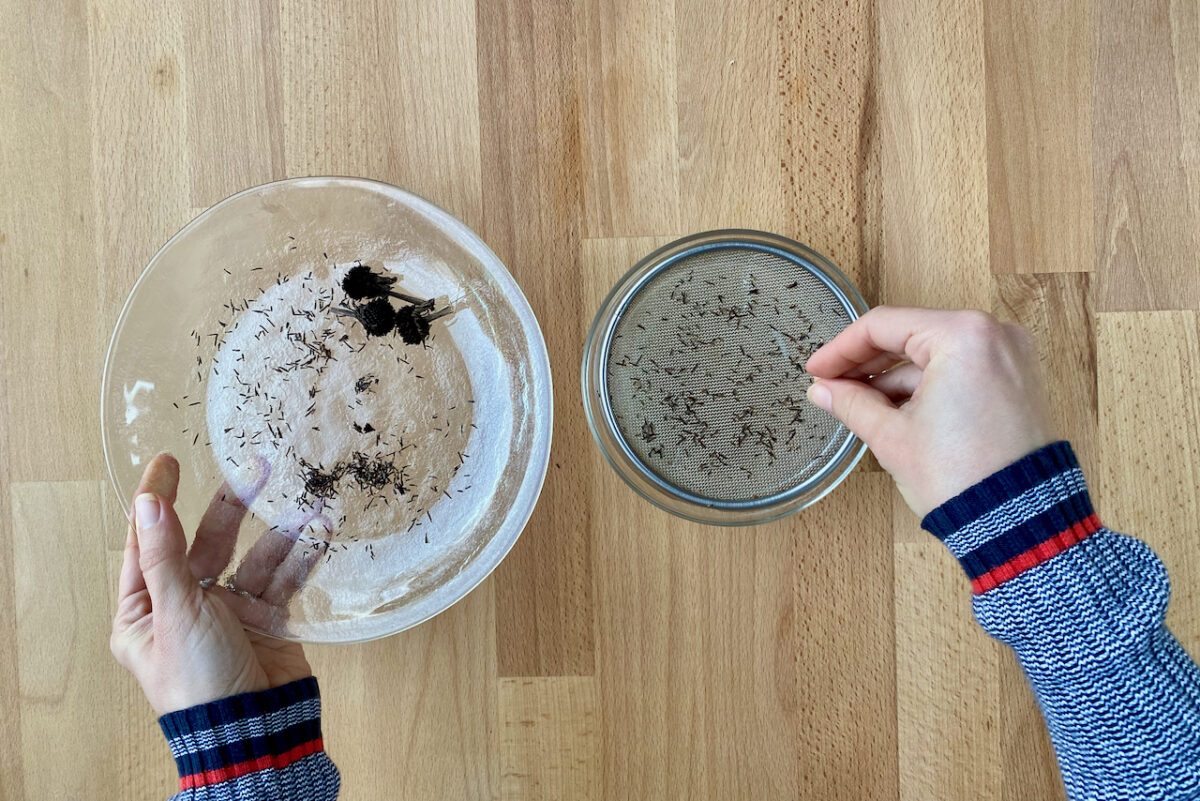
4. The sprouting dish method.
Pros: You don’t need to remoisten it often. So you don’t have to check the seeds as often.
Cons: You need a germinating dish. You can only do a few types of seeds at once. This method is not appropriate for seeds that have tangly roots.
I admit this method is not very practical, because you need a germination dish. And since the dish is already taking up more space than a paper towel, you can’t stratify too many seeds at once. I successfully started three types of seeds in the same dish, but that was about the limit before the seeds start getting mixed up.
Granted, I don’t use this method very often, but it did get me out of a pickle when I knew I would be traveling and wouldn’t get a chance to check the seeds every couple of days. As the water in the germination dish evaporates (much slower in the fridge), it keeps the seeds on the mesh moist, but not soaking.
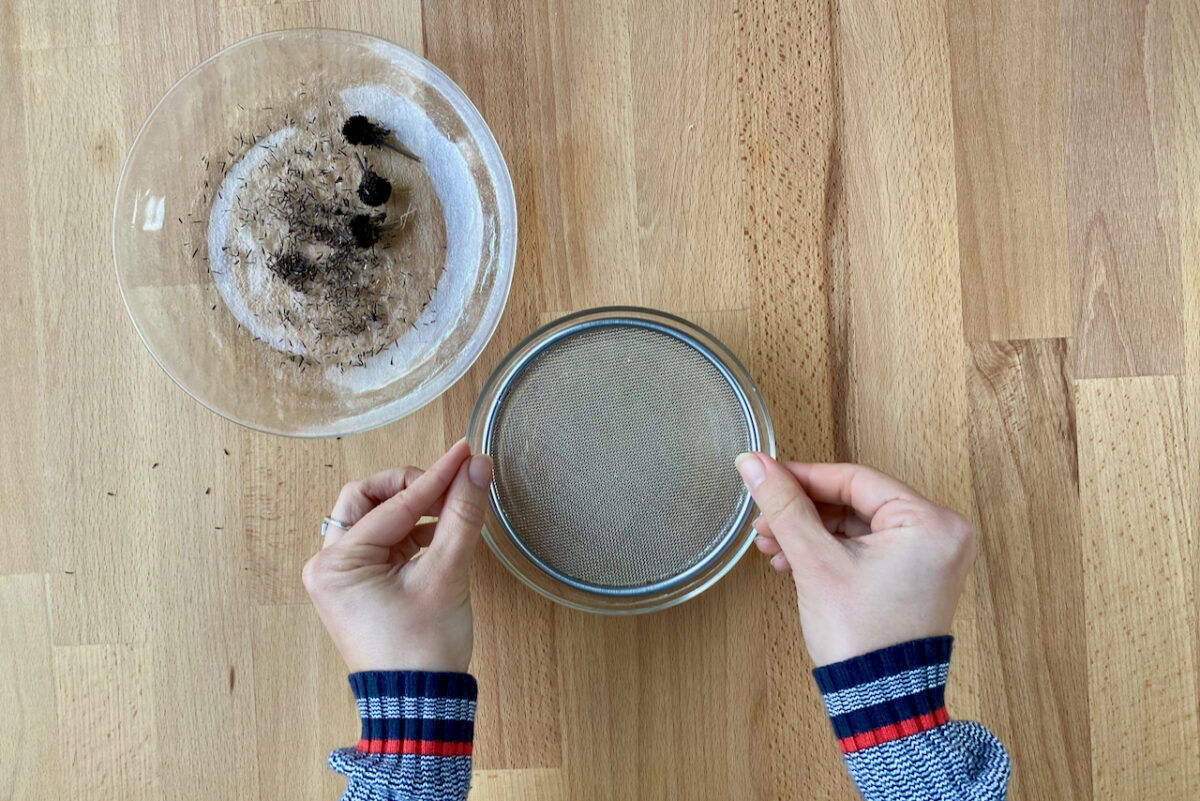
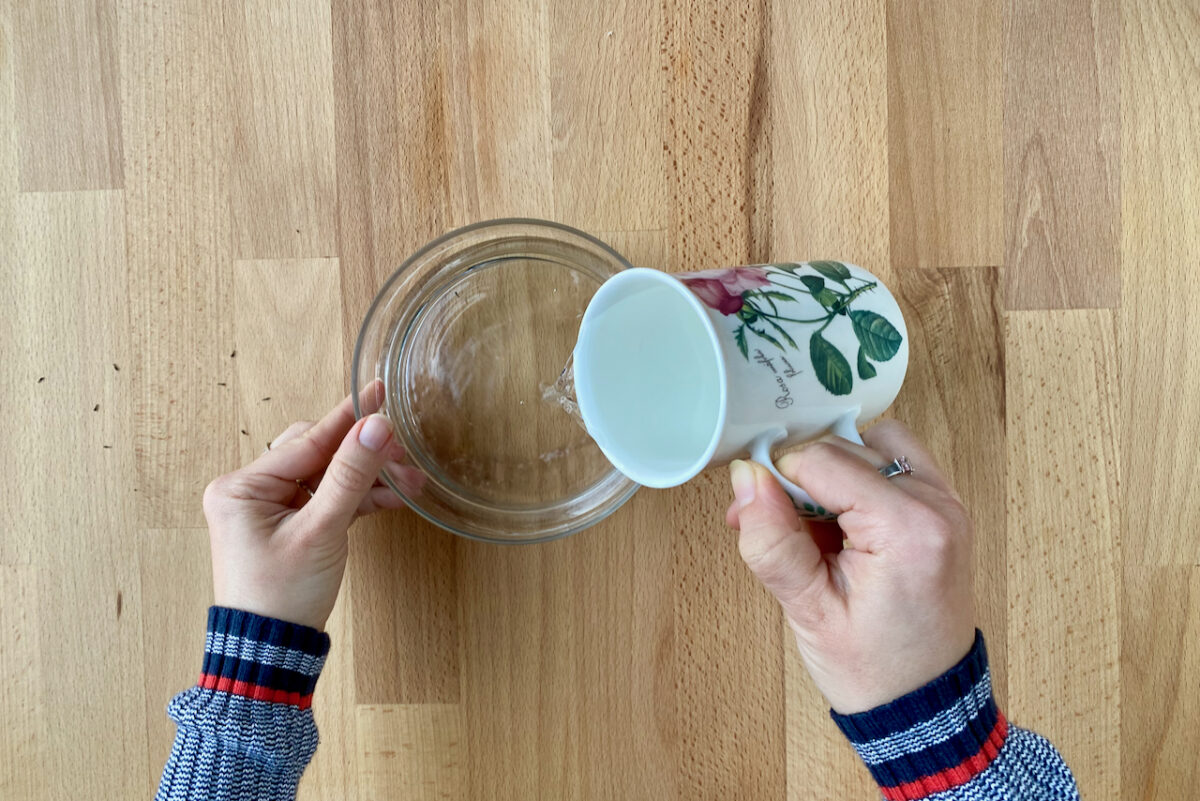
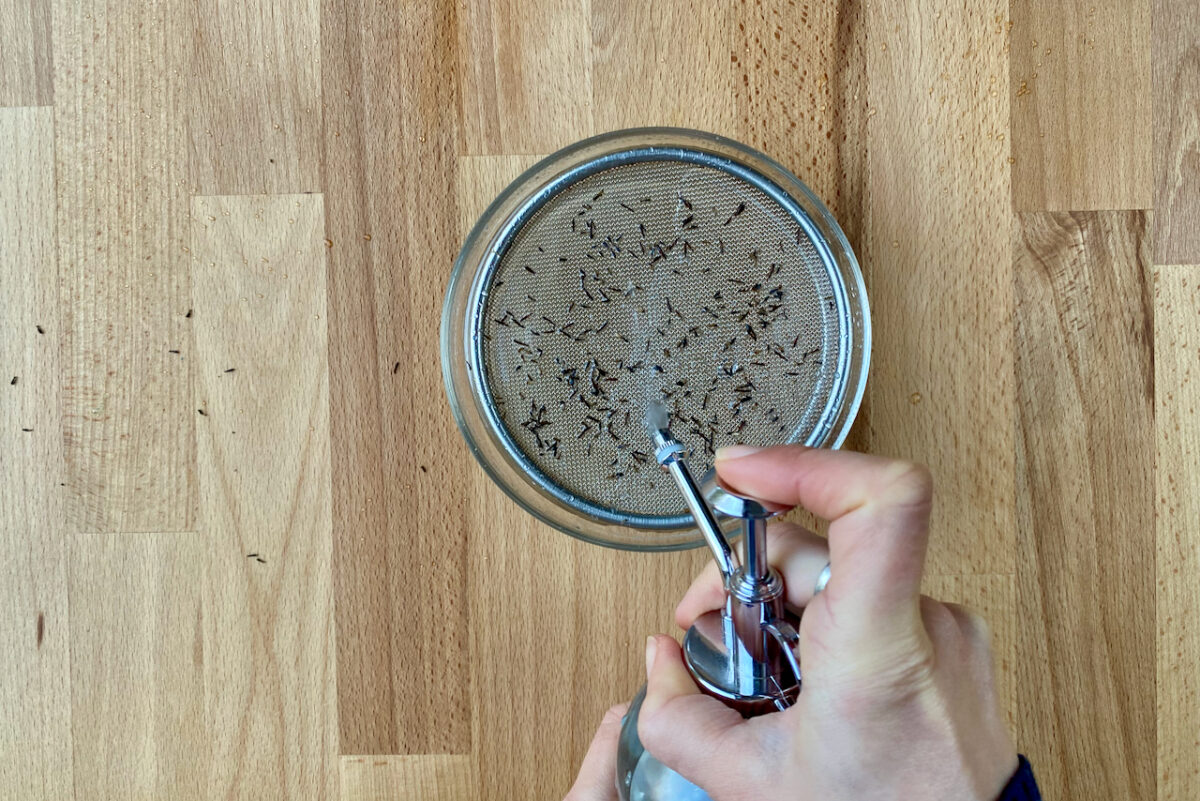
Start by filling up your sprouting dish with water. Then add the seed mesh and sprinkle your seeds on top, making sure the water can reach the seeds from below, but not enough to drown them.
Spritz the seeds with more water, if needed.
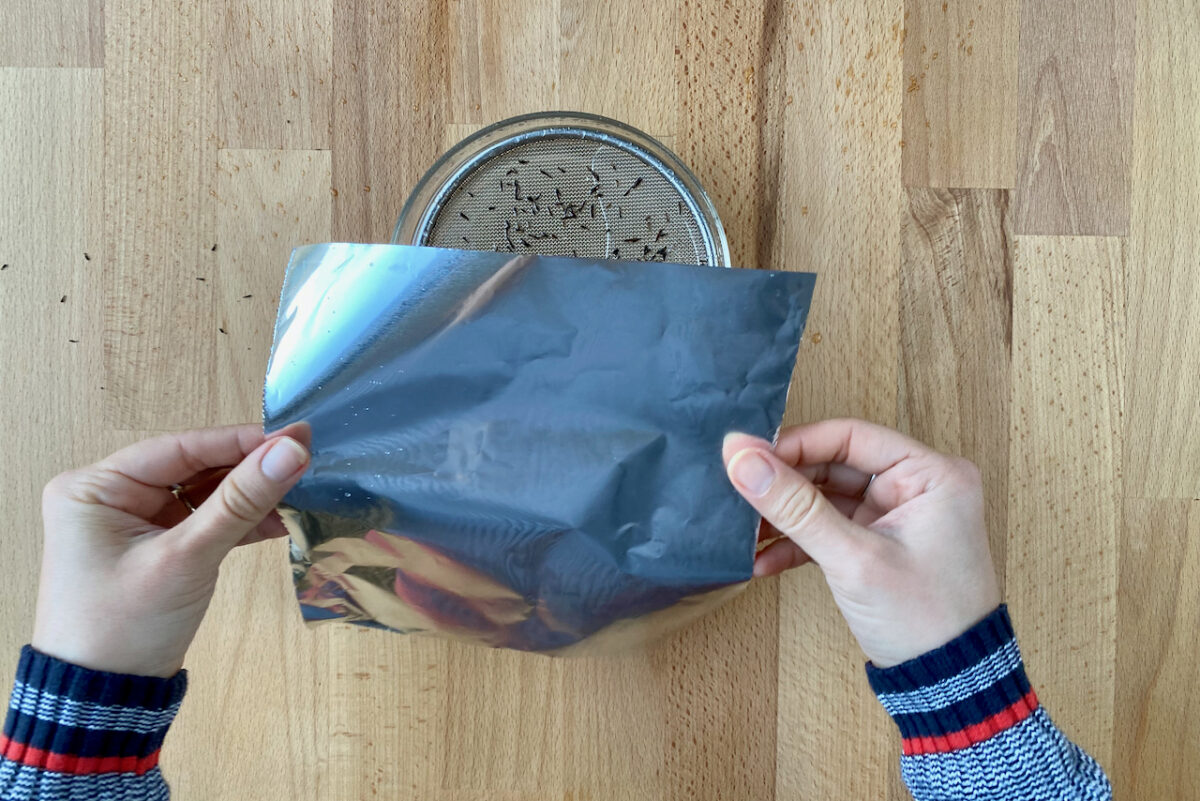
If you’re using this method, you still need to add some sort of cover to prevent it from drying out too fast. You can use tin foil or cling film, or place the entire dish in a plastic bag.
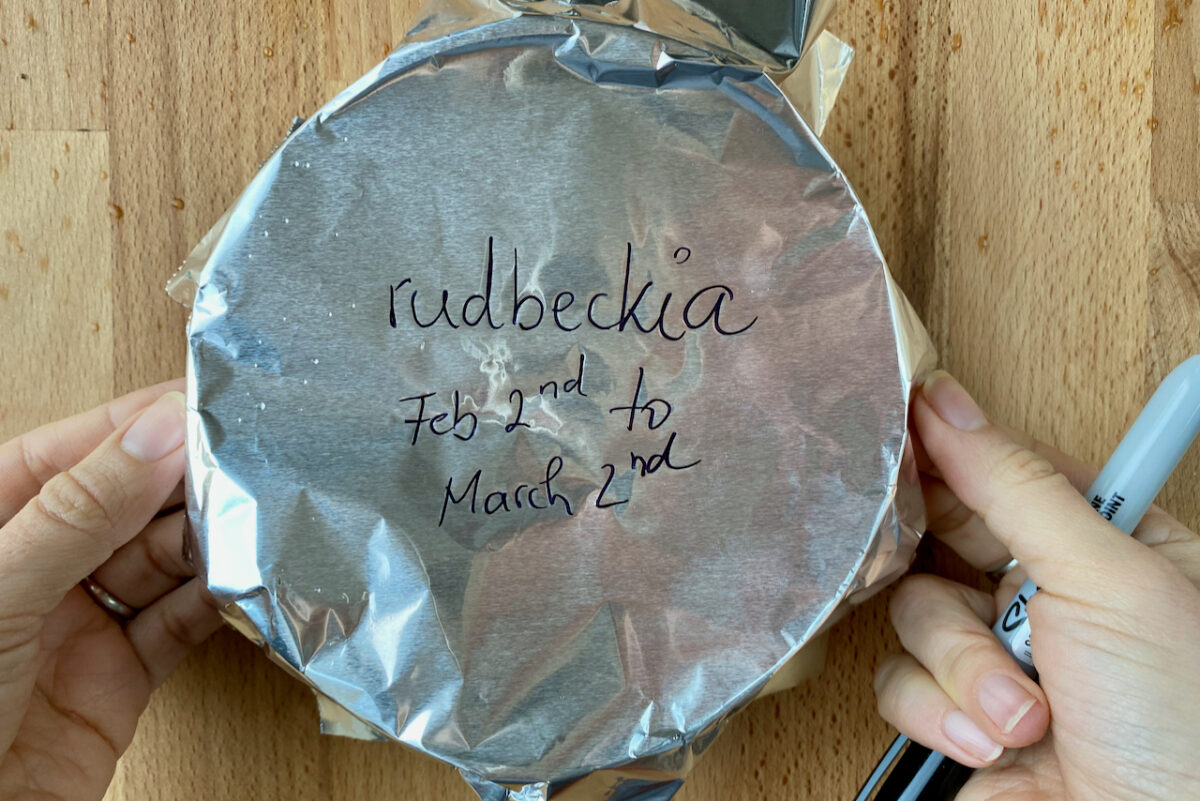
Don’t forget to label it before you place it in the fridge.
One word of warning though – it’s not a set-it-and-forget-it method. If you’re stratifying seeds that might sprout too quickly, the roots will grow through the mesh and they will be hard to disentangle. That’s why I prefer to use this method sparingly and only for seeds that are less likely to sprout in the dish.
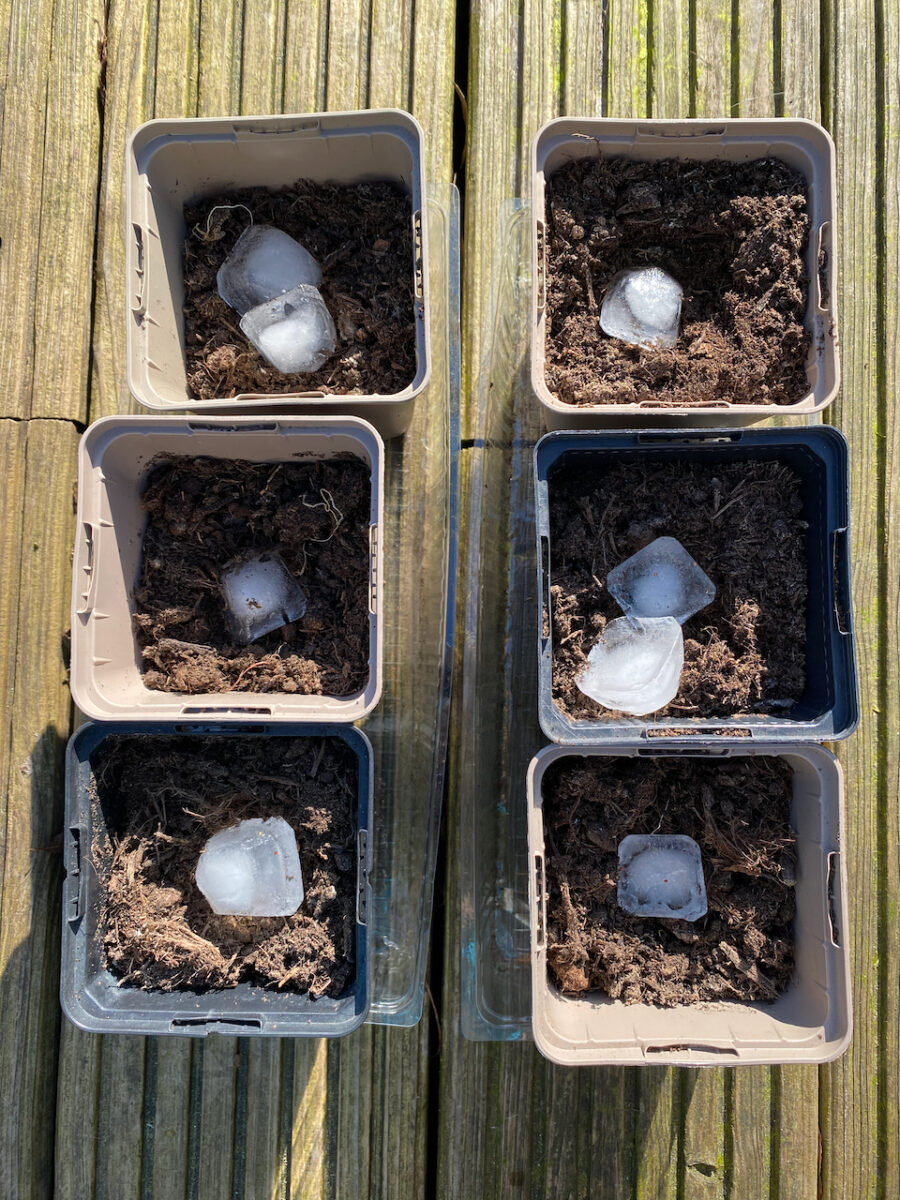
5. The ice cube method.
Pros: It’s perfect for plants that need a freeze before germinating.
Cons: It has more steps and requires more planning. You need to clear up freezer space.
I learned about the ice cube method from a YouTube video almost ten years ago, and I’ve been using this method on and off ever since. I don’t use it every year, mostly because I think it’s a bit overkill for most of the plants that I grow from seed for my small garden. In The Plant Propagator’s Bible (by Miranda Smith), I read that for most flower seeds, chilling is enough and freezing is not required.
But there are plants that need a good freeze followed by thawing in order to have a high germination rate. Delphiniums, euphorbia, hellebores, daylilies (Hemerocallis) and Bells of Ireland (Moluccella) are some of the most common examples.
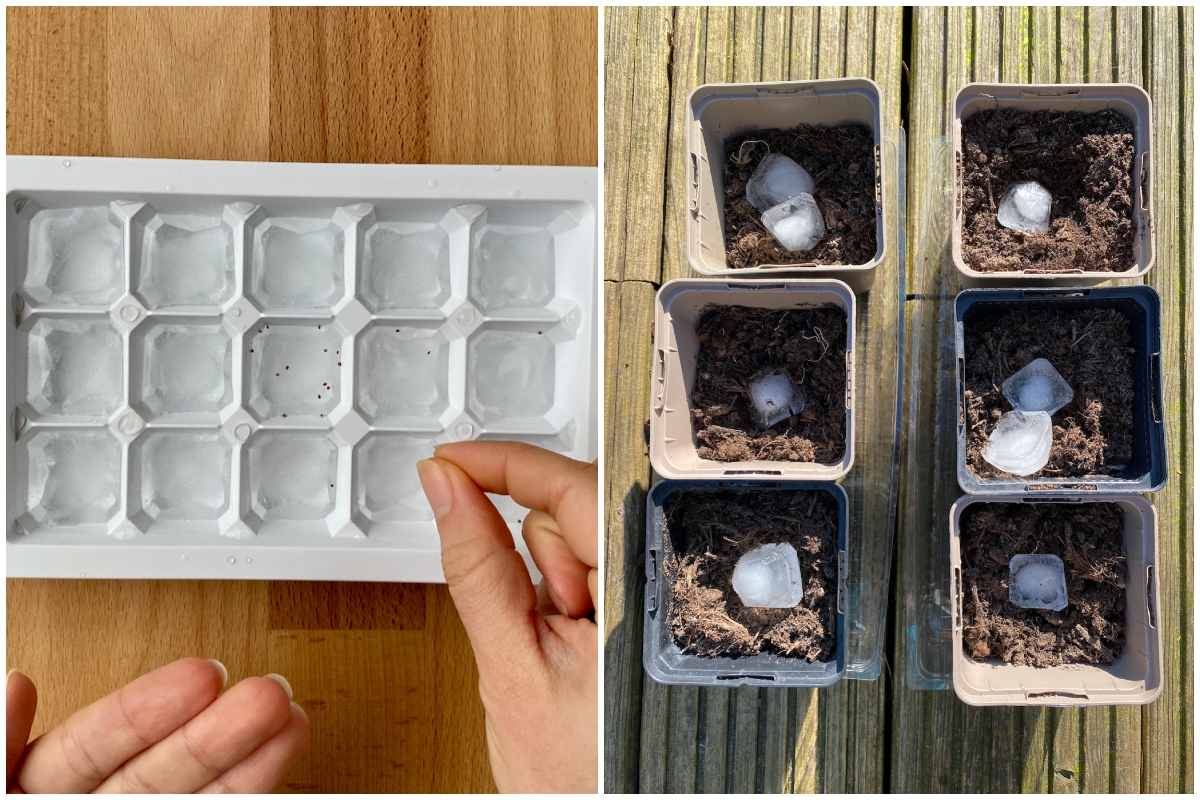
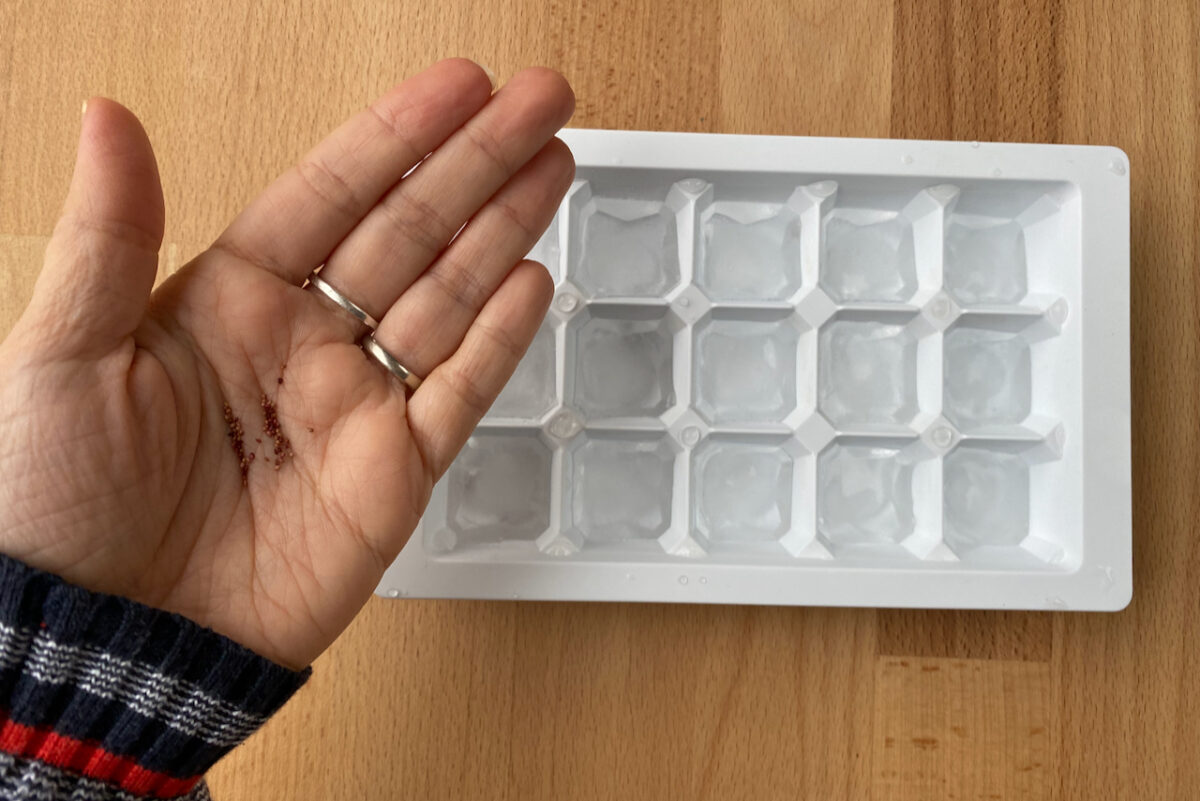
Here’s how to stratify seeds in ice cubes.
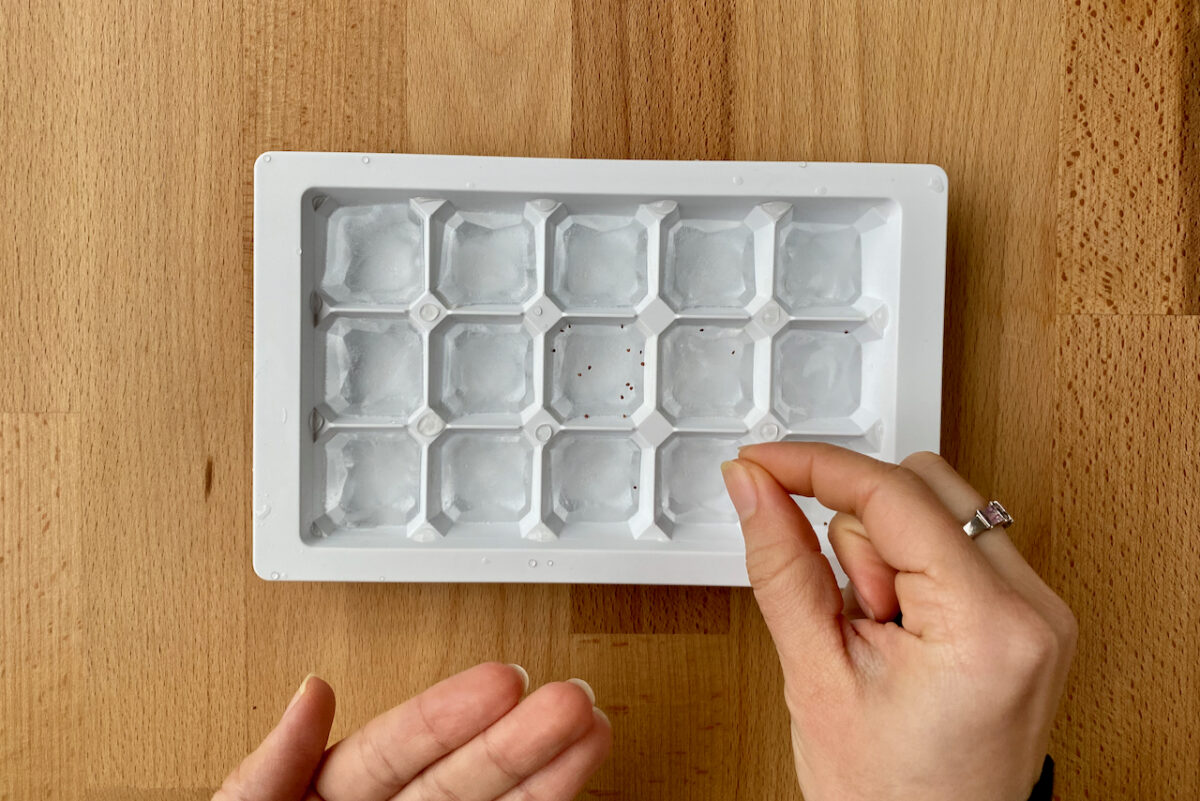
Fill an ice cube tray with water halfway, then put it in the freezer. Once the water is solid, take it out of the freezer and sprinkle the seeds on top of the ice.
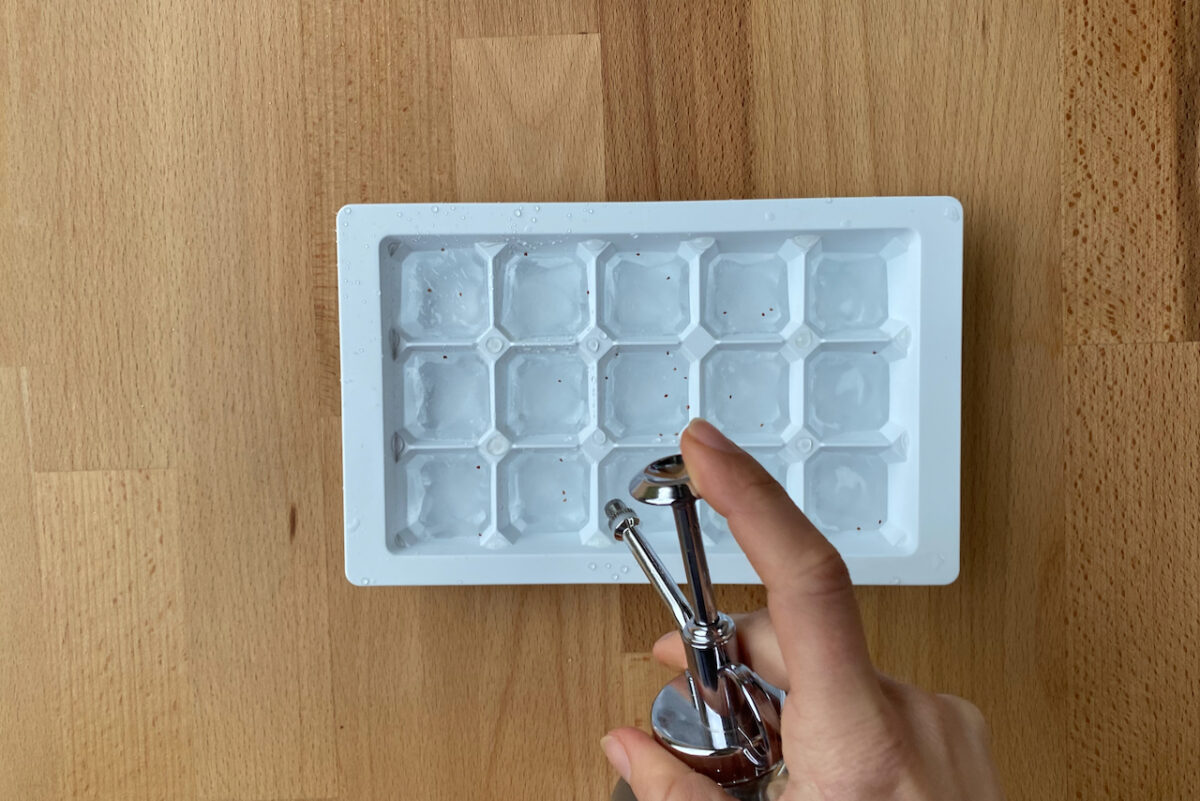
Then carefully spritz more water to make the seeds stick to the ice.
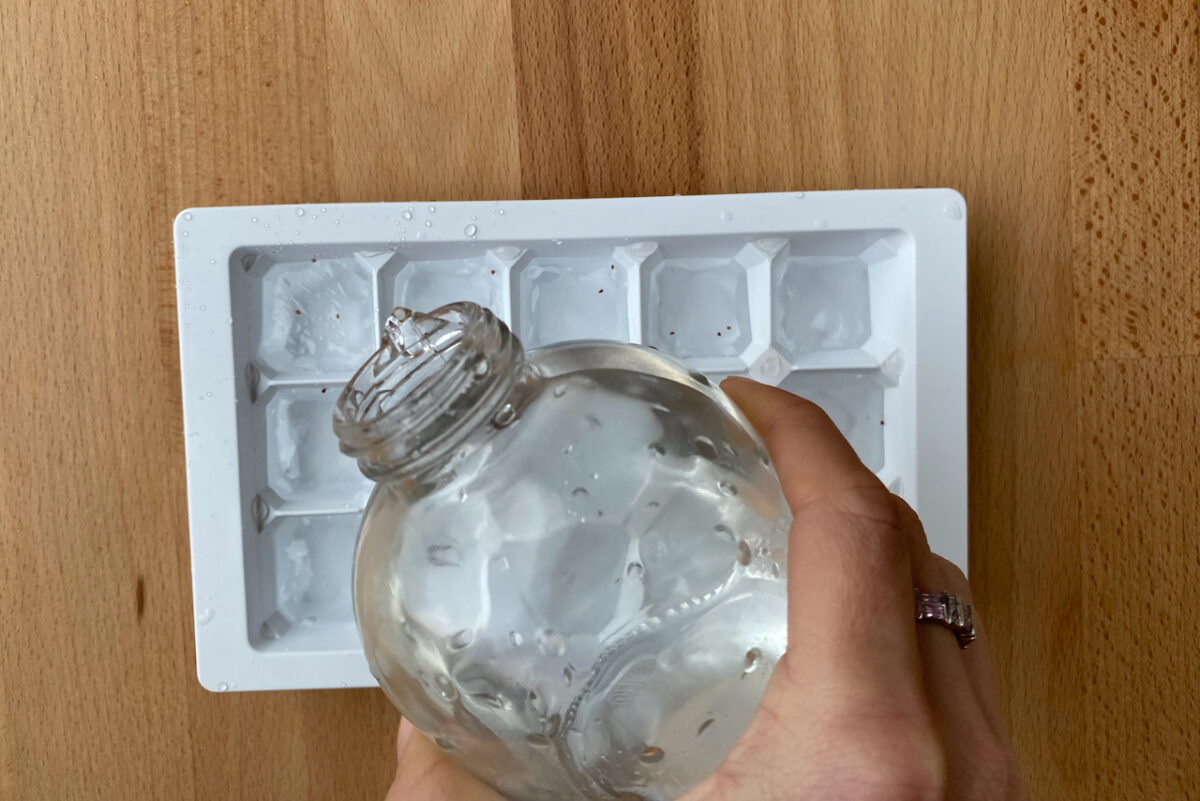
After that, pour more water to top up the tray and place it back in the freezer.
After the required stratification period (generally a week to a month), you just need to pop out the ice cubes with the seeds still frozen solid inside. Then place them on top of the soil in your germination pots. As the ice cube melts, the seed will be released into the soil.
Keep in mind that if you’re starting a seed that needs to be in the dark in order to germinate, you should sprinkle a bit of potting soil on top of the ice cube to lightly cover the seed.
These days, I use this method for starting alpine strawberries (Fragaria vesca ‘Regina’) from seed. Berries, especially the cultivars that are closer to their wilder ancestors, are notoriously hard to start from seed. And most of the time, the only troubleshooting you’ll need to do is to freeze the seeds for a couple of weeks to a month in order to trick germination.
6. Outdoor stratification.
Pros: You don’t need fridge or freezer space to make it work.
Cons: You have to remember to water the seeds. You have to time it just right so the seeds don’t sprout before a freeze. It’s not as easy to control environmental factors.
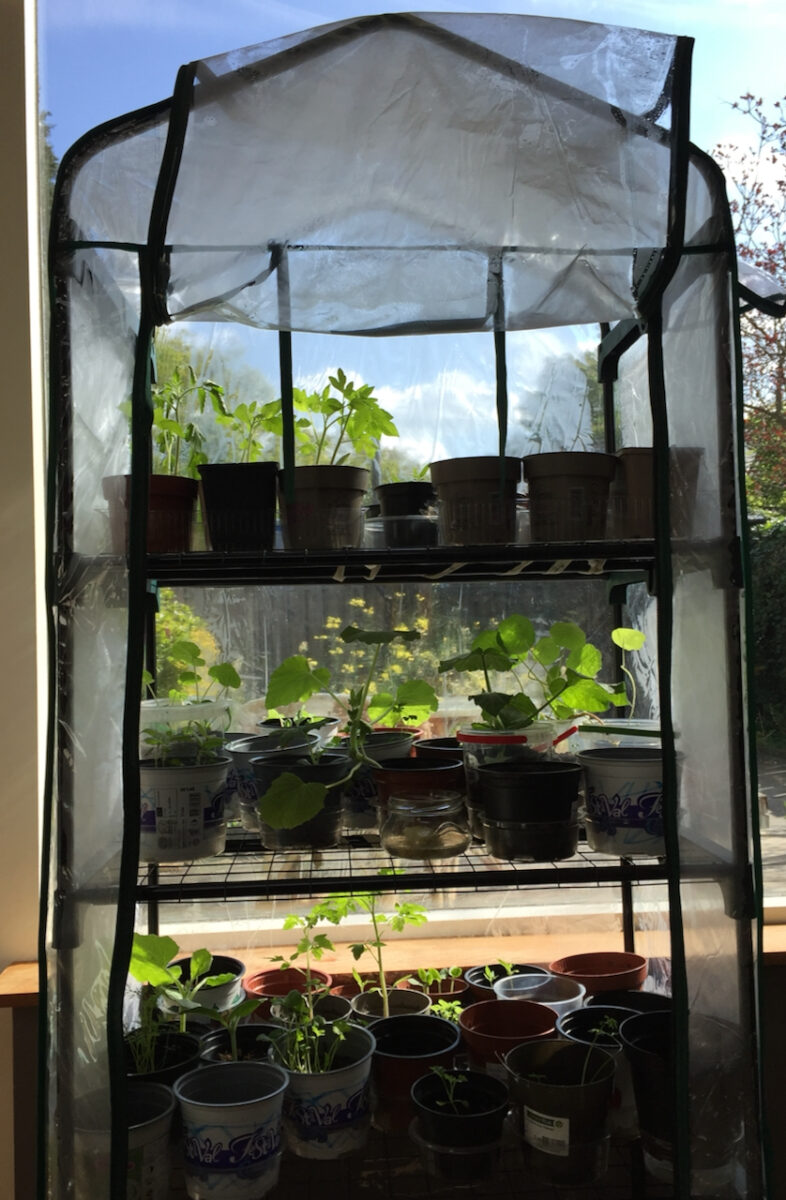
I think of outdoor stratification as being one step removed from planting the seeds straight into the ground. But since the ground may still be frozen, stratifying your seeds in containers outdoors is still a better option in late winter.
You simply plant your seeds in pots and let mother nature do the “chilling” part. The trick with this method is that you need to watch your seeds carefully so they don’t sprout too early if you have a warm spell in February, say. If they do start sprouting, you need to bring them indoors.
It’s a good idea to keep the pots in a place that doesn’t get direct sun at all in order to prevent the seeds from sprouting. And you still need to check every few days to make sure the soil in the pots is still moist.
Another consideration is keeping the seeds away from hungry birds or other critters. If you have an outbuilding or cold frame that you can keep critter-free, then this might be the best method for you.
Two seed stratification methods that I don’t use.
I’ve successfully used all of the methods I described so far; and over time I learned which ones work better for my lifestyle and for the type of plants I grow from seed.
But there are two methods that I keep reading about that simply wouldn’t work for me.
Stratifying the seeds in pots in the fridge.
According to this method, you would plant the seeds straight in seed trays, then put the trays in a plastic bag and put everything in the fridge.
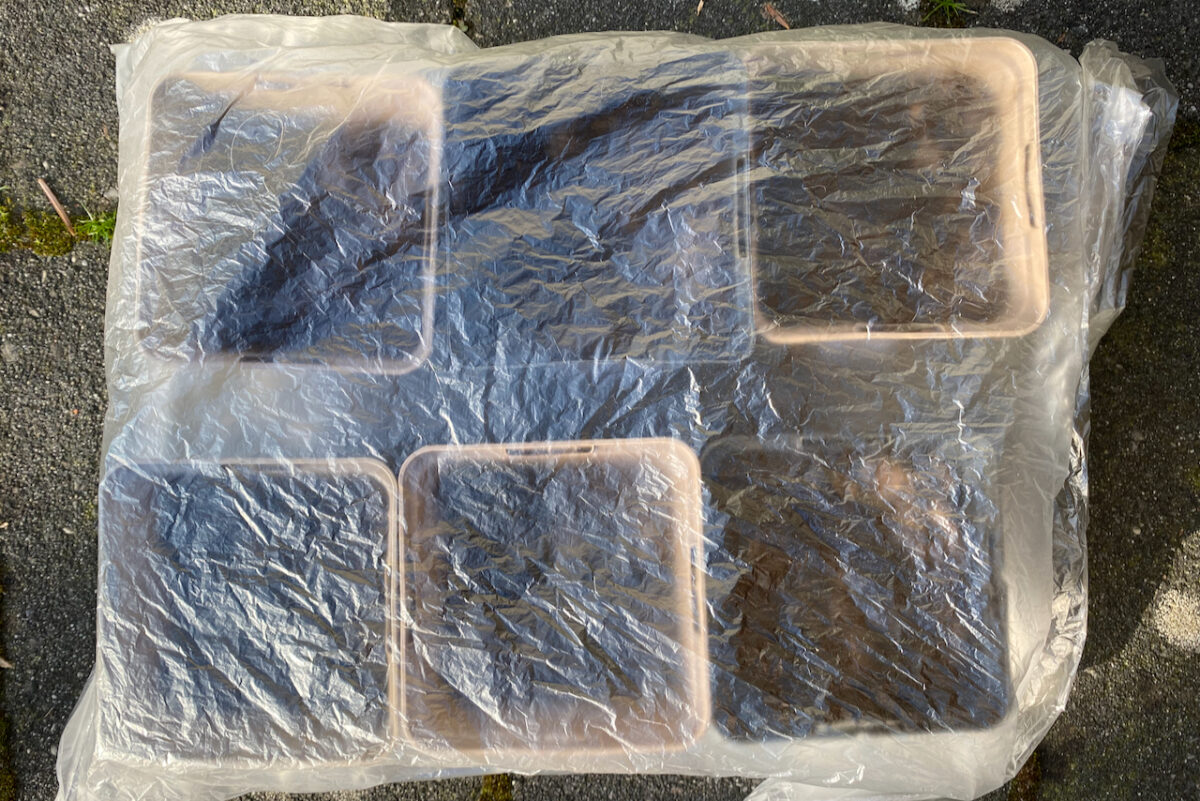
If I were running an extra fridge in my garage, that would work. But with only one fridge in this house, and at least eight types of seeds requiring stratification every year, I see no way to pull this off logistically. It simply takes up too much space.
Stratifying the seeds in bags of sand.
The sand pouch works as a substitute for the paper towel. I’ve seen this method recommended often in YouTube videos, but the absolute mess it creates doesn’t work for me.
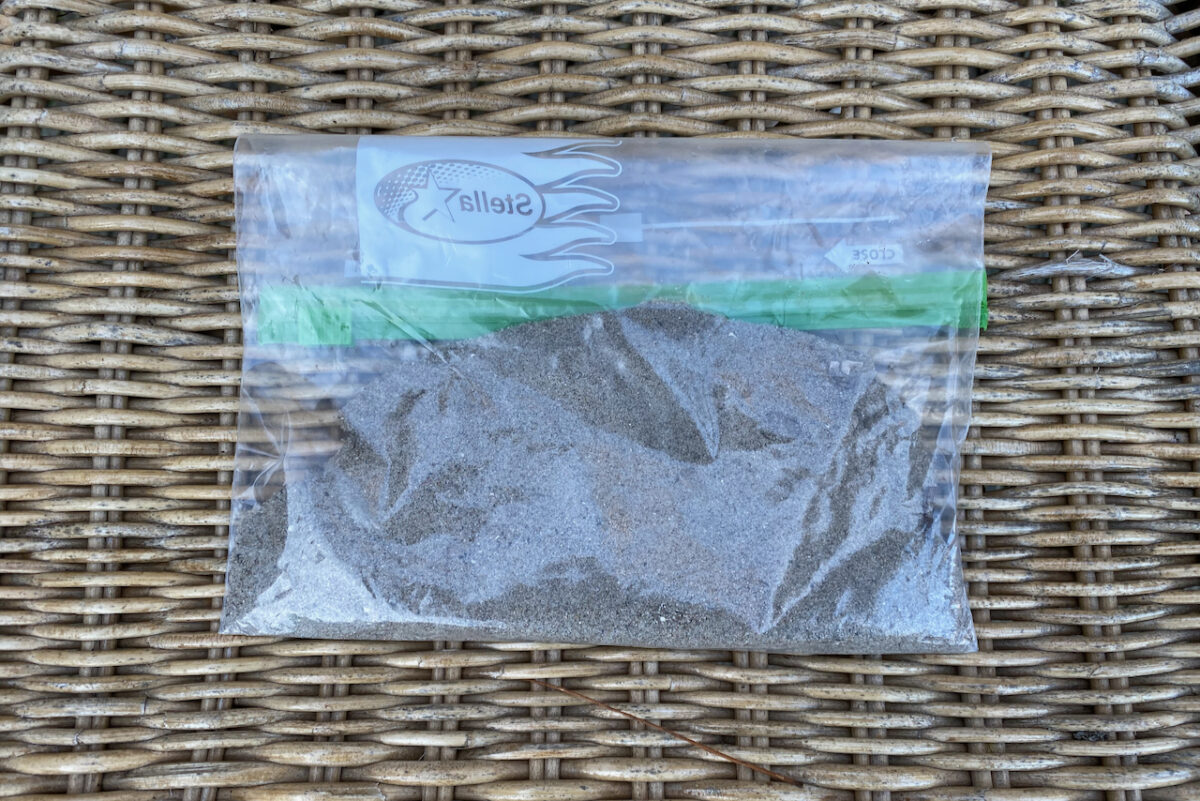
You just mix your seeds with a handful of horticultural sand, then moisten the sand and put the bag in the fridge. Well, good luck finding the seeds again, I say. Unless we’re talking about large seeds, such as lupines or delphiniums. And even then, my patience would run ragged while separating the seeds from the sand. You could plant some sand with the seeds, of course. But the mess isn’t worth it for me when I can easily use a paper towel instead.
How long do I need to stratify seeds for?
Different seeds have different requirements. Some require a couple of months of being exposed to cold temperatures (truly mimicking nature), while for others a week is enough. In general, the tougher the seed, the more time it needs to spend in the cold. But that’s not a hard-and-fast rule. Always check the seed package for more personalized information.
However, I’ve been experimenting with timing – out of an abundance of caution coupled with a lack of fridge space. And I’ve noticed that even a bit of stratification is better than none at all for the seeds that actually need it.
So if you forgot to do it way before planting season, stick your seeds in the fridge ASAP and leave them there for ten days to two weeks. You may not maximize the rate of germination, but you’ll certainly increase it.
It’s worth noting that some seeds will come pre-chilled if you order them in spring. A lot of online vendors will specify whether their seeds have been stratified already. However, the seeds will not be moist stratified, just cold stratified.
36 Popular Plants That Need Seed Stratification
I’ve put together a list of the most popular plants that need cold stratification. It’s by no means an exhaustive list, so check before you start a specific plant. I’ll link below to a few other sources for more plants that need stratification.
Sea holly (Eryngium)
Anise hyssop (Agastache)
Astilbe (Astilbe chinensis)
Beebalm (Monarda)
Bergamot (Monarda fistulosa)
Baby’s breath (Gypsophila paniculata)
Bleeding heart (Dicentra)
Coreopsis (Coreopsis lanceolata)
Columbine (Aquilegia)
Valerian (Valeriana officinalis)
Comfrey (Symphytum)
Echinacea (Echinacea purpurea and Echinacea pallida)
English daisy (Bellis perennis)
Goldenrod (Solidago)
Lemon balm (Melissa officinalis)
Larkspur (Consolida)
Delphinium
Lavender (Lavandula)
Catnip (Nepeta)
Snapdragons (Antirrhinum)
Pinks (Dianthus)
Blazing star (Liatris aspera, Liatris pycnostachya and Liatris spicata)
Lobelia (Lobelia cardinalis and Lobelia siphilitica)
Lupine (Lupinus perennis)
Milkweed (Asclepias syriaca)
Mugwort (Artemisia)
Mullein (Verbascum thapsus)
Phlox
Sage (Salvia officinalis)
Poppy (Papaver)
Black-eyed Susan (Rudbeckia fulgida, Rudbeckia subtomentosa and Rudbeckia hirta)
Penstemon (Penstemon digitalis and Penstemon grandiflorus)
Rosemary (Salvia rosmarinus)
Verbena (Verbena officinalis)
Sweet pea (Lathyrus odoratus)
Alpine strawberry (Fragaria vesca)
For more plants that need stratification, including ornamental grasses and trees, I’ve found the following sources to be very useful:
The Plant Propagator’s Bible by Miranda Smith is a book I highly recommend for anyone new to plant propagation.
A seed guide published by the Missouri Botanical Garden on native plants and cold stratification.
A seed dormancy guide from North Carolina State University if you’re interested in stratification for trees and shrubs.