A crowded patch of irises is the most common reason for a disappointing show of flowers. If you’ve experienced a disappointing flush of iris blooms this spring, then it’s probably time you divided your iris rhizomes.
While most gardeners have done root divisions before, in the case of bearded and Siberian irises, we’ll have to do a rhizome division. It may sound a little bit intimidating at first, but it’s really not hard to do (and a very useful gardening skill to have).
When should you divide your irises?
Irises should be divided every 3-4 years.
The best time is about six to eight weeks after their expected bloom time. You should use this timeline even if your irises have skipped their blooming period this year. So for irises that would have bloomed in May, you can start thinking about dividing them in early August.
One word of advice though: avoid dividing your irises too late in the growing season.
This is because you want them to have enough time to get established in their new space well before the arrival of cold weather.
Depending on how early your winters set in, you might be able to wait until mid-September to divide your irises.
Here are the steps to take for proper iris rhizome division.
Step 1: Collect your tools.
You’ll need a well-sharpened gardening knife, a garden fork or a hand spade and a rag imbibed with rubbing alcohol to disinfect your blade when you move from one rhizome to the next. The disinfecting wipe is not mandatory, but it’s a good idea to have it handy if you suspect that your iris rhizomes may be suffering from bacterial soft rot.
One word of advice: I mentioned that your shears or knife should be sharp enough to cut right through the rhizomes without tearing them. This is really important because clean cuts are less likely to cause rhizome tear that will make your plant susceptible to a bacterial attack.
Step 2: Trim back the foliage of your irises.
Start by trimming back the foliage to about six to eight inches in height above the crown. If you’re not comfortable with cutting back so much, then you can stick to cutting off about a third of the top. If there are any dead or damaged leaves, you can cut them even shorter.
This step is optional, but it’s very useful for a few reasons:
- short foliage is easier to maneuver than tall leaf spades;
- short foliage means there is less moisture loss through evaporation while you’re disturbing the roots of the plant;
- having the foliage trimmed back makes it easier to inspect for pests and diseases while you’re dividing your irises;
- and finally, once you’ve disturbed the rhizomes, the tall foliage will likely look limp and unsightly (due to loss of water in the leaves), so shorter foliage works around that problem.
Some gardeners prefer to cut the leaf blades straight across, while others prefer to shape the iris leaves into a fan-like structure, following the natural growth pattern of the leaves. It’s up to you to choose how to trim the foliage, if you want to trim it at all.
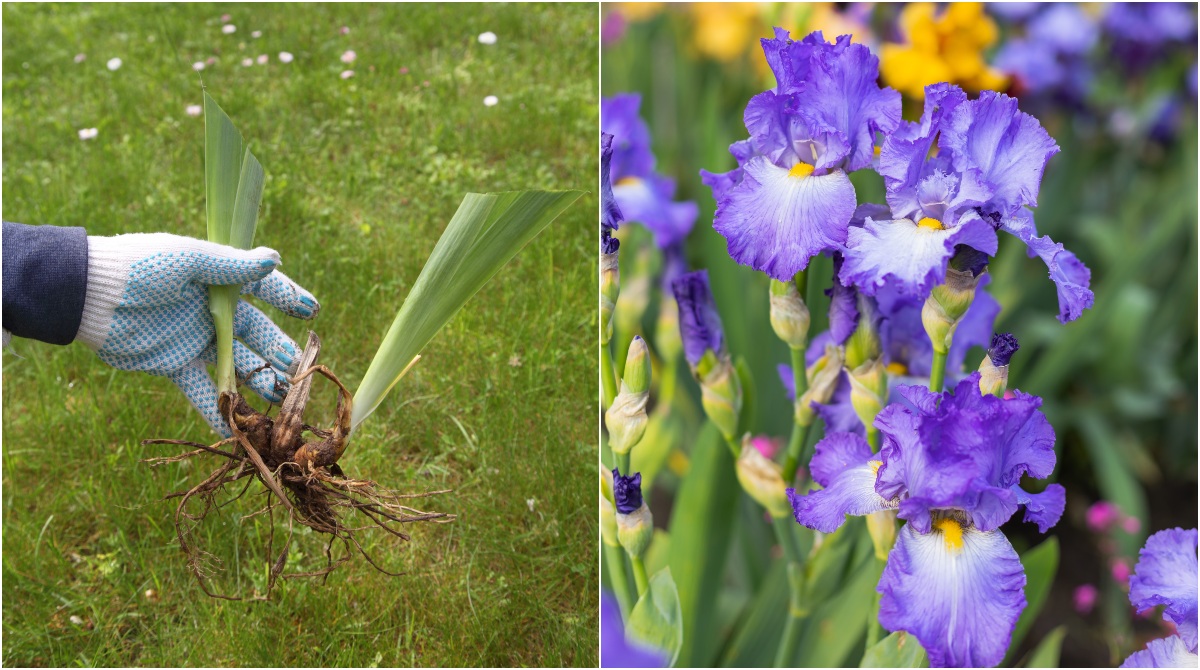
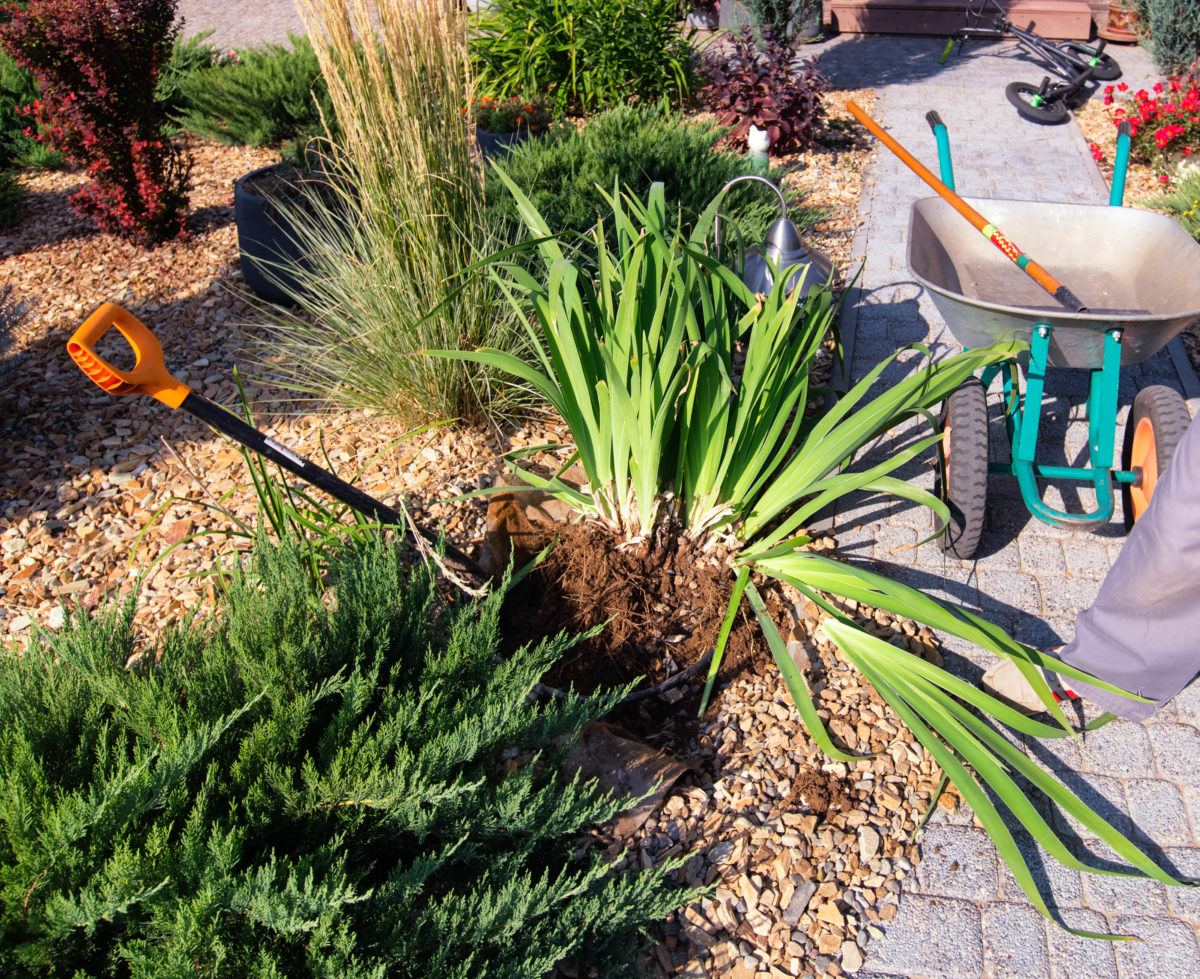
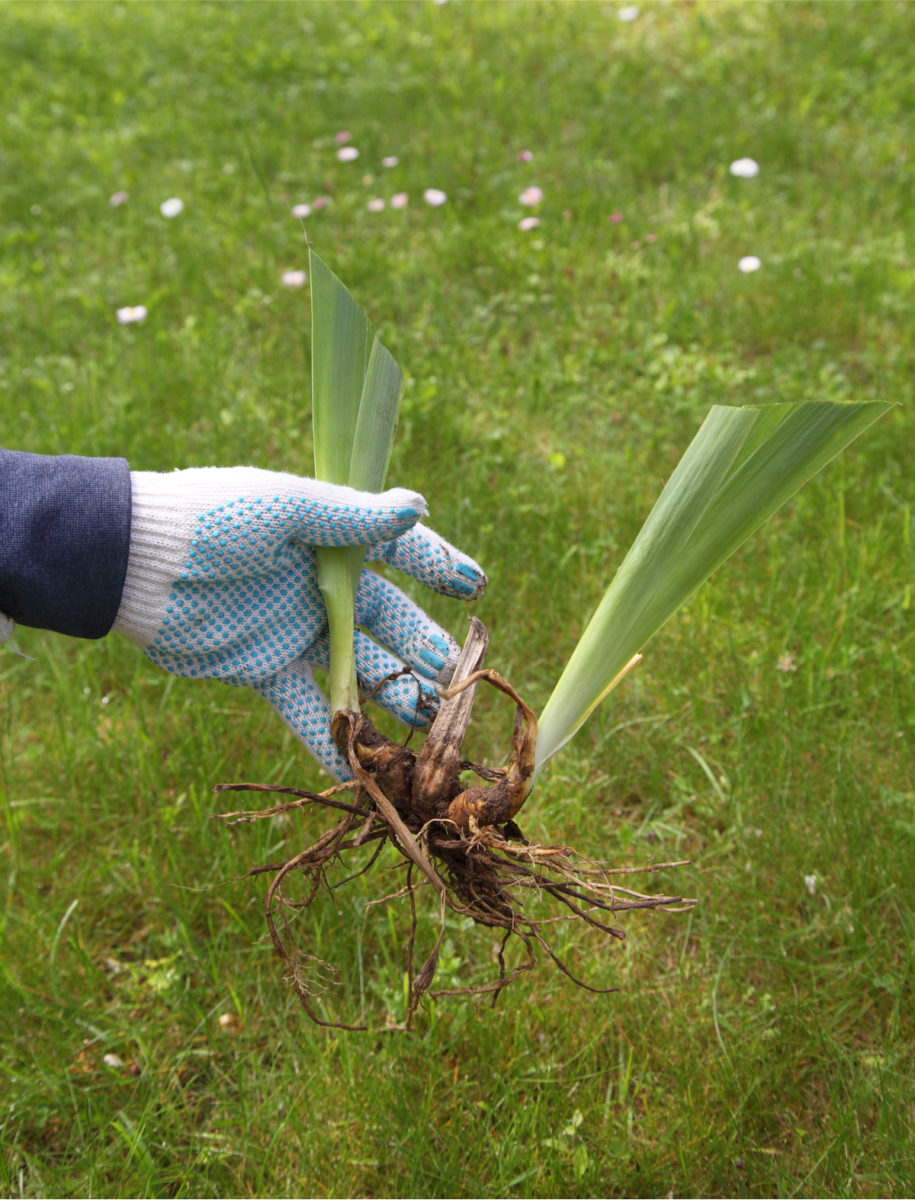
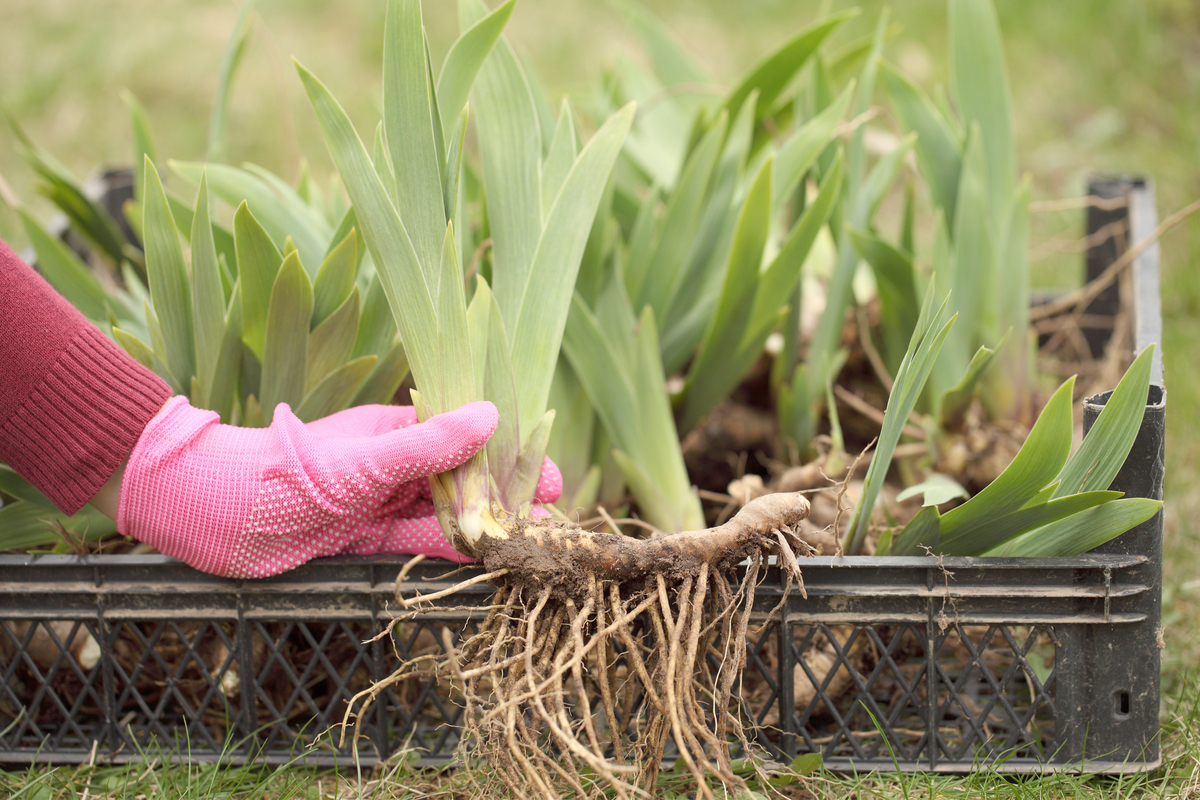
Step 3: Dig out the iris rhizomes and inspect them.
If the iris root clump has already solidified into a compact mass (more likely to happen in depleted clay-heavy soil), you’ll need a bit of leverage to lift it out of the ground.
Gently lift the rhizomes out of the soil, but don’t tug at them. This is where a trowel or a hand spade will come in handy. Don’t use a regular spade, as this may be too large for the job and damage the rhizome when you’re digging.

Pull out the rhizome structure, then gently brush off the remaining dirt or rinse it off with a hose. This will allow you to have a good look at what you’re left with. Here’s what to get rid of to make sure you’re only keeping the healthy rhizomes:
Discard the rhizomes that feel soft and mushy.
This symptom is often accompanied by a foul smell. (Trust me, you’ll know it when you smell it!)
It is most likely an indication of bacterial soft rot and you should be extremely careful not to spread it from one rhizome to another during division. This is where the disinfecting wipe comes in handy. Wipe the blade of your knife between cuts if you notice signs of disease. There’s no need to discard the entire rhizome (especially if it’s a large one), but cut off the parts that have rotted. Throw away the rotted parts, but not in the compost.
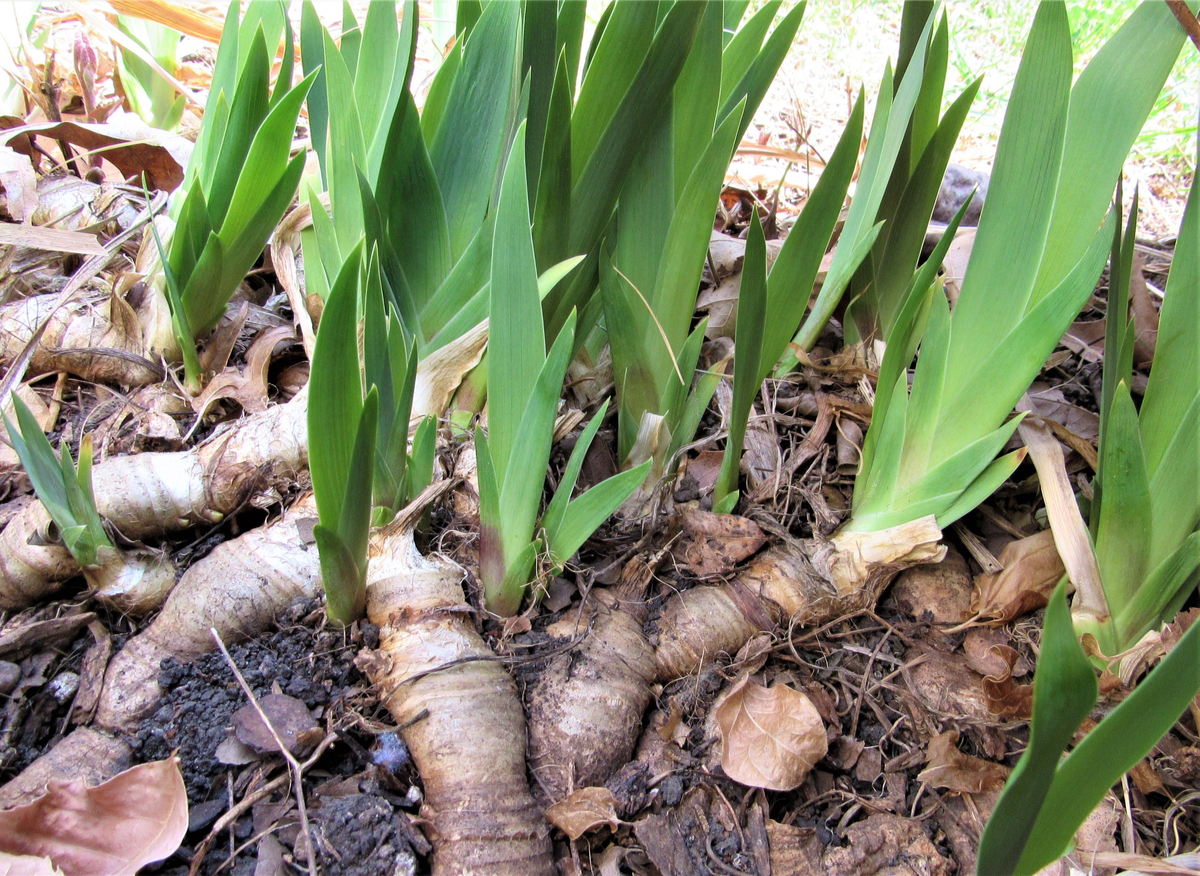
Discard rhizomes that have holes in them.
This is a sign of the iris borer at work (Macronoctua onusta), a caterpillar that chews into the leaf and digs down all the way into the rhizome. Get rid of these rhizomes and of any caterpillar larvae or eggs that you may find.
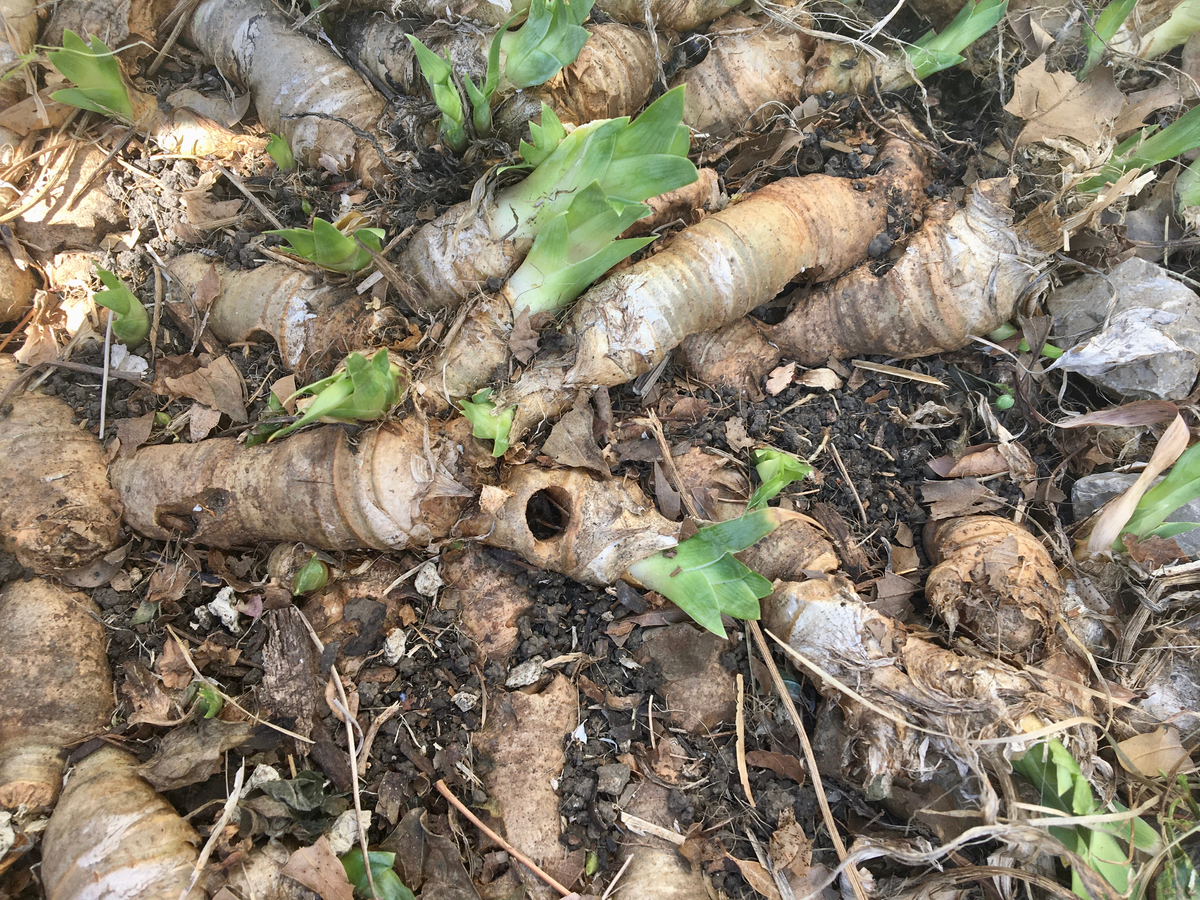
The rhizome in the middle is showing signs of iris borer damage.
Step 4: Divide your iris rhizome.
First, start by removing the rhizomes that are already growing separately. Set them aside. They’re ready to go back into the ground.
Then for the remaining large rhizome structures, identify the sections that have naturally split off or changed direction. Cut the larger chunks off into separate sections, making sure each is at least three to four inches long, has healthy roots attached and, if possible, at least a couple of leaf fans protruding out of the surface of the rhizome. Leaves are important for rhizomes because, through photosynthesis, the rhizomes get enough energy to start putting out growth again.
At this point, you can either choose to keep all rhizomes you’ve divided or you can share them with others.
If you don’t have enough room to relocate the new rhizomes, you can make another gardener very happy by sharing your iris glut. In one of the neighborhoods I used to live in, there would often be iris rhizomes for sale at back-to-school garage sales in the fall.