“I can totally start these flowers from seed,” I mumble under my breath as I weave my way around stands upon stands of starter plants at the gardening center on a chilly Saturday in February.
After the fifth disgruntled mumble, my husband kindly reminds me of all the times I made fun of him for his constant refrain of “I can build this cheaper and better.” Which, to be honest, has been every single time we meander through the maze of that Scandinavian furniture retailer.
Don’t get me wrong, I buy plenty of starter plants for my garden. Over the years, I’ve bought berries, bulbs, perennials and herbs that were grown in greenhouses, shipped all over the country and sold at a premium for the simple convenience of just sticking them in the ground.
But nothing compares to the satisfaction (dare I say, smugness) that comes with nurturing plants from seed to seed through the seasons. In addition to saving a lot of money, starting my flowers from seeds helps me avoid bringing a lot of plastic into my garden.
I also garden organically, and when I start my own plants, I know for sure they haven’t been sprayed with any pesticides I’m so desperately trying to avoid.
I will still buy starter plants, of course. But when it comes to the flowers on this list, it’s just so easy to start them from seed. I have the time, the space and the materials, so here’s how I will keep myself busy on the cold late winter and early spring evenings over the next few weeks.
1. Lupines (Lupinus)
Time to germination: 14 to 28 days.
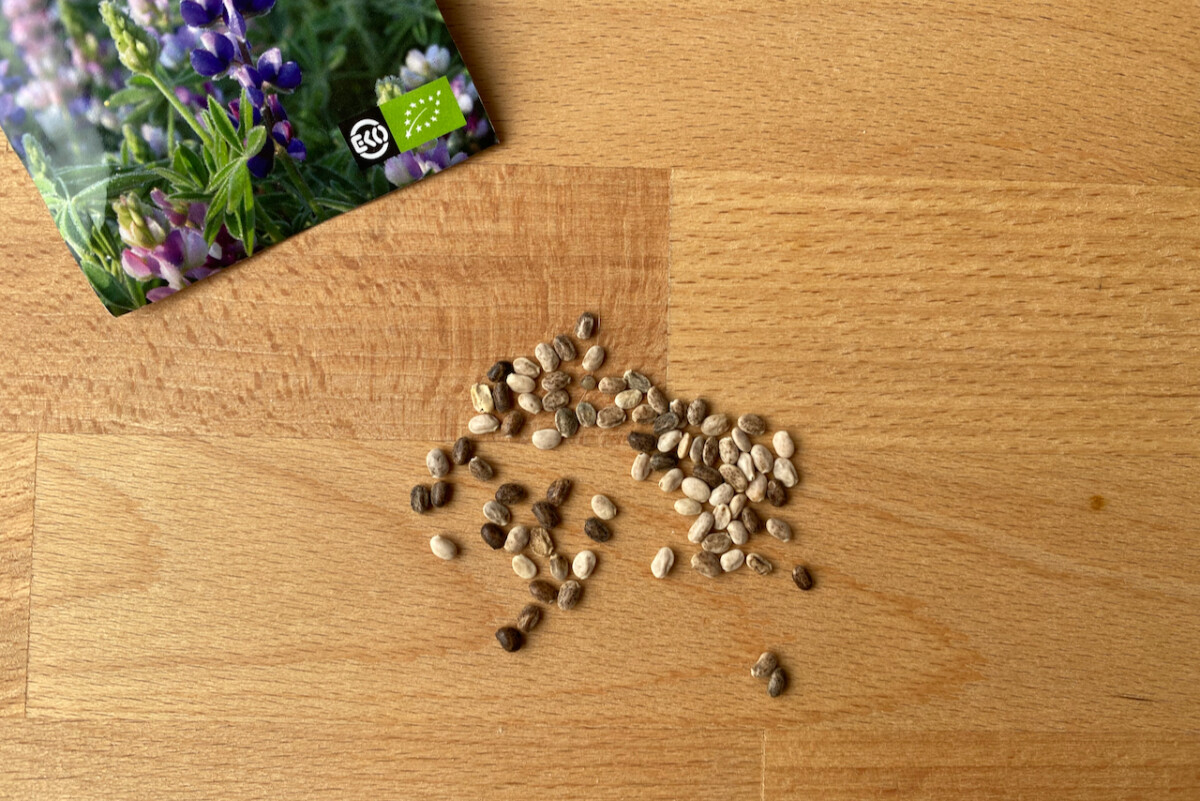
Lupines are generally biennials, which means that they’ll use the first year to develop a strong root system and foliage and only bloom in the second year. But if you choose miniature lupines, you can grow them as annuals, which means they will bloom in their first year.
Sure, the smaller varieties will not be as showy or grow as tall as their larger counterparts. But having them bloom right away is worth the compromise, in my book. So this year, I’m planting miniature lupines along my deck to enclose it and create a feeling of a cozy outdoor living room.
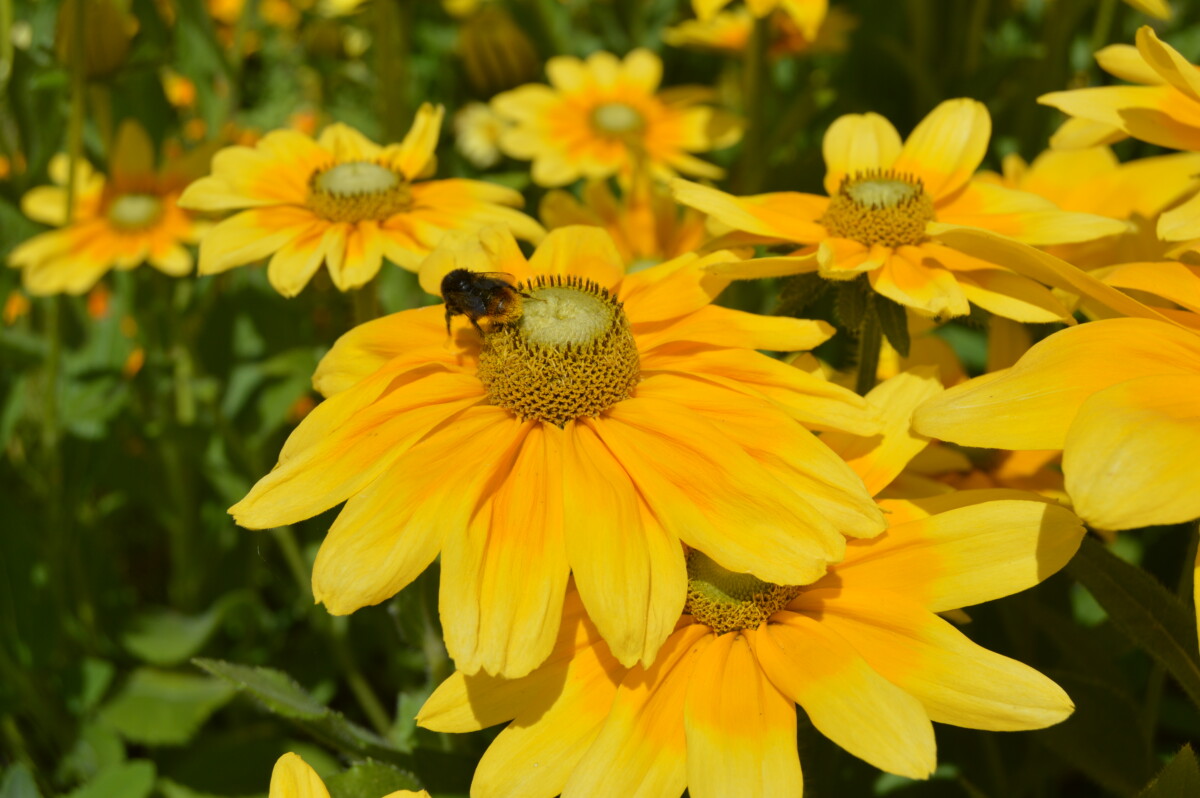
The small bicolor flowers are a boon for bumblebees and butterflies while being a repellent to other pests such as deer and rodents.
The seeds of the lupine have a glossy wax coating on them; the best way to soften that is by soaking the seeds for 24 hours before planting. Some gardening books recommend soaking them in hot water, but I’m always afraid of accidentally boiling the seeds. So warm water will have to do.
Sow the seeds about a quarter to half an inch deep and lightly cover them with a light potting mix. It takes about 14 to 28 days for seedlings to emerge, depending on factors such as moisture and temperature. Lupines don’t like their roots disturbed, so I’d recommend not sowing too many in a pot or a cell. Keep the seedlings evenly moist and transplant them when the danger of frost has passed.
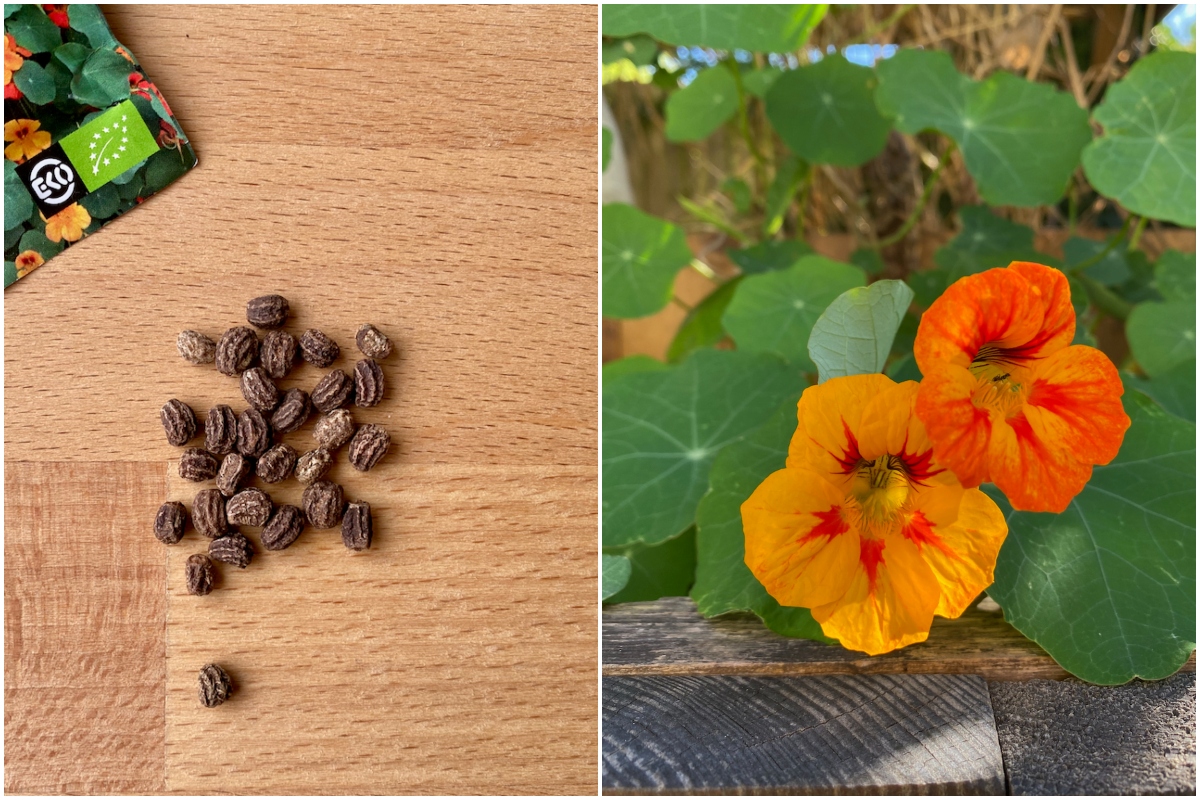
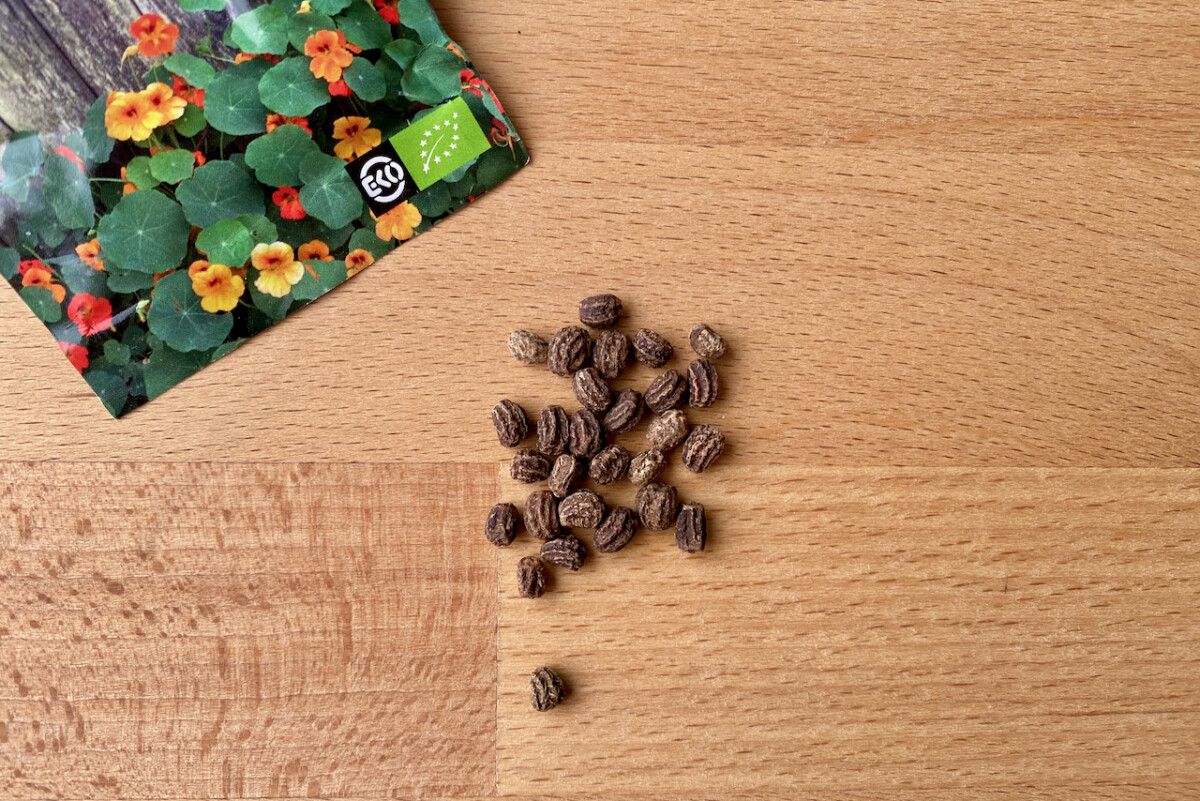
2. Nasturtiums (Tropaeolum majus)
Time to germination: about 14 days.
If there’s one flower that embodies instant gratification, it’s the nasturtium. You can plant it as a sprawler, train it up a vertical structure, or let it cascade smoothly from window boxes. You can sprinkle the flowers on a salad, make pesto out of the leaves and pickle the fresh seeds. Add to that its penchant for attracting whitefly away from the brassicas, and you’ll see why nasturtium is the ultimate multitasking garden companion.
I could sow nasturtium directly in the garden after the last frost, and it will poke its tiny little head out in about three weeks. So why should I bother to start it from seed indoors?
I switched to starting nasturtium indoors after it was all annihilated by a late frost one year. Self-sown nasturtium had been out of the ground during a balmy March. Then got blitzed by an overnight frost around Easter in mid-April. Not having any backup plants, I started some in May and it took as long as August for them to flower.
So now I let the nasturtium self-seed in place for a repeat performance, but I also start a few plants inside, just in case I need to fill in some gaps. The February sown nasturtium will likely be in full bloom by early June. And it will keep blooming for months.
If you cold-stratify nasturtium, you’ll get a near perfect germination rate. For faster germination, you can also scarify the chunky seeds by nicking their coating with a nail file or sandpaper.
Plant the seeds about half an inch deep roughly six weeks before your last estimated frost date. Cover them with a bit of potting soil and keep them moist and around 70-75F warm (21-23C) for faster germination. You’ll see seedlings emerge in about two weeks.
3. Mallow (Malva)
Time to germination: 10 to 21 days
If the aforementioned nasturtium is a rather popular kitchen garden plant, I can’t say the same thing about the humble mallow (Malva).
In the first year I grew Malva sylvestris, I thought it was an annual and just yanked it right out at the end of the season when it was looking worse for wear. I can’t hold it against myself, as the flowers are rather short-lived. But it turns out it’s not only a perennial that will come back after spring pruning, but some varieties are used for cooking and as herbal remedies. And if you’re into foraging, you’ll notice it pops up on various YouTube channels. I’ve only grown it as an ornamental, but I’m planning on changing that this summer.
If you plan on eating mallow leaves and flowers, make sure it’s a Malva. Sometimes, the word “mallow” is popularly used to describe other plants as well. And some varieties of mallow may resemble larger varieties of geraniums.
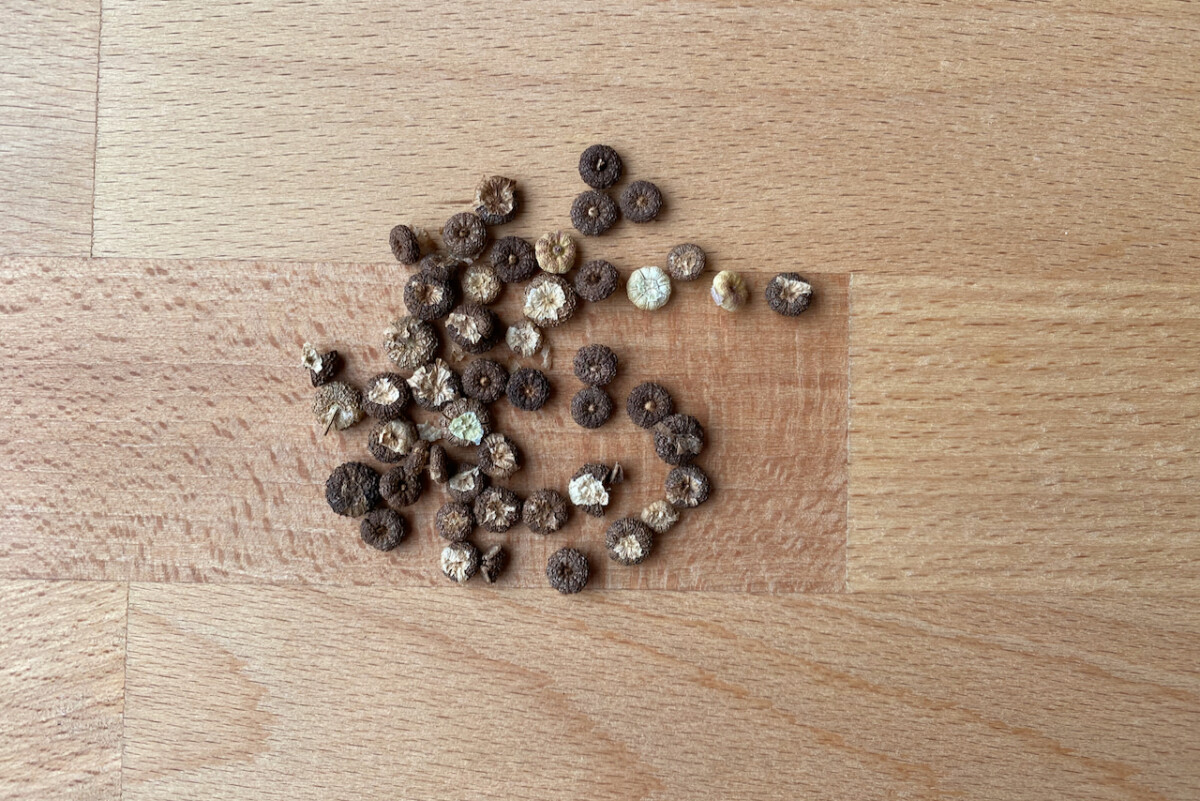
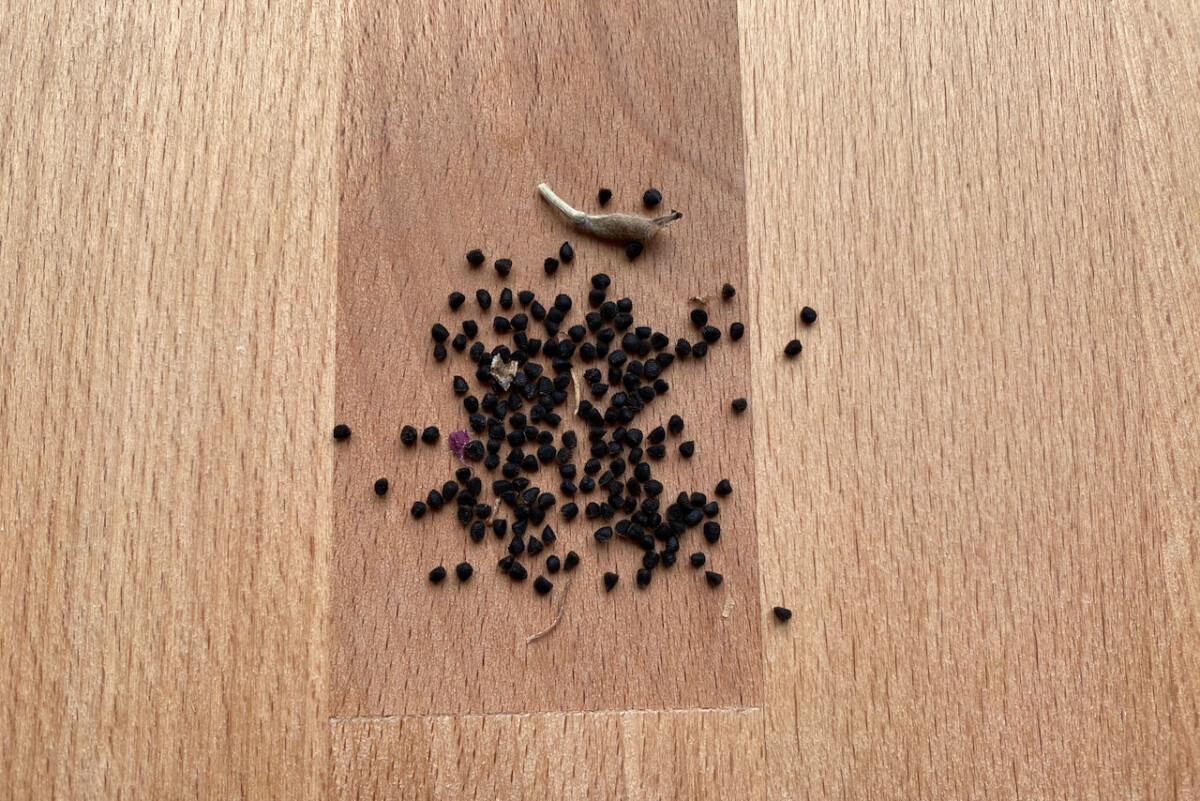
Another name for mallow is “cheese plant” and you’ll see why if you have a look at the seeds. Each seed disk looks like a miniature version of a cheese wheel with each seed constituting a “slice.” Most seed pods will have around ten seeds each. But it’s the pink pinwheel flowers and the crinoline leaves that make mallow an attractive plant.
In fact, the name of the color “mauve” in English is the same as the name for mallow in French. So the color was named after this flower. Take that to your next trivia night!
I guarantee that once you’ve discovered mallow, you’ll keep growing it. It’s drought- and heat-resistant and not many intruders nibble at it.

Start the seeds indoors in late winter or early spring. Mallow seeds are quite hard-shelled, so they will require some stratification and light scarification. Their ideal germination temperature is around 53-68F (15-20C). You can bury the seeds, but not deeper than their width. Remember to keep the seeds moist until the seedlings start showing up.
Mallows bloom prolifically in their second year, but you will have some blooms in the first year as well if you plant it early enough.
4. Love in a mist (Nigella damascena)
Time to germination: 10 to 14 days.
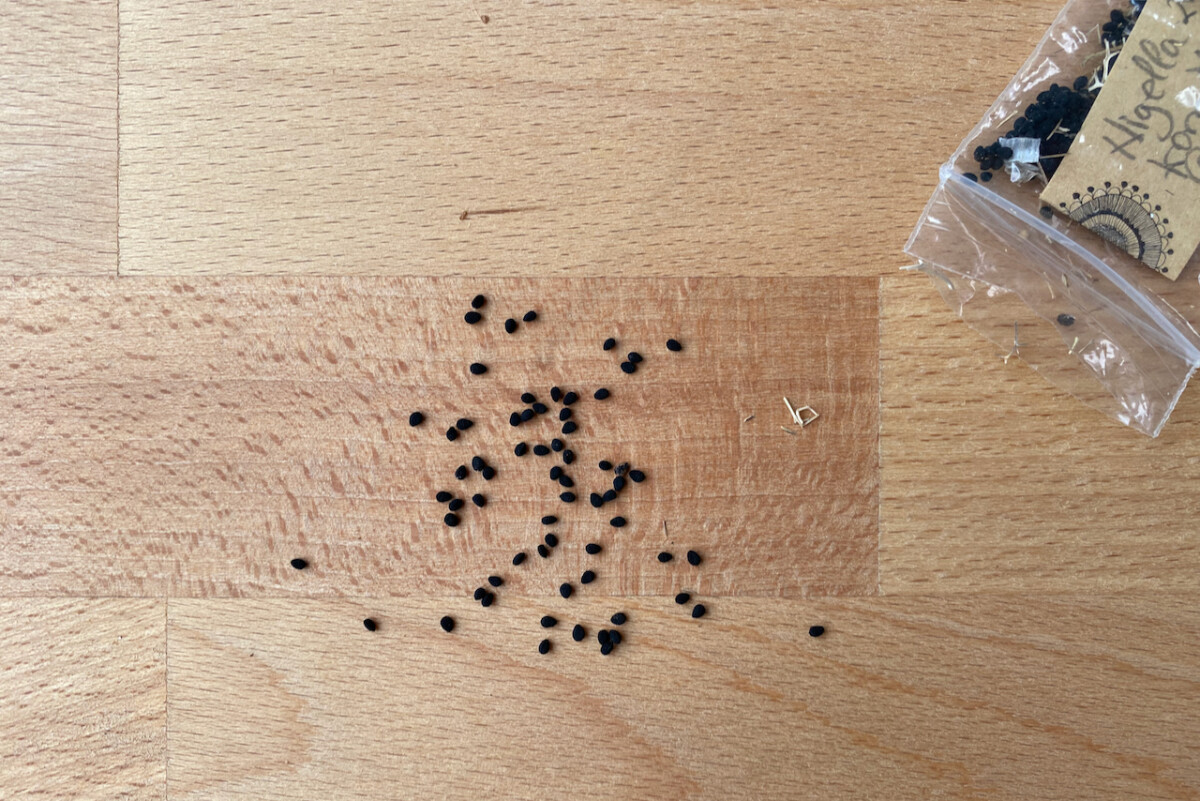
For such a delicate plant, nigella packs a lot of decorative punch. The wispy blooms in shades of blue, white, purple and pink make excellent cut flowers. And later in the season, when the heat gets a bit too much, I usually save the flowers for drying. This way, I get to enjoy nigella all winter long without lifting a finger.
Nigella is an annual, so I sow it from seed indoors about two months before I plan on transplanting it outside. This allows me to get ahead of my short growing season. Even though this plant self-seeds quite abundantly, starting it inside is the only way I can enjoy it longer.
Another way to prolong the blooming season is to start a few rounds of love in a mist about three weeks apart. Depending on how long and how mild your season is, you might even get three or four rounds of nigella seed-starting in one single year.
Love in a mist germinates at a lower temperature than other ornamentals. So you can save your heated mats for your peppers and safely keep nigella seeds at around 60-65F (16-18C) without any extra heat. Nigella seeds require light for germination, so don’t bury the seeds (the same advice does not apply if you sow them outdoors though).
The plants don’t like having their roots disturbed, so it’s better to sow one seed per container. For the same reason, I would recommend planting the seeds in small pots, as opposed to small germination cells, in order to avoid having to up-pot them. It takes an average of ten to fifteen days for nigella seeds to germinate. And by that point, it’s time to sow them again.
5. Marigolds (Tagetes)
Time to germination: 10 to 14 days
After an impromptu takeover of my garden by a coterie of self-sowing marigolds that had scattered in a storm, I decided to take control of this unruly bunch. Especially since they didn’t do too well when I tried to relocate them from their very erratically chosen spots.
I know I could let them self-seed (and I do, some of them). But since I also use marigolds as companion plants to my tomatoes, I prefer to have a say as to where they’ll end up.
You can grow marigolds from seed and transplant them outside after the last frost; or you can also sow them directly in the garden after the danger of the last frost is gone. Marigold seeds need stratification, so put them in the fridge for a couple of weeks before you plan on planting them.
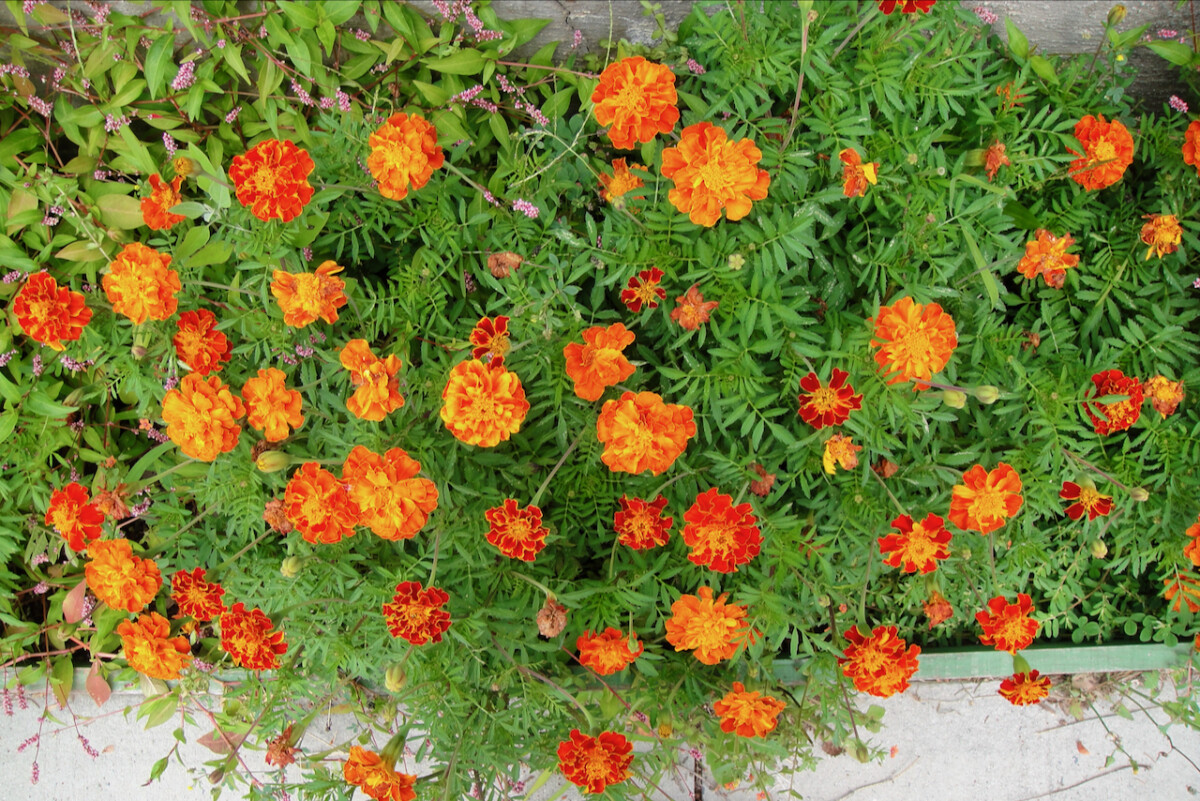
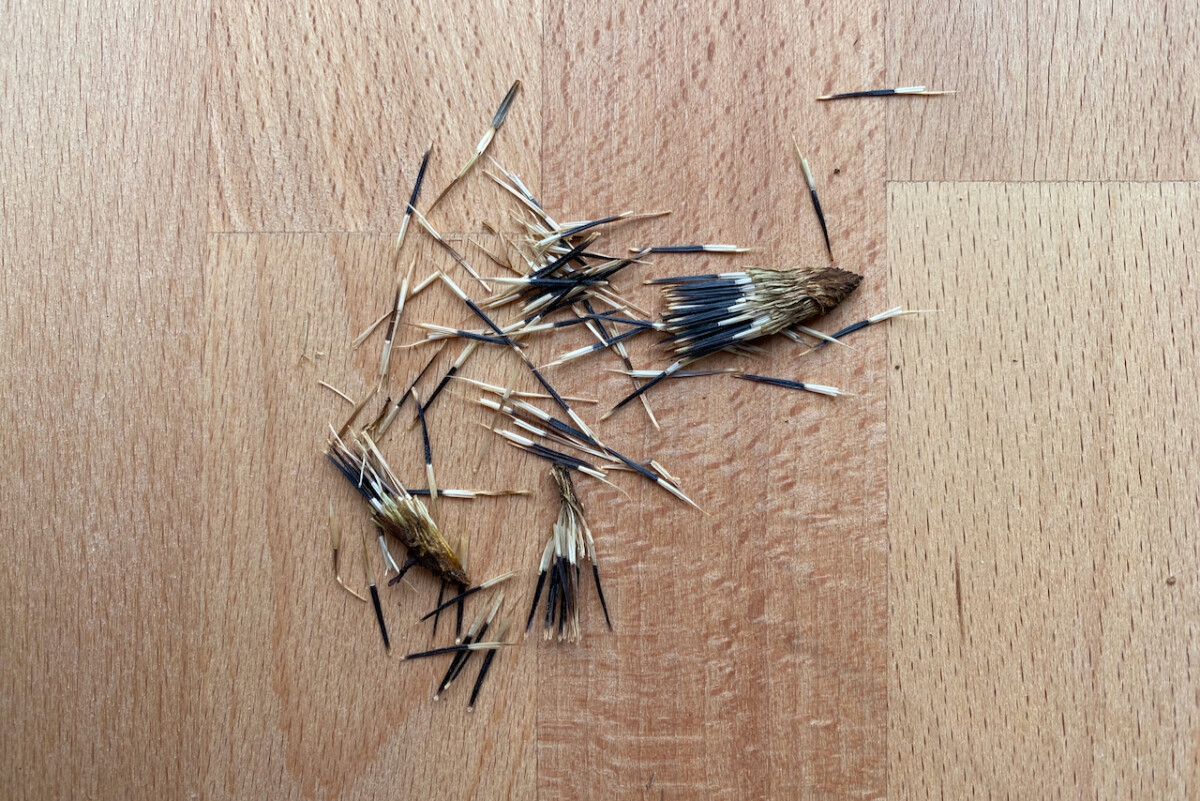
Marigold seeds look like wispy little black and white straws that you can just pull out of the seedpod. It can be tricky to figure out which way to plant them, so just to keep it simple, plant them flat and cover them with a light layer of potting mix.
You can sow them indoors about six weeks before the last expected frost. You have to keep them moist and warm (70-75F, about 21-24C), so if you don’t have a heated germination mat, a warm windowsill is a must.
I find that marigolds look much better in a clump, especially the ‘Red Knight’ cultivars that I prefer; so I use bigger germination pots and plant about four or five seeds per pot. I don’t always get that many plants, but I do get at least a couple per group.
6. Hollyhocks (Alcea)
Time to germination: 14 to 21 days.
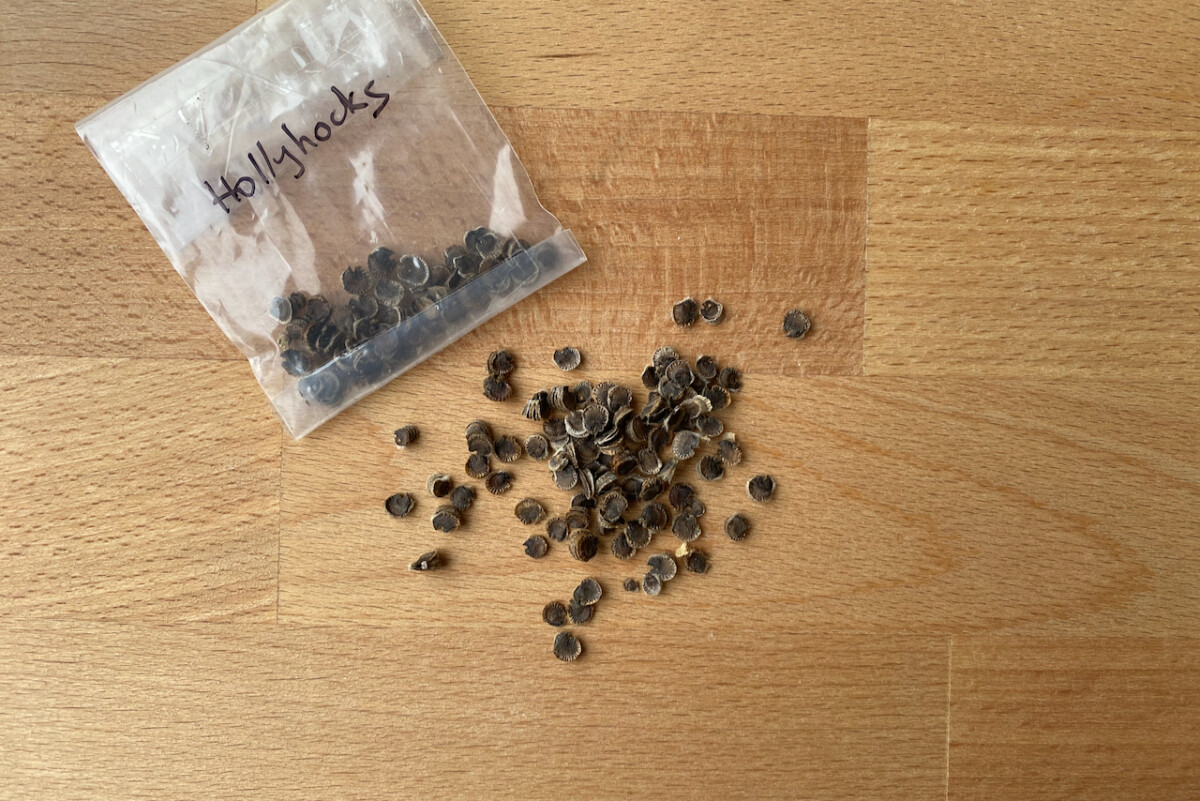
Hollyhocks are the one plant you’ll see happily growing through tiny cracks in the asphalt in the middle of a hot city in the summer. So you know they are resilient. And yet … Hollyhocks will make you exclaim other expressions beginning with “holly” when you try to grow them in your garden.
I find it frustrating that hollyhocks are prone to becoming a slug snack and will probably end up covered in rust by late summer. So growing lots of them is the only way to not lose your mind when another one bites the dust.
Most hollyhocks are biennial, but if you plant them early enough, some will flower in the first year.
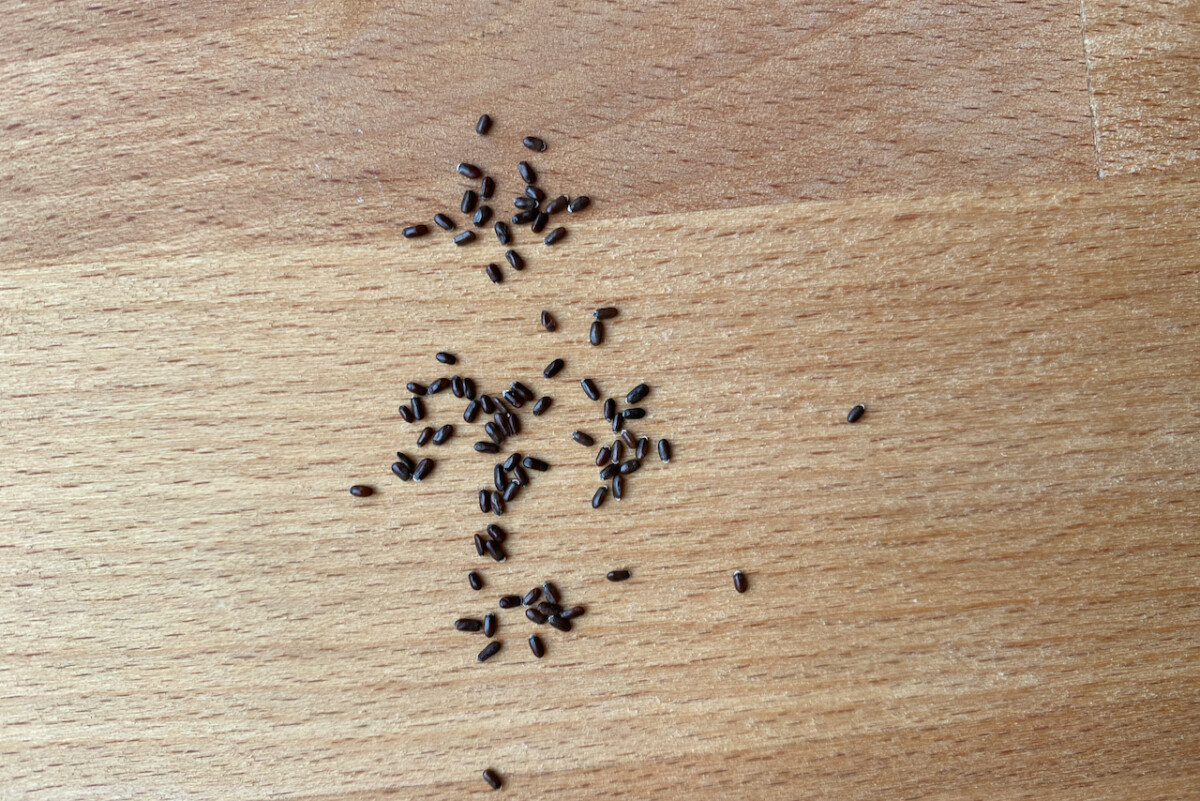
If mallow seeds are wheels of cheese, then hollyhock seeds are the extra-deluxe edition. That’s because they also grow like little wheels that break apart into multiple seeds each.
Start by cold stratifying your hollyhock seeds in the fridge for a couple of weeks. Dry stratification is enough because we’ll also be soaking the seeds in warm water overnight before planting them. Once you’ve placed the seeds on your potting mix, cover them with a light coating of about a quarter of an inch of soil.
Hollyhocks need some light to germinate, so do not pack them in completely. Keep them moist at normal room temperature. After a couple of weeks, you’ll see tiny round leaves poking out. These are also a delicacy for slugs and snails, so keep them indoors a bit longer to get them nice and sturdy.
7. Black-eyed Susan (Rudbeckia)
Time to germination: 21 to 28 days.
I bought the first rudbeckia for my current garden as a potted plant. After a successful season, I divided it in the fall (and even found a baby Susan in the mix). But since rudbeckia is a short-lived perennial, that means I’ll have to keep buying it if I want to enjoy it in my garden. And it’s not cheap. At the time I’m writing this, black-eyed Susan goes from anywhere between five dollars (for a classic Rudbeckia hirta) to nineteen dollars for a more colorful cultivar, such as this ‘Denver Daisy’ Rudbeckia.
So to the propagation station we go! You can start rudbeckia anywhere from seven to ten weeks before your last spring frost date. To increase germination rates, make sure you remember to cold-stratify your rudbeckia for at least a couple of weeks before you plant them.
Seeds that haven’t been stratified will still germinate, but might do so at a lower rate. But if you’ve saved your black-eyed Susan seeds as I have, chances are you have plenty of seeds to spare.
Sprinkle the seeds about a quarter of an inch deep into the potting mix and keep them moist. The seeds are so small that you can just broadcast them on top of the soil, then mist them in place. They’ll work their way down into the soil naturally this way. Rudbeckia seeds need a consistent temperature of around 70-75F (21-24C), so make sure you place them on a warm windowsill, an indoor greenhouse or on a heated germination mat.
8. Chamomile (Matricaria recutita)
Time to germination: 14 to 21 days
As far as I’m concerned, chamomile is a staple of the kitchen garden, whether you’re growing German chamomile (an annual) or Roman chamomile (a perennial).
I’m currently growing German chamomile because I find it’s more flower than leaf (unlike its smaller counterpart). I harvest the blooms when they’re fully open and use them all throughout the year. Chamomile tisane is a favorite of mine for evenings when I know I’ll need a mild sedative before sleep. So I always have to make sure that I’m planting enough to cover the winter gap.
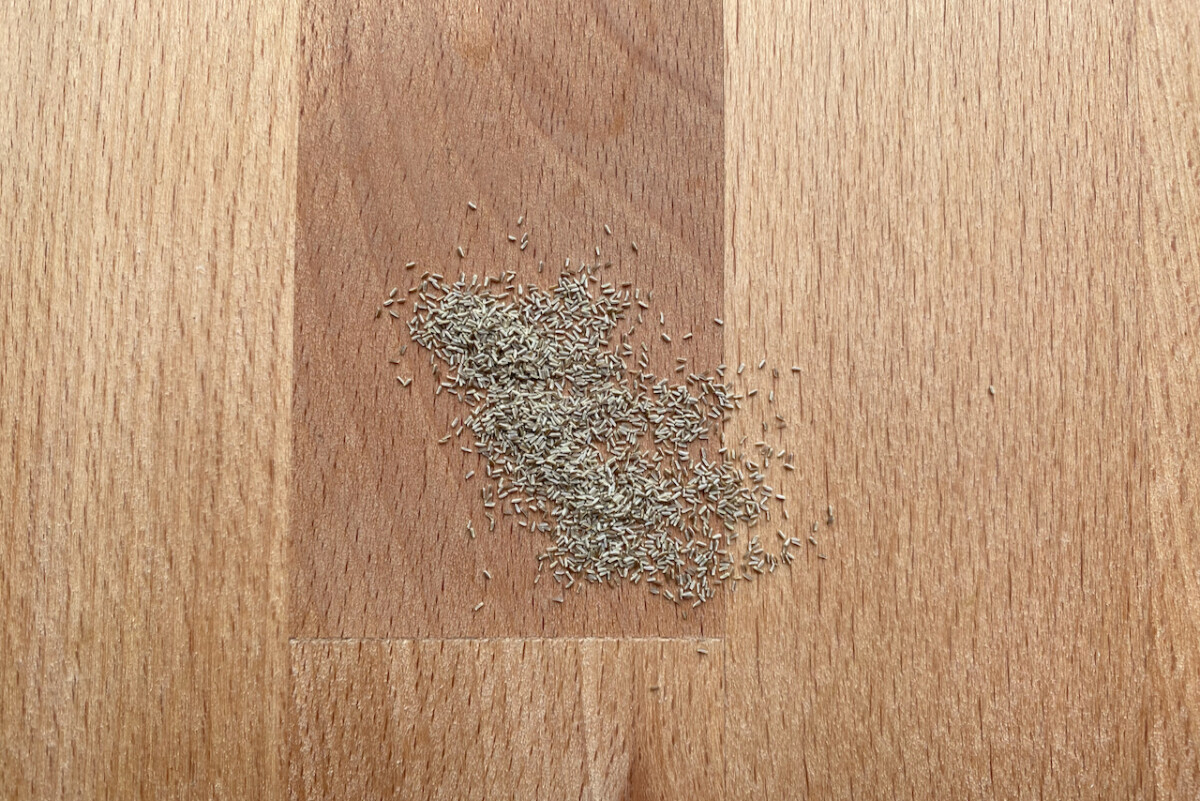
You know how seed packets have an approximate number of seeds stamped on them? Can you guess how many chamomile seeds came in a single average-sized packet? 4500 seeds! I couldn’t believe it until I saw how small they were.
Start your chamomile indoors about eight weeks before you plan on transplanting it outdoors. Two to three of these weeks will be taken up by germination, so you can start it even earlier or delay the transplant.
Lightly sprinkle the seeds on top of soil and give them a good mist. Chamomile seeds need to be exposed to light in order to germinate, so make sure they don’t sink more than a quarter of an inch deep. Seeds prefer to stay on the cooler side, around 65F (18C).
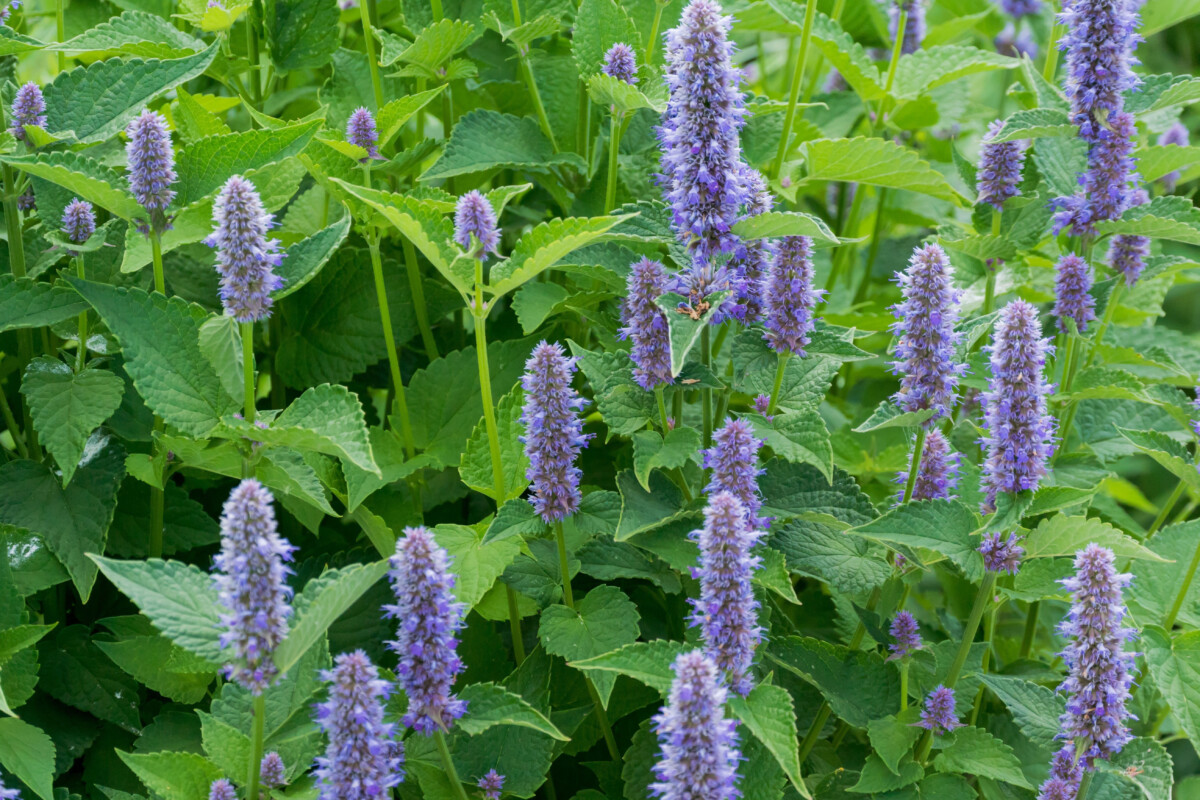
9. Anise hyssop (Agastache)
Time to germination: 10 to 14 days
Keeping with the herb garden theme, let’s talk a bit about one of my favorites. And not just mine, the bees absolutely love anise hyssop. I use the fresh leaves to spice up salads, the dry leaves to brew tea (it tastes like licorice) and the seeds as a replacement for poppy seeds in baked goods. In fact, I wrote an entire article about how much I love anise hyssop and why I think it belongs in any and every garden.
I like to plant several seeds in a small cluster and keep them growing together in order to create a fuller look. Keep the seeds in the fridge for a couple of weeks in order to increase the germination rates. But since anise hyssop is such a generous seed giver, even if you forget to do this step, you’ll likely have enough seeds to overcome any poor germination setbacks.
The seeds are just as small as poppy seeds, so you’ll need to keep them uncovered because they need light to germinate. You should mist them every day to keep the soil moist, but otherwise they don’t require too much fussing over. They’ll be happy at room temperature.
Wait until the last frost has passed before you move the baby plants into the garden. But once the plant is established, it turns into a hardy perennial that will come back from the roots every year.
10. Larkspur (Consolida ajacis)
Time to germination: 14 to 28 days, depending on temperature
Larkspur (also known as knight’s spur), is the annual version of the perennial larkspur (also known as delphinium). While I absolutely love delphiniums, I prefer this annual because of how low-maintenance it is. It’s shorter, so it doesn’t need staking. It can also handle cold weather, drought and part shade conditions.
Larkspur comes in different shades of pink, blue and white. But I prefer the almost translucent purple that contrasts with the creamy-white rhododendron that it grows next to.
When Larkspur self-seeds – usually in the middle of summer – it doesn’t immediately start germinating again. It waits for the soil temperature to cool down to below 60F (approximately 15C) and for a layer of leaves and other fall mulch to cover it. Only then will it start thinking about sprouting again.
So we have to mimic these conditions when we start the seed indoors. First, chill the seeds in the fridge for about two weeks to a month. Then plant the seeds in a cool location and cover them with soil. Don’t bury them too deeply though. You’ll want to only bury them about the diameter of the seed, not deeper.
11. Valerian (Valeriana oficinalis)
Time to germination: 10 to 21 days.
Valerian is one of the biennials I grow in my garden simply for the bees. Harvesting and processing the tap root is on my list of things I want to learn how to do soon.
Valerian grows very tall, so I tuck it in the back of the beds or next to a wall. But because it only flowers every other year, I start a new batch of seeds every year.
My first experience of letting this plant go to seed induced a mild panic attack. By October, the entire garden bed it was in and all the pots around were sporting tiny valerian sprouts. I had nightmares of my neighbors chasing me with pitchforks for having invaded their yards with valerian. Alas, it all died over the winter and by February there was nary a valerian baby left in sight. I wish I’d had the foresight to pot up a couple of seedlings and bring them indoors.
Valerian seeds are very small and finicky to handle. They need light to germinate, so lightly scatter them on top of the soil. Then mist them lightly and keep them damp until they sprout. You could sprinkle just a very (very!) light layer of soil on top if you think you can’t keep them moist enough.
12. Lavender (Lavandula angustifolia)
Time to germination: 21 to 28 days
Yes, you can start lavender from seed. Yes, I’ve done it successfully! I know it may sound crazy to start it from seed, especially since every gardening center carries lavender potted plants ready to stick into the ground. But after a couple of years of buying lavender that just didn’t take (it just dried out within the first year), I decided to grow my own.
Fair warning: only embark on this journey if you have enough patience to wait for germination. It takes a long time for the first baby lav to show up, and you may be running trenches into the carpet pacing up and down waiting for something to happen, especially if you forgot to stratify the seeds. At least that was my experience.
It takes about 200 days for lavender to reach maturity and bloom, so it’s best to start it about eight to ten weeks before your last estimated frost date.
As you can see from my photo, lavender seeds are very small. They’re also coated in a natural wax that prevents the plant from sprouting at inopportune times. So we’ll first need to trick the seeds by cold stratifying them. In my experience, this made the difference between the year when I got very weak lavender seedlings and the year I got good growth.
Lavender seeds need light to germinate and – this is the tricky part – a difference in temperature between day and night. So place your germination tray next to a southern-facing window that gets some warmth during the day but gets a bit chilly at night. If you can’t manage that, at least stick to the light part.
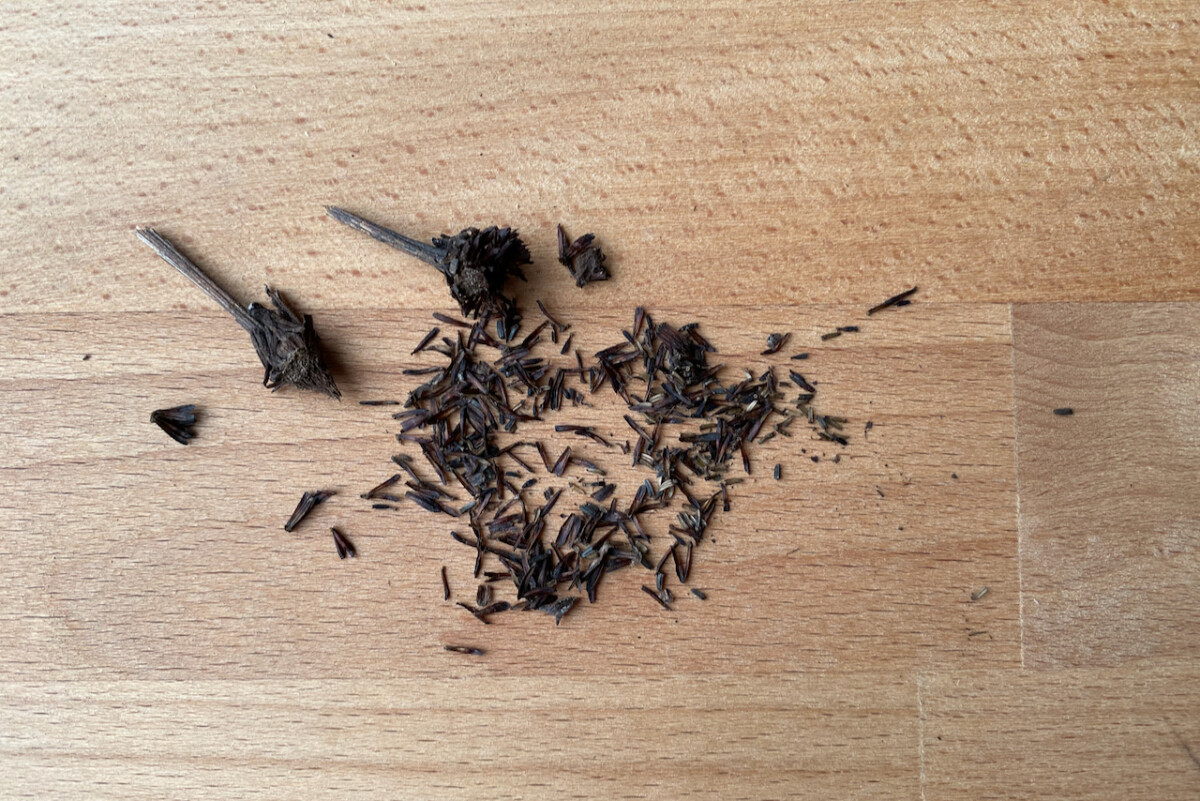
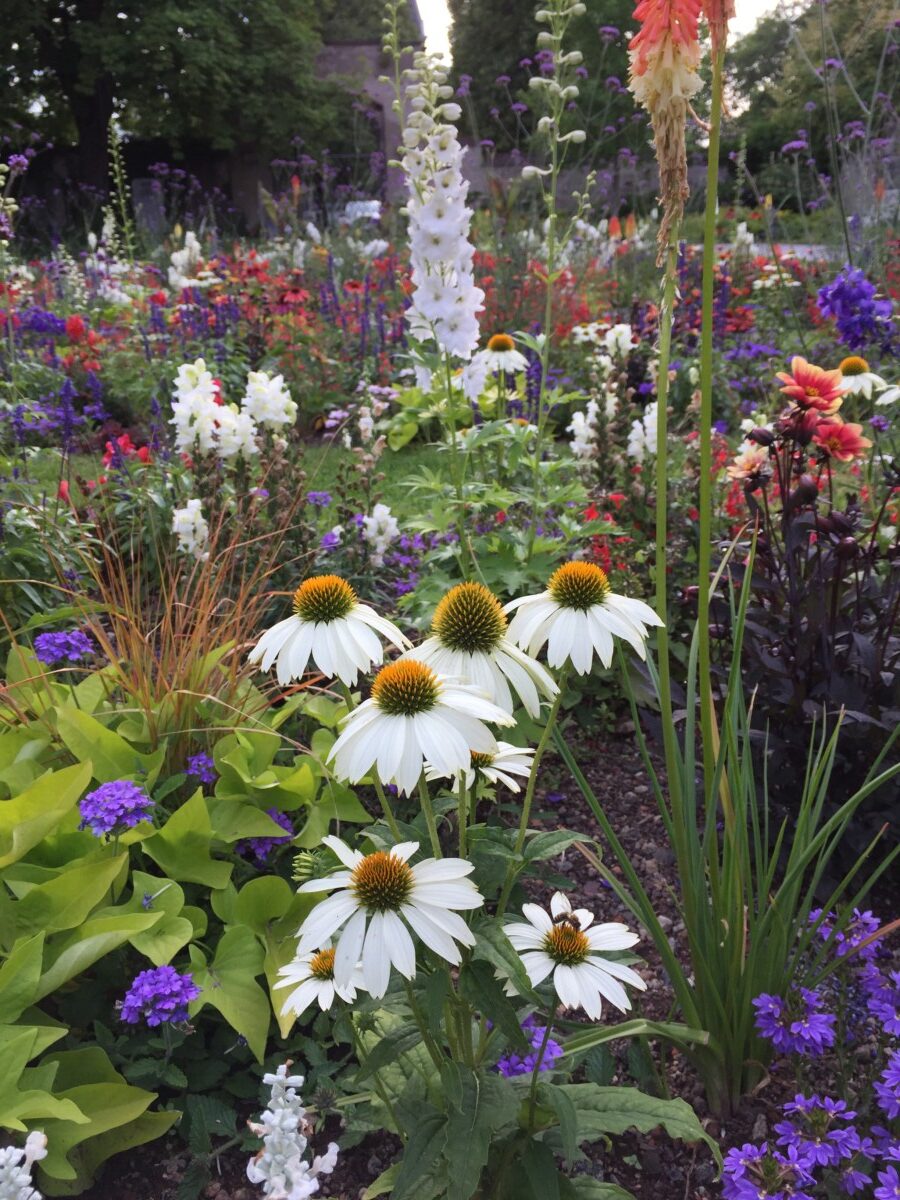
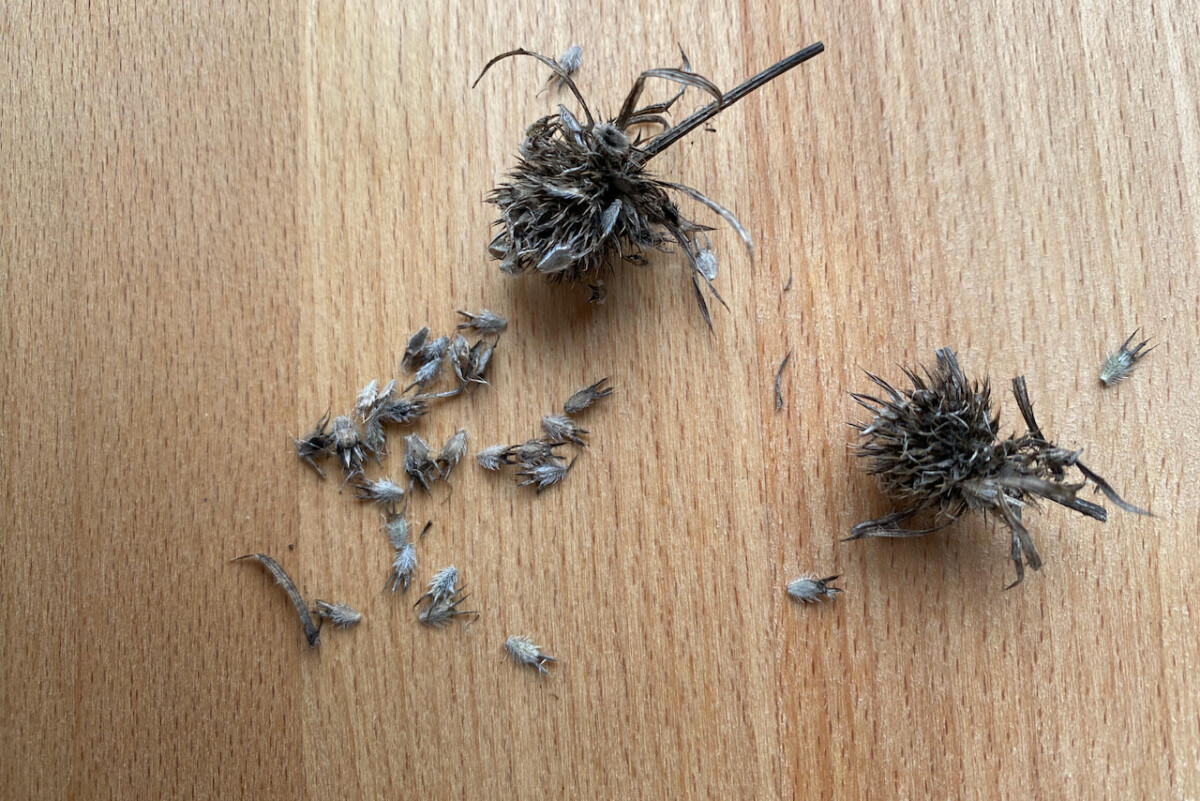
13. Coneflower (Echinacea)
Time to germination: 10 to 20 days
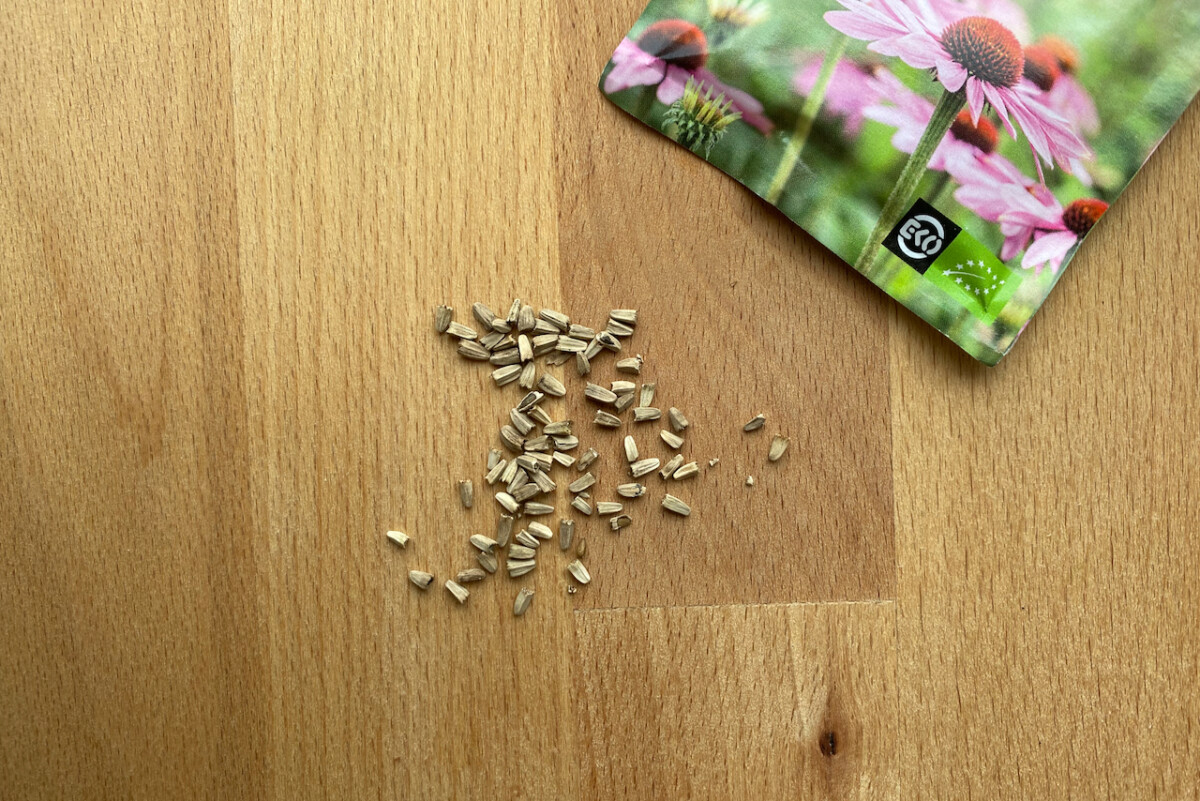
I’m thrilled to notice that echinacea is having a comeback. As it should! It’s the perfect flower for cottage gardens, tidy borders and meadow gardens. Pollinators love it as much as herbalists do.
I’ve grown orange and icy-white echinacea in my garden in the past. But this year I’m going the classic route and planting some purple echinacea.
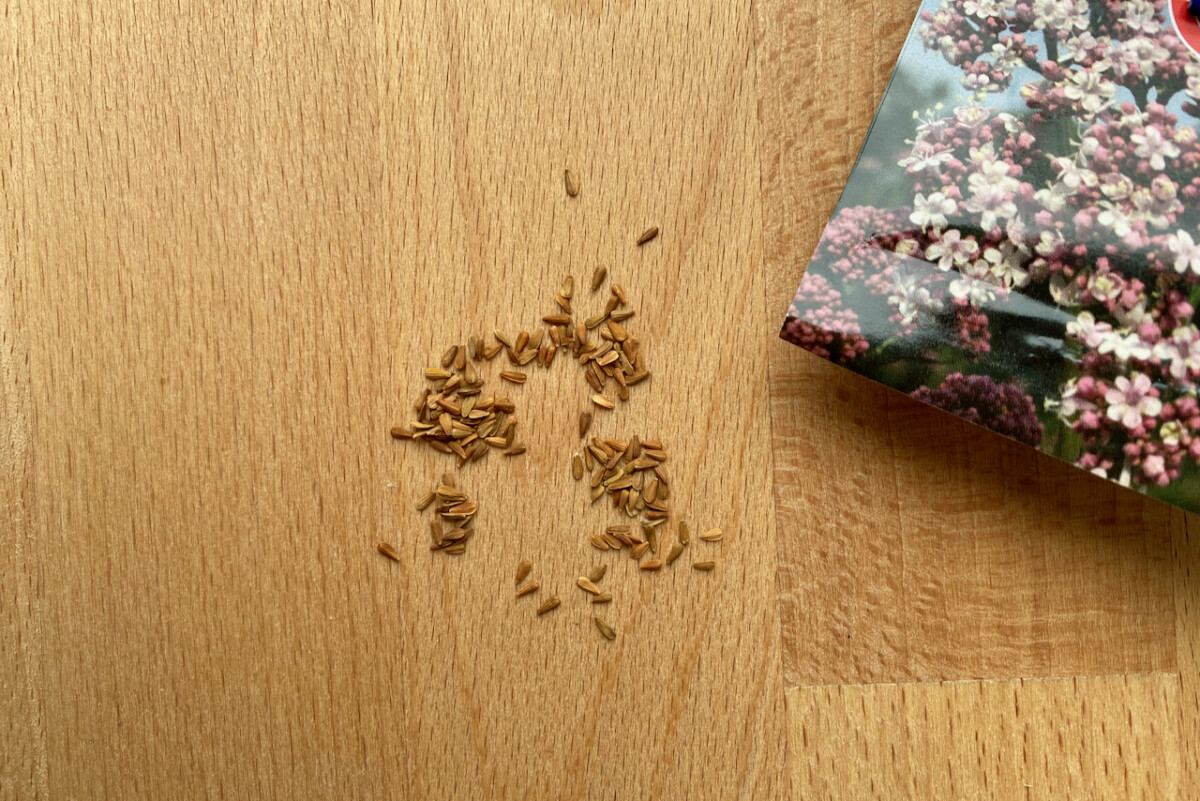
The coneflower seeds look like elegant little flapper skirts, don’t they? You should chill your seeds in the fridge before you plant them to improve germination rates. You can plant echinacea about a quarter inch deep. And just like with marigolds, if you’re not sure which way is up, plant them flat. Seeds will germinate at about 65-70F (18-21C), so they don’t need any special treatment other than keeping the soil moist.
14. Verbena (Verbena bonariensis)
Time to germination: 21 to 28 days
Let’s get one thing straight. The verbena I’m growing in my garden is not what’s commonly called vervain (Verbena officinalis). I prefer to grow the butterfly magnet that is Verbena bonariensis. Because I like the way it looks, constantly flowing a good couple of feet above everything else, like a lifeguard surveying its domain from June until November.
One year, I let it go to seed, but nothing happened. No new verbena babies frolicking at the base of the mother plant (or anywhere else in the garden, for that matter). So I decided to collect the seeds and take matters into my own hands.
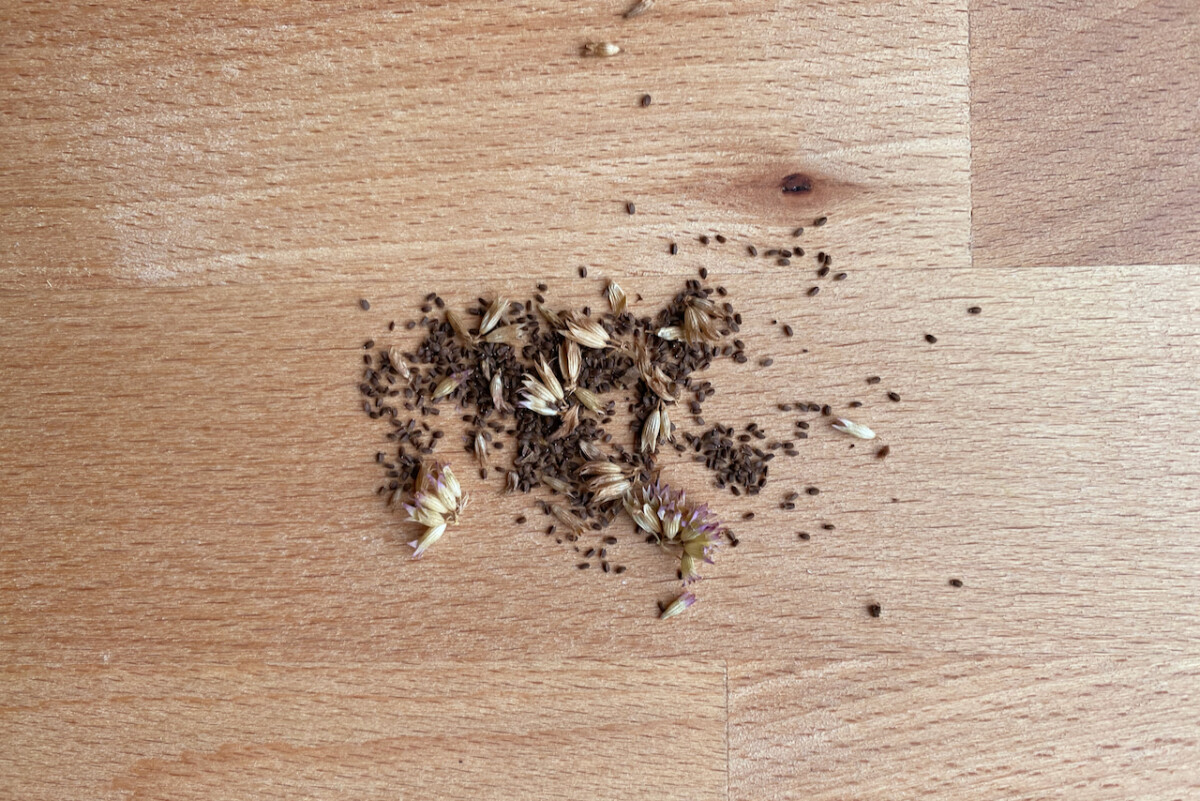
The trick with verbena seeds is that they are full of chaff. And since I don’t have a professional seed sorting machine at home, I couldn’t separate all of it. So I’m planting it with the chaff, which will just have to compost on its own in the ground.
The verbena seeds need darkness to germinate, so sprinkle a very light layer of seedling mix on top after you plant them. Germination is relatively slow and not very reliable, so make sure you plant at least three or four seeds per cell. Keep the soil moist and you should see germination in about three weeks.
15. Sea holly (Eryngium)
Time to germination: 21 to 28 days
To me, growing eryngium from seed is still a wonder. How can a plant that looks so out of this world be grown from seed in my own living room? Magic, probably!
Most popular eryngium varieties are biennials, but some may flower during their first year if you start them up (then pot them up) early enough. That’s why I start them a good two months before my last frost, but not before stratifying them in the fridge for a couple of weeks.
The trick with eryngium is that they have tap roots, so even when you pot up the baby seedling, you have to be very careful not to damage the root. That’s why I only plant a couple in a pot. I know I’m too clumsy to separate multiple seedlings.
Plant your eryngium seeds flat and sprinkle a light layer of potting mix on top. Keep everything moist and at room temperature, and you’ll see sprouts popping up in about three weeks. Eryngium babies are sensitive to frost, so keep them indoors until the danger of frost has passed.
How I Start Flowers from Seed
When it comes to gardening, theory without practice doesn’t amount to much. So here’s a short tutorial on how I start my flowers from seed. If you already have a different method that works for you, I suggest you stick to it. You know your own environment best in terms of temperature, light intensity and humidity.
Step 1: Choose a high-quality seed starting mix.
It may be tempting to scrounge up whatever you have around, such as compost or soil from your garden. But for a high-quality result, you need to start with high-quality ingredients.
Now I know that the potting mix is not technically “soil,” but bear with me when I refer to it as such anyway. It makes it easy to understand for people who are new to this whole gardening business.
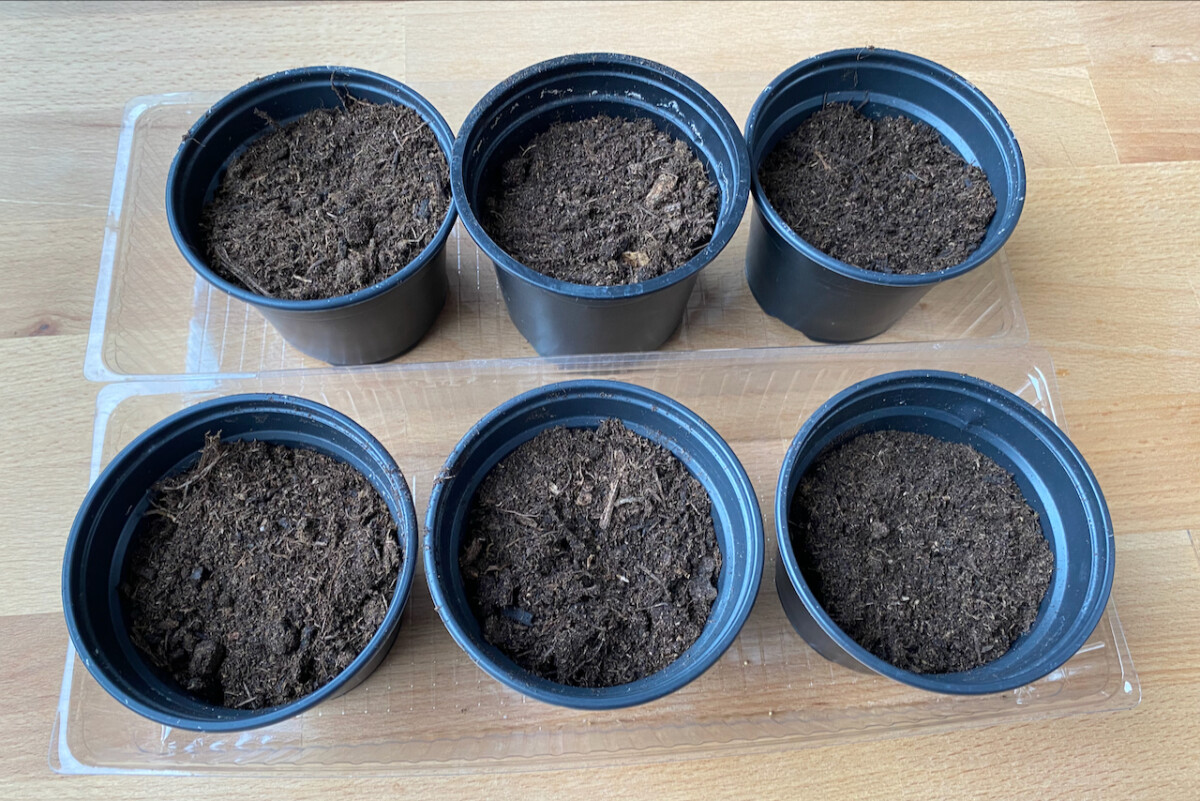
Some bagged potting medium is suitable for seed starting, but not all of it. Always check the bag specifically for the “seed starting” symbol rather than just the “suitable for pots” one. Your seed starting mix should be mostly inert, without too much fertilizer that could burn the seeds.
A good starting mix is also well-draining and well aerated, so you’ll often see perlite, vermiculite or coco coir in that. That keeps the mix loose and open.
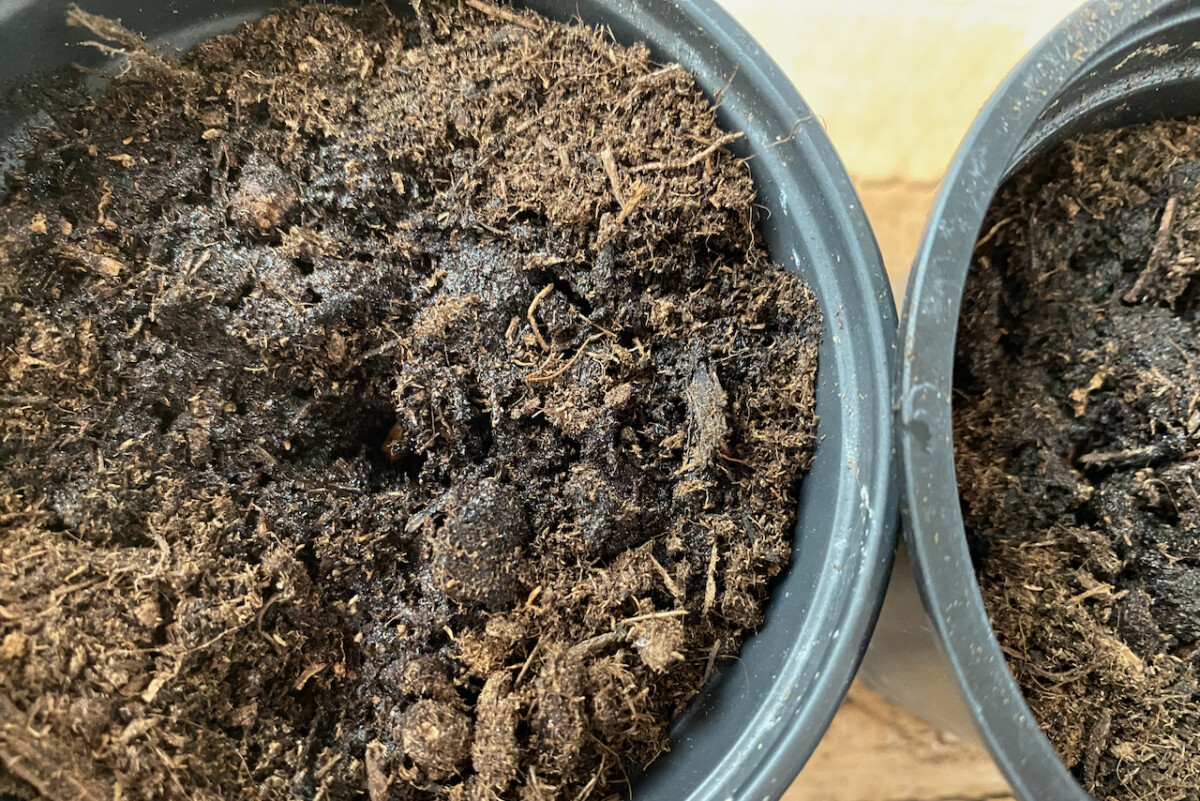
It’s hard to photograph well, but the mix that I’m using has a lot of coco coir added. According to the bag, the mix has thirty percent “dry matter.”
Step 2: Get the soil evenly moist.
Whether you use a spraying garden hose, a bottle or a watering can, I found that it’s important to get the potting mix evenly moist before I place any seed in.
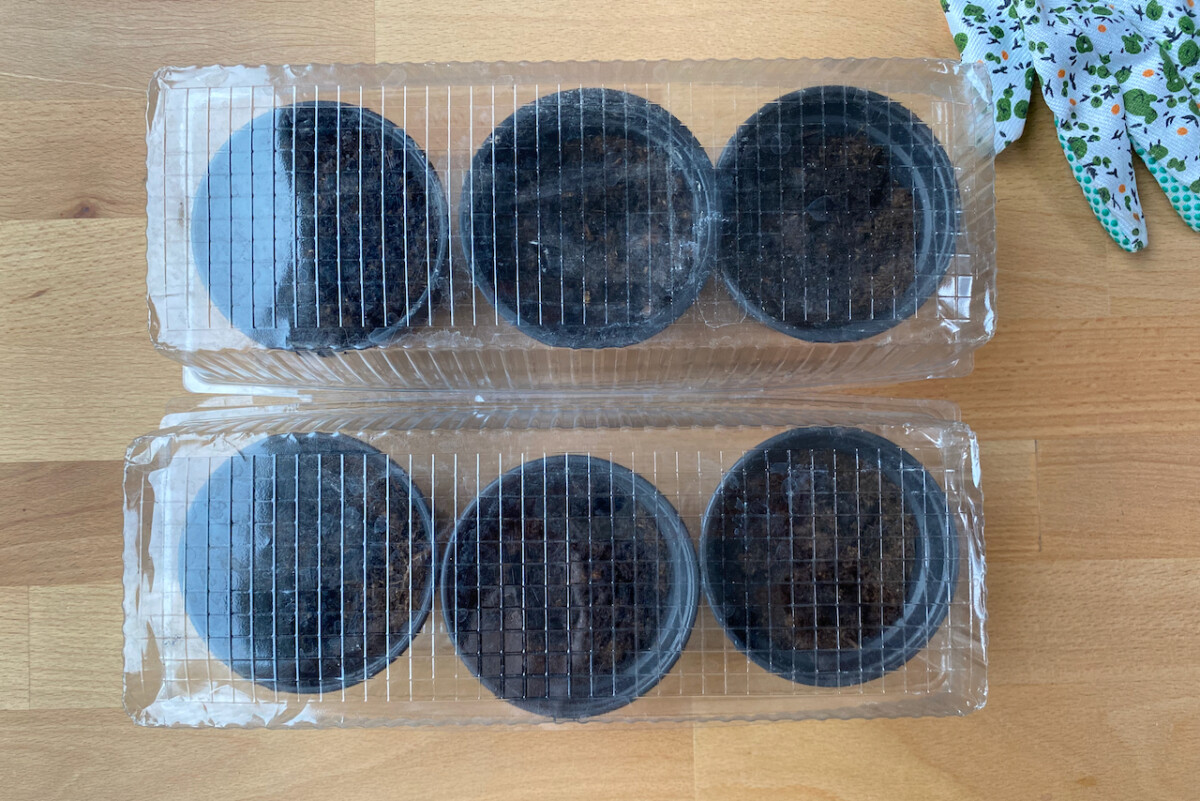
I’m starting my seeds indoors, so I water the trays and pots using a bottle and allow the water to drain through the soil into the catchment tray below.
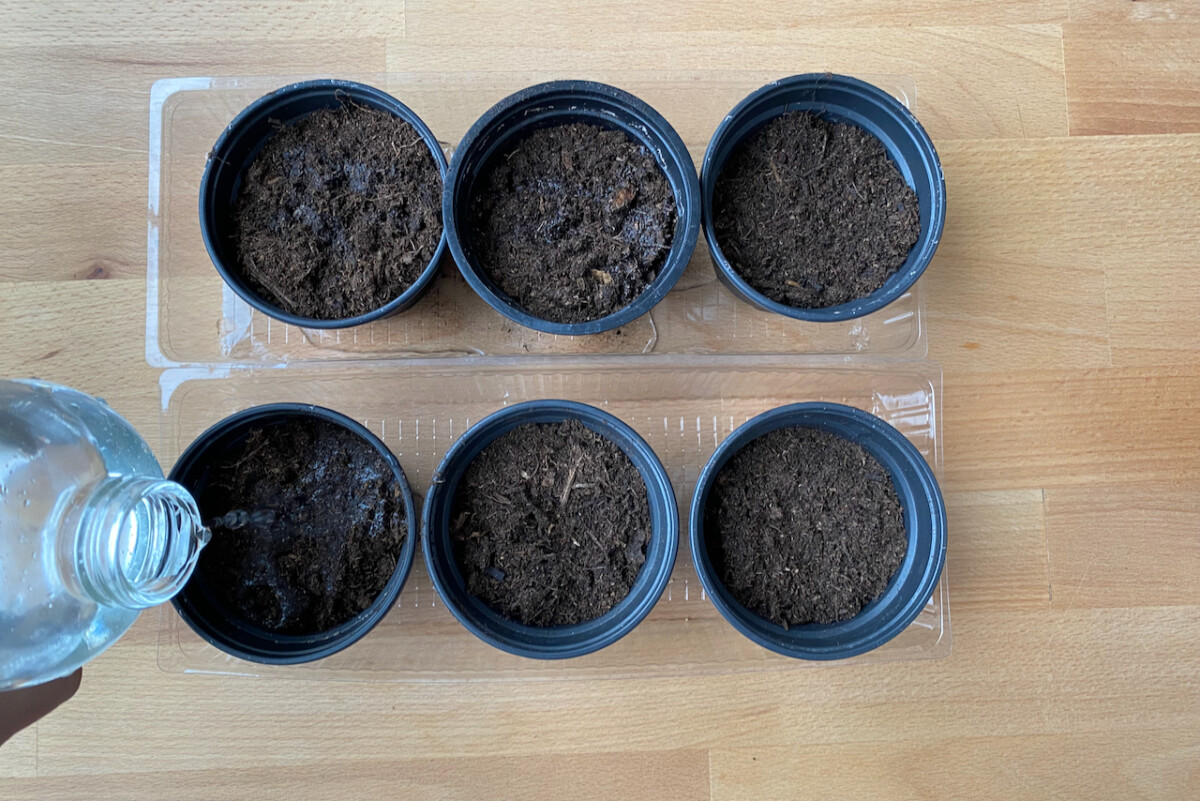
You can choose to use or upcycle whatever pots you want. I’ve used yogurt pots, plastic clam shells from fruit and newspaper pots. But the one thing that always made a difference was whether the container had drainage holes or not. No drainage, no luck.
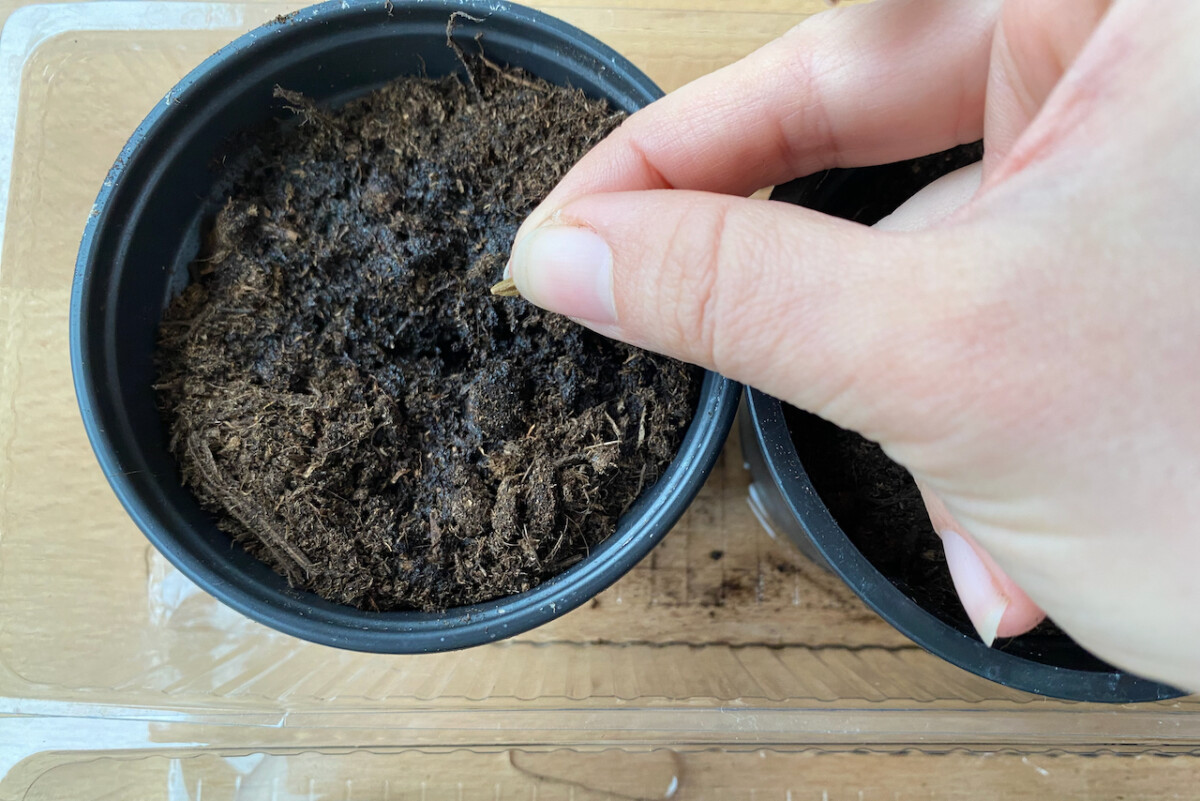
Step 3: Make a slight indentation and plant your seed.
I use the tip of a pencil to make one or more grooves into the soil to plant my seed. In this case, I’m planting larkspur, a seed that needs darkness to germinate.
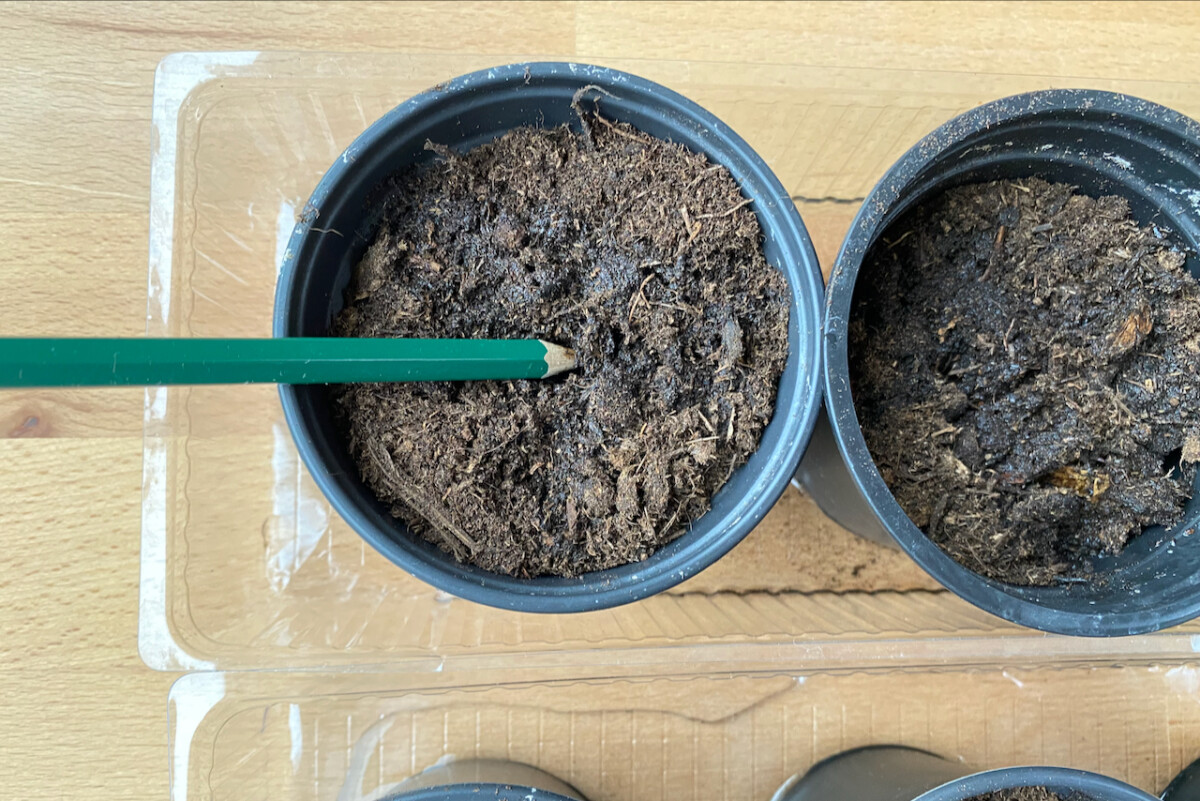
So after I plant it, I cover it up with a bit of potting mix. If needed, I mist the seed in place again.
But as you may have noticed, not all seeds will germinate in the dark. As a very general rule of thumb, the smaller the seed, the more likely it is that it needs light to germinate.
This is not an absolute truth, so always check the seed package or Uncle Google whether that’s true for the specific seeds you’re planting.
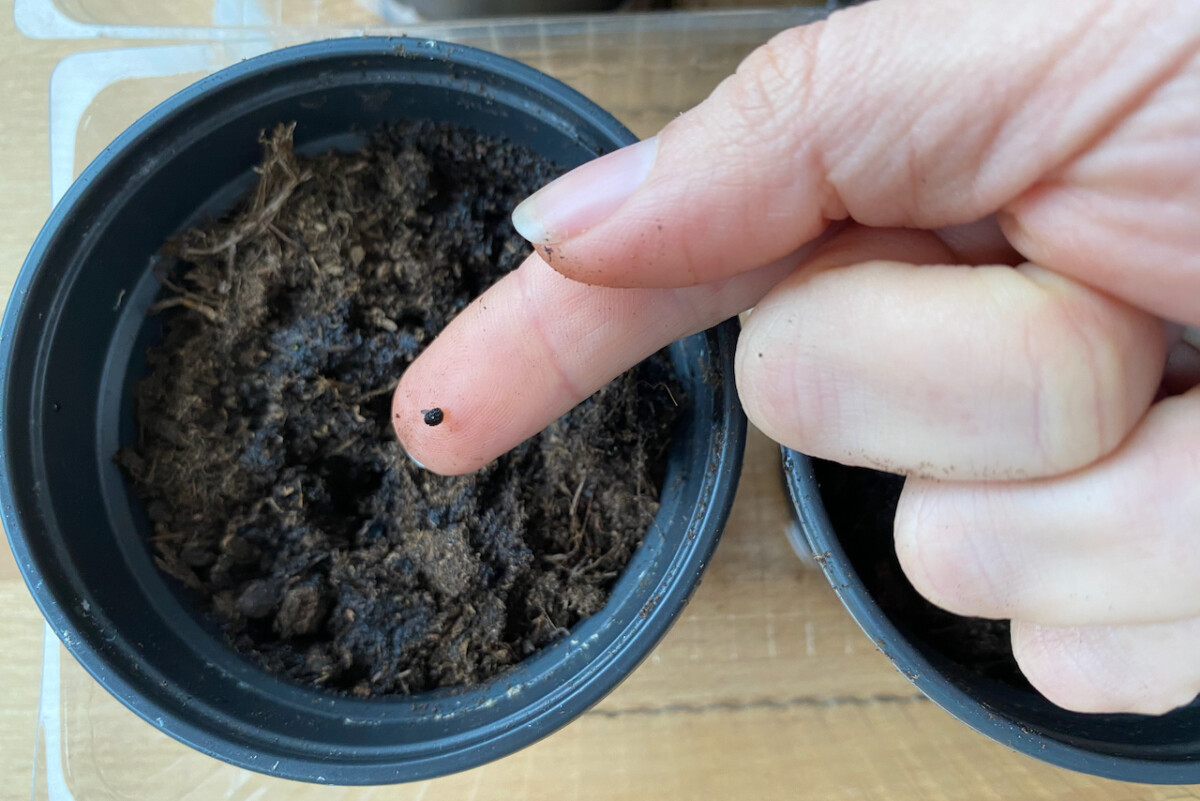
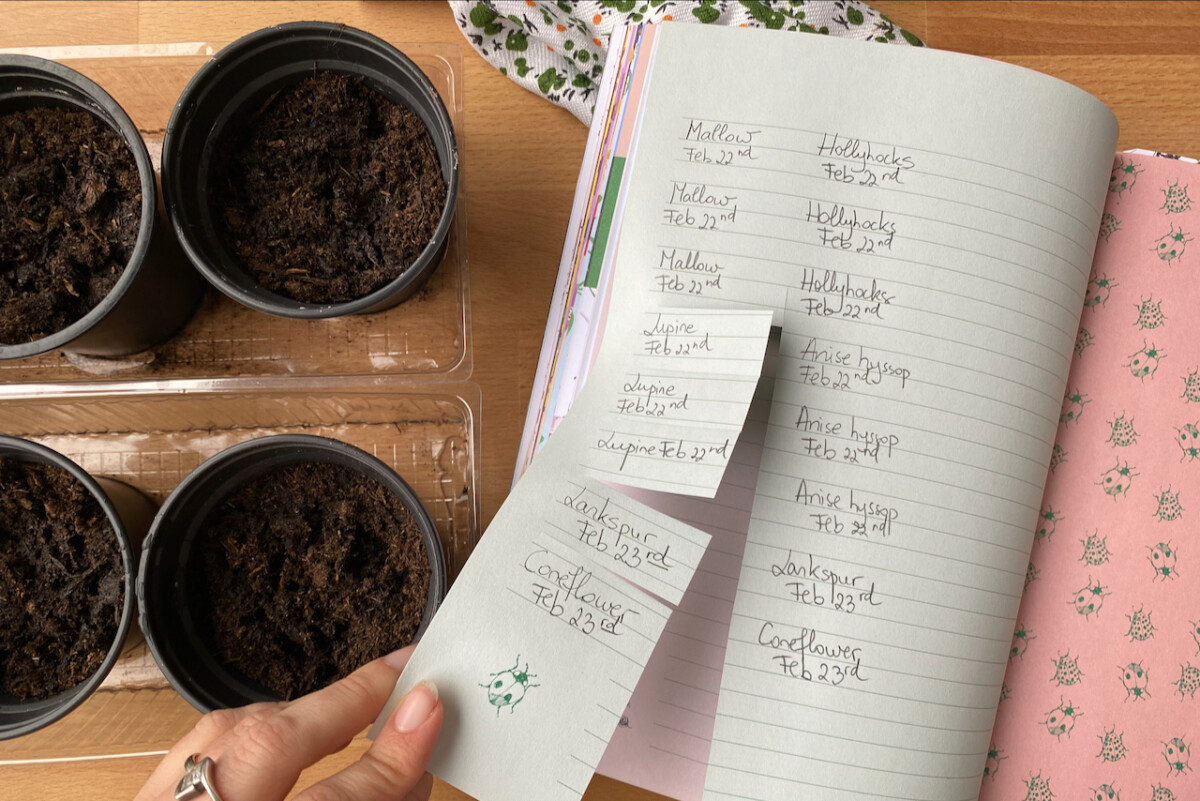
Step 4: Label, label, label!
Do not rely on your memory here. Because when you have about fifty pots of dirt cluttering up every nook and cranny of your living (and sometimes sleeping) space, you won’t remember what you potted up and when.
I label every pot or every tray with the name of the seed and the date I started it.
Step 5: Conserve moisture.
When you start seeds indoors, especially when heaters and radiators are still in use in late winter and early spring, the surface of the soil will dry fast. And once the seed starts germinating then dries out, that’s the end of its life. So it’s a good idea to keep the soil evenly moist, either by using a cloche system, a roll of cling film or any other cover that allows light to penetrate.
I have an indoor mini-greenhouse that works both as a heat and moisture preserver . But until the greenhouse is in operation, a simple top cover will have to do.
Seed starting is both a science and an art, in my opinion. And the more you practice the science, the better you’ll be at the art of seed starting.