At any given moment, I’m ready to shout from the rooftops all the ways in which gardening is helping me take care of my mental health. In addition to teaching me patience and perseverance, it’s also a constant reminder that in gardening, much as in life, there’s a season for pushing hard and a season for rest.
Perhaps the most beneficial mindset shift that I’m learning over and over again is that it’s ok to make mistakes, especially if you’re wise enough to learn from them.
As I was working in the garden this past weekend, I was thinking about the many perennial planting mistakes I made over the years and the lessons I learned on how to fix them. Let me count the ways in which I messed up and maybe you’ll learn from my mistakes too.
Mistake #1: Not planning before planting.
If memory serves me correctly, I was never a kid who constantly asked for things when out and about on a shopping errand. But as an adult, if you unleashed me in a gardening center when I first started gardening, I would come back with a cart chock full of colorful plants. There was nothing wrong with that, of course, except for the fact that I had very little understanding of what I was buying.
Without any experience or knowledge to guide me, I allowed myself to be distracted by all the plant choices without a clear plan of where I was going to plant these perennials once I got home.
Having no plan before I went shopping for perennials meant that I was setting myself up for disappointment. I often bought the wrong plants for my type of soil and for the climate I was gardening in. (Unfortunately retailers can sell whatever they want, regardless of how incompatible some of the plants may be with the location they’re being sold in.)
And every time a perennial didn’t stand a fighting chance where I had planted it, it reinforced the belief that gardening was too complicated. It’s not. As long as you understand the basics.
Solution: Do your research first. I ask myself some questions before I go perennial shopping in spring. What kind of plants would go well with my existing plants? What kind of perennials will thrive in my soil? Which ones would give me more bang for my gardening buck, in terms of staying in bloom longer or being easy to propagate?
Then I draw up a shortlist and, as much as possible, try to resist the temptation to buy plants that haven’t made it on this list. A few might slip through the cracks, but I’m much more likely to have a thriving garden if I stick to a plan.
Mistake #2: Waiting too long to buy perennials in spring.
While I’m generally diligent about ordering my summer bulbs early, there were years when I procrastinated on getting young perennial starters until as late as mid-May. That usually happens when I’m too busy starting my vegetables and flowers from seed, and I put plant shopping on the back burner.
A side effect of buying perennials too late into the growing season is that what I’m looking for is no longer in stock. For example, heuchera, also known as coral bells, seems to fly off the shelves very quickly in my area.
Another result of this procrastination is getting my plants in the ground a bit too late. You may get away with transplanting perennials as late as July if your growing season is relatively long. But I don’t have such a luxury. Where I garden, even a three-week delay might end up stunting the plant for the entire summer. The plant won’t die if you plant it late, but it will also not develop to its full blooming potential.
Solution: Planning over planting is, again, the best lesson I’ve learned in this instance. I now have a gardening calendar where I actually schedule in time to go look at plants and buy them in person from a few local gardening centers.
Mistake #3: Planting perennials outside too early.
This one is tricky to balance because, once I’ve bought the perennials, I have to resist the temptation of planting them out in the garden too early. Some years, we get a string of warm sunny days in March when it seems like everything is possible.
A few years ago, I was tricked into transplanting new perennials from their nursery pots straight into the ground by a very mild week in late March. Ten days later, we had a few days of frost that wiped out a bunch of tender plants, as well as any feeling that I was getting ahead.
Solution: Follow the instructions on the plant labels to the letter. And only plant out tender perennials after the danger of overnight frost has passed in your gardening zone.
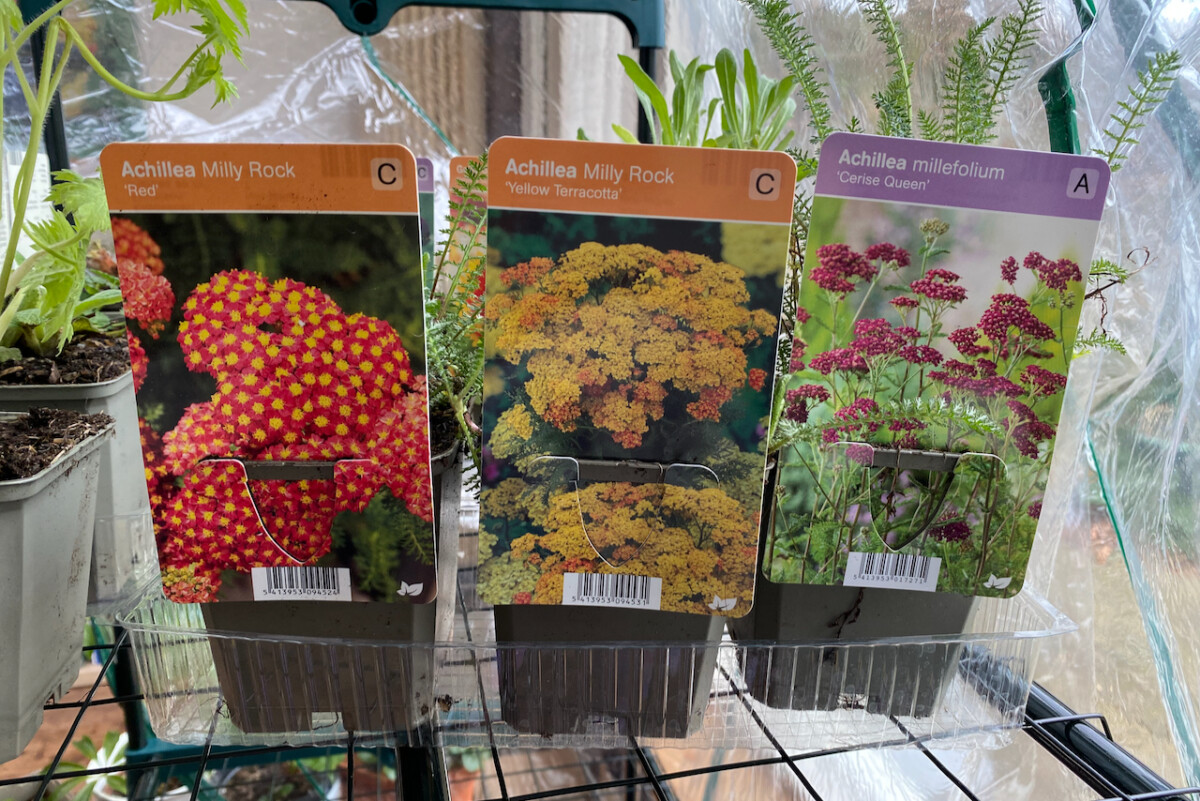
Mistake #4: Not properly quarantining nursery plants indoors.
Uff, I’m still very bitter about this one because it happened recently. I’m usually very diligent about quarantining any new plant that I bring into my home, whether it’s a houseplant cutting gifted by a friend or a purchase from a plant store. It may take a couple of weeks for a plant to show noticeable signs of disease or pests, so I always kept new plants in a separate spot, as far away as possible from my resident houseplants. And I thought that was enough.
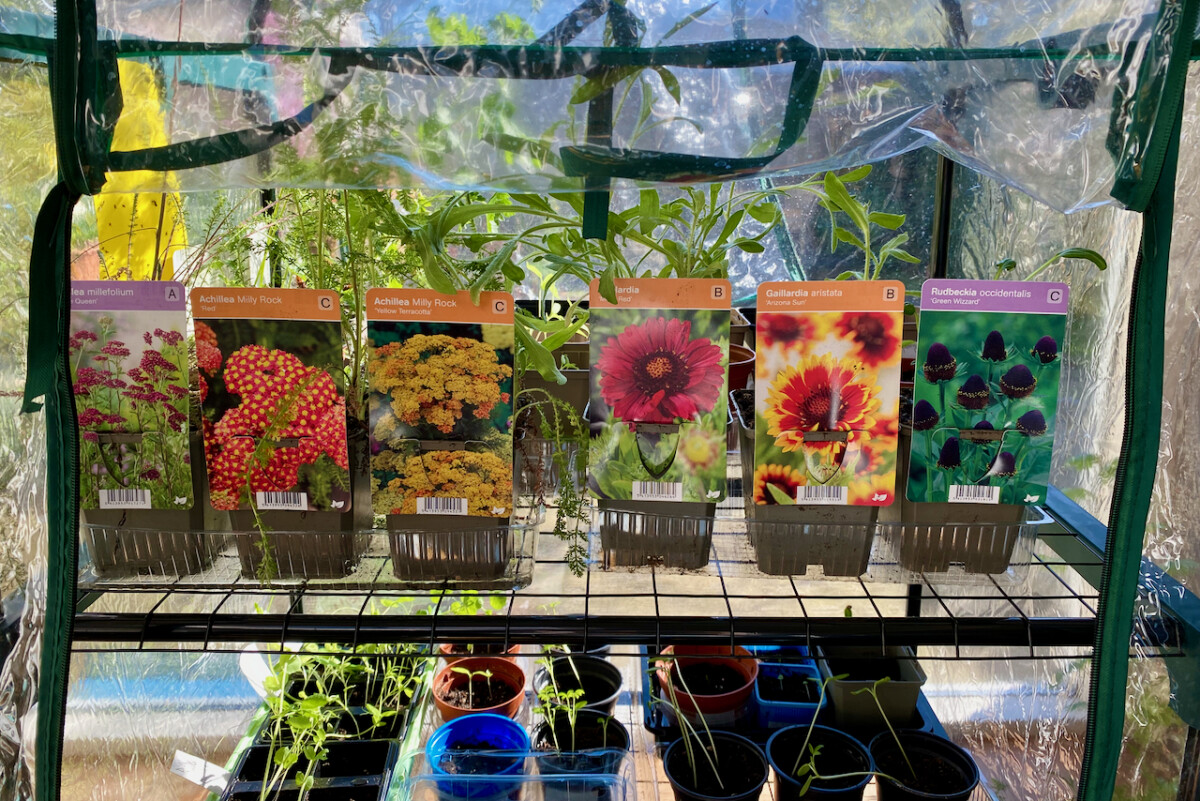
I was just as diligent this year. First, I inspected all the perennials I had bought from my local gardening center (a reputable chain working with large suppliers) as thoroughly as possible. Then I gave them a good wash and looked closely along the stem and at the underside of the leaves for any signs of hitchhikers. Then, as an extra measure, I placed them in my indoor stacked greenhouse to patiently await the move to their forever home outdoors.
Crisis averted! There was no way any pests would transition from these perennials to my beloved indoor houseplants, right?
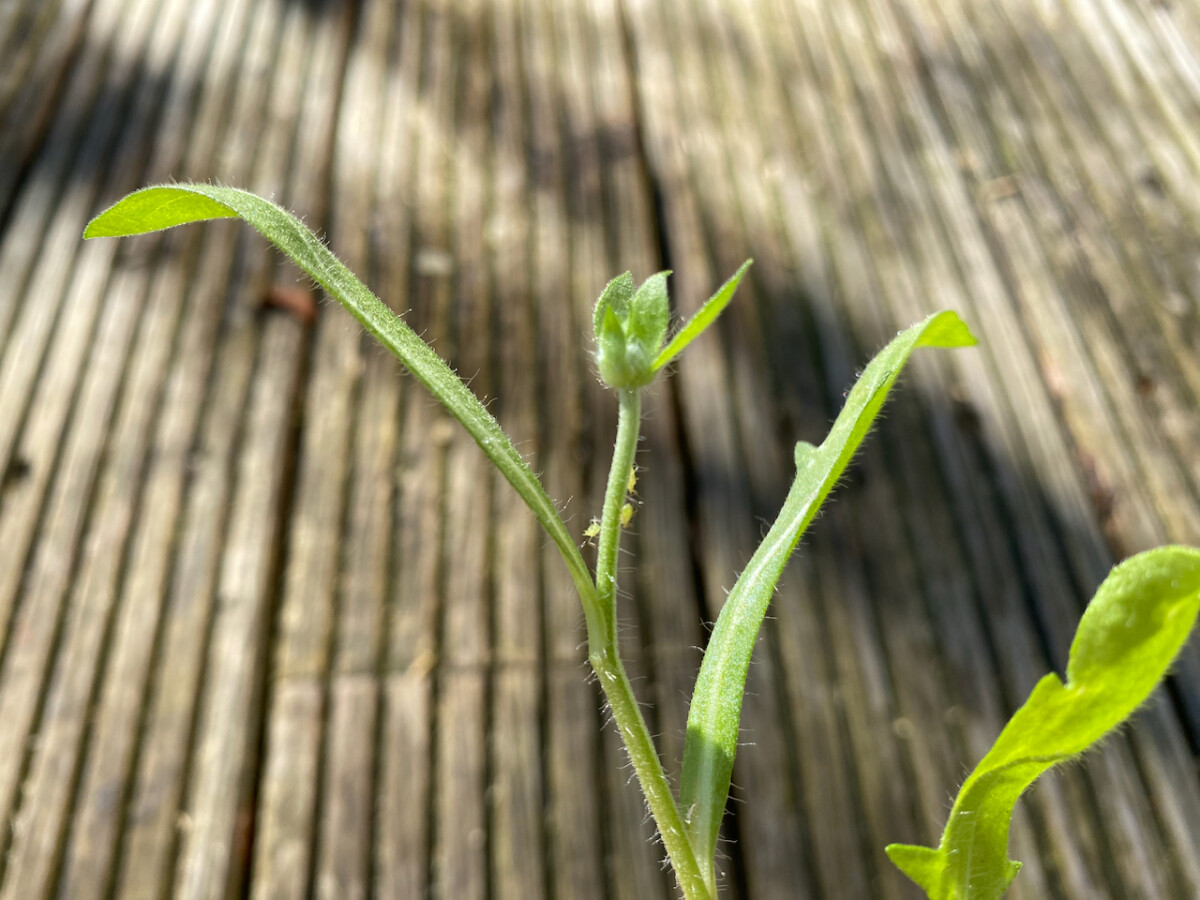
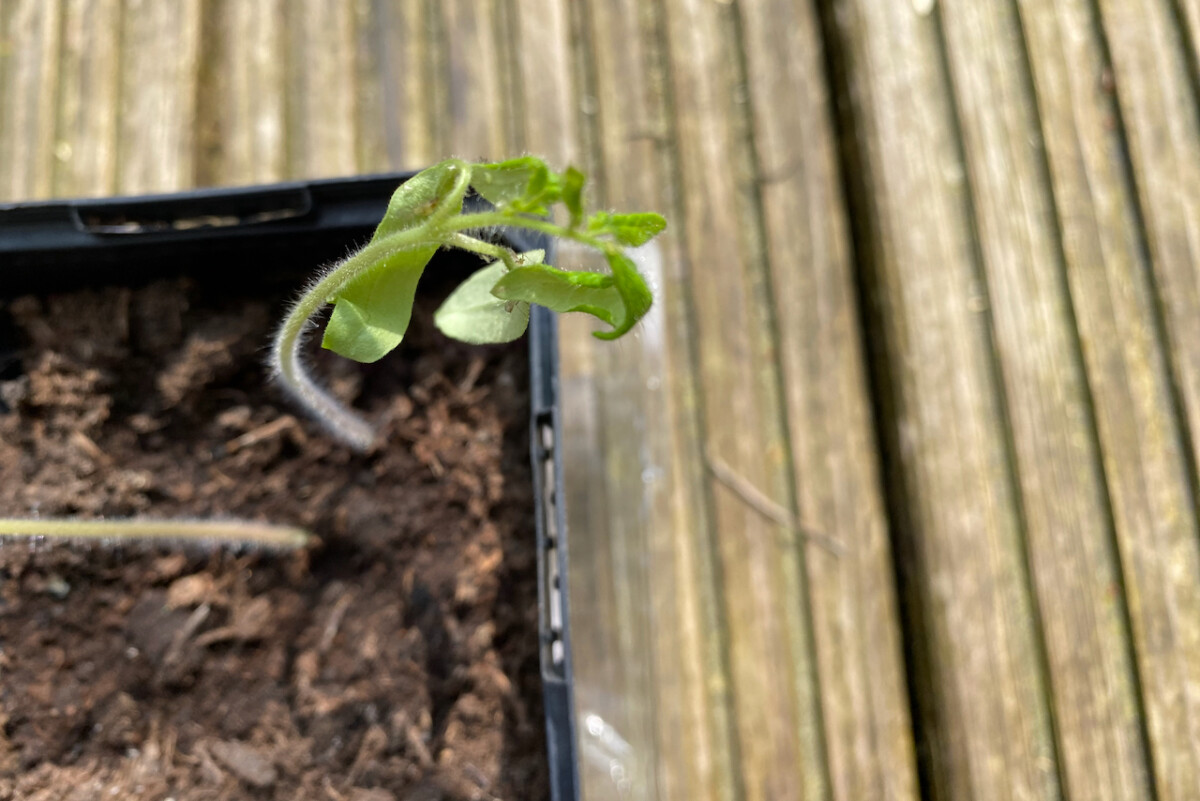
Except that I failed to take into consideration their greenhouse roommates. It turns out there were some aphids on the new arrivals. And these aphids started happily munching away on the tomato seedlings that I was growing in the same greenhouse.
By the time I noticed the intrusion, the damage had already been done. Some of my tomato seedlings were distorted or completely destroyed by aphids. I’ve had to restart them from seed. Talk about a setback!
Solution: If it’s too cold to transfer your new perennials straight into the garden, keep them contained and completely separated from your houseplants and your seedlings.
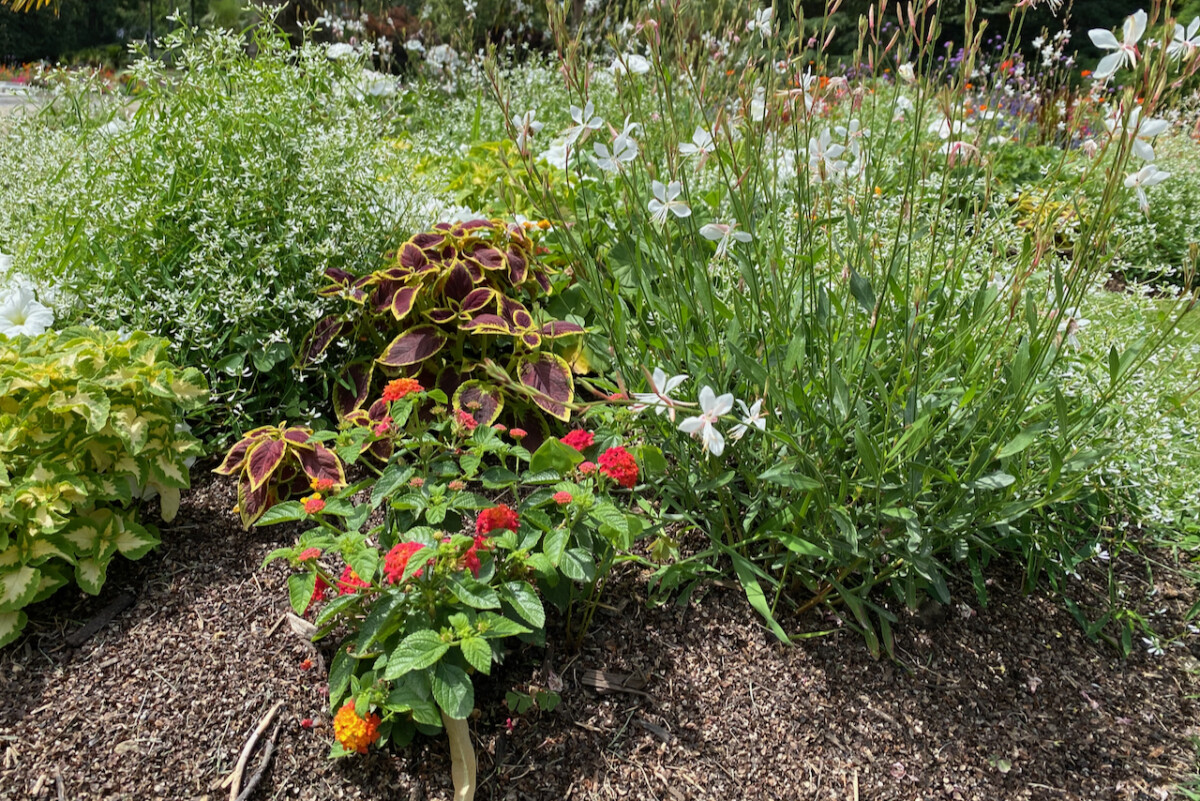
Mistake #5: Not buying enough of some plants.
Now this is a mistake my husband and I made when we were designing our first front yard. After painstakingly pulling out crabgrass, buying a barrel and filling it with spring bulbs (to great effect) and planting a couple of shade-tolerant shrubs, we still had a good surface area to fill.
We decided that a combination of brunnera (‘Jack Frost’) and grasses would bring just the right amount of elegance while still keeping within the limitations of our tight newlywed budget.
But when it was all said and done – and planted – the eight or so clumps strewn around didn’t make for a very cohesive scheme. It would take a few years for the brunnera and the grasses to fill out, by which point we were already moving out.
Solution: My one lesson from this mistake is to either buy enough plants to fill up the space, especially if you’re starting a new garden from scratch; or to group the few plants that you get in a way that looks intentional.
Mistake #6: Not considering the size of the mature plant.
I’ve made this mistake numerous times with numerous plants. As it turns out, I’m very bad at estimating the size of the mature plant when all I’m planting into the ground is a small baby plant. Has this ever happened to you? Having a perennial grow much larger than its allotted space is not the end of the world, of course. On the contrary.
However, this becomes problematic when said plant overcrowds its neighboring plants, when it overshadows the plants behind it (this is more likely to happen in mixed borders), or when it interferes with other elements (such as blocking the view from a window). You can easily fix this at the end of the growing season by dividing the oversized perennial or even transplanting it to a more suitable location.
But there is a way to avoid making this mistake at planting time.
Solution: Again, you’ll find the information about the height of the plant at maturity on the plant labels. But it can sometimes be hard to really envision what that means in situ. In this case, a little simulation will do the trick.

Grab a couple of bamboo poles (or whatever you use for staking tall plants in the garden), mark the expected height of the mature perennials on the poles, then stick them in the garden at the same depth. How do the markings look in comparison with each other and with the surrounding plants or shrubs? Do you need to shuffle them around for a more harmonious display?
Mistake #7: Not considering how the planting site changes throughout the season.
Speaking of not thinking a few months ahead, this perennial planting mistake is along the same lines.
When we plant out our perennials in spring, the surrounding trees are usually bare. With no foliage to cast shade on my garden, I have overestimated the amount of light some of my plants would be getting throughout the summer. It’s also easy to misestimate whether the intended location will be overlooked by other buildings, fences, trees or other structures casting shadows on the garden.
As the trajectory of the sun will change rapidly over the coming months, so will the quantity and quality of the light your perennials will be getting. We talk a lot about the quantity of light a certain plant needs in order to thrive; but the quality of the light is just as important. The morning sun is bright, crisp and clear while the evening sun tends to be rich and warm. Some perennials prefer the morning sun, while others do better in the afternoon sun.
Solution: Track the trajectory of the sun on your property throughout the summer months. The easiest way to do this is by taking photos on sunny days and noting where the sun falls. Notice the sun early in the morning, at midday, at three o’clock in the afternoon and in the evening. If you don’t have the time or the patience to create your own sun map, you can download an app, such as Sunnytrack, to do the calculating for you.
Mistake #8: Not paying attention to details when planting perennials.
I want to believe that anyone reading this knows the basics of planting something. Dig a hole in the ground; remove the plant from the pot; stick the plant in the ground; then fill the hole back in.
But there are some perennial planting tricks that can make the difference between a meh! garden and one that’s the talk of the neighborhood. If I were to pick three details that really make a difference if done right at planting time, it would be these:
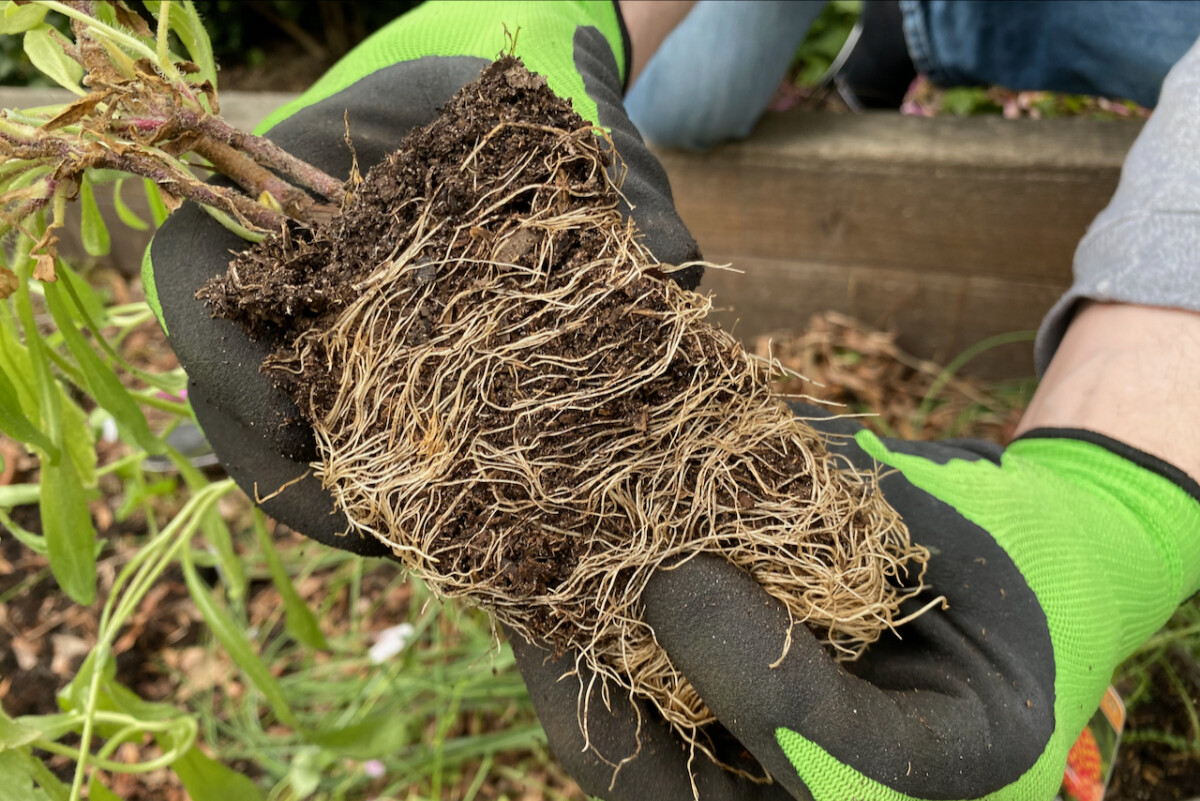
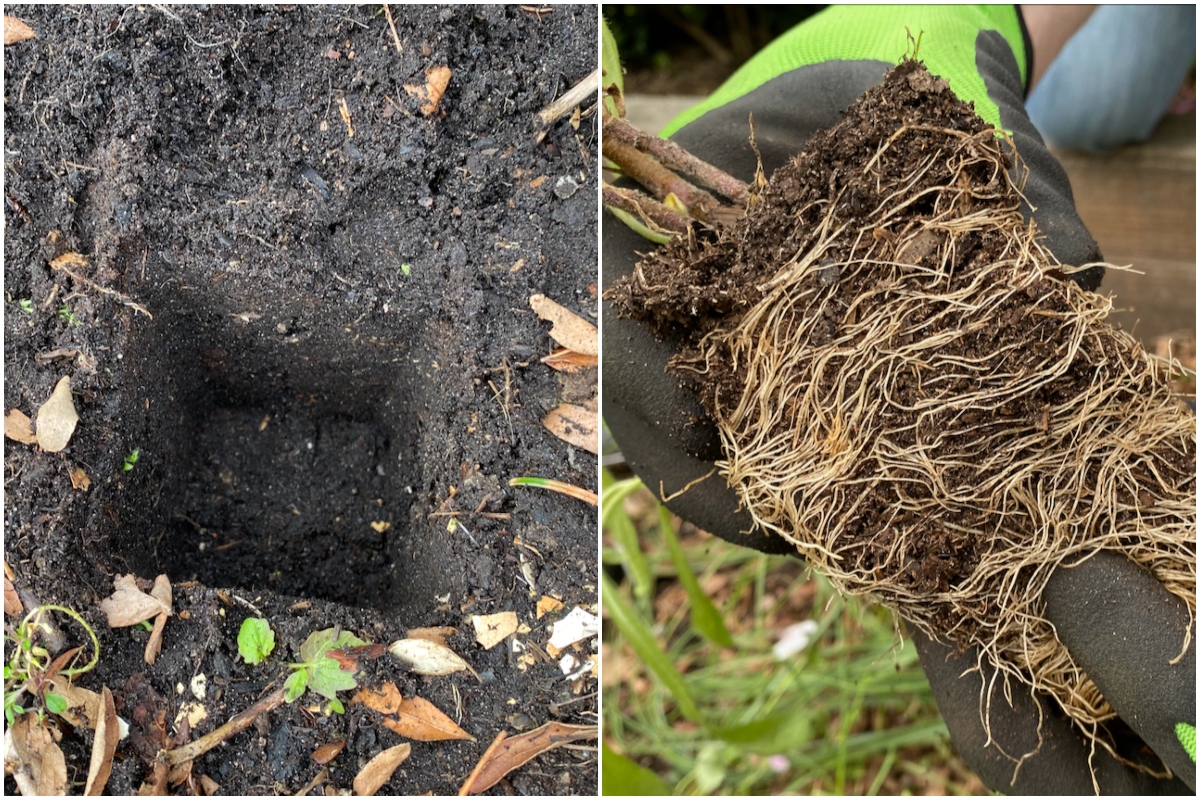
Loosen up the tangled roots of the plant before sticking it in the ground. The easiest way is by using a gentle twisting motion a few times per plant.
Add some fresh compost to the soil you’re planting in, especially if the soil is compacted or clay-heavy.
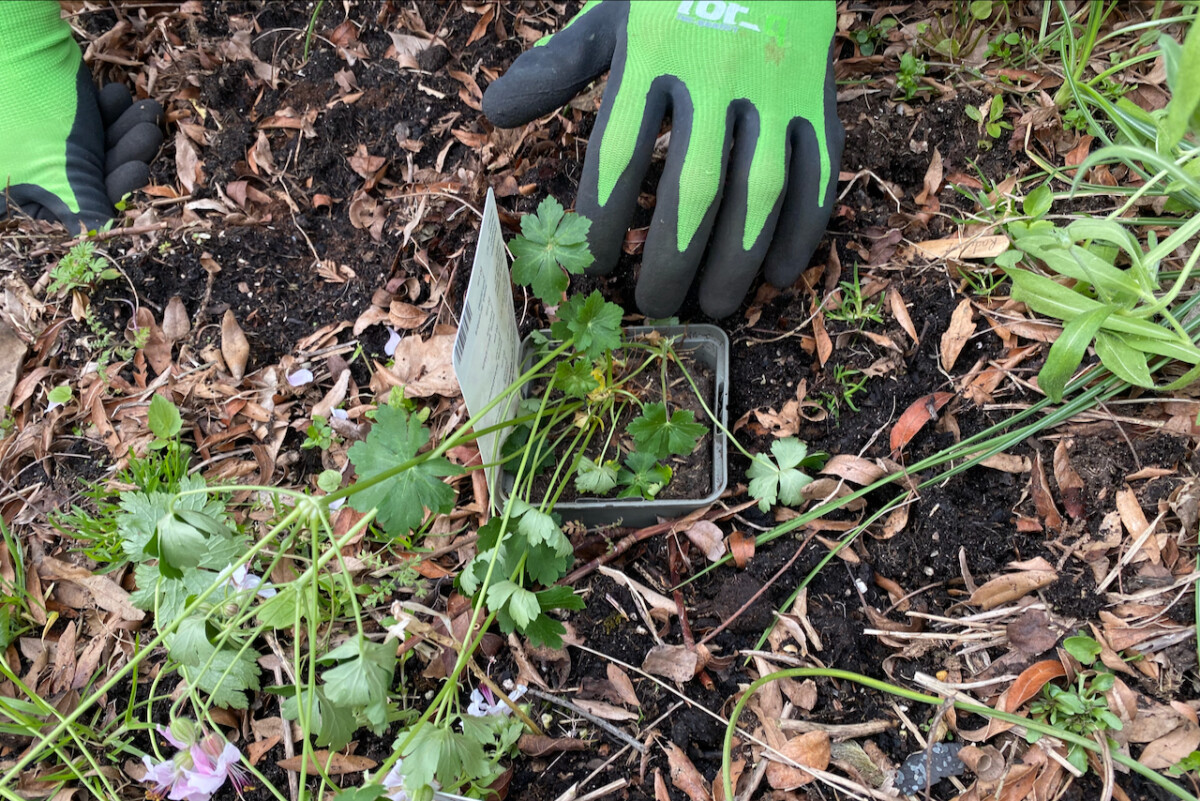
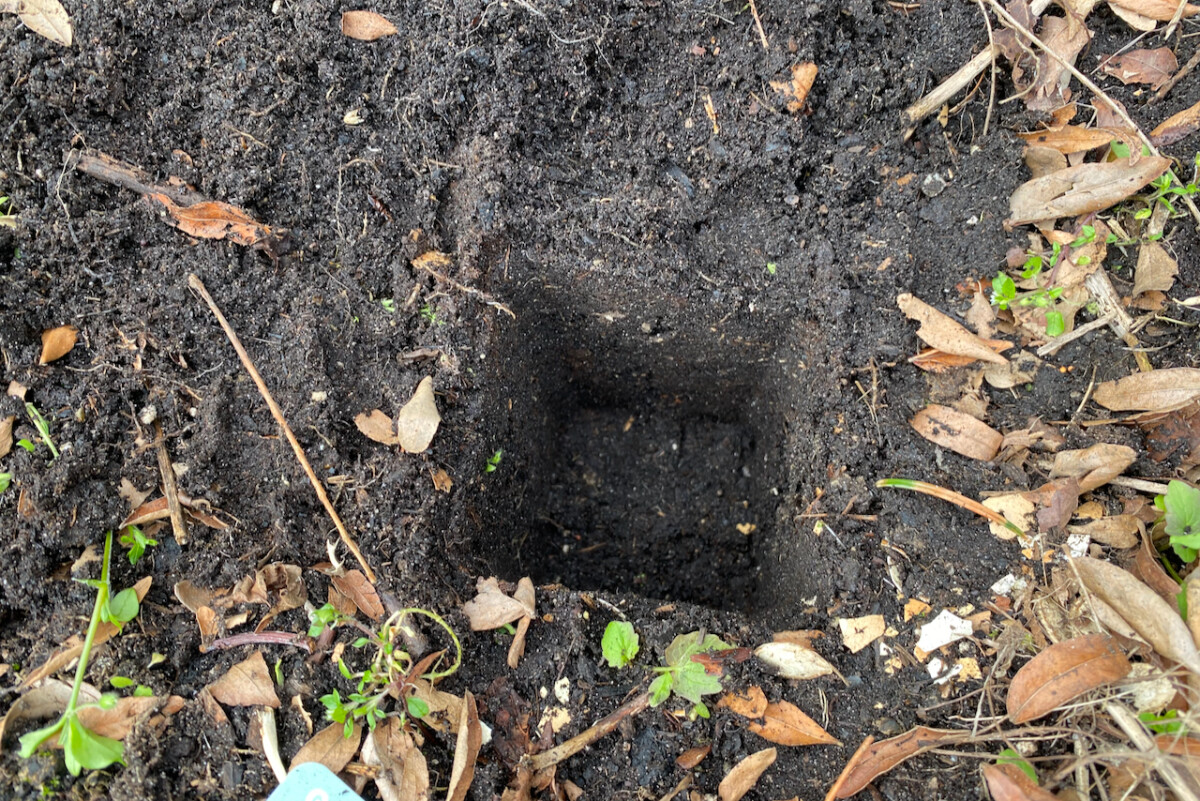
Bury the plant at the right depth. That’s usually the depth of the nursery pot they come in. What I usually do is try to match the size of the pot by burying the pot first, I then shape the planting hole around the pot. After that, I dig out the pot, pull out the plant and transfer it to the hole left behind.
Mistake #9: Ignoring planting aftercare.
This is not a mistake I make nowadays, but one that I notice very often when I walk around my neighborhood. It breaks my heart to see that some gardeners – who otherwise seem to know what they’re doing – take a “survival of the fittest” approach to their newly planted perennials.
It’s very counterintuitive to see plants – that were presumably both a time and money investment – being left to tough it out in the elements. Just like baby humans need nurturing in order to grow healthy and happy, so do baby plants.
Solution: After you’ve transplanted your perennials in your garden, you have to give them a helping hand to get established. That means watering them properly right after planting them. Then you have to keep watering them every day you don’t get rain until they start developing in earnest. Remember that the root structure of young perennials is still underdeveloped; the roots cannot tap deeply to reach water in case of a droughty spring or early summer.
Another good aftercare step is mulching your perennials right after you’ve planted them; this helps lock in moisture and protect the roots from scorching temperatures.
Mistake #10: Not giving your plants a chance to get established before you write them off.
Ok, let’s say you made Mistake #9 and your perennials are looking a bit worse for wear even in mid-summer. Since transplant shock is real, give them a chance to recover at least until next year. Some perennials pull through better than others. So you might miss out on a beautiful floral display if you pull out the plants now.
Remember the brunnera I mentioned in Mistake #5? Yeah, it didn’t look so well during its first summer. But I left it in the ground and it just bounced back and thrived starting its second year.
Sometimes, some plants that are sold as perennials might actually be biennials. I’ve written an entire article on what biennials are and how they differ from perennials and annuals.
In a nutshell, biennials spend their first year just developing their root structure and foliage and they only flower in their second year. It would be a mistake to discard a true biennial just because it hasn’t flowered in its first year.
Solution: Be patient! It’s one of the many lessons you’ll learn from gardening.
And with that piece of advice, we’ve come full circle to what I mentioned in the beginning of the article. I believe that gardening is an iterative process and perhaps the ultimate learning-by-doing hobby. Without a doubt, the lessons that I learned from my mistakes stick with me longer than the ones I’ve learned from books. Have you made any gardening mistakes when you were first starting out?