Between you and me, I was itching to start my dahlias as soon as I hit publish on this article on how to overwinter them. But as I’m writing this, my garden is still covered in an unexpected layer of snow in mid-March. And our last estimated frost day is somewhere at the end of April. So what’s a gardener to do when they have a dahlia compulsion?
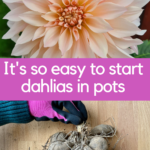
Start dahlias indoors in pots, obviously!
3 Reasons To Start Dahlias In Pots Indoors
I’m planning on transplanting my dahlias outside into the garden in May. So I could have waited until early April to start my dahlias under cover. But I’m choosing to do this task now because of three reasons:
I want to get my dahlia tubers planted and out of the way before I’m knee-deep in starting vegetable seeds;
My growing season is quite short, so I’m attempting to get ahead of it by starting as many plants indoors as possible.
I’m planning on taking cuttings from these dahlia tubers before I take them out into the garden. The high-quality organic tubers that I bought were pricey (no regrets!), so I’m trying to get as much bang for my dahlia buck as possible. These cuttings will also need to “take” and grow before I transplant them outdoors (which will probably happen in early June).
How I start dahlias in pots, assembly-line style
When I’m starting dahlias in pots, I organize all my materials in a systematic fashion, creating an assembly line on my back porch. I like to work this way because it makes it easier to keep track of what varieties of dahlia I’m planting.
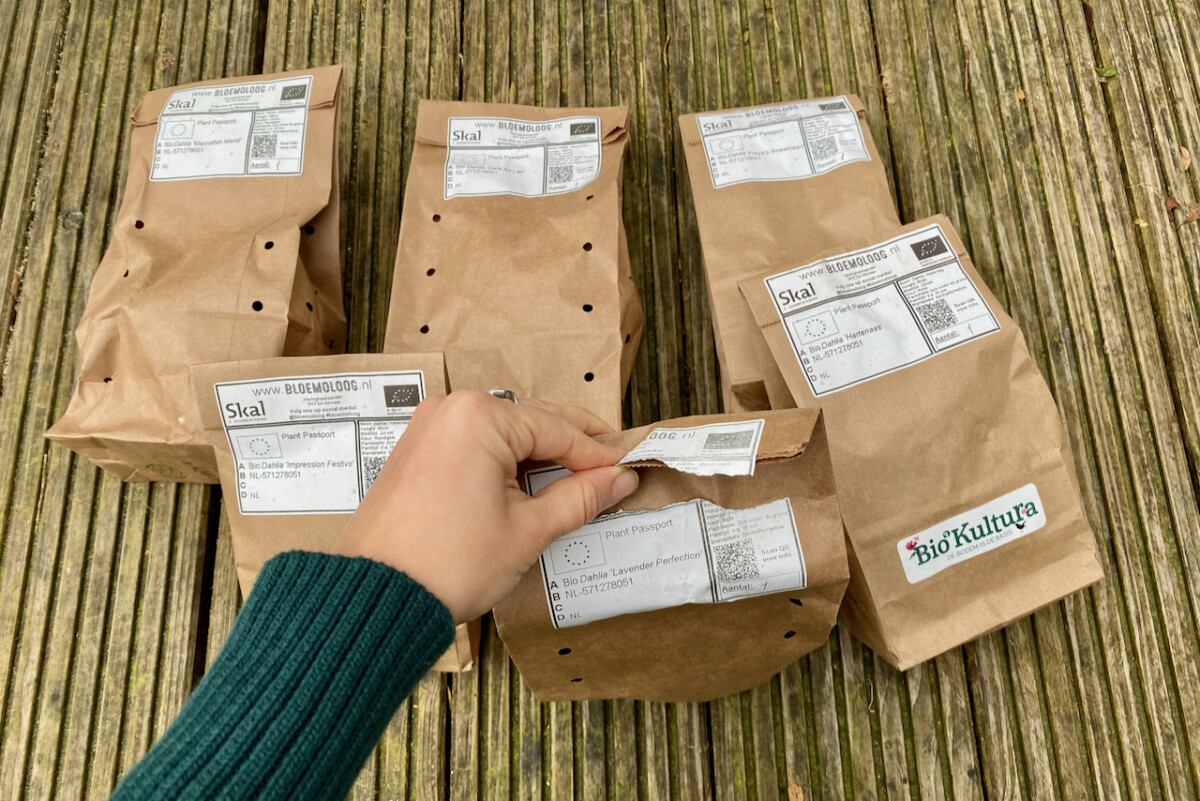
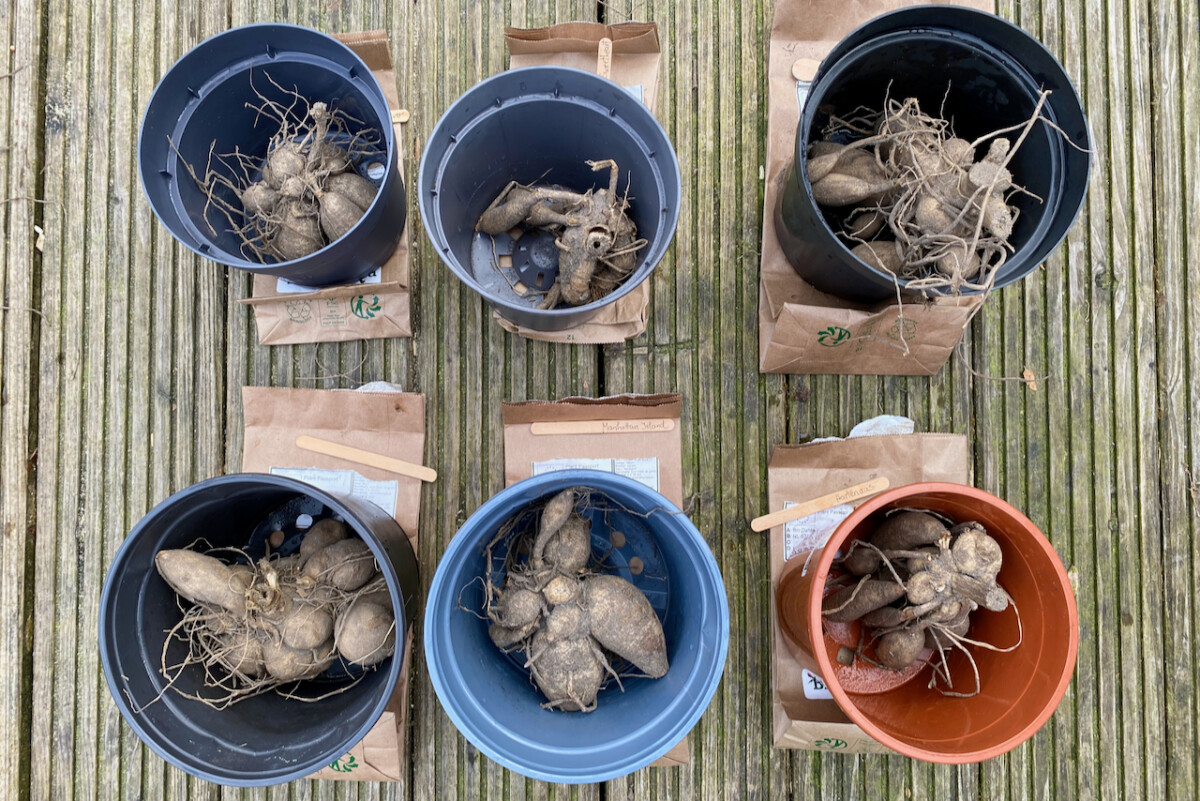
My curiosity and appetite got the better of me when I was ordering the tubers, so I bought six varieties of dahlia, ranging from small ones suitable for containers to perhaps the most beautiful of dinner plates, ‘Cafe au Lait.’
Here’s how I start my dahlias indoors:
Step 1: Write and organize the labels.
Isn’t this the last step in planting? Normally, yes! If I were planting anything else, I would write and stick the labels in the pots last. But since I’m planting six varieties of dahlia, I need to keep track of which is which. And once you’ve opened the bag, one potato-like tuber looks just like another. So in the interest of not getting overwhelmed, I get the labels ready before I get my hands dirty, quite literally.
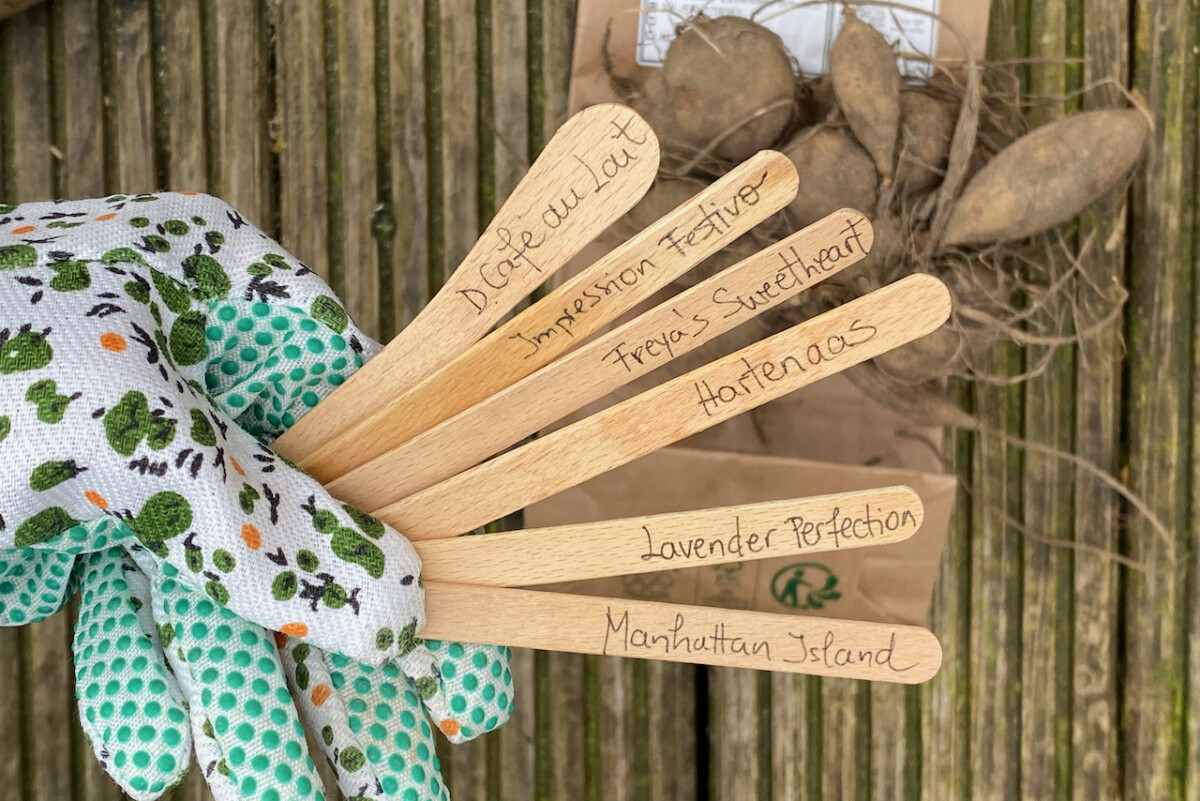
This year, I’m starting the following dahlias:
Dahlia ‘Cafe au Lait’ – a classic dinner plate variety in very pleasant shades of mocha and peach;
Dahlia ‘Lavender Perfection’ – another dinner plant staple that’s a bit more pink than lavender, in spite of its name;
Dahlia ‘Manhattan Island’ – red as red can get with a creamy yellow center.
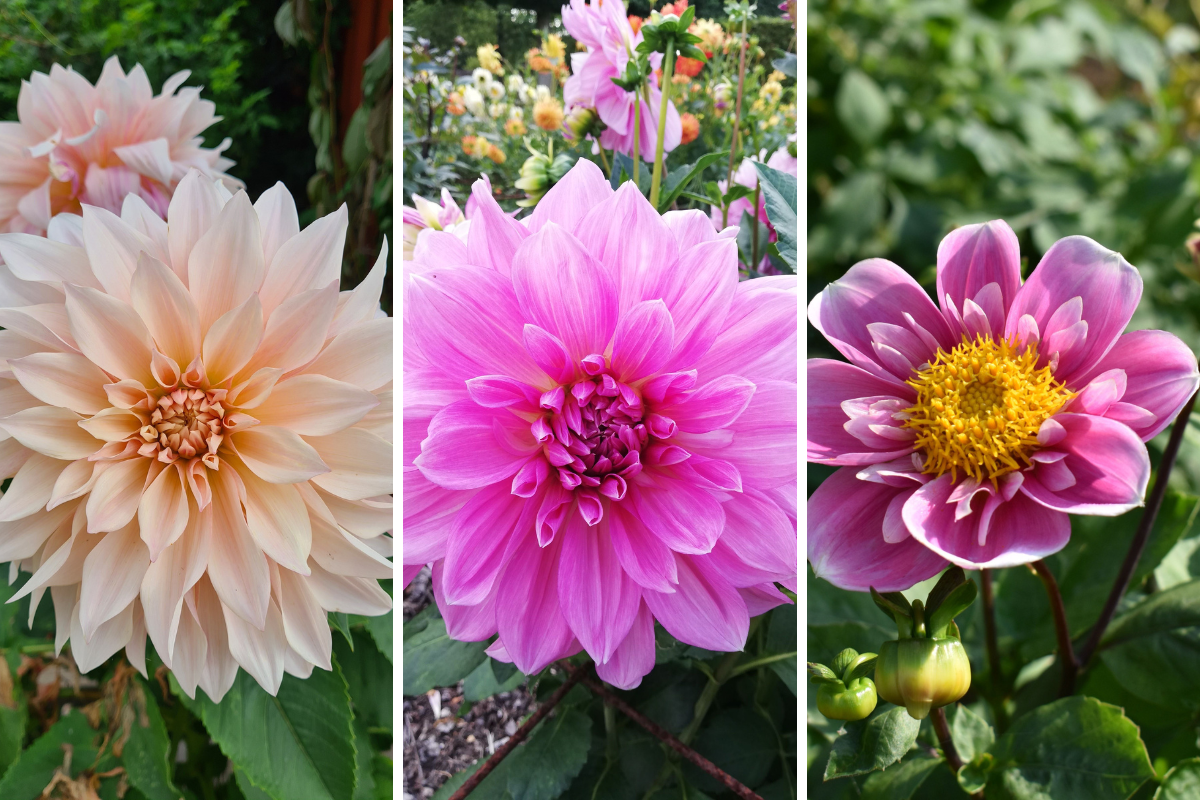
Dahlia ‘Impression Festivo’ – a small bright-red dahlia with creamy yellow edges along the inner petals. It’s suitable for growing in containers and small spaces.
Dahlia ‘Freya’s Sweetheart’ – a petite, fuchsia-colored dahlia with thin white streaks on the edges of the petals;
Dahlia ‘Hartenaas’ – a soft-pink dahlia with a frizzy collar and bright-yellow button center;
The first three dahlias on the list will grow large, both in terms of the size of the blooms and the height of the stems.
The latter three were curated by the vendor in a “balcony pack.” The flowers will be small, but very brightly colored, while the stems will also stay short. If I wanted to, I could leave these three to grow in pots. (I haven’t decided yet.)
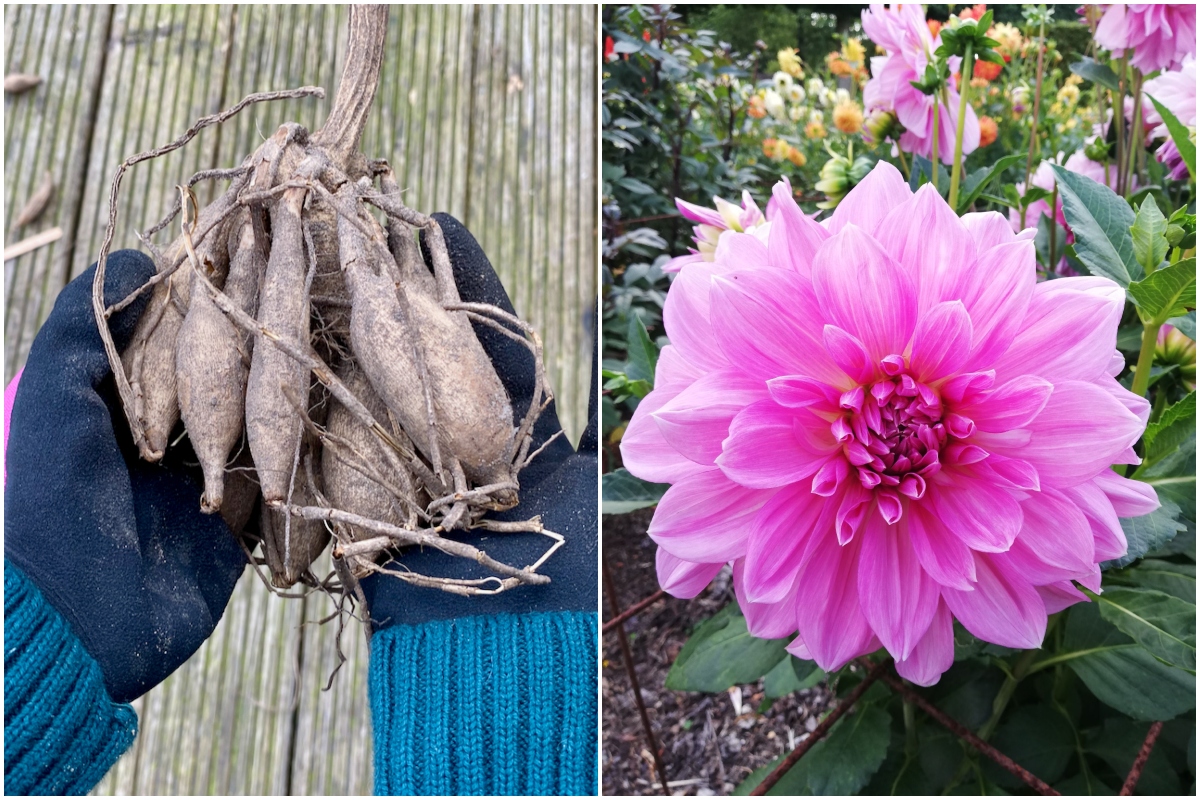
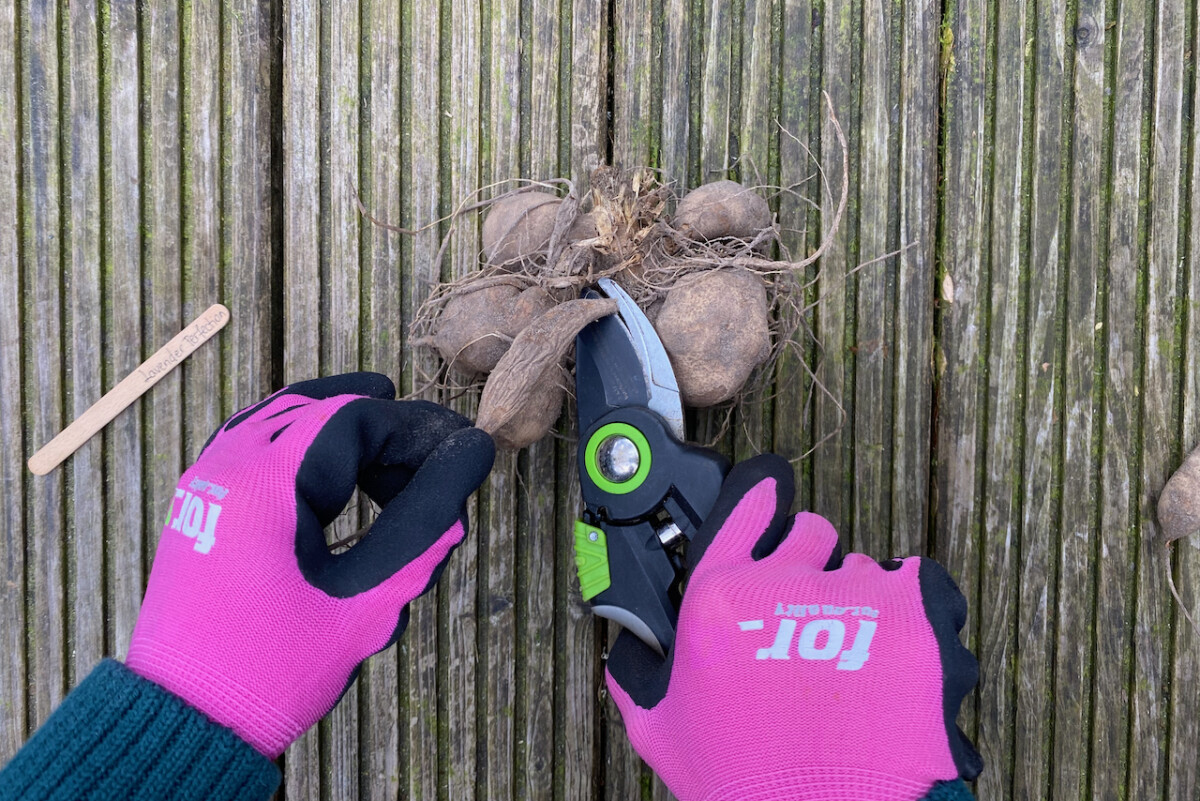
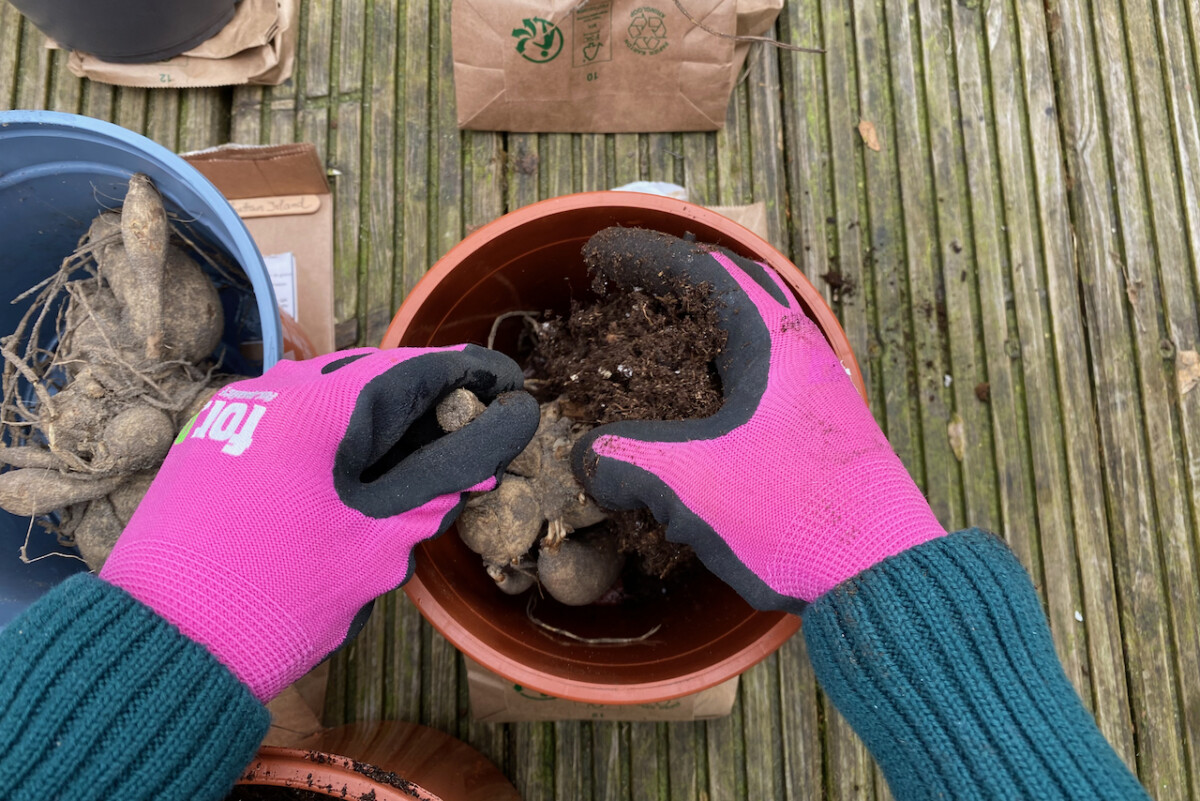
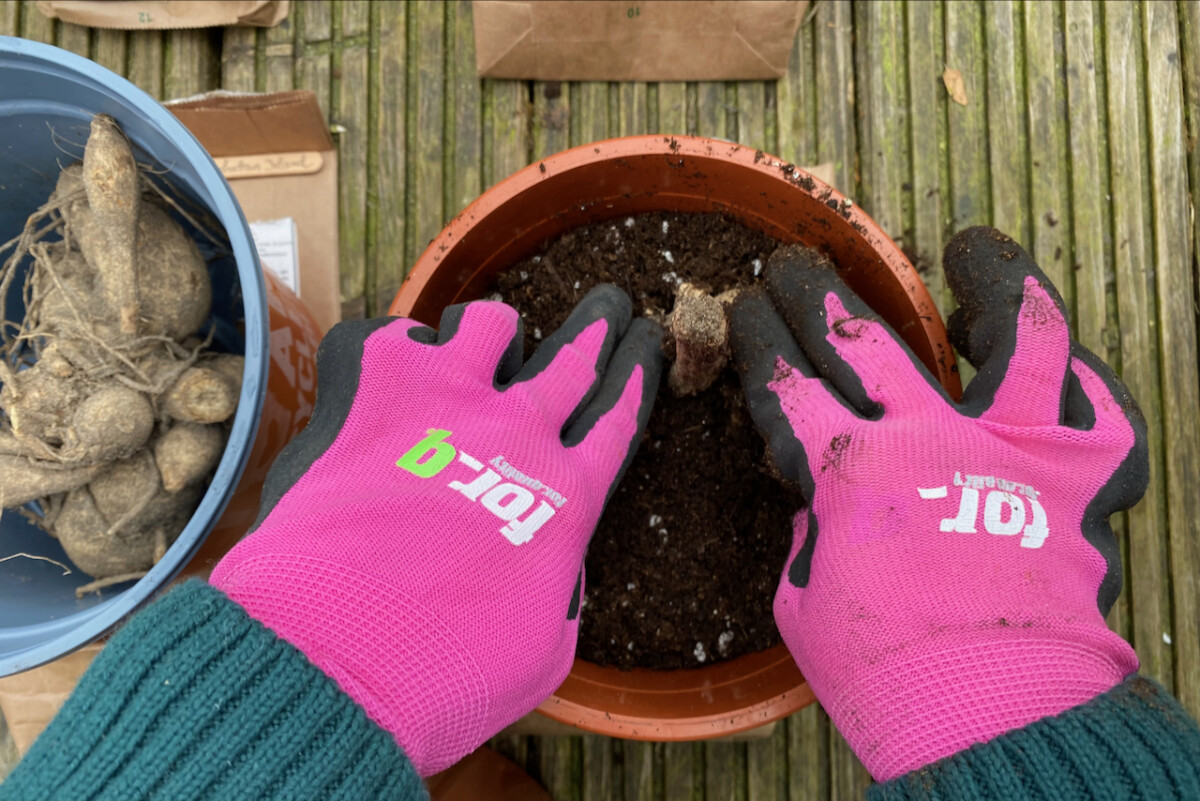
Step 2: Clean up the tubers.
I was tempted to skip mentioning this step, because it’s something I do instinctively. Until my husband, who was kindly taking photos of my pottering hands, asked me a simple question (simple to me).
Some small tubers had come loose in the bag, so when I put them aside, he asked “Aren’t you planting those?” I wasn’t, but I had to explain why. And then I thought that any newbie dahlias growers would have the same dilemma. To plant or not to plant the loose tubers?
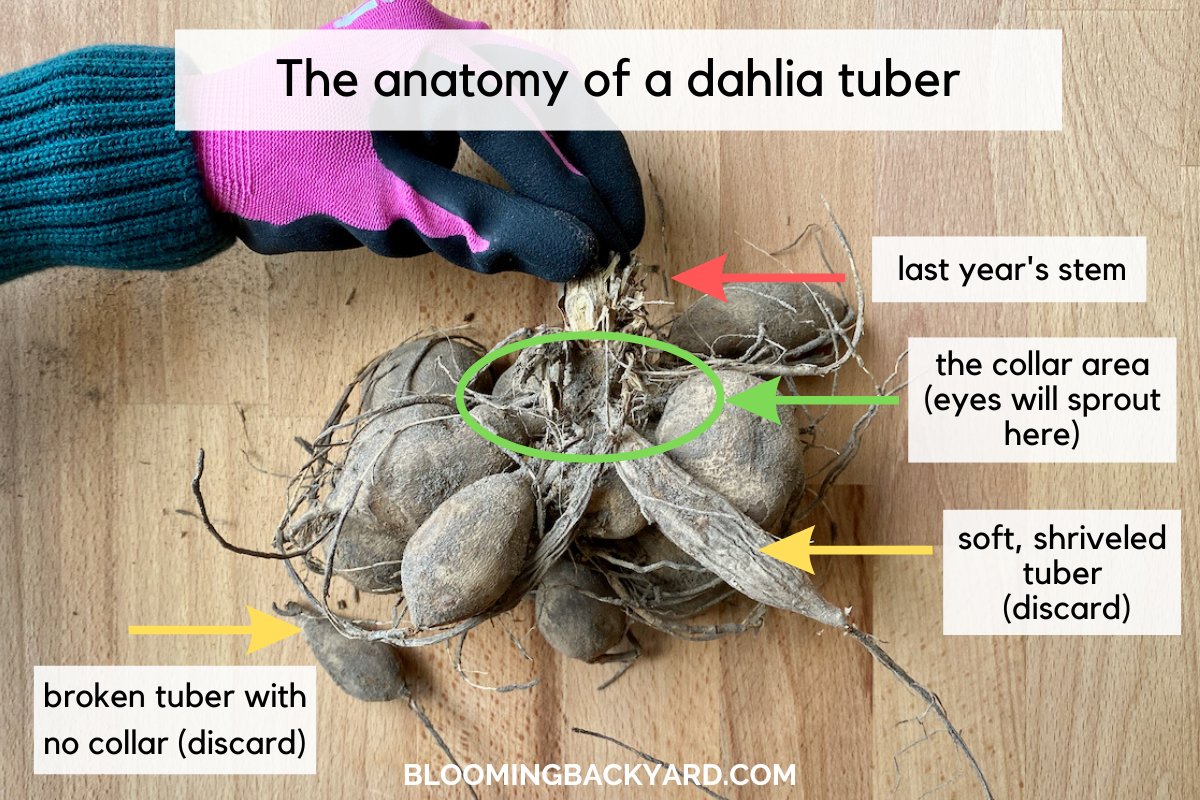
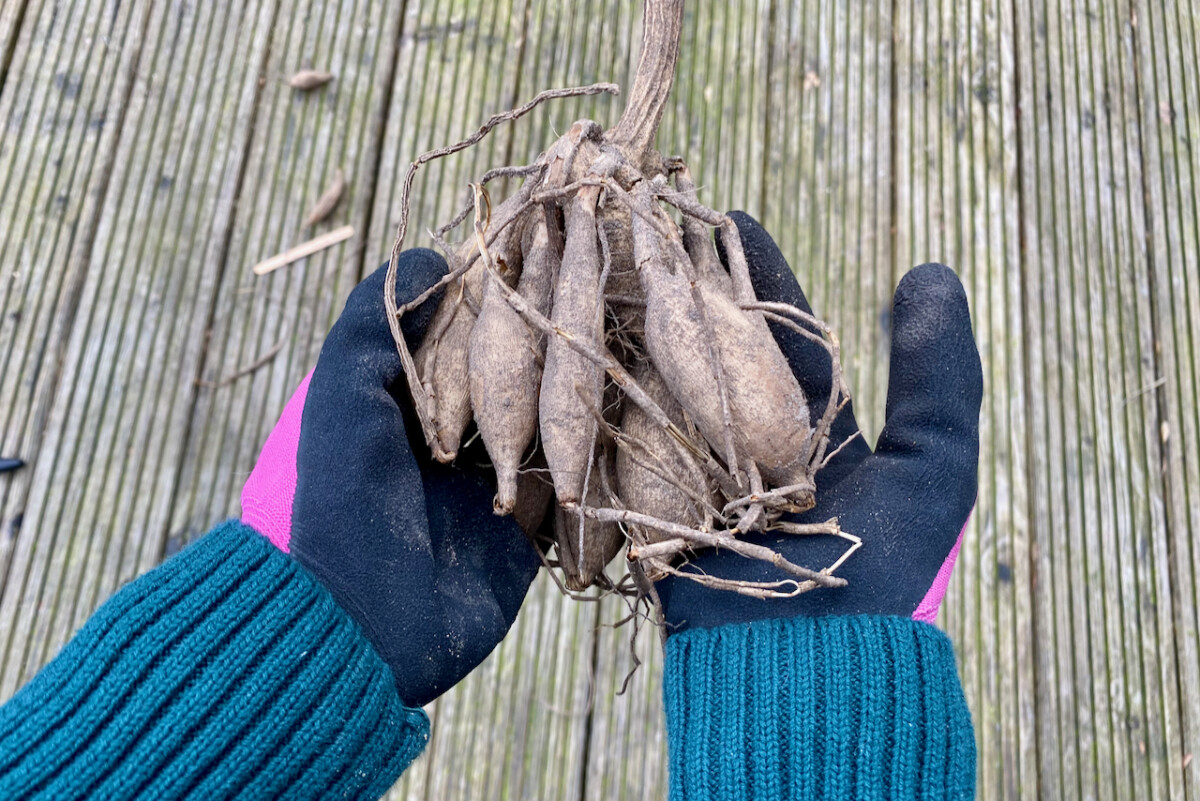
Let’s look at the anatomy of a dahlia tuber structure. You have the old stem (that one will go up when you pot it), the roots (they go down) and in between a collar and a cluster of tubers. The new shoots will come out of the collar, which is the part that’s still attached to the main stem. The shoots will first appear as tiny “eyes” all around the top of the tuber (which is also the bottom of the stem).
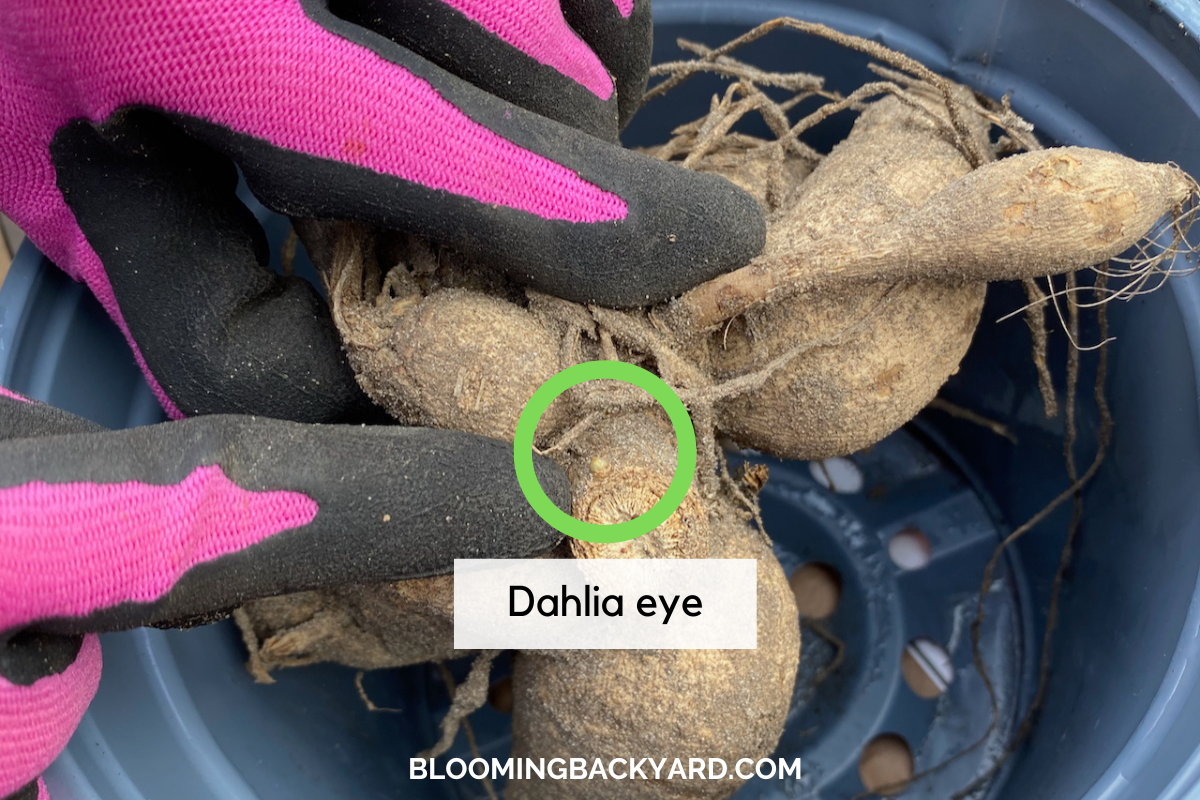
So it’s very likely that nothing will grow out of the tubers that have come loose in the bag (and that have no collar, so no “eyes”). This is why I’d rather not crowd the pots with them.
If you want to test this, you can save them in a paper bag and plant them straight in the garden in June. But don’t expect miracles.
I bought the tubers from a reputable vendor, so I trust they’ve already done this inspection and have done their best to send me high-quality material. But some things still fall through the cracks. So while I’m inspecting the tubers, I’m also removing the growth that is dry, rotten or soggy. A simple squeeze test will do the trick. If the plant material feels too soft or too hollow to the touch, chances are it’s not viable anymore.
This step is especially important if you’ve stored the tubers yourself over the winter months. If the tubers get too cold or frozen, their cell structures might break and you’ll get dry, papery tubers that are no good.
On the other hand, if they were stored in a moist container with not enough airflow, they might have become soggy, mushy and rotten. These tubers will also no longer be viable. So it’s best to remove and discard any such tuber before you bother putting them in the ground.
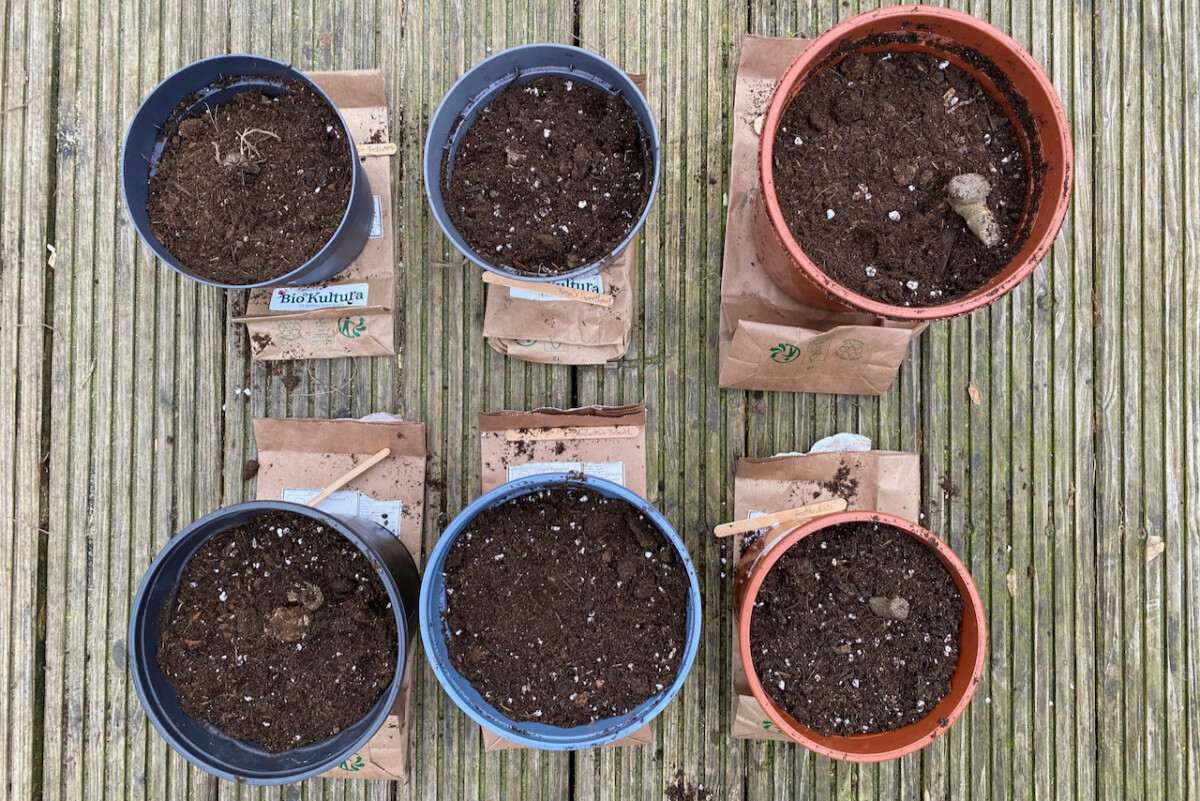
Step 3: Find the right-sized container.
This may not sound like a big deal, but it is. If the container is too large, the tendency will be to fill it up with too much potting soil. And at this point, when there aren’t any roots absorbing moisture out of the soil, that choice spells trouble.
It’s ok for the tubers to be a little bit cramped, but don’t squeeze them so tightly so as to have them bulge out through the container. The crown needs to have enough room for the new roots to start growing.
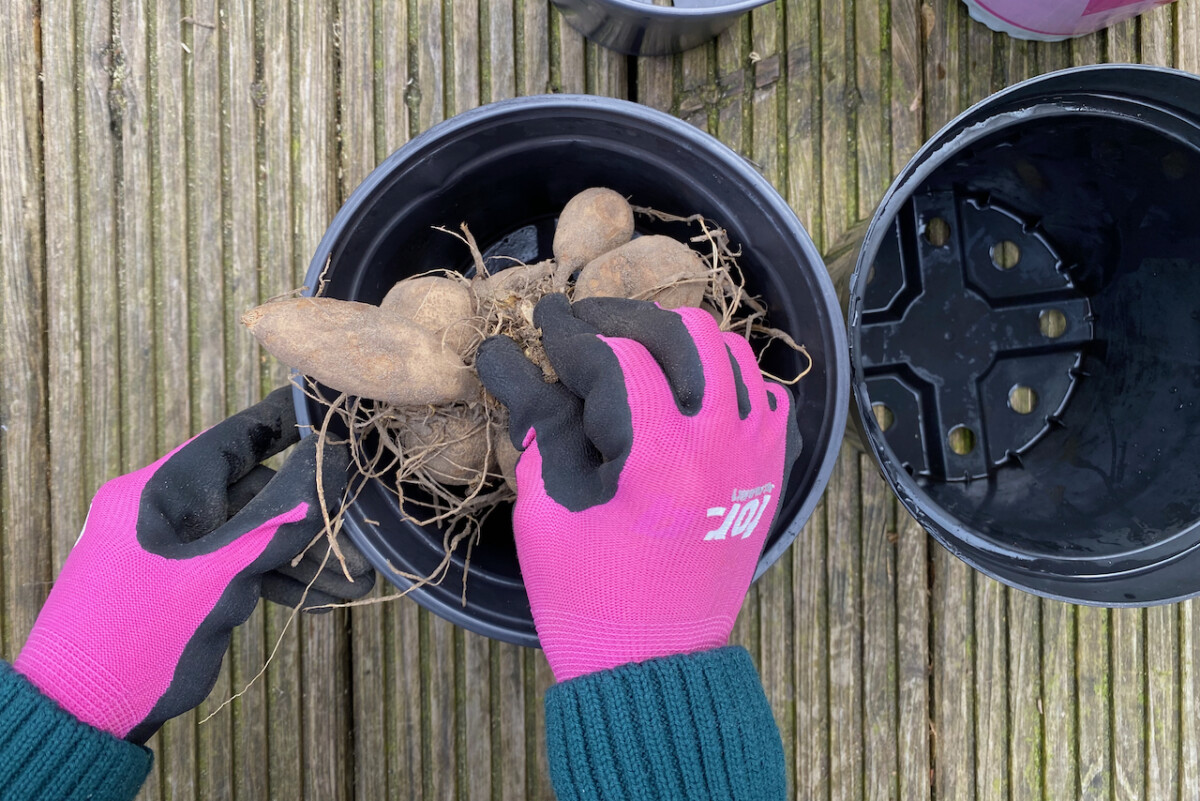
So before I decided on which dahlia crown goes where, I played a short game of musical chairs with my containers.
Placing the pots on the labeled bags made it easier to keep track of the tuber varieties. You may have noticed this was a task I was very meticulous about all throughout the potting up process.
Step 4: Get the potting mix ready.
Now that the tubers are all in order, it’s time to start playing in the dirt. I bought a potting mix suitable for containers and bulb starting. But since I will keep these pots indoors for at least six more weeks, I wanted to make sure the soil is permeable and loose enough.
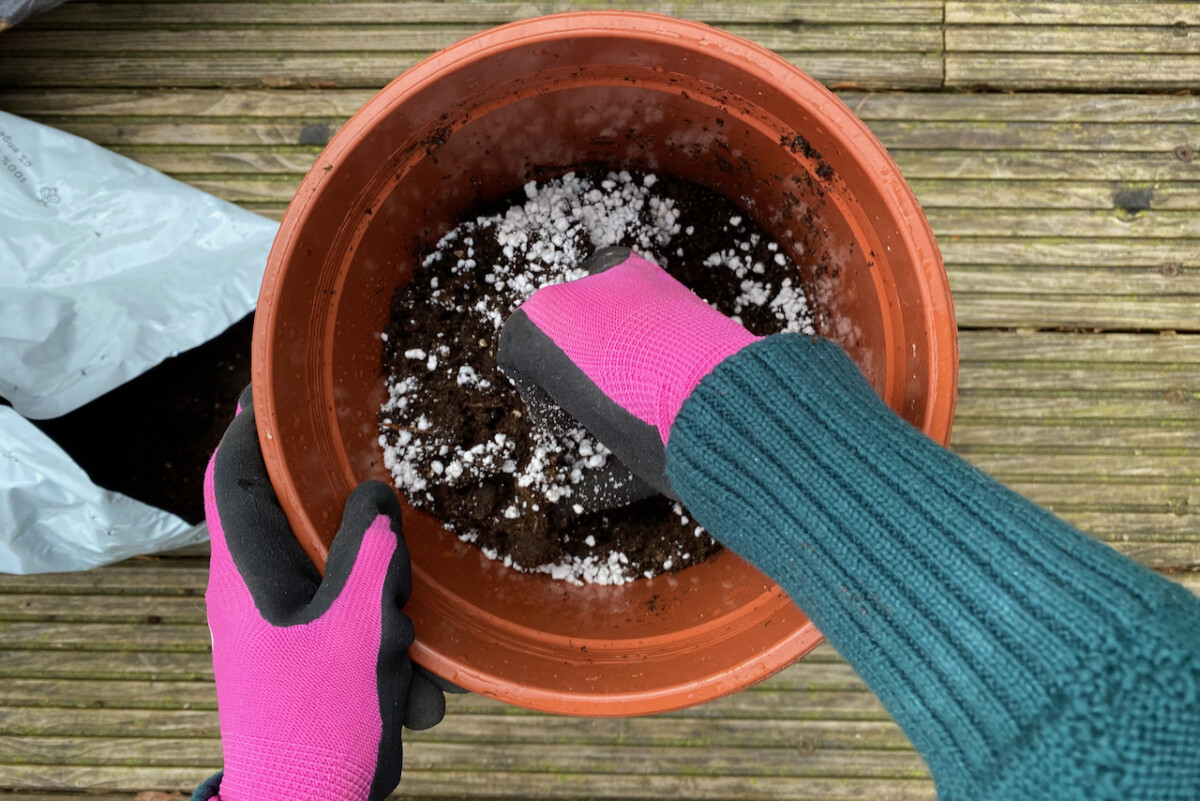
The containers won’t be in the sun and won’t have much airflow indoors – two factors that will slow down the water evaporation – so it’s essential for the soil not to retain too much water.
That’s why I added another handful of perlite (about 15-20 percent of the total) to the potting mix. If you think the potting soil you’re using drains properly, you can skip this step.
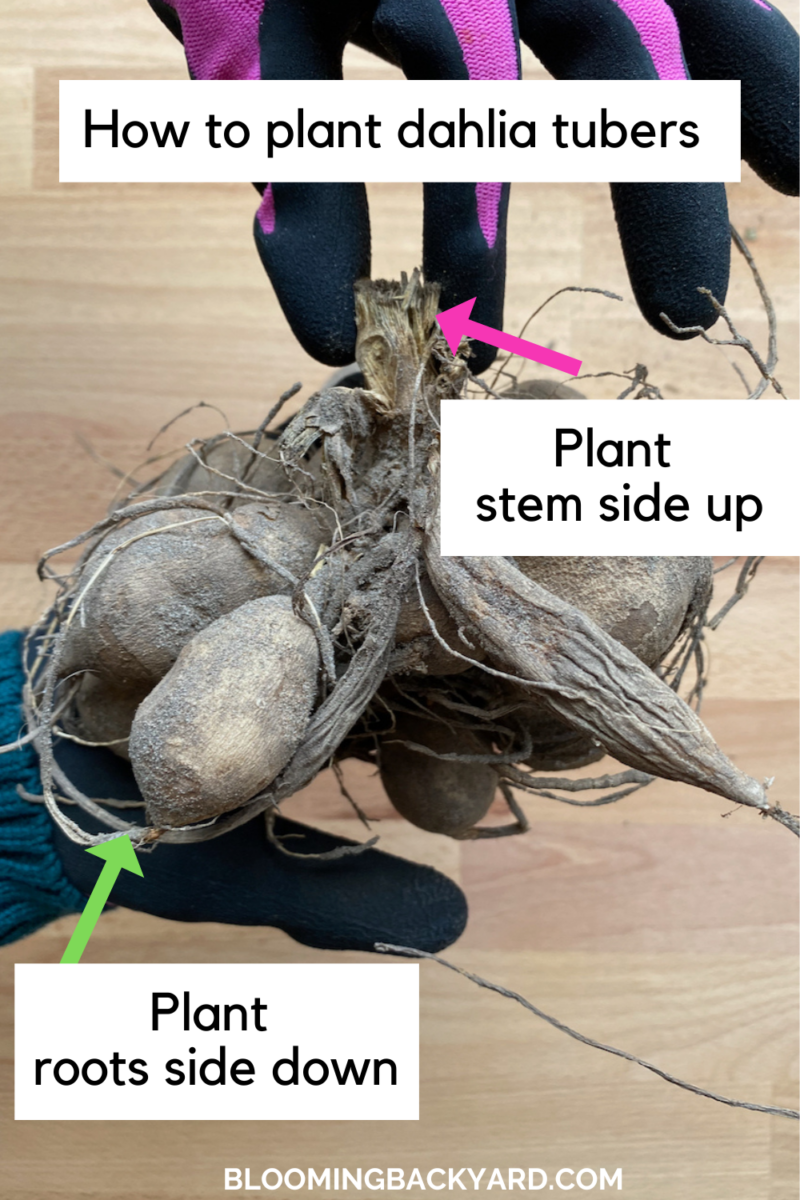
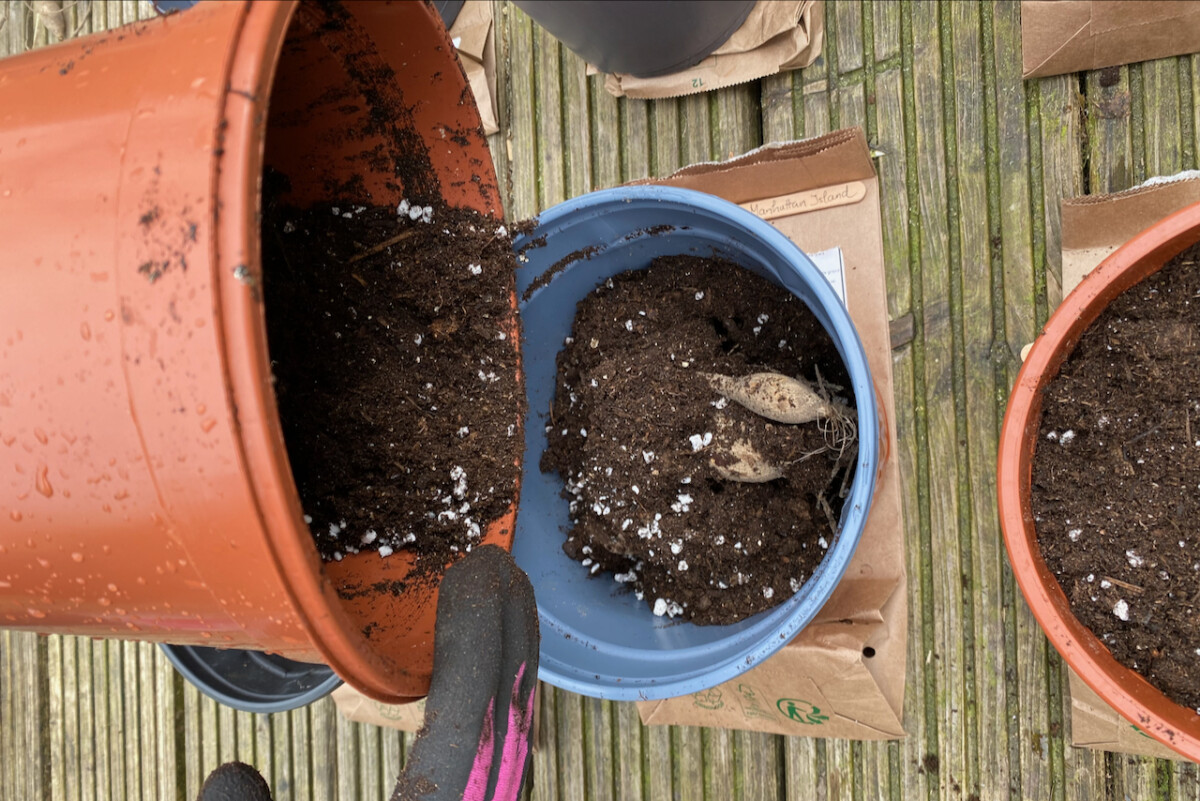
Step 5: Get your dahlia tubers in the dirt.
Start by adding a few inches of potting mix into the bottom of the pot. Not too much (fearing accumulated moisture and rot), but enough for the roots to have some room to start growing. Then place the tubers in the container and, holding the crown by the old stem, start adding more potting soil.
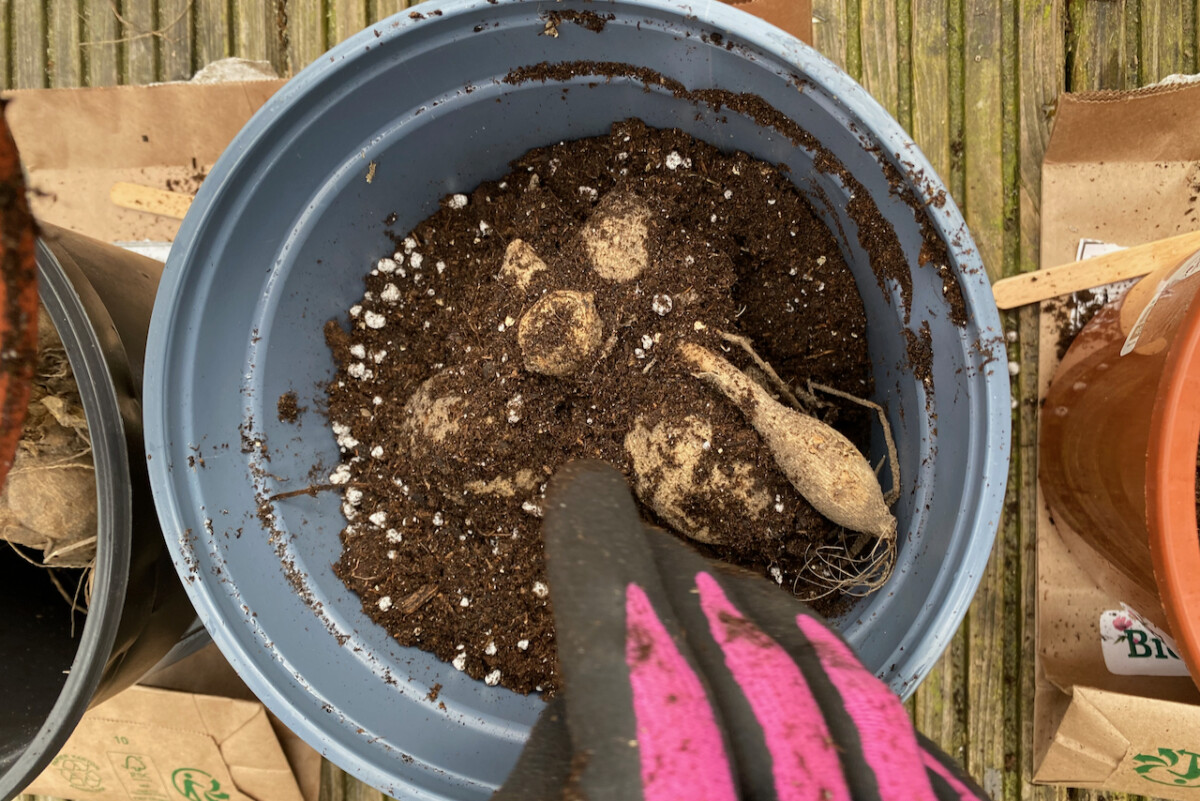
Tap the container a few times to make sure the dirt is settling and there aren’t any large air pockets. But don’t press the soil or manually compact it around the tubers.
Top everything up with soil until you no longer see the tubers. There’s no need to bury them too deeply, so aim for about an inch or two of soil on top, if possible.
However, don’t stress too much about burying every inch of the crown if you’ve miscalculated the size of the pot. What matters is that most of the crown comes into contact with the moisture in the soil in order to kickstart the sprouting process.
I left my tubers pretty close to the top (but still covered) because I plan on taking cuttings once there’s enough sprouting.
You may notice that the old dry stem is sticking out of some of the crowns. That’s also ok. You can cut off the stem flush with the soil now or remove it when you transplant the dahlias into the garden later. I left it on because it made it easier to handle the dahlia crowns.
At the risk of sounding like a broken record, I feel it’s my duty to remind you to add your labels to the pots.
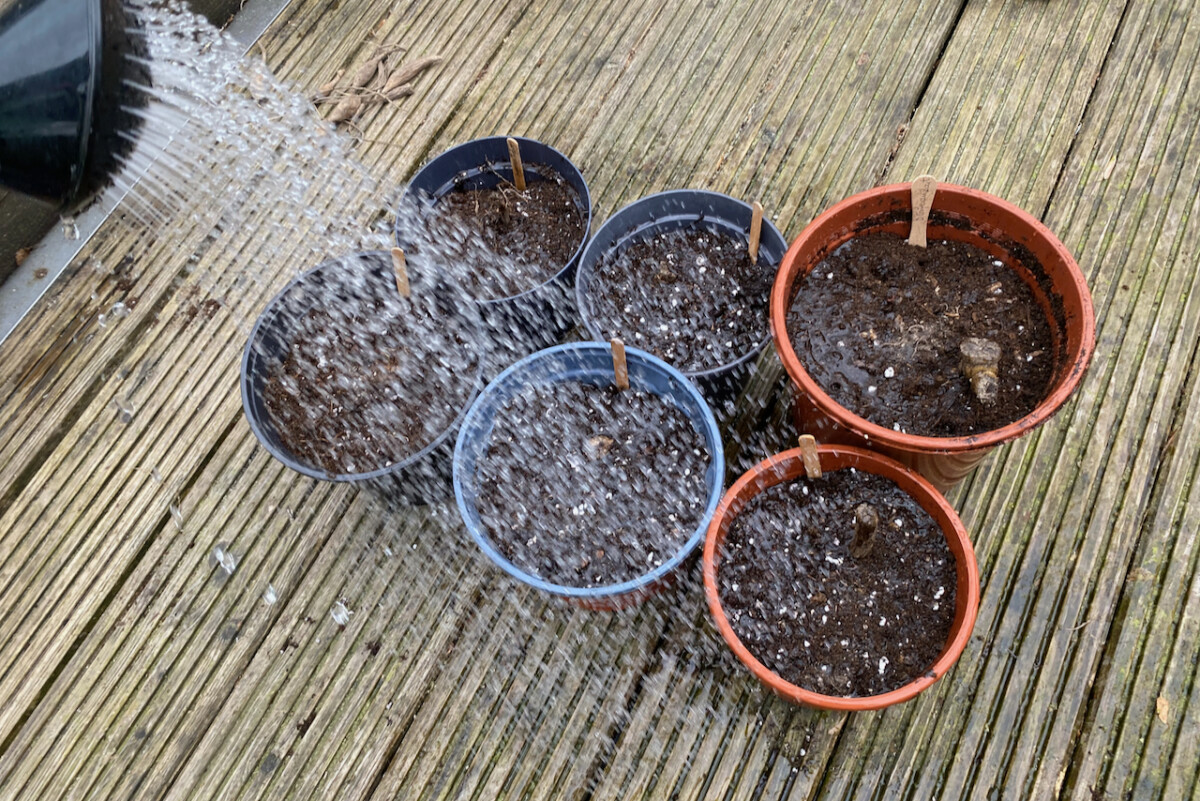
Step 6: Water lightly.
If you’ve started with a moist potting mix, you can skip this step for now. My potting soil was fairly dry, so I need to water the tubers. Do a light watering and let all the water drain out.
Refrain from watering the pots again until you start seeing shoots. And even then, if the soil still feels moist, only water very lightly (if at all).
Step 7: Keep your pots free of frost.
You may have noticed from the photos that I was starting these pots outside, on my back porch. But I took all the pots indoors and placed them in my indoor tiered greenhouse.
I expect the dahlia tubers to start sprouting in three to five weeks. Generally, early-blooming and smaller dahlias sprout faster than later-blooming, larger ones.
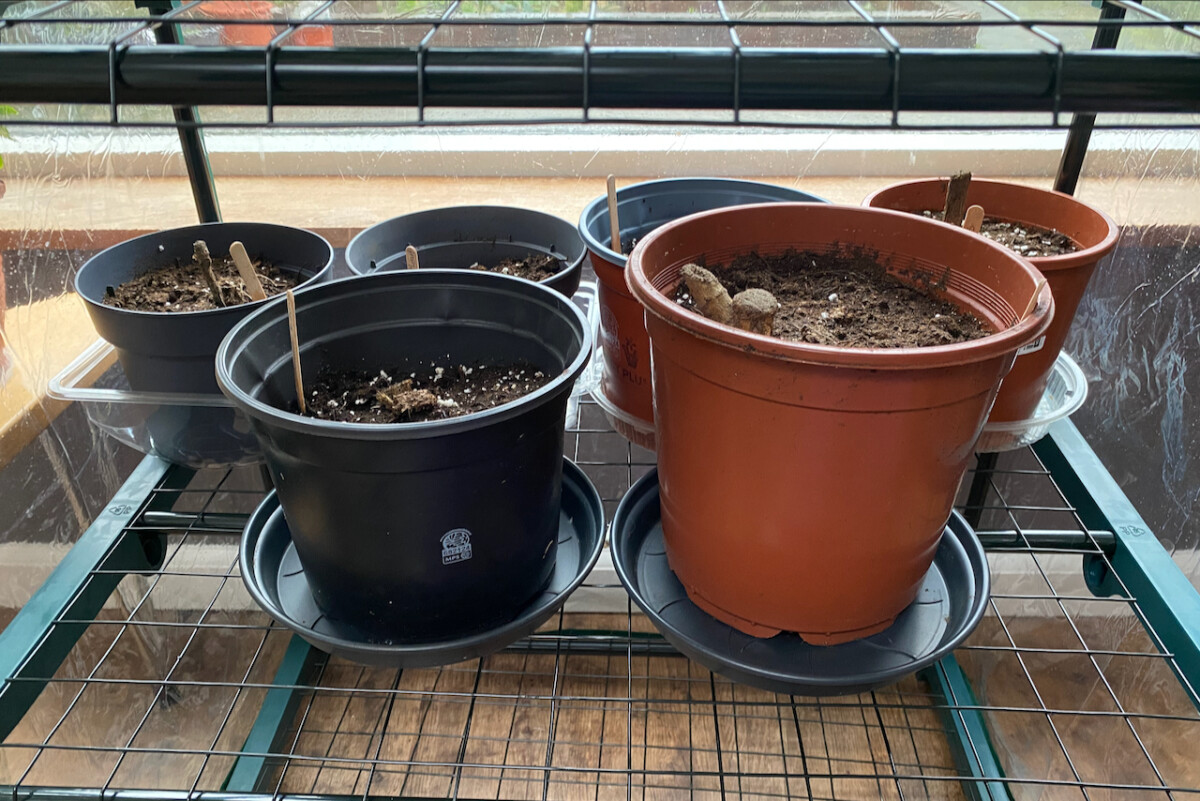
The indoor dahlia tubers won’t need too much light until they start sprouting, but they do need to be at no lower than 70F (21C) in order to sprout faster. And they definitely need to be in a frost-free spot.
So even if you’re growing them in a coldframe, greenhouse or sunroom, make sure the temperature doesn’t dip too low.
There’s no need to stress about providing enough light until the shoots start growing. But once the eyes sprout, you should place your dahlia pots on a windowsill or wherever they can get more light.
Starting tubers in pots might look complicated for a dahlia newbie, but I can promise you it’s worth learning well the first time. And once you’ve done it once, it might quickly become your preferred way of starting dahlias.