My first foray into planting gladioli took place exactly ten years ago, to the month.
On a whim, I picked up a bag of gladioli bulbs while I was “foraging” for gardening deals in one of those stores that has “bargain outlet” in its name. (If you’re on the East Coast, yes, that’s the one.)
When you buy from an outlet that sells old overstock, you generally try not to hold too much hope of a good result. Or at least I don’t, perhaps as a defense mechanism against “gardener’s heartache.”
To my surprise, every single one of the twenty gladiolus corms I planted sprouted; and they then proceeded to develop into glorious bloom stalks. It definitely turned out to be one of the best bargain bags I’ve ever bought. In the meantime, we moved away from that house (and that garden) and left the multiplied gladioli bulbs in the ground for the next family to enjoy.
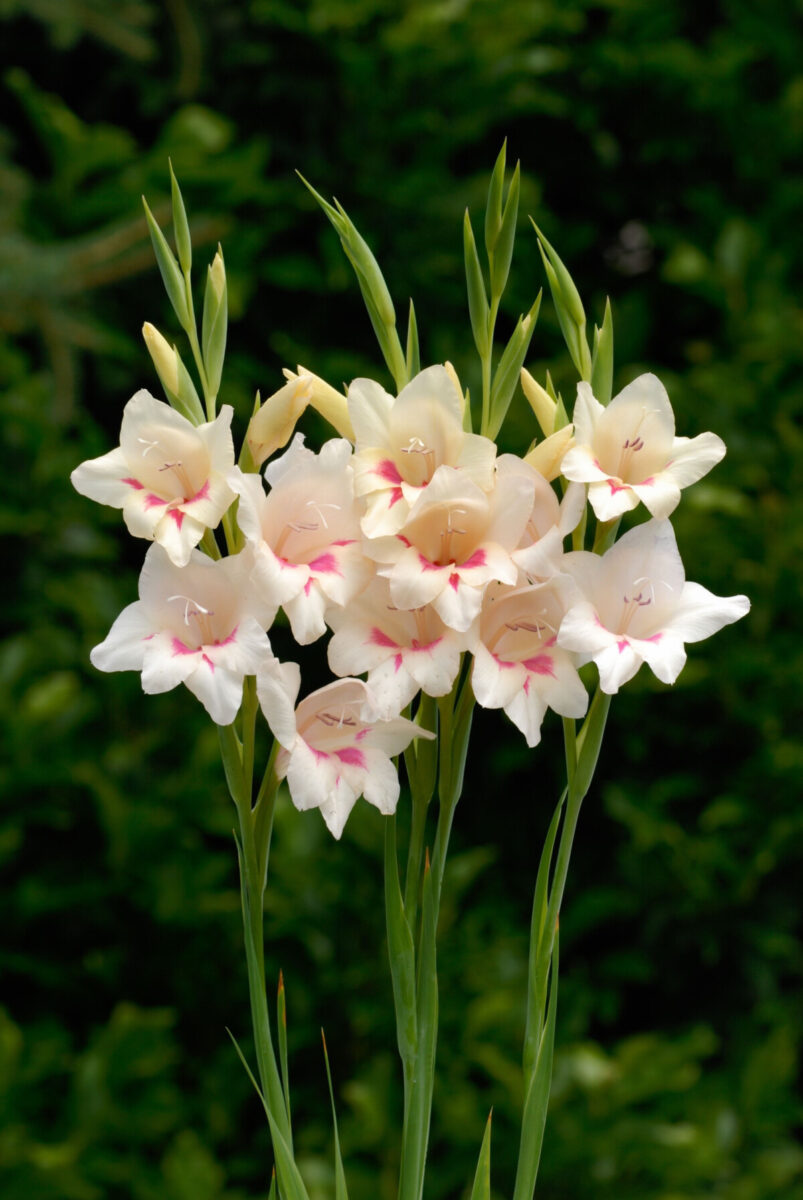
But I find myself once again planning to enjoy gladioli in my summer garden. I invite you to plant along with me so that we’ll both get to marvel at the intricate statuesque gladiolus blooms come July.
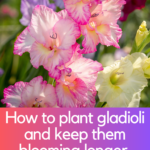
How to Plant Gladioli in the Garden
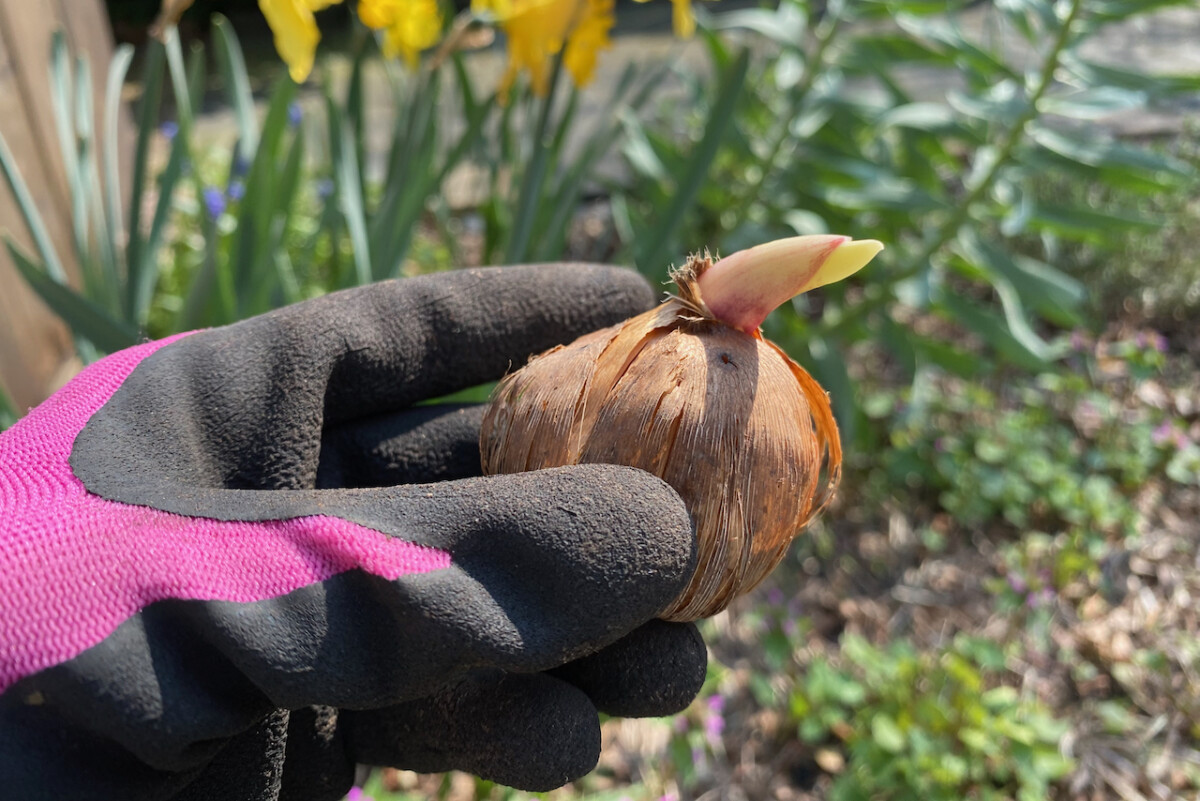
Gladioli grow from corms (although for the sake of not repeating myself too much, I will also call them bulbs) that you’ll need to plant out every year.
If you’re gardening in USDA zone 7 and warmer (or equivalent), you’ll be able to overwinter them in the ground once they start growing. But in other areas, the corms are not winter-hardy, so you’ll have to restart them every year. Totally worth it, by the way!
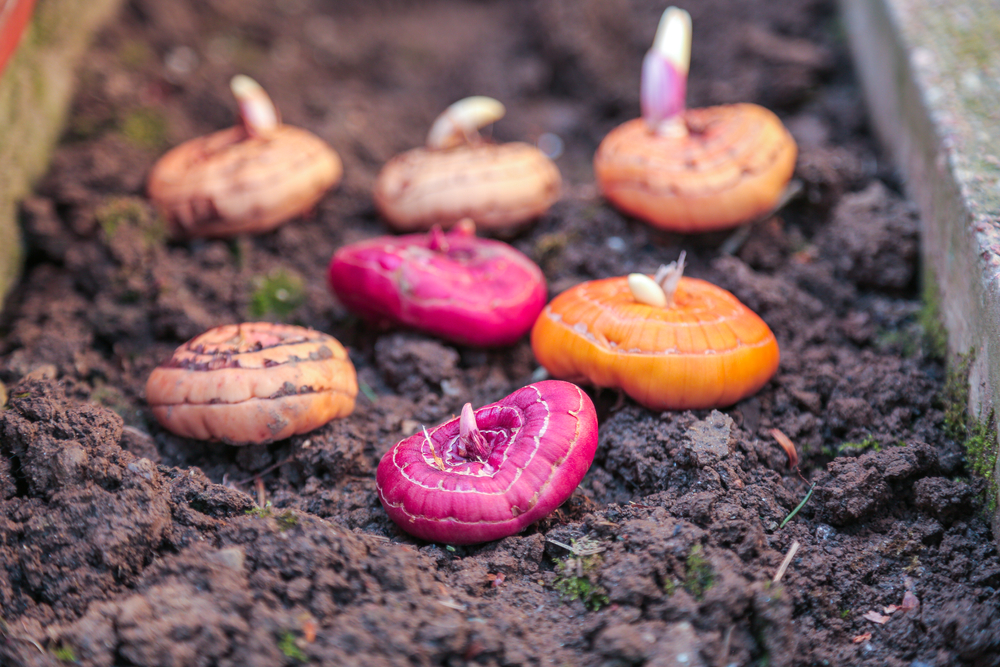
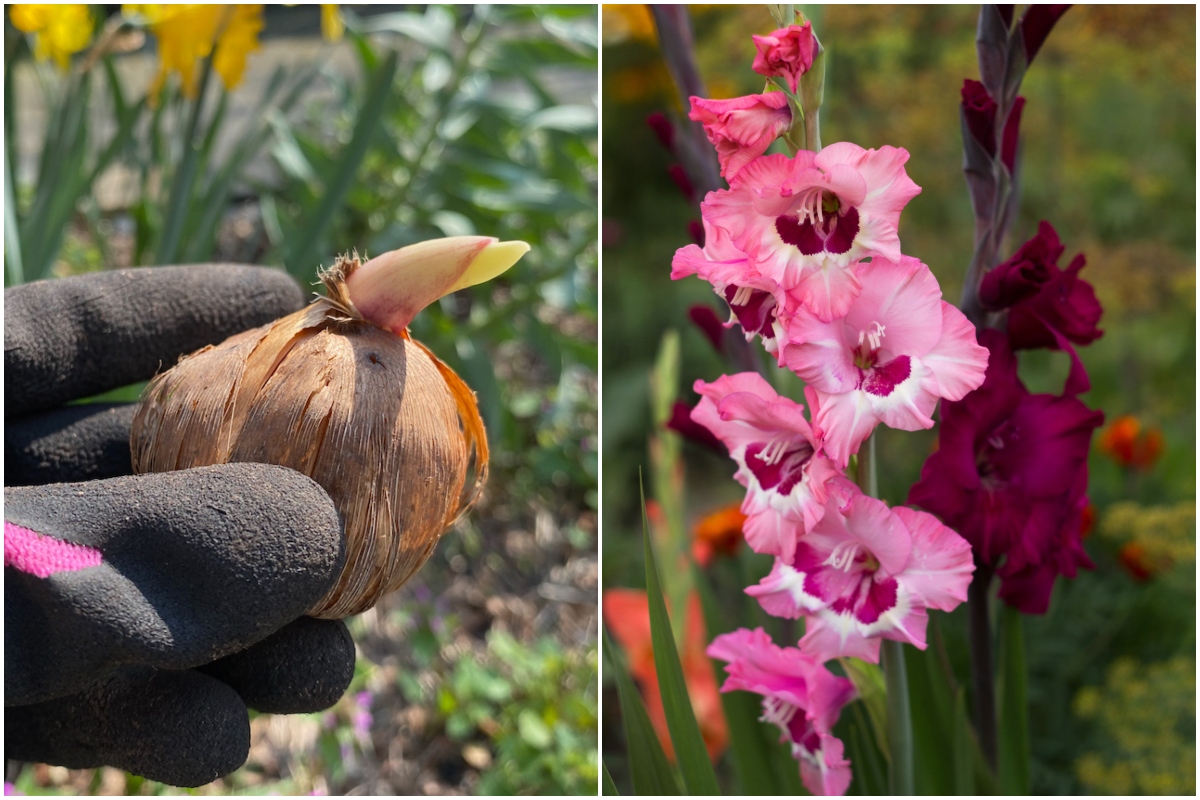
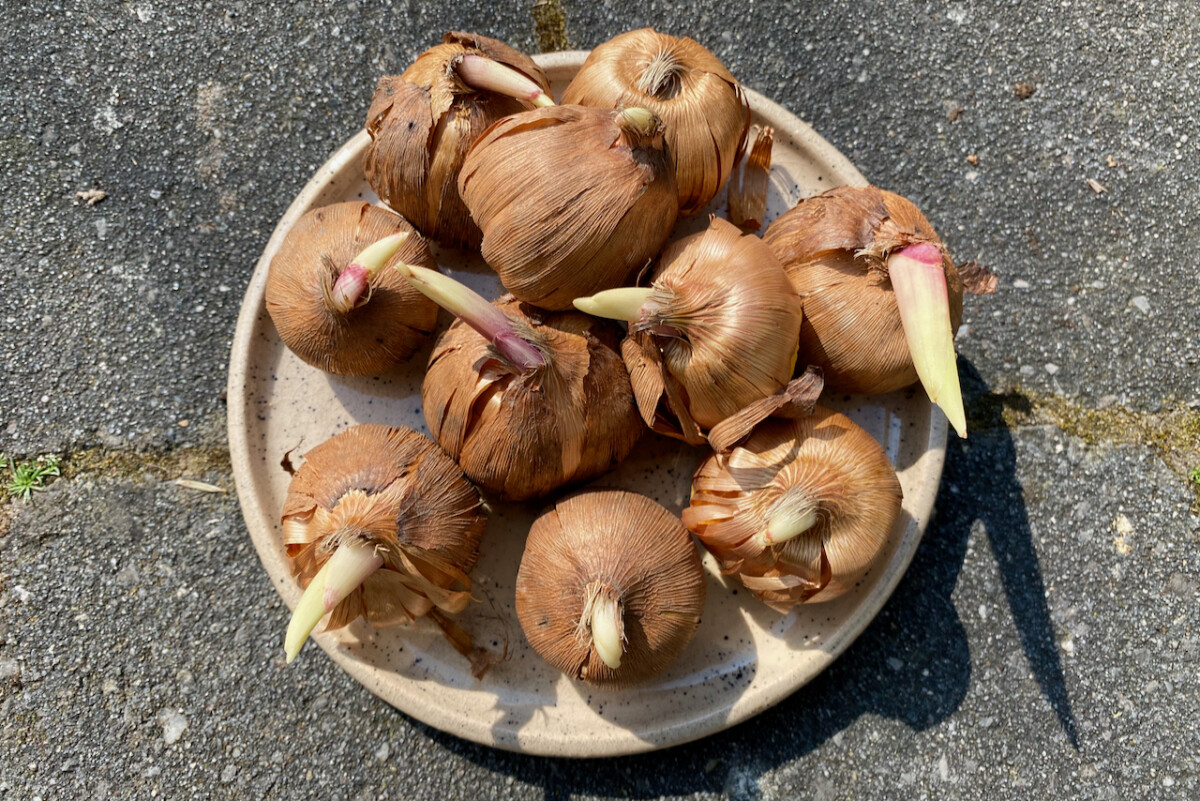
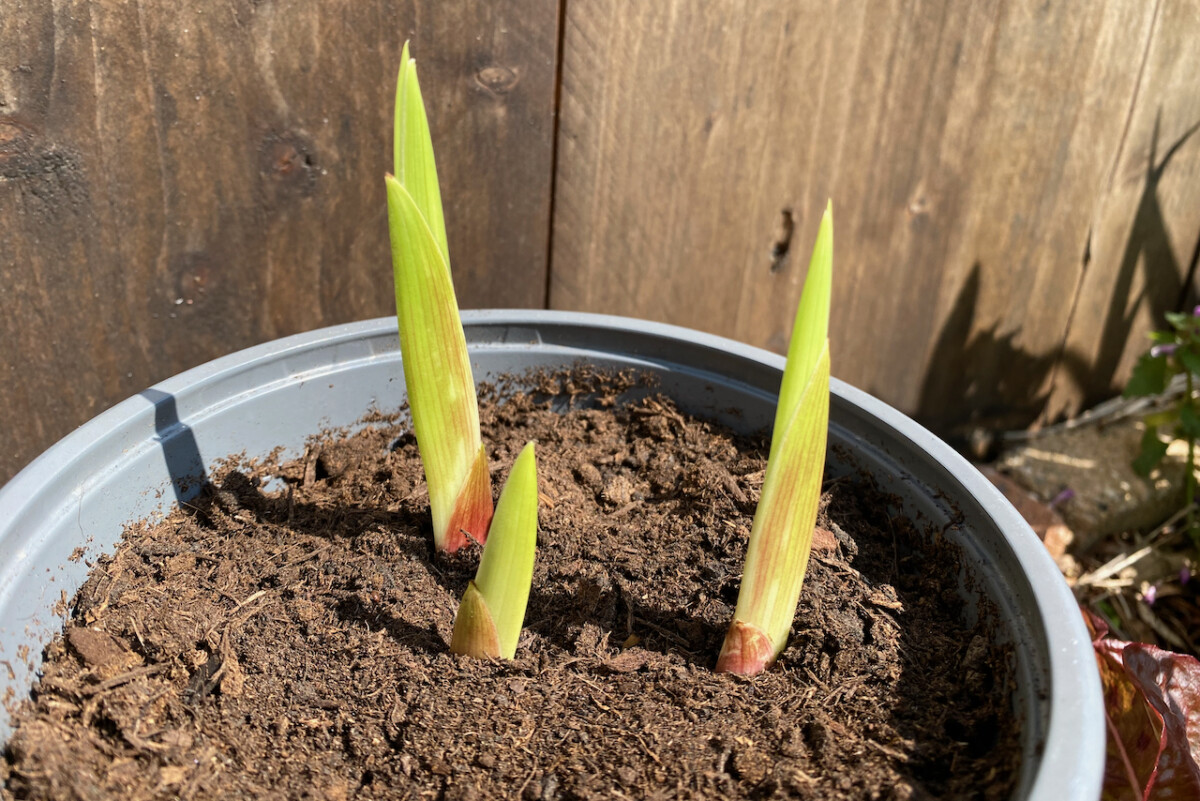
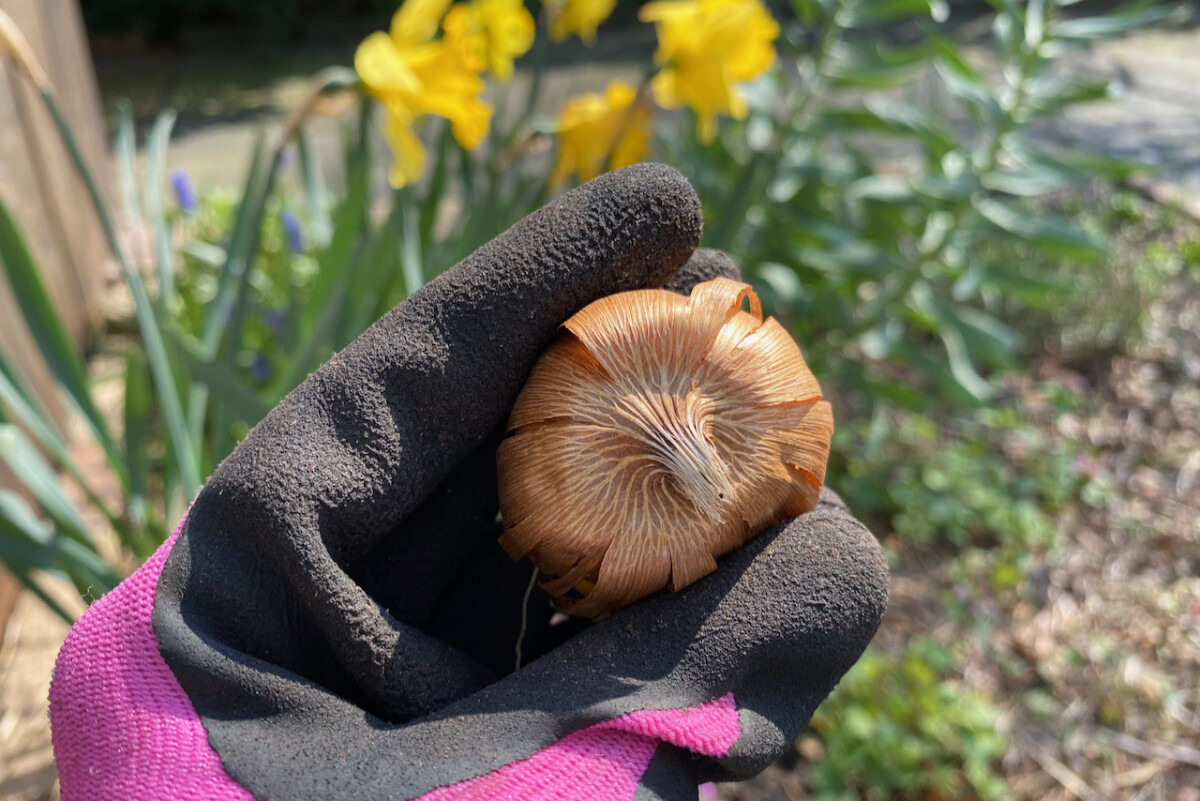
Here’s what a gladiolus corm looks like. I have held off on planting mine for about a month after I received my order, since we’ve been having quite a cold spring this year. In the meantime, some of the corms have sprouted in the paper bag. They’re still good to plant and the sprouting will not interfere with the growth if I plant them deep enough.
Where should I plant gladioli?
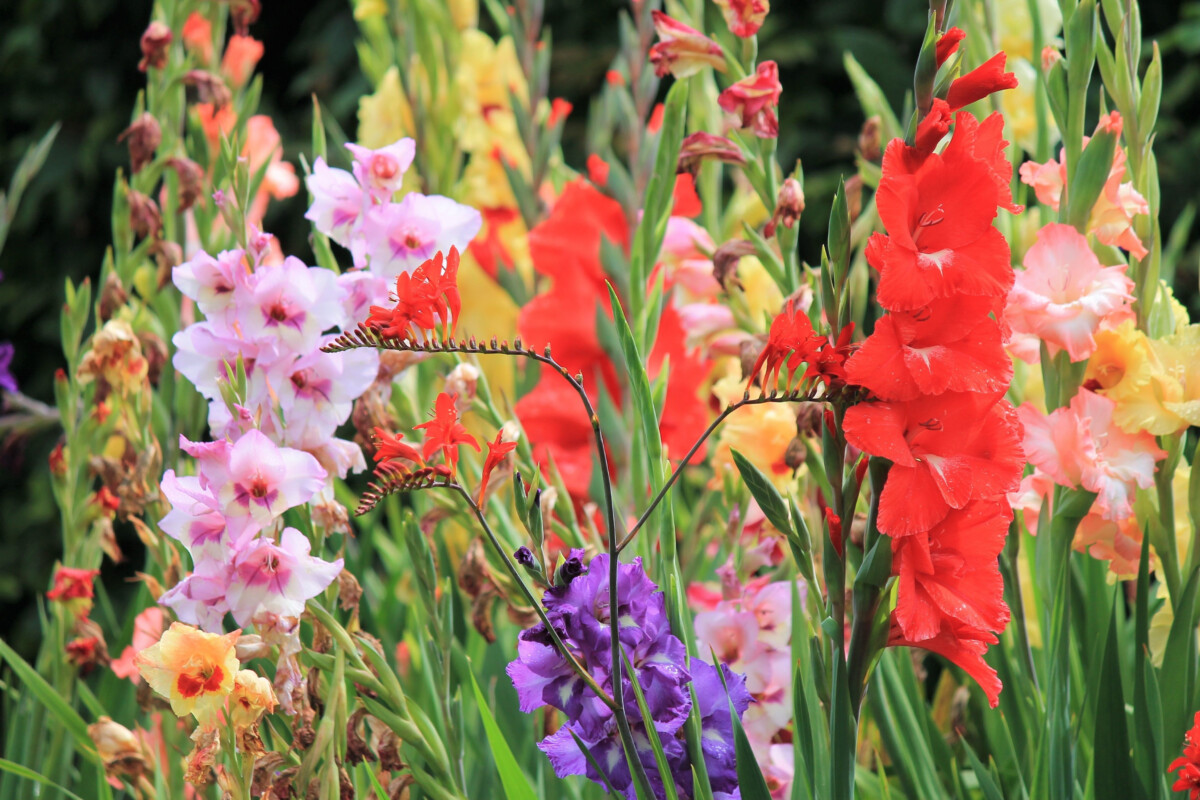
Gladioli can grow anywhere from two to five feet tall, so they’ll usually fit in better if you tuck them in spots where they won’t overshadow (literally or figuratively) other plants.
You can place gladioli in borders, raised beds, cottage gardens and even messy pollinator gardens (my favorite type). In the past, I’ve planted gladioli as a means to beautify a wood fence that had seen better days.
If you don’t have enough space in your garden, or don’t have a garden at all, there are some gladioli that you can grow in containers. Look for the words “dwarf” or “miniature” when you’re shopping around.
In my current garden, I’m planting gladioli in the back of a mixed bed of flowers, herbs and berries. I’ve also planted some canna lilies here and I think the resulting pastel-colored combinations will blend in beautifully. This area gets full sun in the middle of the summer, so that should set up the bulbs for a rich and colorful display.
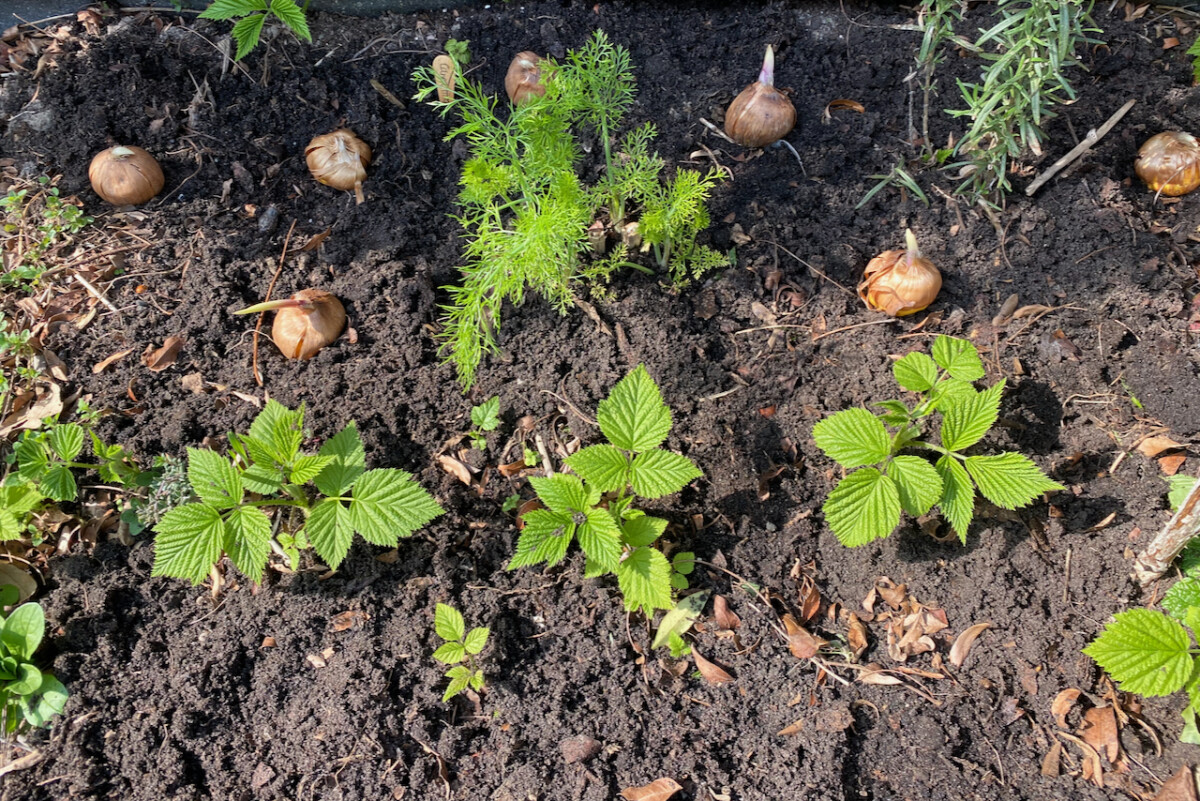
Because I’m gardening in a small suburban backyard, I’m forced to be efficient and squeeze as much as possible out of every inch of soil. So I’m interspersing gladioli with double-cropping golden raspberries. These baby plants will bear fruit late into September, and by that time the gladioli flowers will be long gone. The raspberries should be tall enough by mid-fall to hide the sword-like bare foliage of the gladioli.
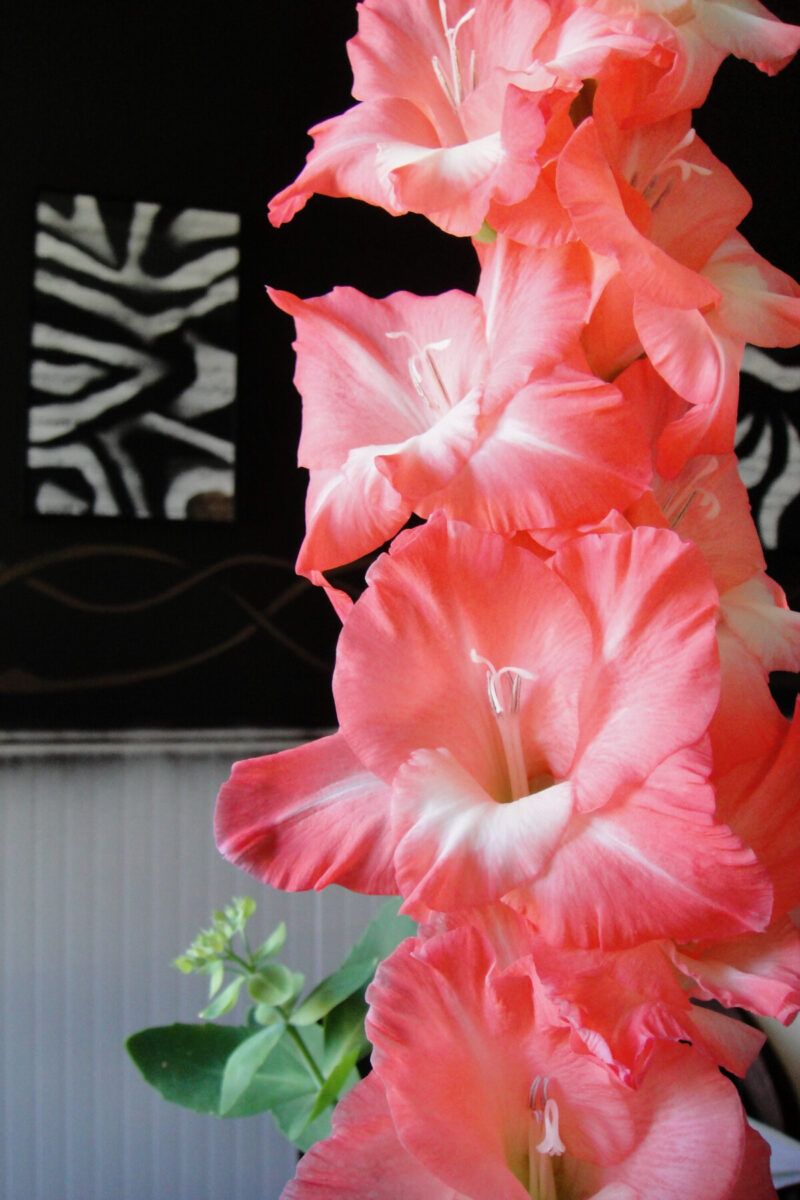
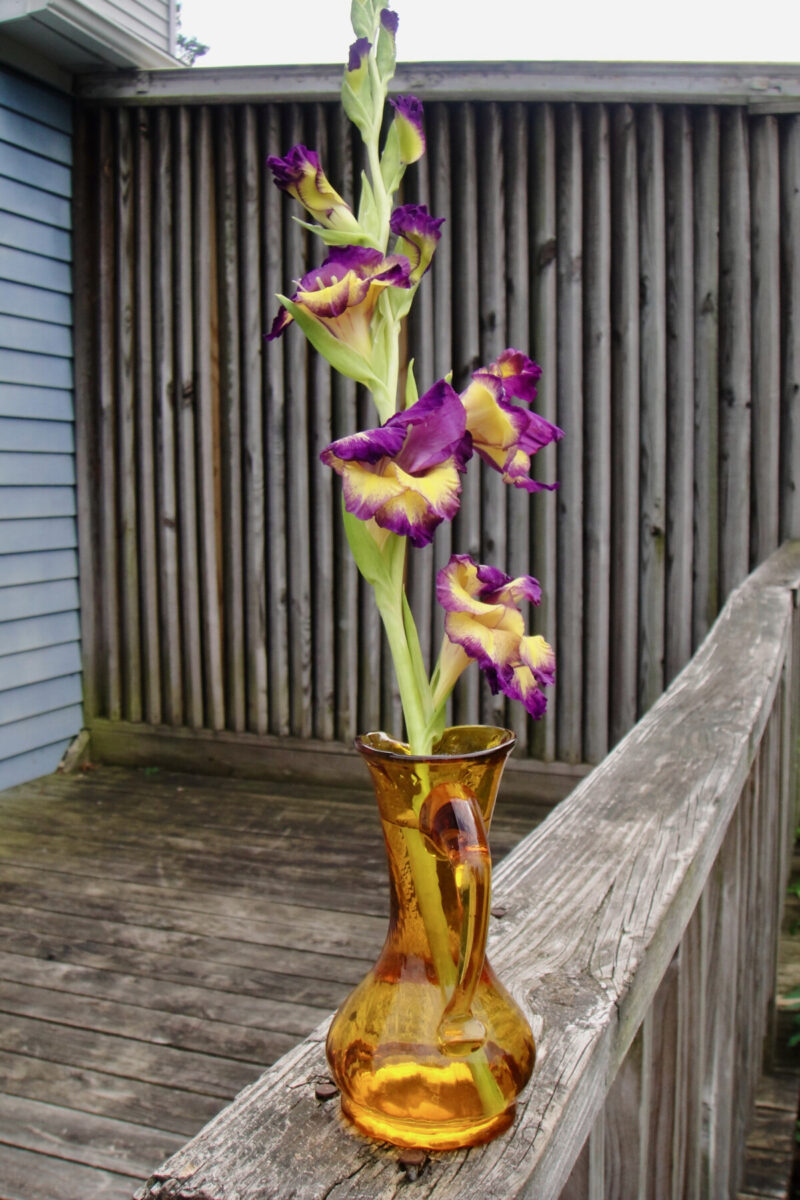
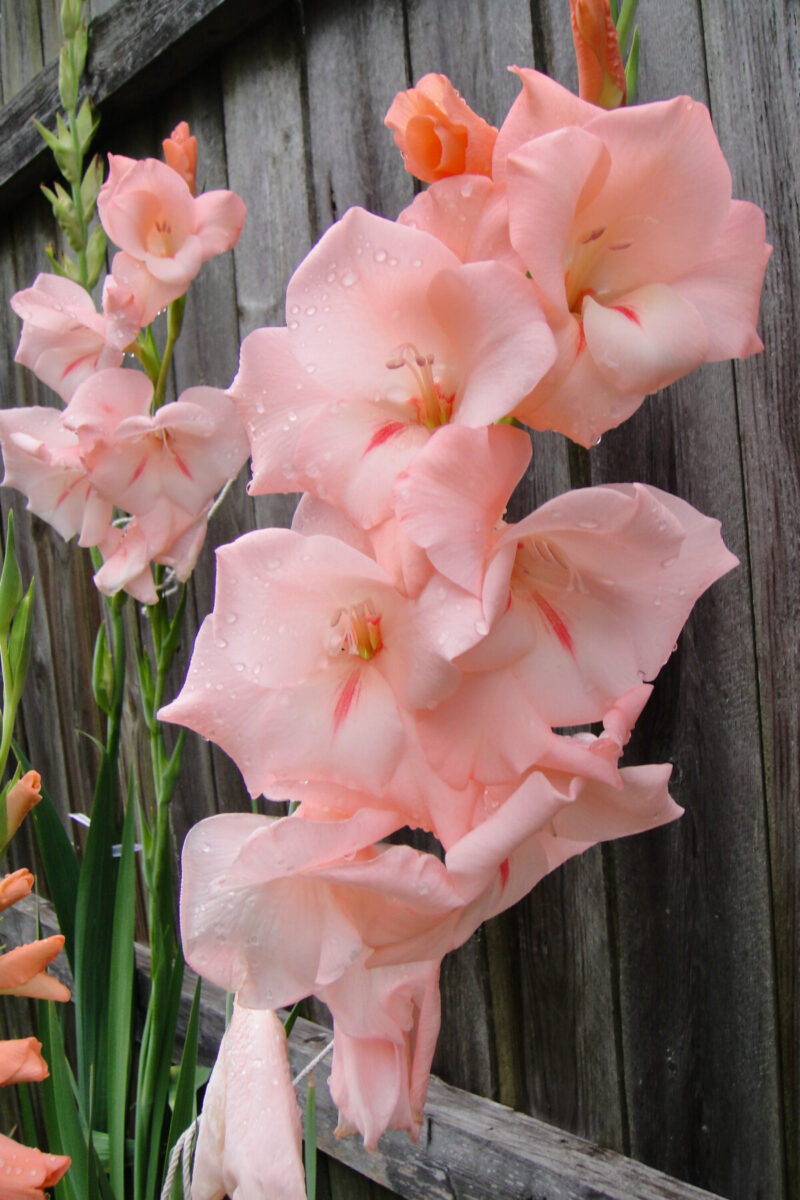
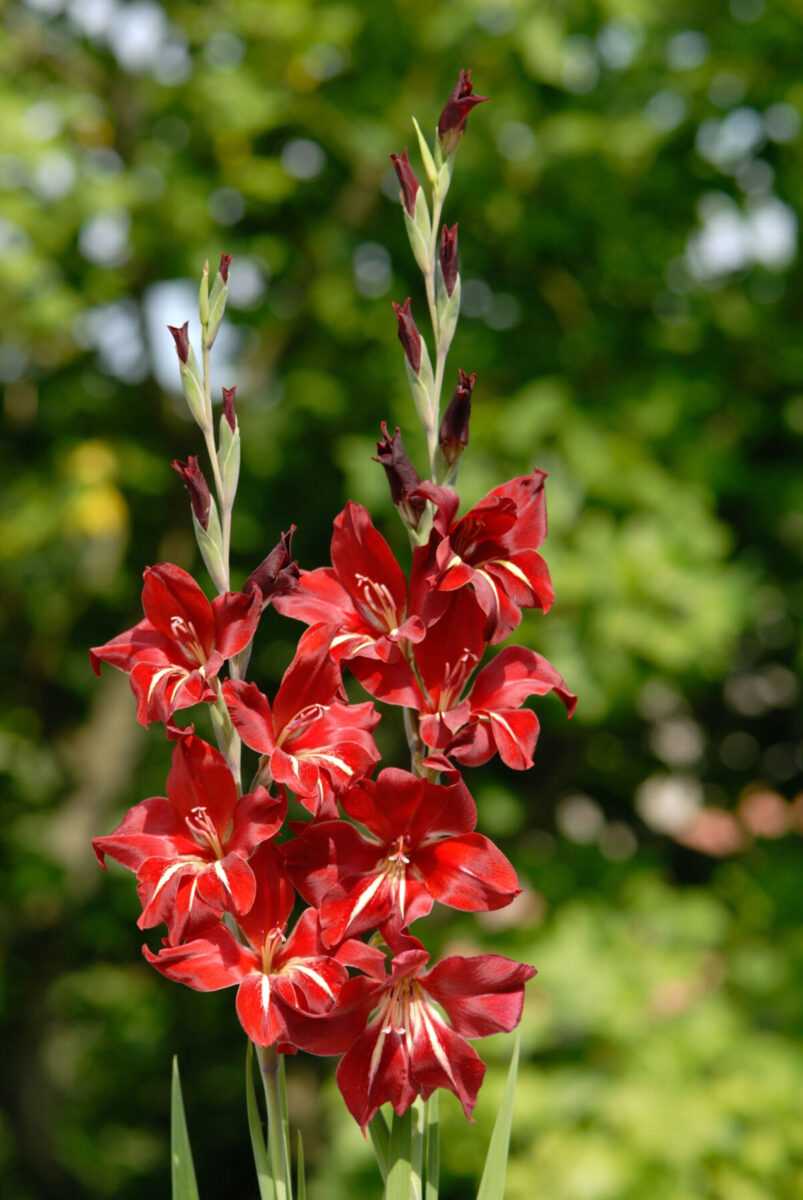
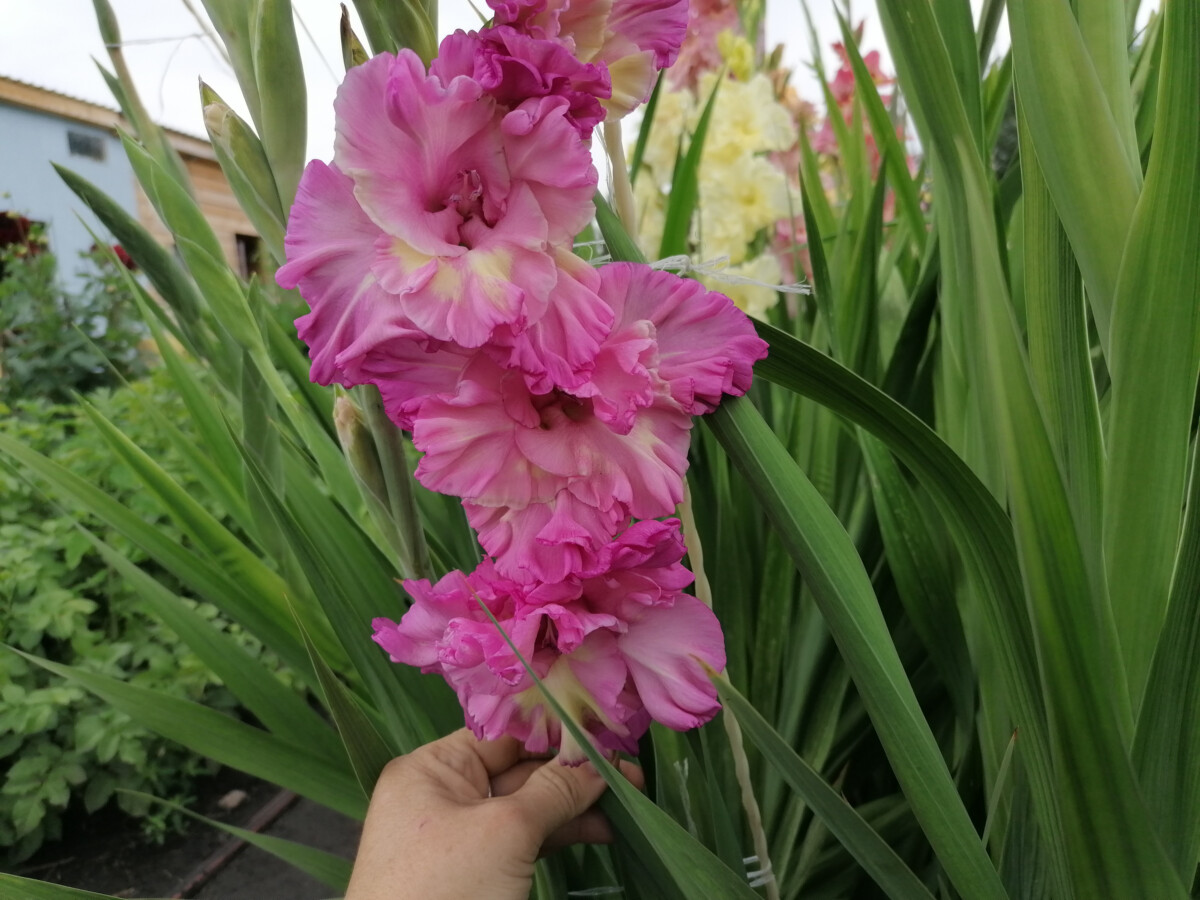
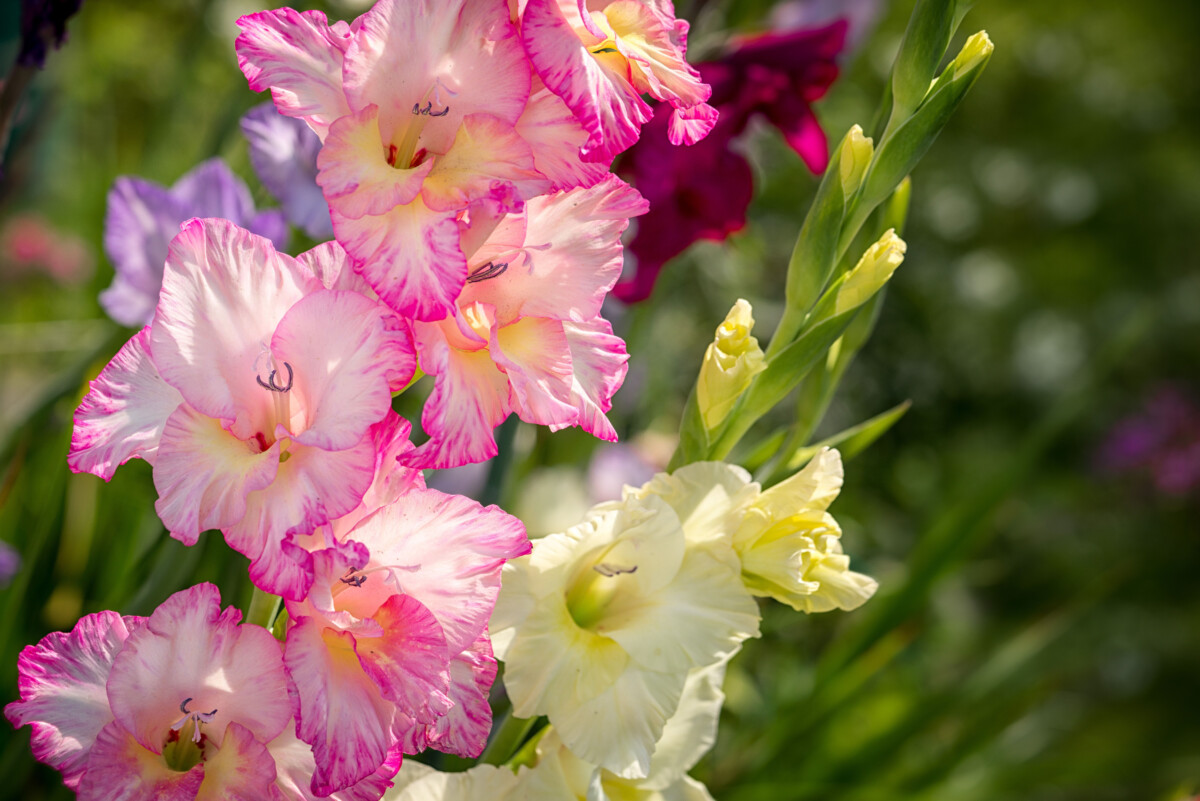
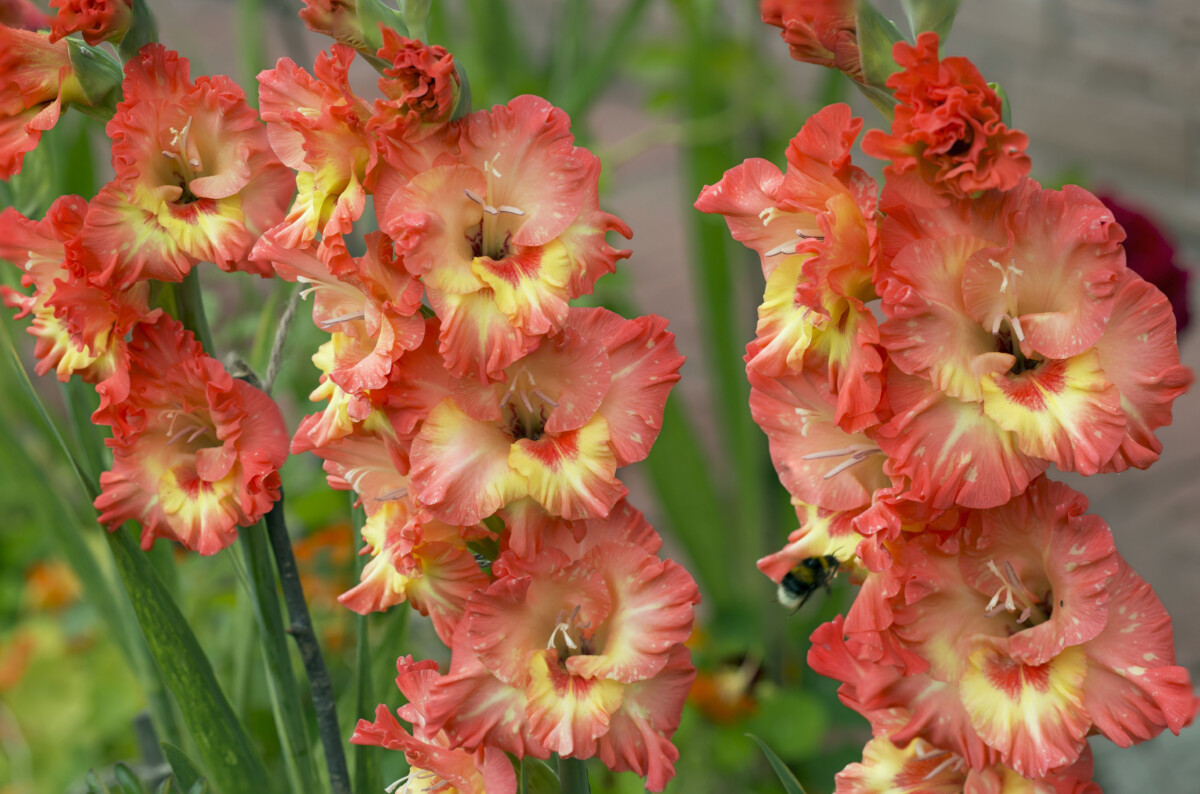
The cultivar I chose this year is called ‘Koersk,’ sometimes found as ‘Koersk Parrot’. It has ruffled petals in shades of salmon-pink and peach that converge in a cream-colored center.
When should I plant gladioli?
Gladiolus is a summer bulb, so we’ll always plant it in spring. As a rule of thumb, summer-blooming bulbs, corms and tubers are not winter hardy, so there’s literally no reason why we should plant them in the fall, when we plant our spring bulbs.
Depending on what gardening zone you’re in, you may plant your gladioli in April or wait until May. Generally, I plant mine in mid- to late April, about two weeks before the last expected frost date. But if your garden is still covered in snow in April, you should definitely wait a bit longer before you put your summer corms in the ground.
It takes a little under three months for Grandiflora varieties of gladioli to bloom, so delaying the planting might result in delaying the bloom as well.
If you’re growing a smaller variety (such as Glamini gladioli or Nanus hybrids), the time-to-bloom will be around two months. Always check this information before you buy the corms. And if you choose to buy a dwarf variety, make sure you know what the final result will look like. Even though the small hybrids also look stunning, they only have a marginal resemblance to Grandiflora cultivars, in my opinion.
As a backup, I also start gladioli corms in pots indoors (more on that process later).
How deep should I plant gladioli?
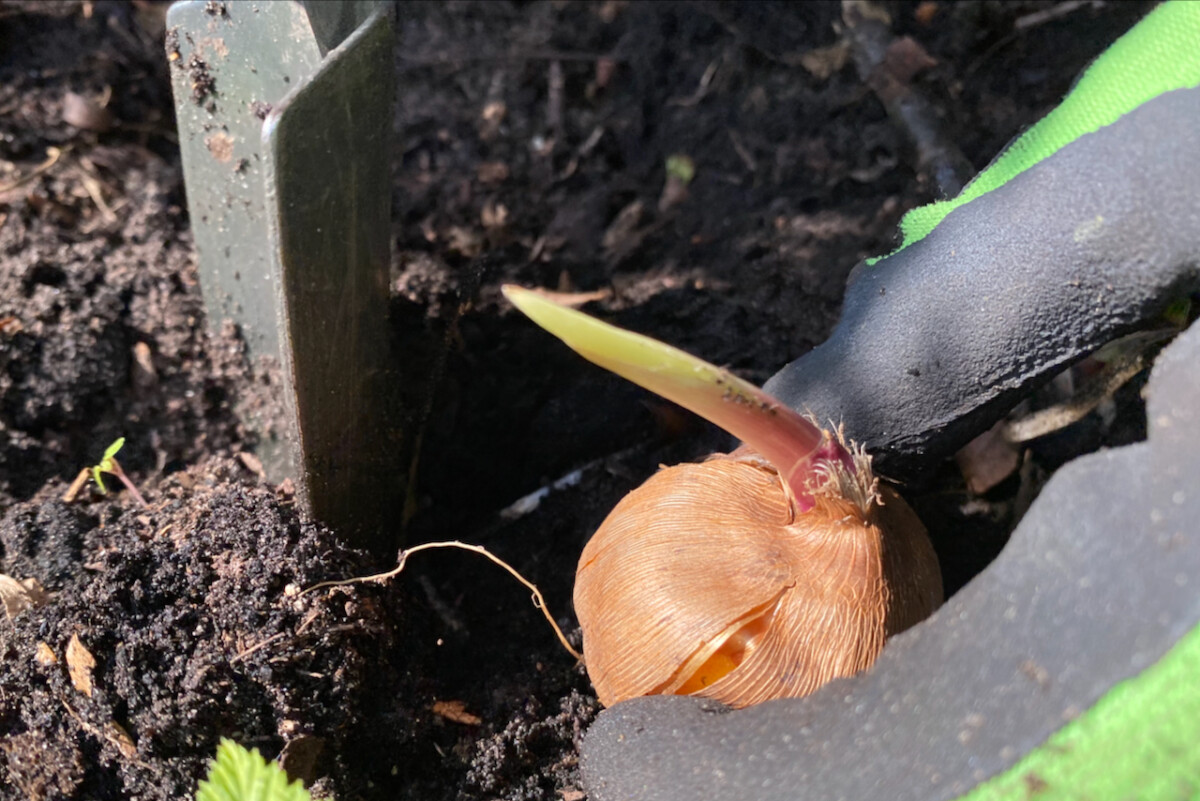
I follow the same rule as for planting spring bulbs. I plant gladioli corms at about three times the height of the corm. These corms are about two inches tall, so I’m planting them roughly six inches (around 15 cm) deep. If you’re planting gladioli earlier than indicated for your gardening zone, you can bury them around eight inches (roughly 20 cm) deep to offer them a bit of extra protection.
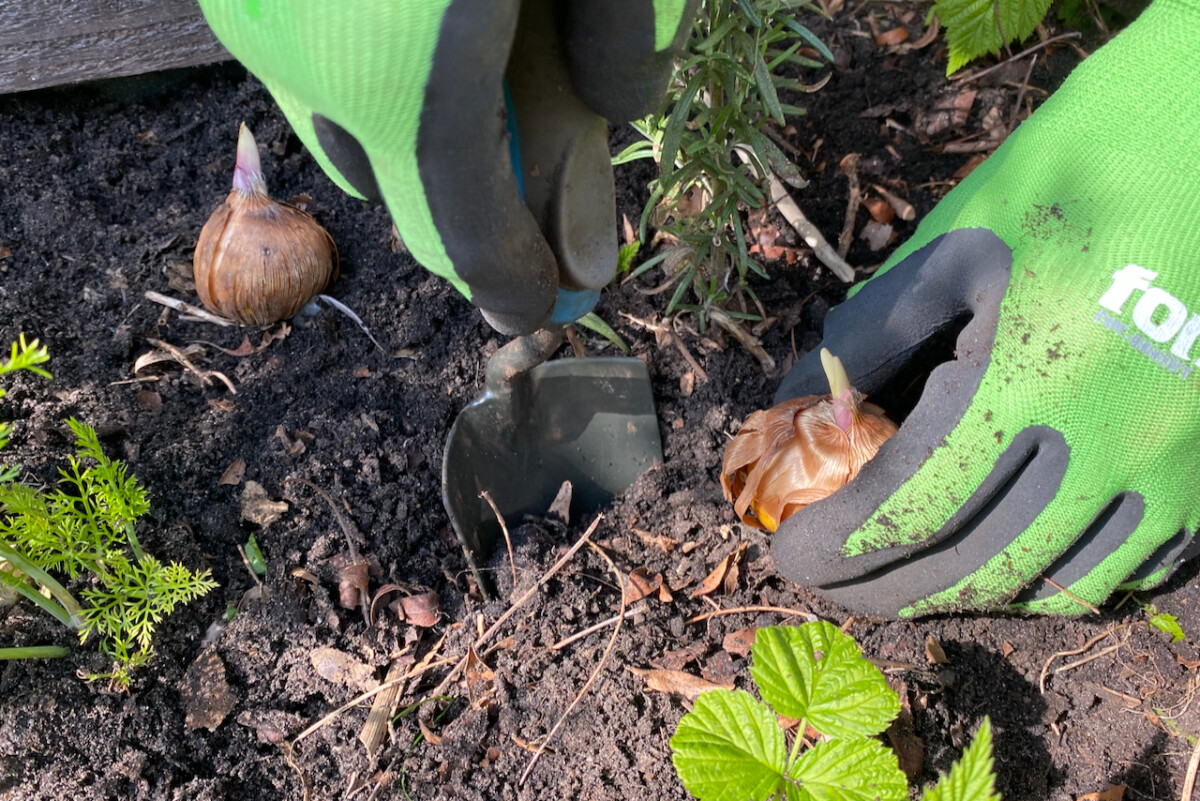
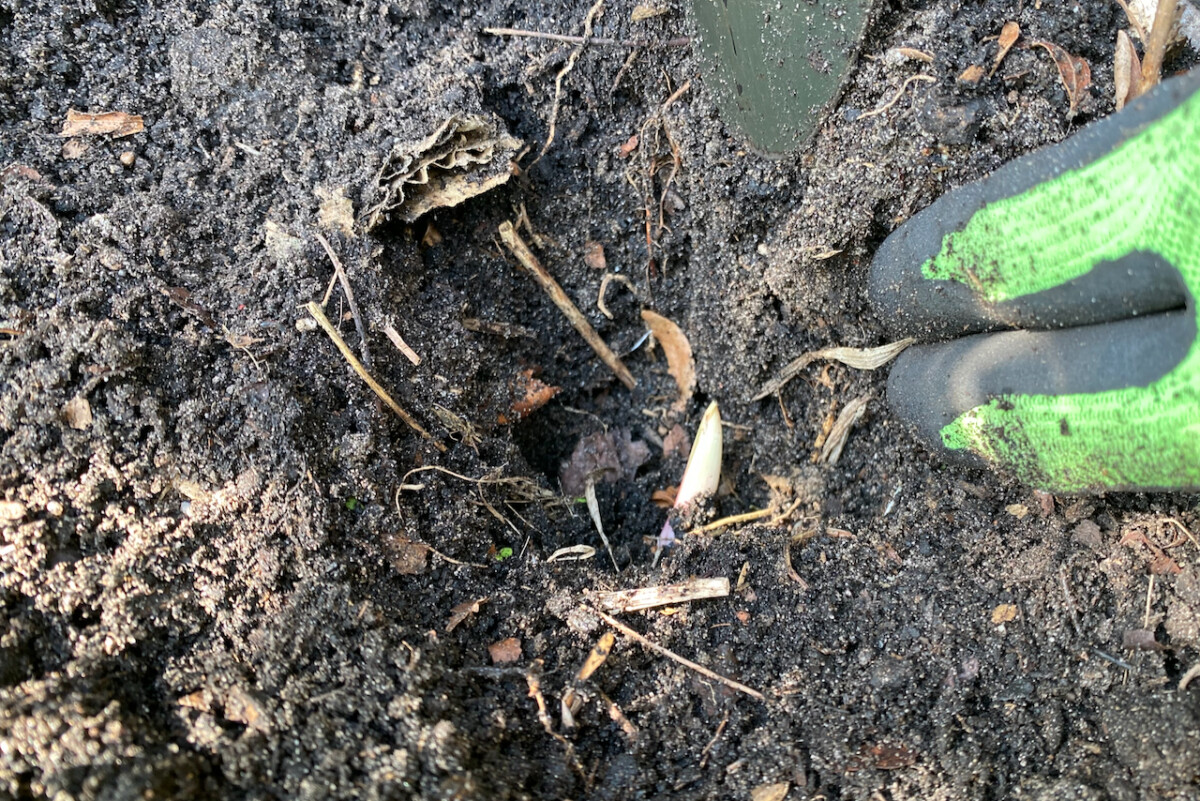
If your gladioli have sprouted, as mine did, you should bury the sprout too. This will help protect it from late frost. Don’t worry, it will make its way back to the surface eventually.
The spacing from one gladiolus to another is all up to you. If you want a fuller look, space them closer together – say, around four inches (about 10 cm). I find that most spacing advice out there always assumes that we live in grand houses with gardens to match. That couldn’t be further from the truth for me and for most of the gardeners I know in my area. Packing gladioli in is preferable to not planting them at all, I think.
Always plant gladioli in a spot that drains well, just like with any other summer bulbs. The more water pools around the planting site and the longer the ground stays soggy, the higher the chances of bulb rot or other diseases. If the soil doesn’t drain well, consider adding more compost to the planting site.
To stake or not to stake gladioli?
Since gladiolus likes to grow tall and lanky, some guides recommend placing a stake next to the corm at planting time. I think that’s a bit too early.
First, I want to see where exactly my corms will come out of the ground and only then worry about keeping them upright. I might stake these plants when they reach about 15 inches (38 centimeters). I don’t find a forest of bare bamboo sticks a particularly exciting addition to the garden in the spring, when there’s not much to stake yet.
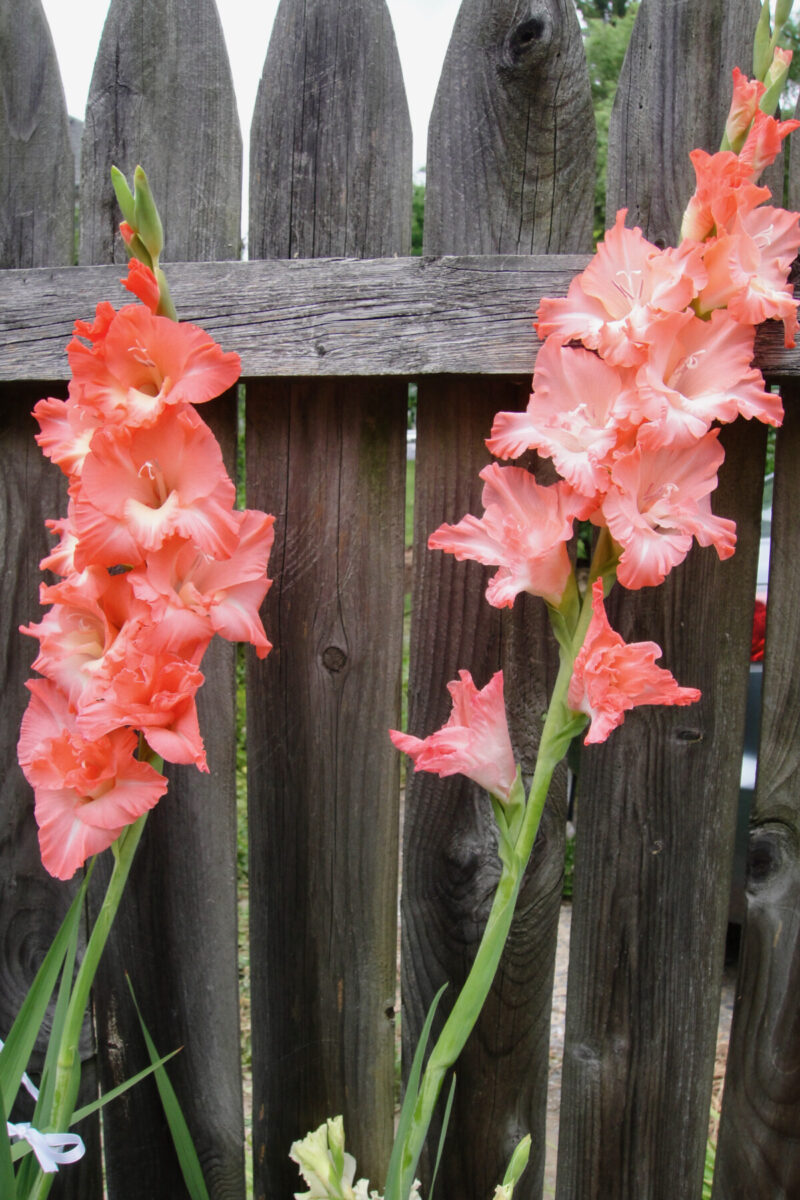
When I used to plant gladioli next to the fence, I used the fence itself as a stake. I simply anchored the heavy flower stalks to the fence posts with colorful ribbons.
How to Start Gladioli in Pots
In addition to planting gladioli bulbs in the garden, I’m also starting some in pots. Just to be clear, I won’t grow these in pots throughout their life cycle. I’m just starting them indoors in containers and I will transfer them to the garden once the plants are large enough.
I start my gladiolus in pots for a few different reasons:
- It allows me to extend my growing season if I start them early enough.
- They are backups in case the bulbs in the garden succumb to a late freeze.
- They will sprout faster indoors (due to the warmth) compared to the ones planted straight in the ground. This means that they will also bloom earlier.
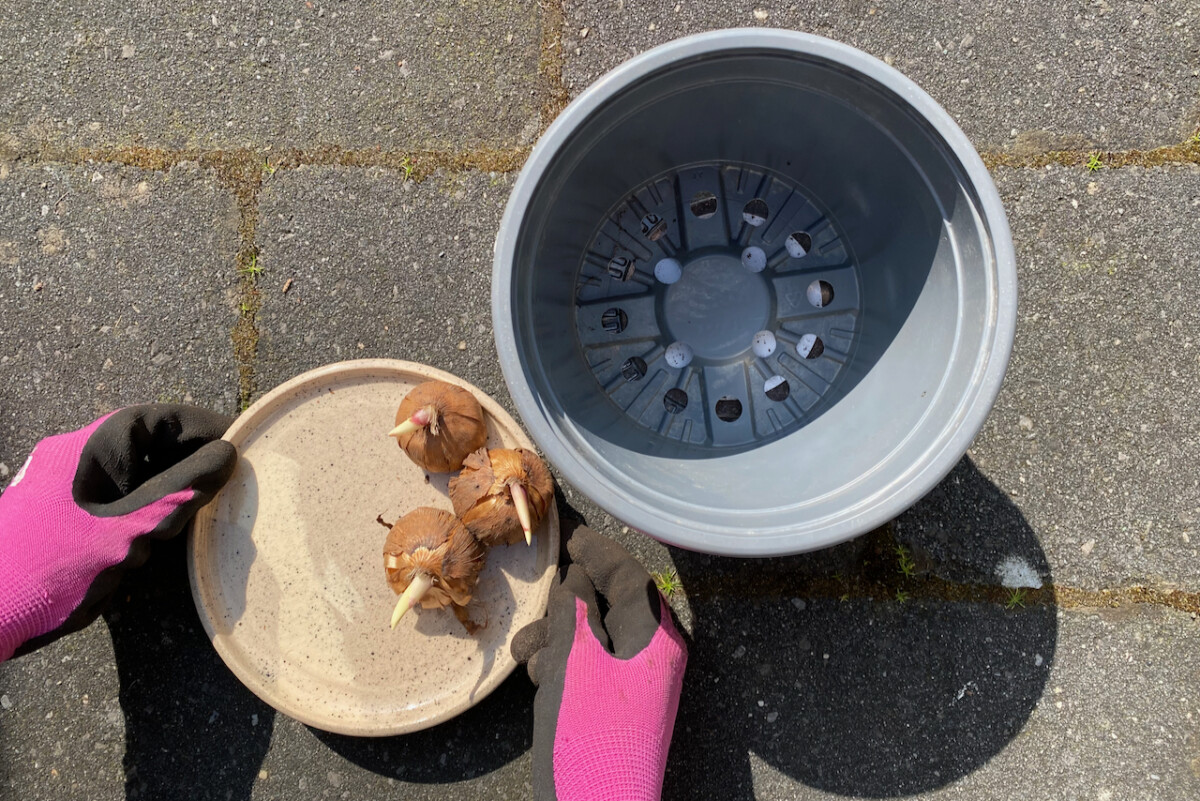
I’m planting sets of three gladiolus bulbs in the same container. I’ll keep them grouped together when I transfer them to the garden. This will give me a richer, tighter flower display. So I’m not worried about the roots getting tangled as they’re growing in the pot.
If you’re planning on separating your plants, my advice is to plant them separately from the get-go in smaller individual pots.
Step 1: Half fill your container.
Always start with a base of potting mix that the bulbs can expand their roots into. Planting in well-draining soil is perhaps even more important within the confines of a pot. So just to make sure the potting compost has sufficient drainage and aeration, I add a handful of perlite and mix it in thoroughly.
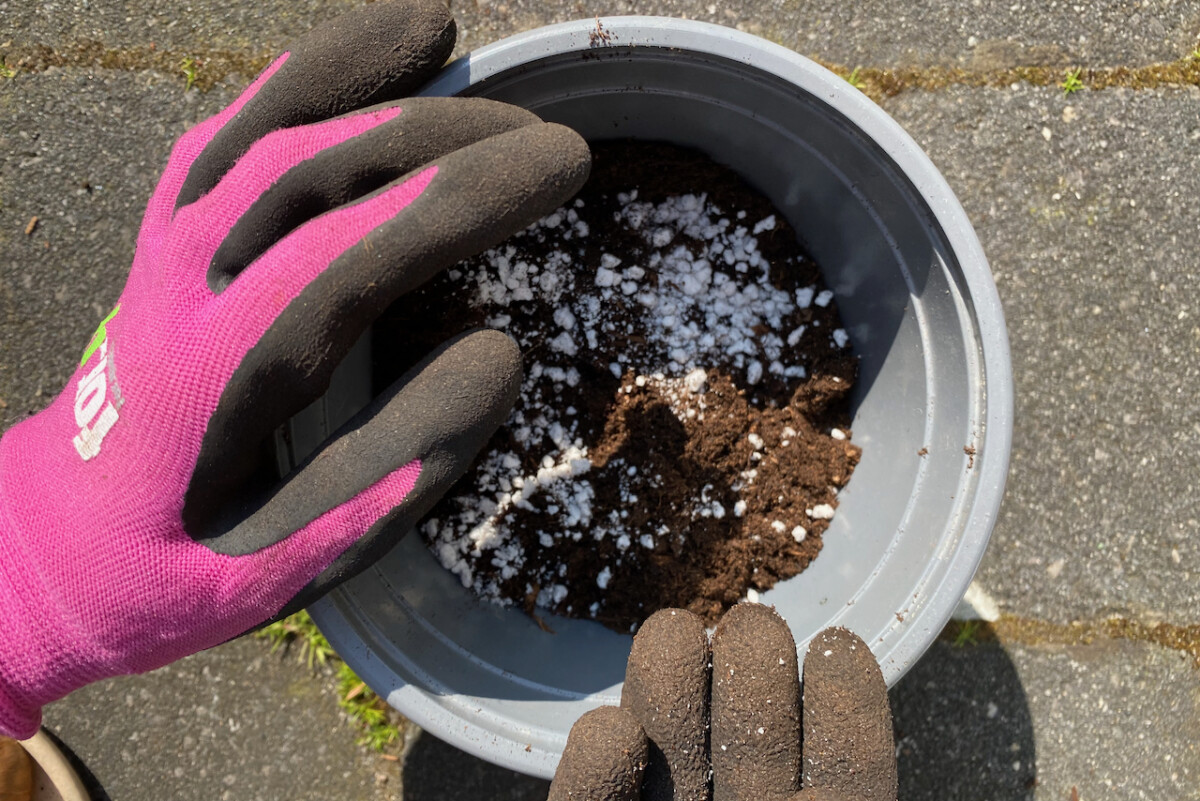
Then I tap everything lightly to allow the compost to settle.
Step 2: Place your corms in the pot.
Add your corms to the container, pointy side up. Make sure you leave enough space at the top for the corms to be covered by at least two inches (five centimeters) of potting medium.
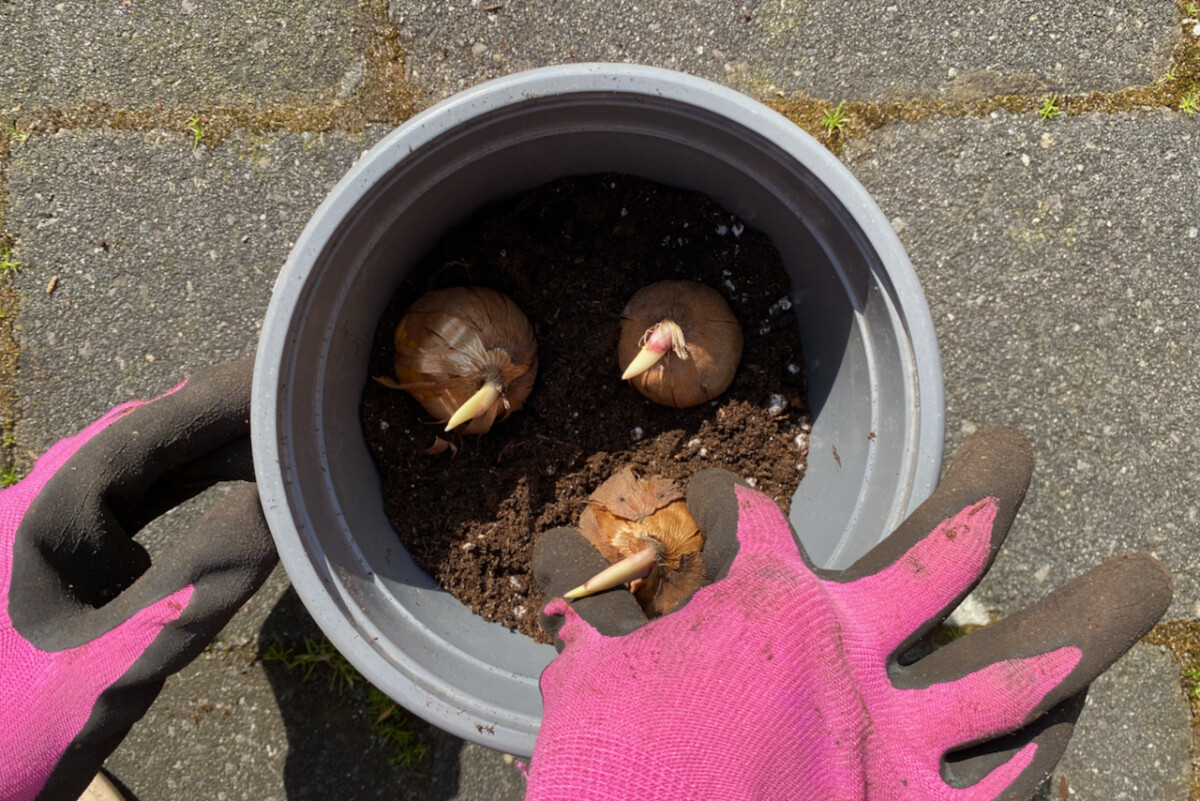
If your corms have sprouted, as mine have, you can also cover the new growth with the potting mix. I’m not worried about covering the sprouts completely when I plant in pots because I’m bringing them indoors. I know the tender sprouts won’t be subjected to any freezing temperatures in my living room.
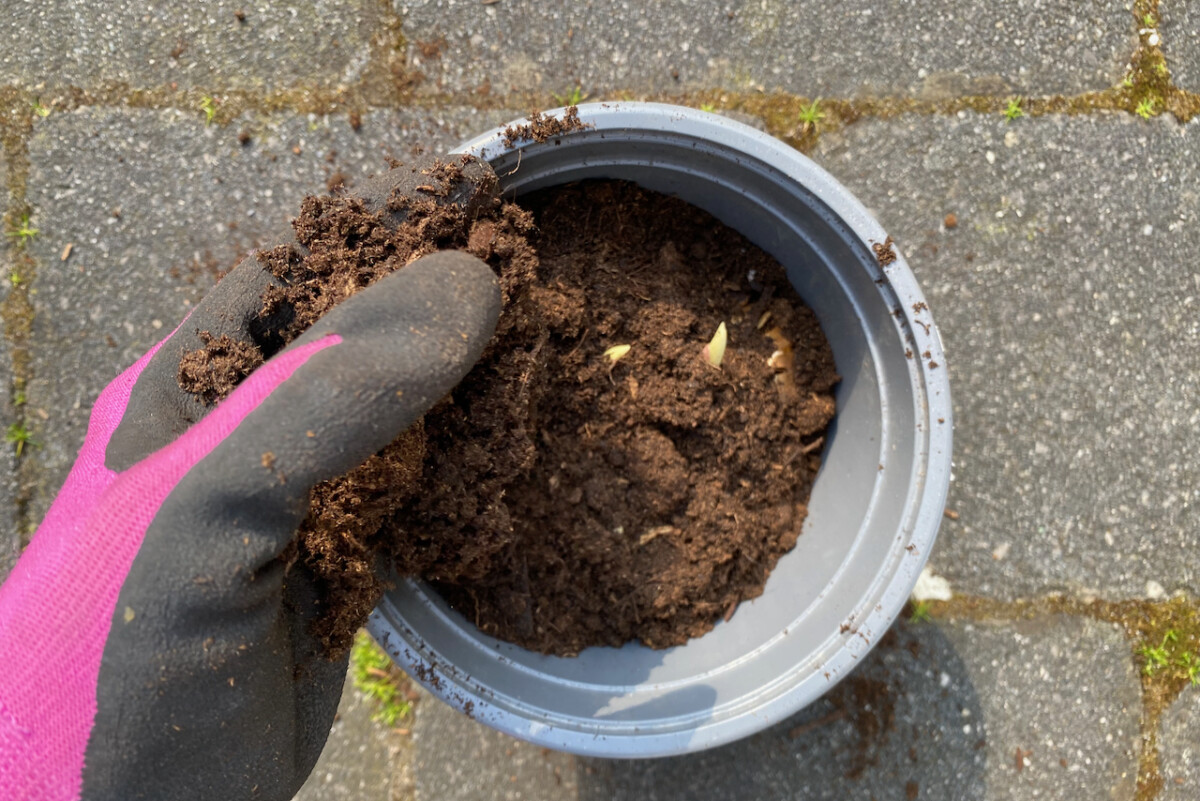
Step 3: Top it up.
Completely cover the gladioli corms with potting mix. Tap on the container a few times to make sure the soil has settled around the bulbs. You can press down lightly around the corms to help them settle in. Then give the container a good soak and, if needed, top up the compost again.
If you’re planting more than one variety of gladioli, now’s a good time to add labels. I’m only planting one type this year (‘Koersk’), and I’ve already made note of its name and starting date in my gardening spreadsheet.
How do I get more gladioli flowers?
There are some tricks to prolong gladiolus blooming time and increase the quality and quantity of gladioli flowers.
Do proper planting aftercare for your gladioli.
In addition to planting your corms in a well-draining place in full sun (or as much sun as you can get on your property), gladioli need water. They’re generally considered thirsty plants, especially when they first start growing – they are very fast growers.
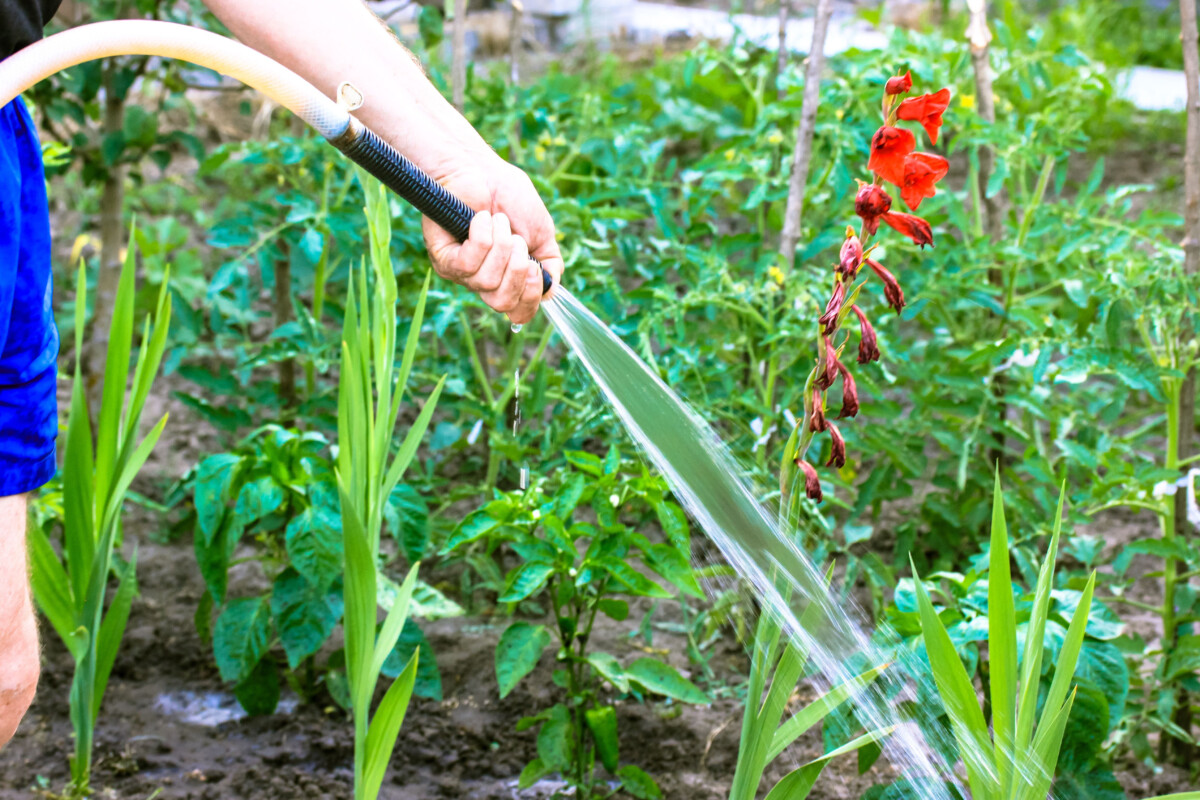
So if you’re not getting enough rain this spring, you should water your planting site every couple of days. Remember how deeply you planted your bulbs and make sure that water reaches that deep.
You should also add a layer of mulch around the planting site. Mulch helps retain moisture in the soil and regulate the temperature around the corms.
Stagger your gladiolus planting time.
If you fall under the “organized gardener” category (how I envy you) and if time allows it, you can stagger the gladiolus planting time. Planting bulbs every couple of weeks from late April until mid-June will often translate into a staggered flowering time.
If you decide to do this, keep in mind the length of your growing season. Gladioli need sun and warmth in order to bloom richly, so if your season ends early (say, September), this strategy won’t work very well.
Start some of your gladioli indoors.
I have neither the time nor the space to stagger-plant too many gladioli corms. So what I usually do is start some of them indoors earlier, as I explained above.
The bulbs that I start and keep in pots indoors will get more warmth than the ones that I’ve planted in the garden. This means they’ll sprout earlier and – once transplanted outdoors – will also bloom earlier.
Plant different varieties of gladioli.
As I mentioned before, it can take anywhere from 60 to 90 days (give or take) for a gladiolus corm to turn into a gladiolus flower. Different cultivars have different growing habits, so you can always mix and match them. The earliest blooming is Gladiolus byzantius, though it’s not as showy as its Grandiflora counterparts that bloom in July and August.
Don’t use synthetic fertilizer.
I’m a little bit disappointed every time I read a blanket statement of “fertilize your bulbs when you plant them.” Just to be clear, I do believe that garden plants need fertilizer, but these nutrients should be a component of healthy, living soil. (That’s why I recommend adding compost in and around the planting site.) Synthetic fertilizer is just a shortcut that you won’t need once you start paying attention to the health of your soil.
In essence, a bulb should have stored all the energy it needs during the previous season, if the post-blooming aftercare was done correctly. That means leaving the corms in the ground and leaving the foliage on the plant for as long as possible.
When you’re adding synthetic fertilizer, the effect you’ll get, most of the time, is an overabundance of leaves. This will also negatively affect flower production. It’s a common problem amongst overeager gardeners who think that fertilizer fixes everything (through no blame of their own, with so much misinformation circulating around.)
Over-fertilizing is one of the main reasons why plants such as rhododendrons and dahlias don’t bloom.
Overall, I think gladioli are easy to plant and easy to grow, And, if I may be so bold, I predict a resurgence in popularity of this classic summer beauty.