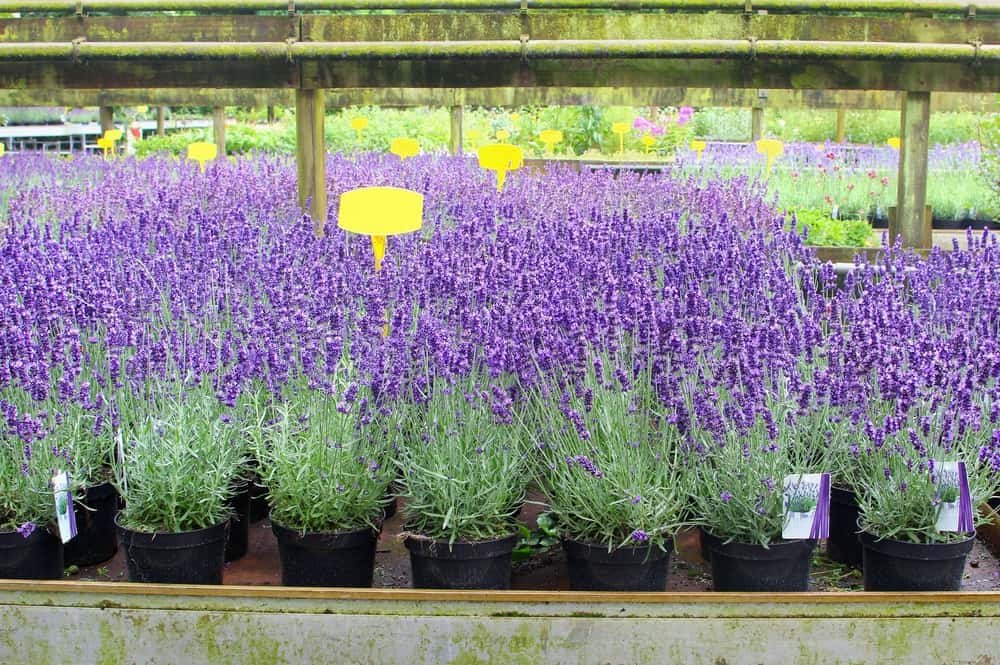
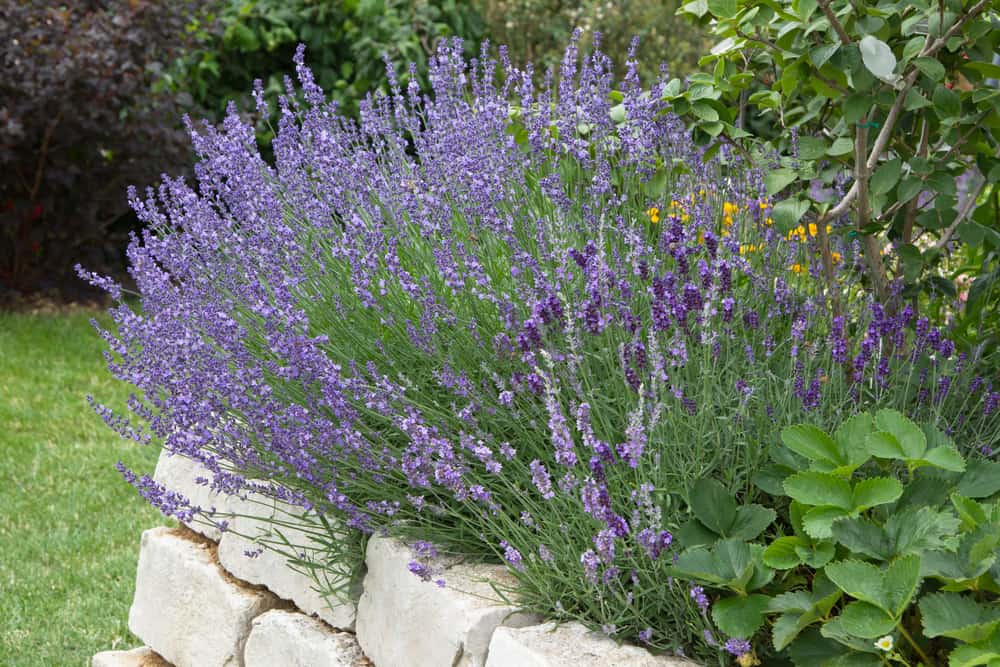
Lavender is one of the most popular garden plants around the world. Its greyish foliage with pops of purple is stunning, but the benefits don’t stop there. They also smell wonderful, have a million uses in the home and garden, and attract a range of pollinators to help the rest of your garden and the environment at the same time.
It’s hard to resist packing your garden with these stunning plants, especially when grown as a hedge.
However, your budget may get in the way. Instead of buying masses of lavender plants from your local nursery, why not grow your own?
Propagating lavender from cuttings is an incredibly simple process and will yield you plenty of flowering plants from one propagating session. Find out everything you need to know below.
Related Reading: How To Propagate Basil In Soil Or Water
The Process
1. Prepare the soil
When rooting cuttings, it’s always best to make your own soil mix rather than use garden soil. Tender cuttings trying to develop roots need plenty of drainage and the right consistency in the soil. Garden soil is unpredictable, potentially harboring pests or diseases, which will make your success in growing lavender from cuttings less likely.
Any well-draining soilless potting mixture will be suitable, using components like peat moss, perlite, sand, or vermiculite.
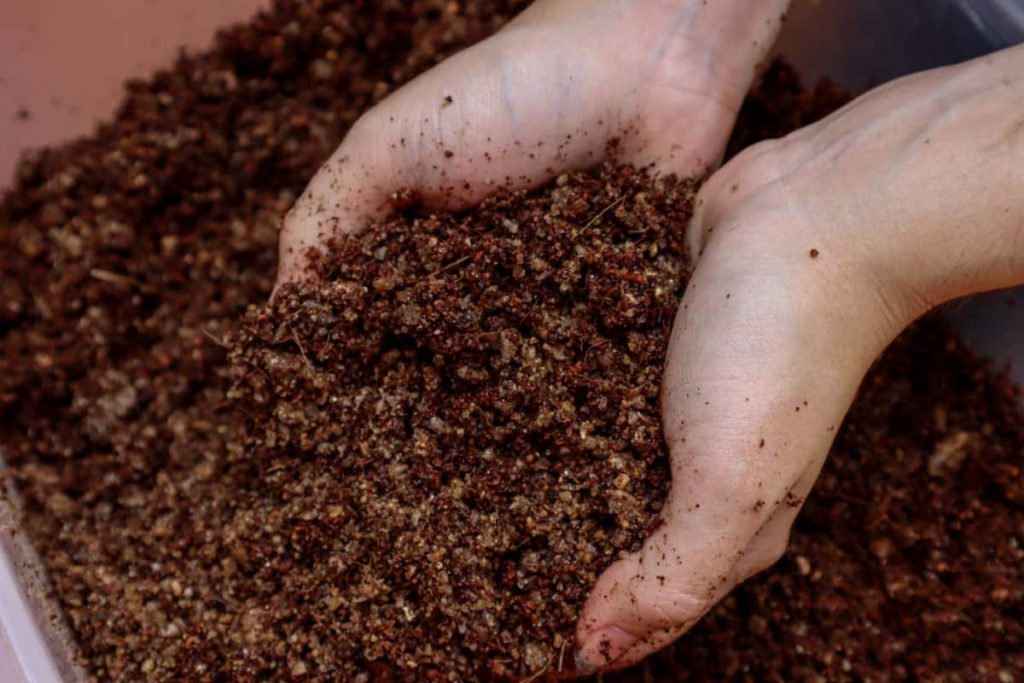
We’ve chosen a 50/50 mixture of coconut coir and sand to root the cuttings. The coconut coir, a more sustainable alternative to peat moss, helps the cuttings develop roots quickly and retains water. The sand improves drainage and more closely matches the soil conditions the plant will ultimately end up in, limiting the chances of transplant stress later on.
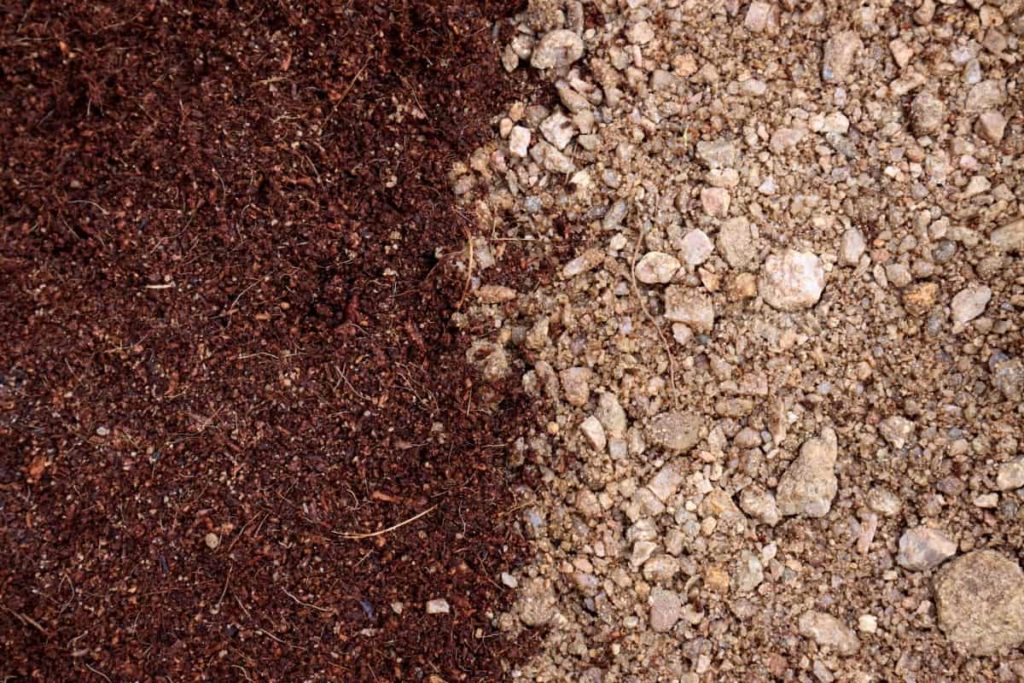
Coconut coir is shipped in compact bricks that need to be soaked in water before use. Reconstitute the coir right before getting started, as this added moisture will help the coir and sand better combine. You also need to start with a moist potting medium anyway, so this will give you a head start.
You can also use a combination of peat moss with added perlite and vermiculite to improve drainage, depending on what you have on hand.
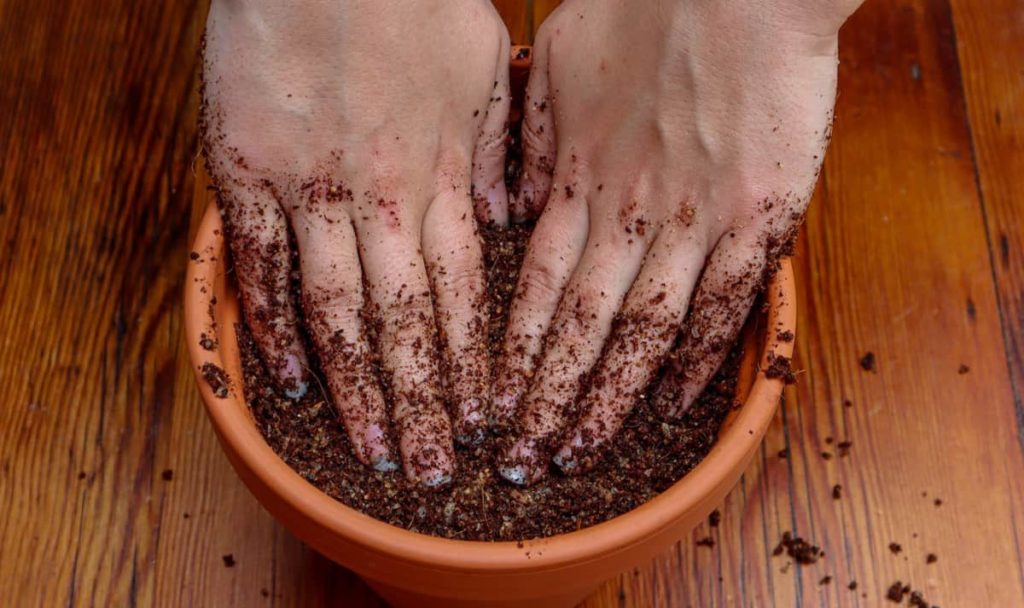
Place this mixture into a pot or tray of your choice, leaving a bit of space below the rim. Firm down gently to remove any large air pockets.
2. Remove the cutting
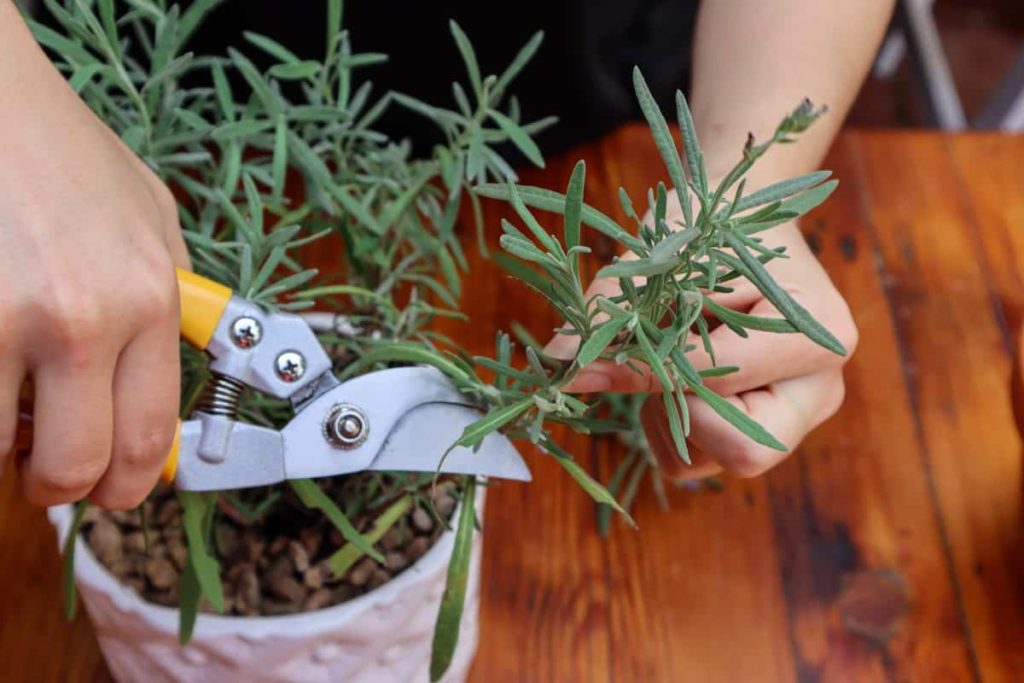
Lavender can be propagated by hardwood or softwood cuttings. Softwood usually propagates faster and has a higher chance of success, but either are viable options.
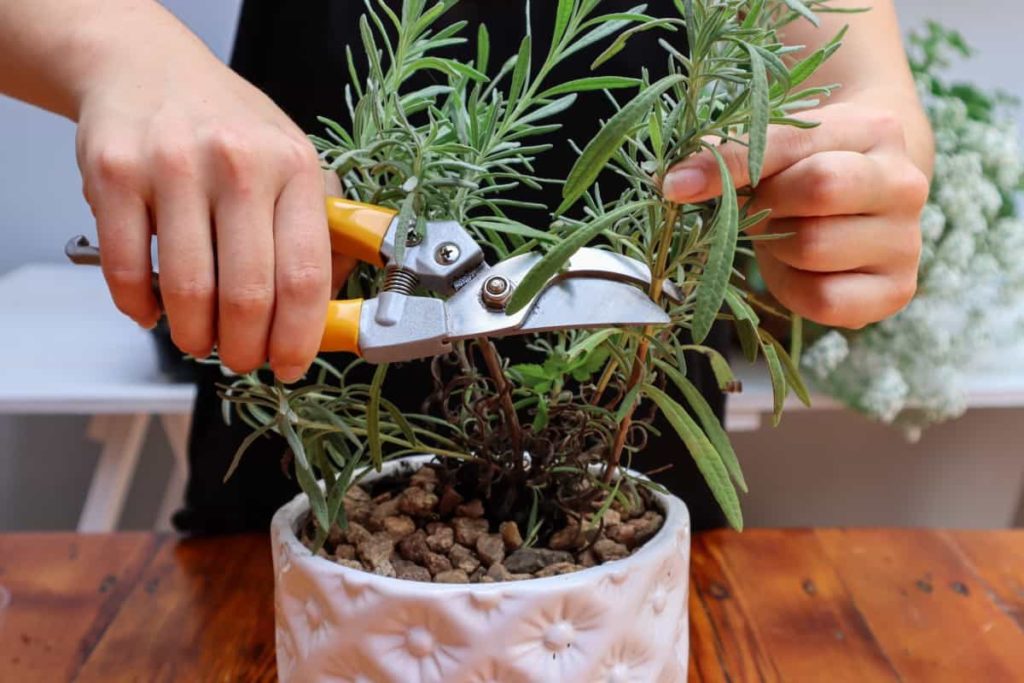
Remove a cutting around four inches long from the base of the plant. Choose a stem that has not flowered yet to allow the cutting to focus on root growth, or remove the flower before rooting. Always remove cuttings with a freshly cleaned pair of trimmers to prevent any potential spread of disease.

3. Remove the lower leaves
Remove all the leaves from the bottom half of the cutting to facilitate root growth. The cutting will still need a couple of leaves for photosynthesis on the top half.
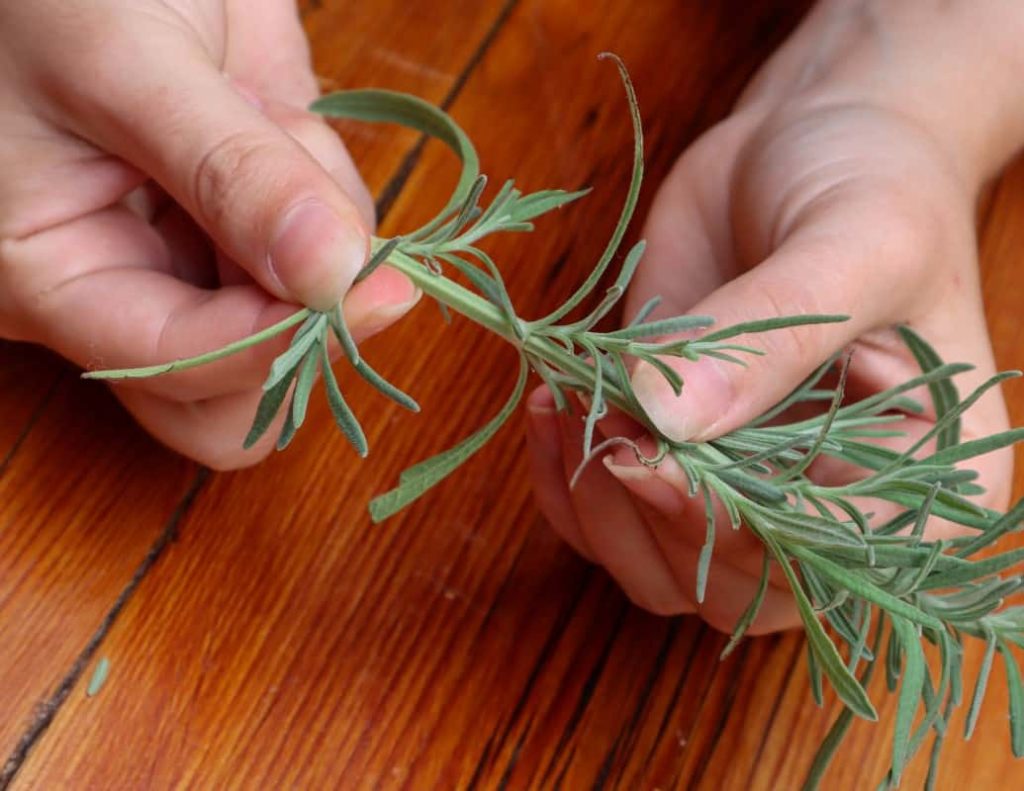
If you’ve taken a longer cutting, you can also remove a few of the leaves from the very top by trimming the stem. This is not a necessity, but may speed up root growth, especially if the chosen stem was about to flower.
While you’re at it, remove any woody sections of growth from the bottom of your cutting. This leaves the softwood which roots far quicker.

4. Dip in rooting hormone
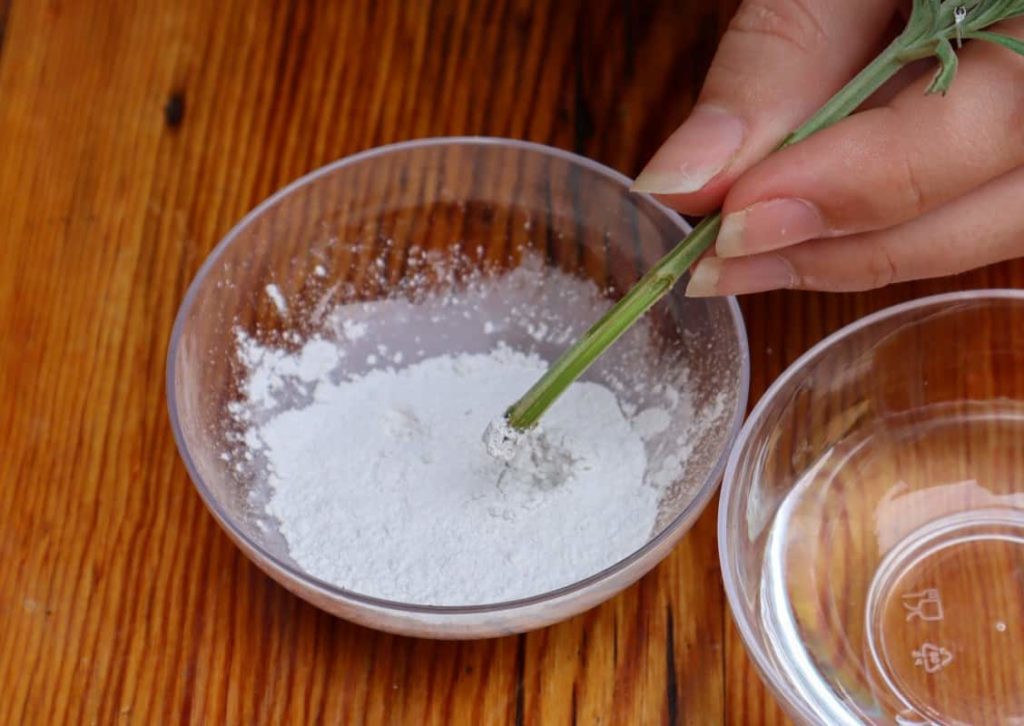
Rooting hormone is not always a necessity when rooting softwood cuttings. This is true for lavender cuttings too, which will take quite often without the aid of rooting hormone. However, using it does greatly increase your chances of success and limits potential problems with diseases.
Rooting hormone works by stimulating root growth at the point of the cutting. This not only makes root growth more likely, but also improves root growth to give you stronger plants overall.
Rooting hormone is usually sold as a powder. It’s available in plant nurseries and online. This is the rooting powder I use.
Always place a small amount of the powder into a separate container before use, rather than dipping directly into the tub to prevent potential contamination. Then, simply dip the end of the cutting into some water and the rooting hormone before planting.
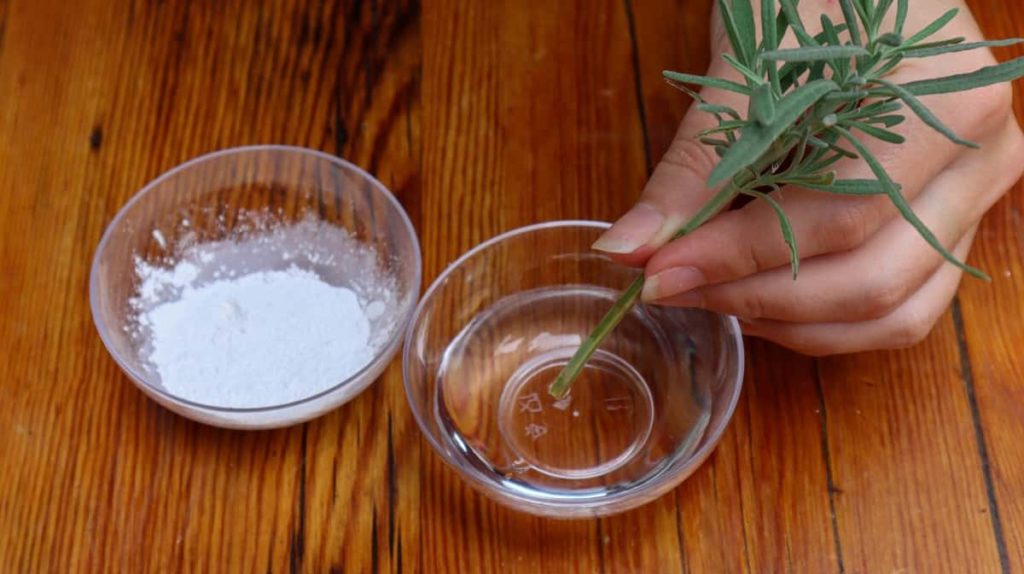
Discard any leftover powder – never put it back into the container.
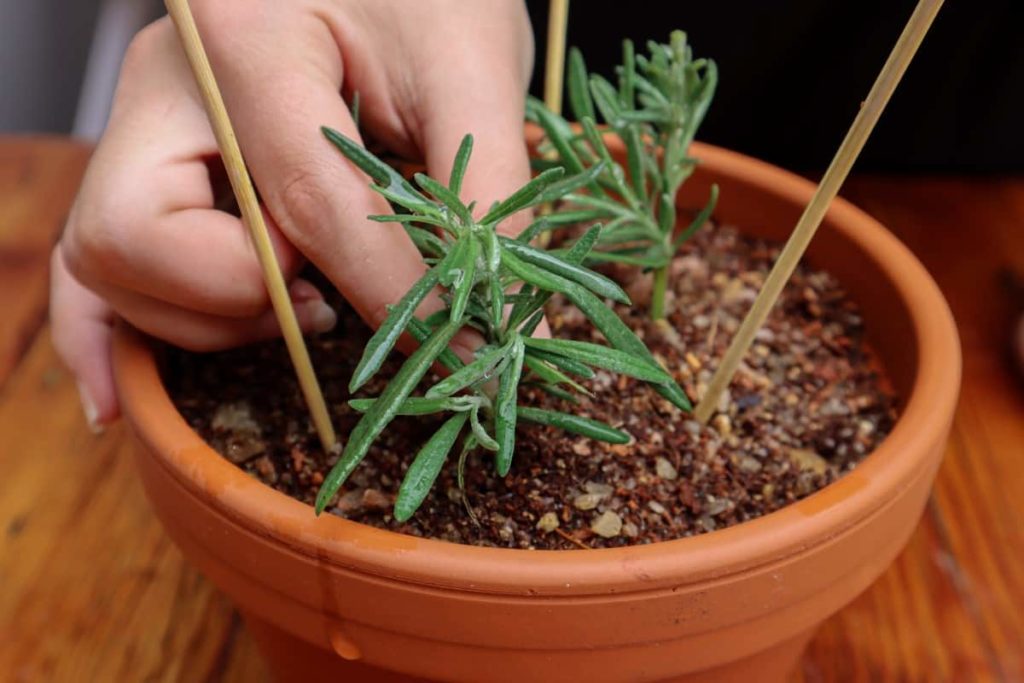
5. Plant the cutting
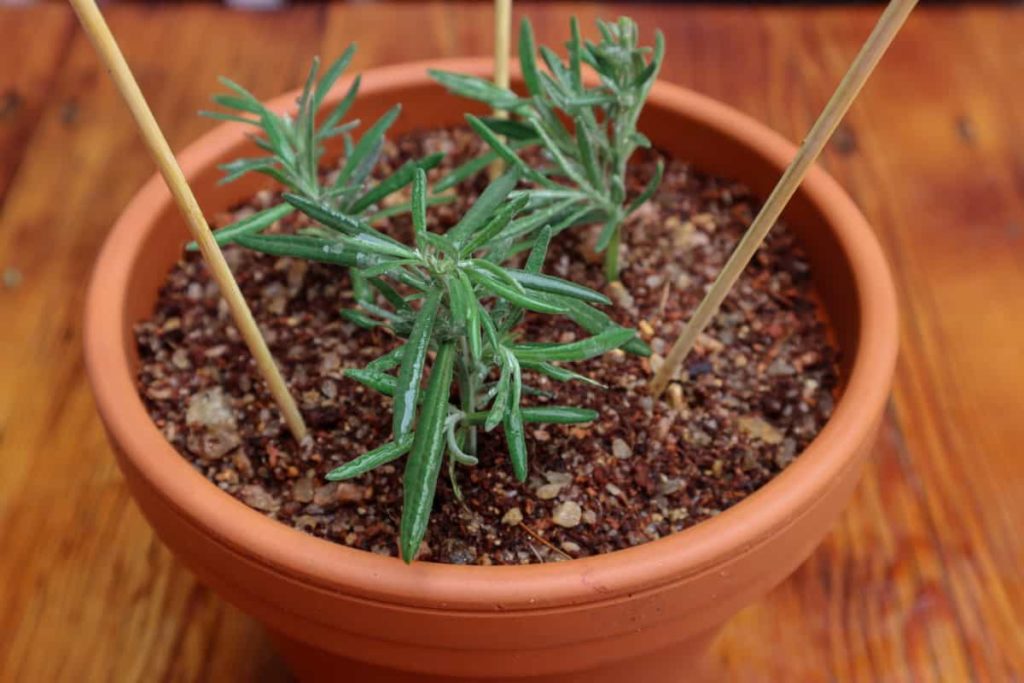
Make a small hole in the mixture with a skewer and place the cutting in the hole, leaving a small bit of stem exposed before the first set of leaves. Press around the soil gently to secure the cutting in place.
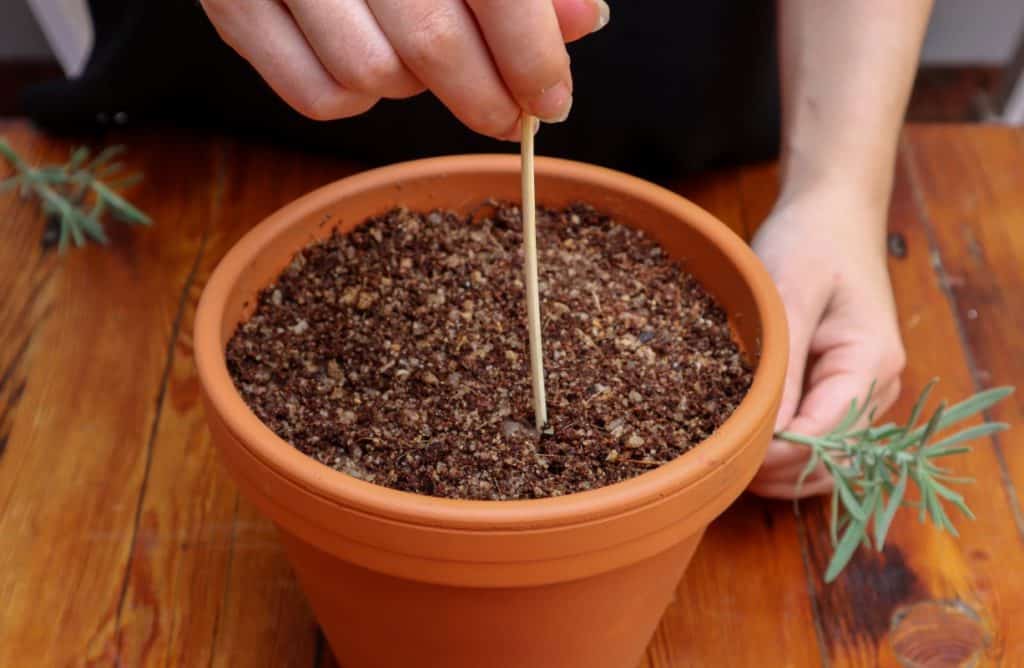

You can plant several cuttings in the same pot to develop roots, as long as you transplant them into individual pots once the roots have grown.
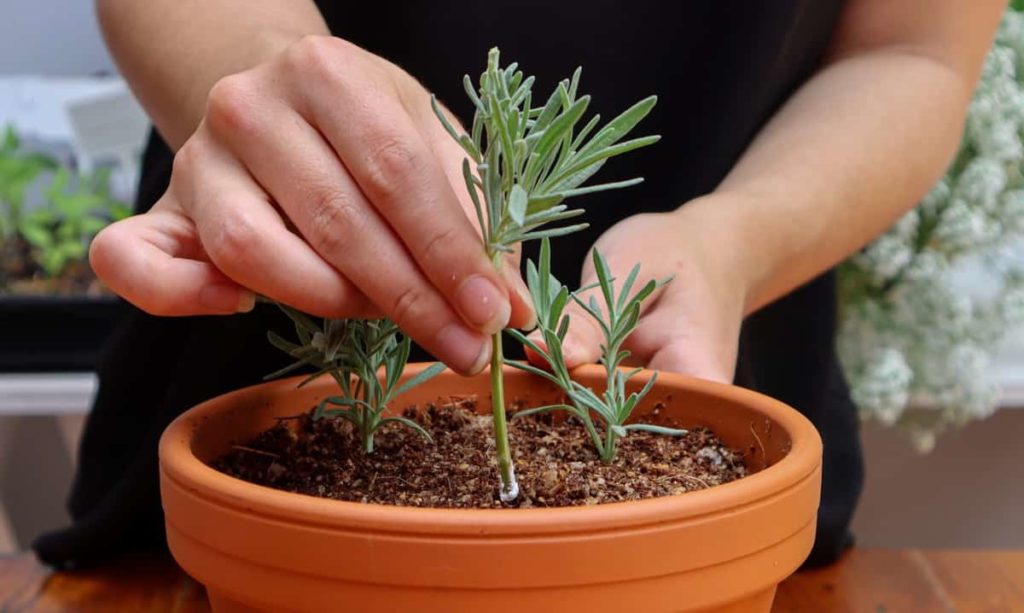
6. Cover
Once the cuttings are planted, it’s time to make a mini-greenhouse to replicate the perfect conditions for root growth.
If your soil was not moistened before planting, ensure you water thoroughly before starting this process, otherwise the humidity will not be generated and the cuttings will dry out.
Take a few of the skewers you used to make a hole for the cutting and place them around the edge of the pot. Then, place a clear plastic bag (sandwich bags work well) over the top of the pot. The skewers should keep the bag in place and prevent it from touching any of the cuttings, resulting in rotting.
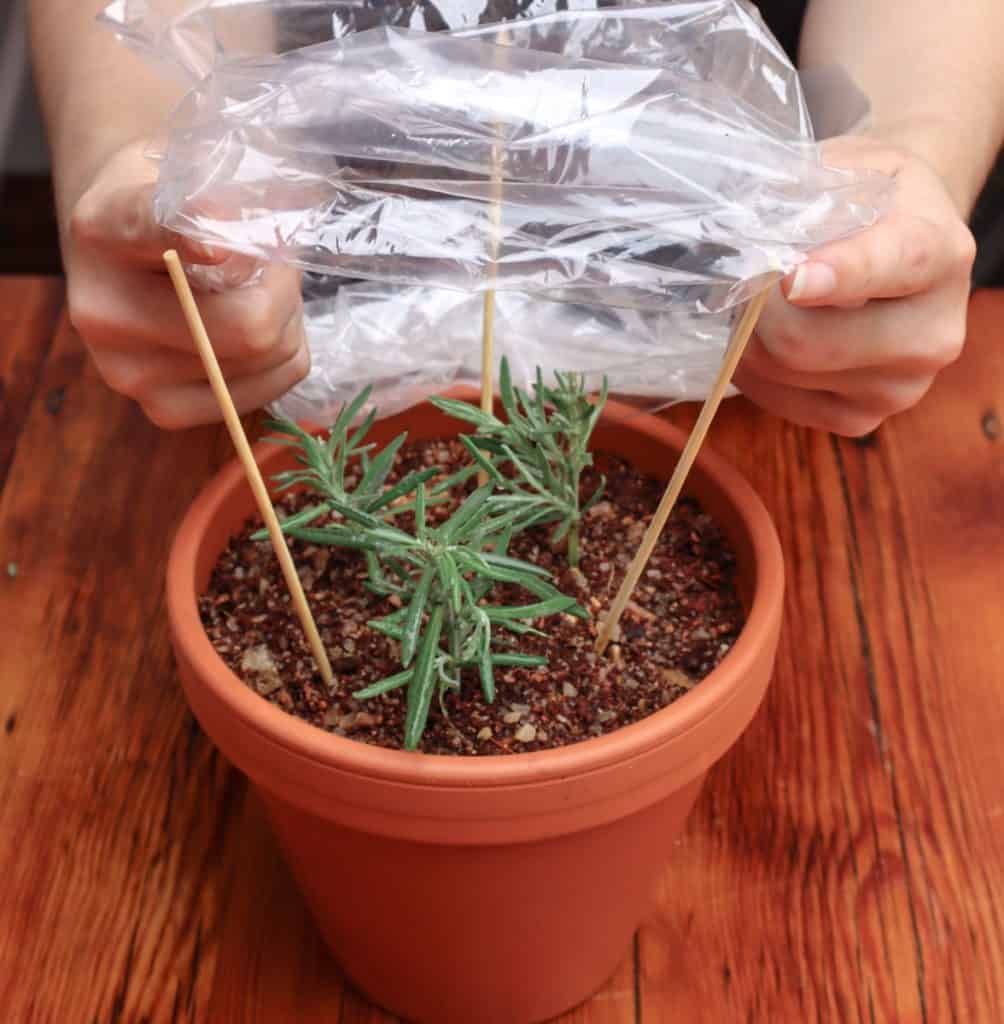
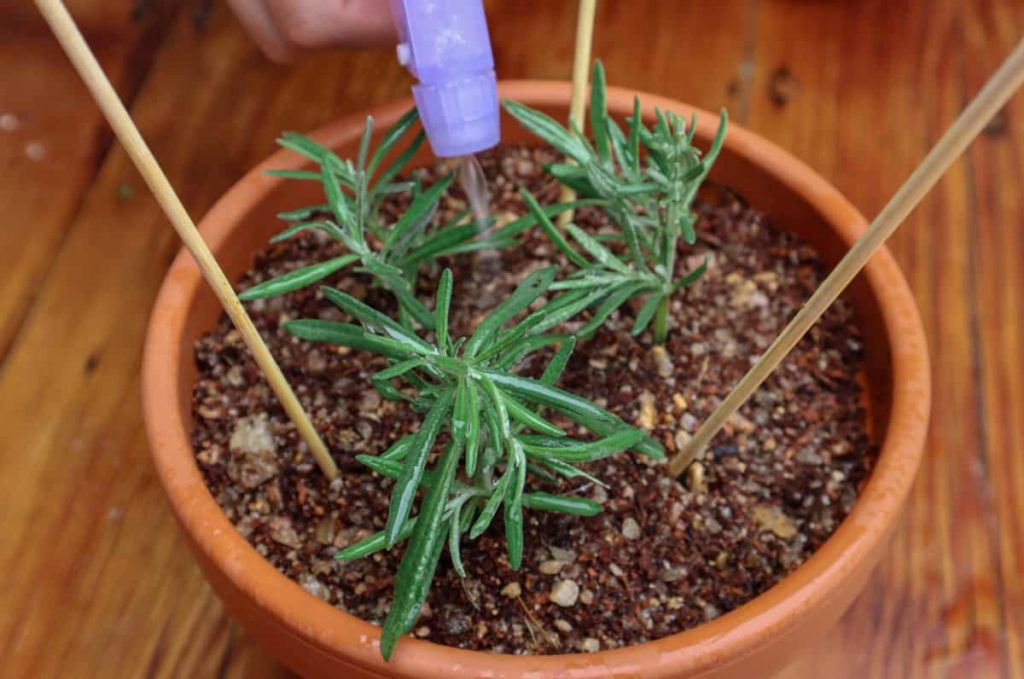
When placed in a warm spot, this cover creates a high humidity environment around the cuttings, stimulating growth. You will need to lift the bag every couple of days to check on the progress of the cuttings, and potentially mist the soil if it is beginning to dry out.
When you’re finished, simply replace the bag and return the pot to its original warm spot, away from direct sunlight.
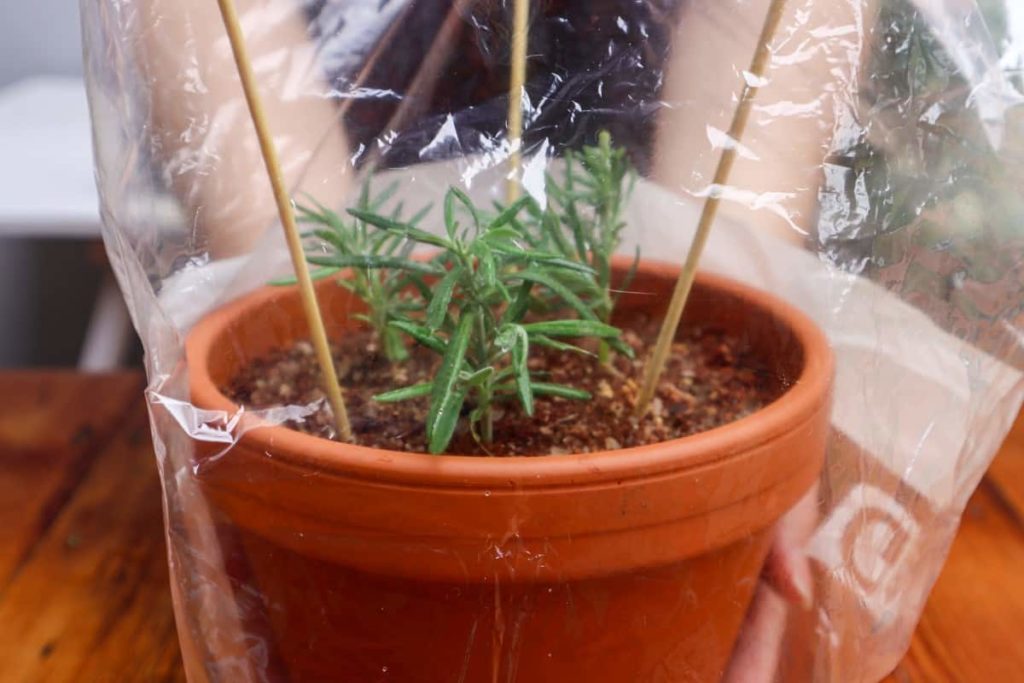
Using a marker, label the plastic bag with the name of the specific lavender variety and the date the cuttings were planted. This will help you accurately track the progress of growth without worrying about when the cuttings should be ready.
The cutting should have developed roots within a couple of weeks. Be patient though – it can also take longer than a month. After about three weeks of growth, pull gently on the cutting. If there is some resistance, the plant has developed roots.
Related Reading: How To Propagate Rosemary – Step-by-Step With Photos
Propagating Lavender In Water
Lavender can also be propagated in water, requiring far less equipment. However, propagating in water is generally less successful long-term, as the cuttings will struggle to establish strong soil roots when transplanted.
Fill a clear glass or vase about halfway with room temperature water. Alternatively, invest in a stylish and practical propagation station to make your propagating part of your home decor. Here are 13 of the best.
Follow the same process as above for removing and cleaning the cuttings, excluding the rooting hormone step.
Depending on the height of your glass, you may need to remove a few more leaves to ensure none are touching the water. Leave the glass in a warm spot away from direct sunlight.
Change the water every couple of days or when it appears cloudy. Leave the cutting in the water until the roots have grown several inches before planting into individual pots.
To get the cutting used to soil conditions over time rather than all at once, you can slowly add teaspoons of coconut coir to the water each day once the roots are visible. This will limit problems with transplant shock and root growth once the cutting is planted out.
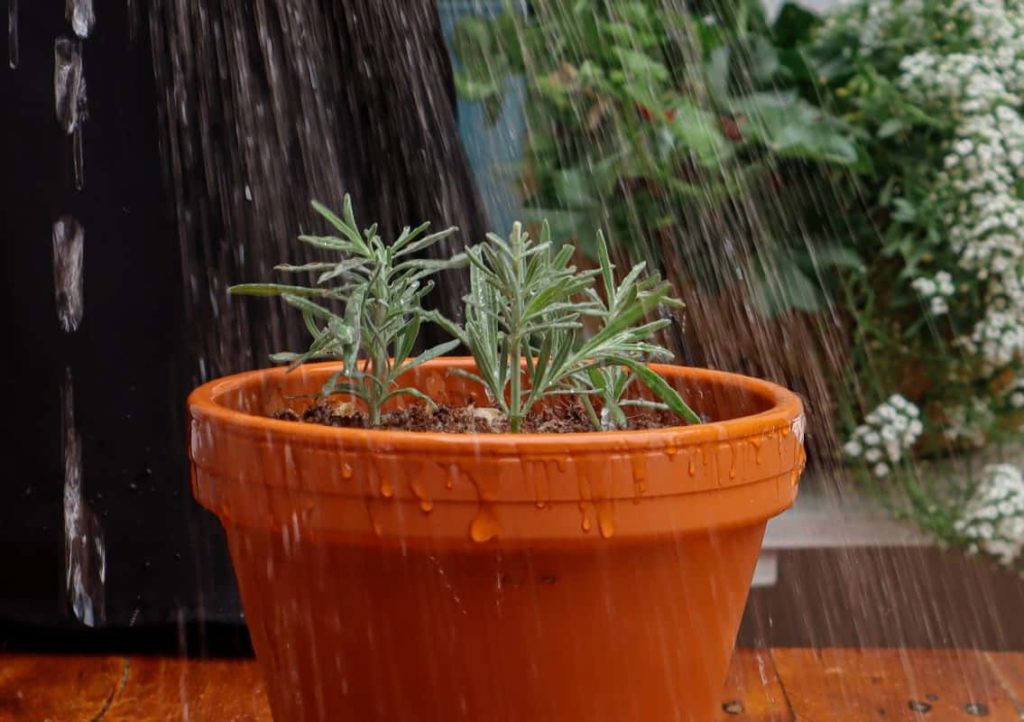
When Should I Transplant My Lavender Cuttings?
Lavender cuttings can be moved into individual pots or planted straight into the garden as soon as the roots are an inch or two long. In the potting medium, this will take a couple of weeks. In water, root growth will be faster.
Whether planting in a pot or into garden beds, ensure the soil is very well-draining. Originating in the Mediterranean, lavender loves sandy or rocky soils. While you can increase watering while your cutting establishes itself properly, limit watering once new growth emerges – lavender prefers soil on the drier side.
Ensure the cutting is in a spot with plenty of sunlight and it should grow into a fully-fledged plant in no time.
Why not propagate lavender cuttings to start your very own lavender hedge without the expense of dozens of established plants? Here’s why every backyard needs a lavender hedge and how to grow one.

Alternatively, you can train your lavender cuttings to grow into a lavender tree with a single main stem. It’s absolutely beautiful. Here’s how to do it and care for your lavender tree – or where you can buy your own ready-made lavender tree.