It is possible that, at some point during the growing year, I talk about my clematis plants more than I do about my cats. I will definitely write more about clematis. I already wrote a guide on how to prune clematis depending on when it blooms. And I also wrote about how to get this beautiful climber ready for winter.
In between, there’s not much to do but admire the flowers and gently guide them along the trellis when they go through their mid-summer growth spurt.
This year, I was even brave enough to propagate some clematis cuttings. Ok, maybe it doesn’t require bravery as much as it requires persistence. That’s because not all clematis will propagate well via cuttings, so the trick here is experimenting with all clematis you can get your hands on.
If you want to add to your collection, I invite you to propagate your clematis with me. Here’s how to do it.
Step 1: Cut a longer clematis branch.
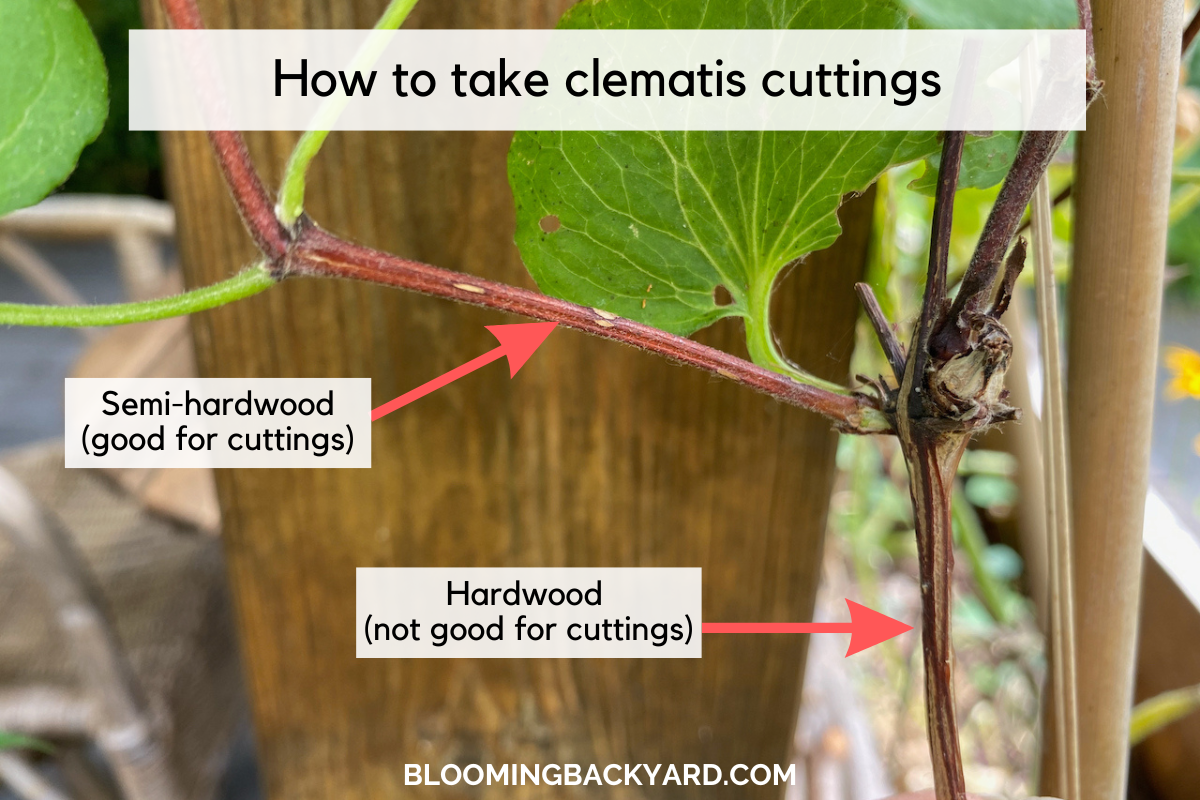
This is how I do it, but I’m not saying this is the only way to do it. Clematis vines keep growing and climbing throughout the season. So naturally, there will be soft new growth at the tip of the vine. This kind of softwood growth doesn’t propagate very well (in fact, I’ve failed to propagate it at all), so my purpose is to get to the nodes along the semi-hardwood that’s below the softwood on the branch.
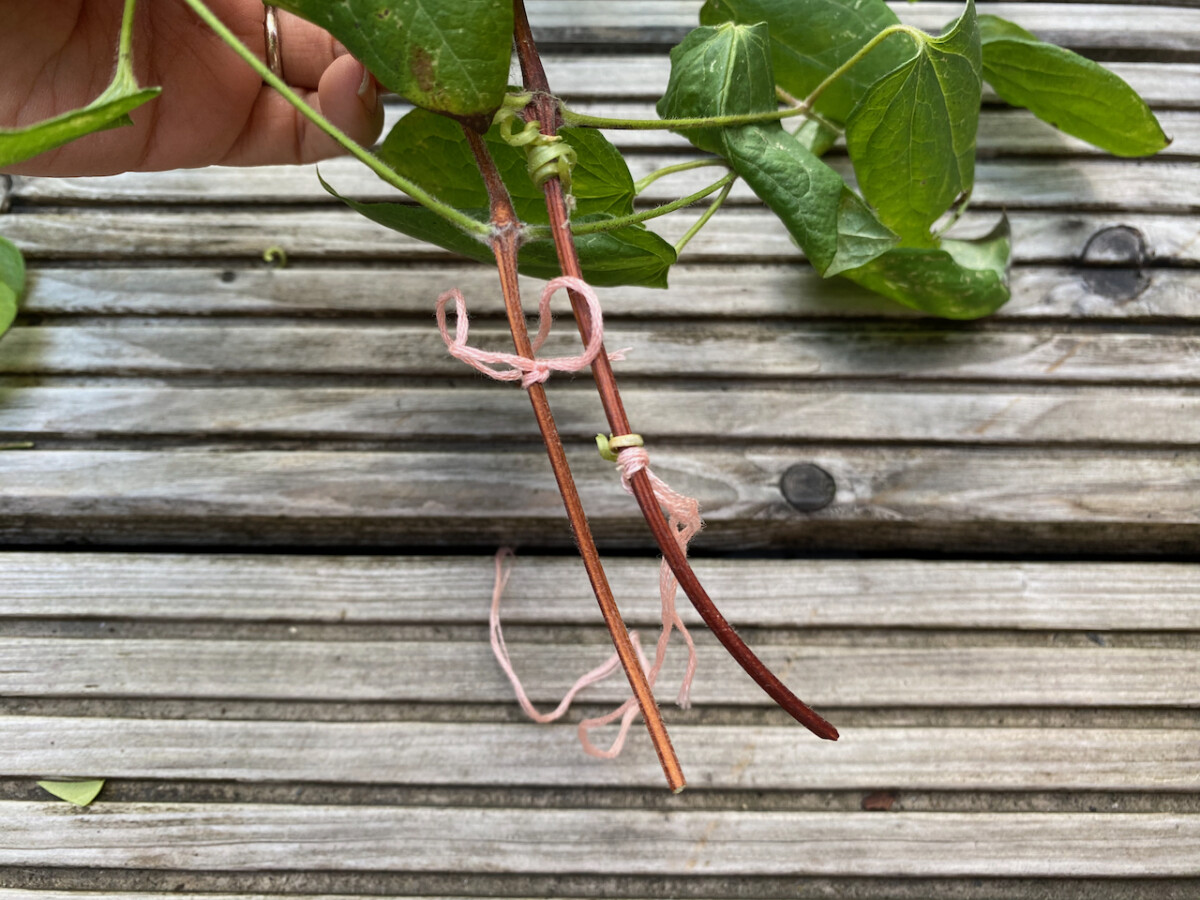
Now this is where it might get a bit tricky, especially if your vine did several loop-de-loops on its growth along the trellis. This makes it tricky to figure out which way is up and which way is down. Most of the time, even the orientation of the leaves won’t help because they always twist themselves to grow upward and reach for the light.
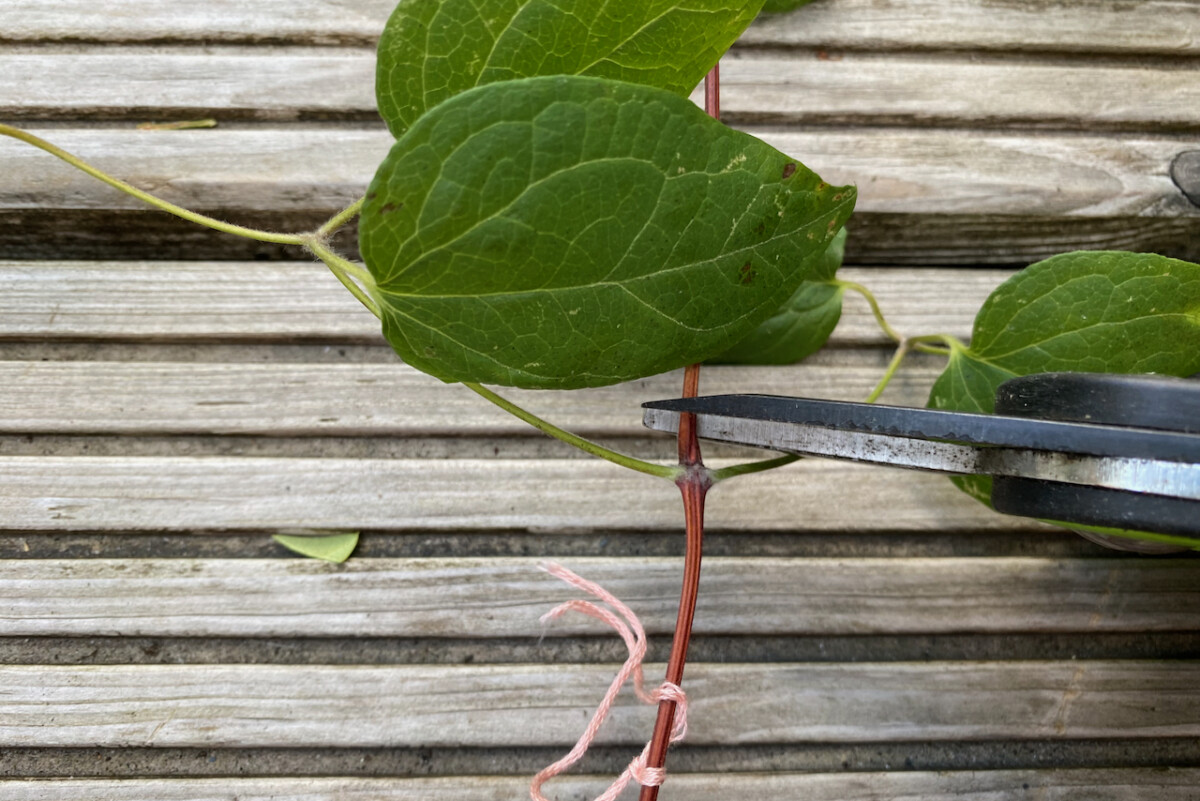
So if you find yourself holding a newly-cut vine and trying to figure out which way is up, use my trick next time. Before you even make the cut, see if you can follow the vine with your hand all the way down to the ground. Then follow it back up and decide where you want to cut it from. Before you snip, tie a ribbon to the stem to indicate which way is down. Then cut right above a leaf node.
How long should the first clematis cutting be?
That depends on how tangled it is, how far down the semi-hardwood is, and how far apart the internodes are. I aimed for getting about four or five viable cuttings from one longer vine. I would say my larger cuttings ended up being about three feet (90 cm) long.
Step 2: Separate the large cutting into several individual cuttings.
Now that you have your long cutting, it’s time to separate it into several shorter ones.
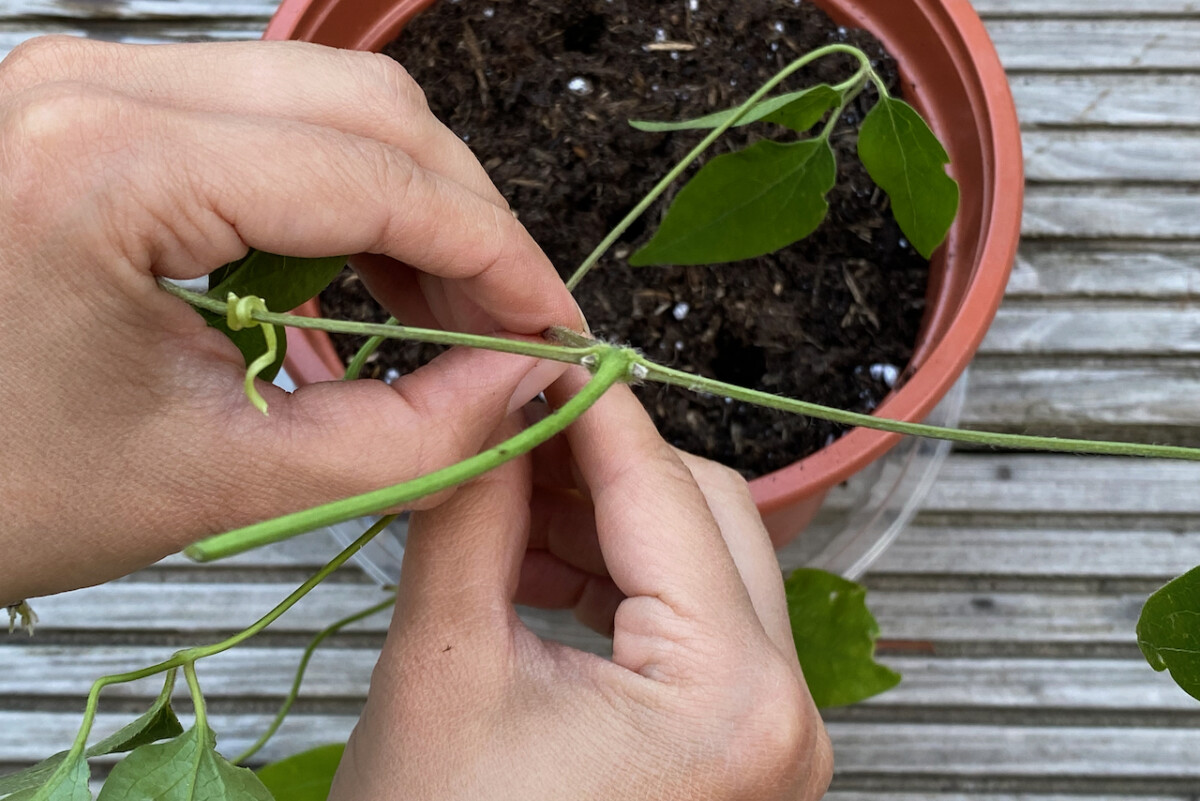
Clematis are propagated via internodal cuttings, so we’ll start by looking for the nodes. Each individual cutting should have one node at the top and a short stem at the bottom (long enough to stick the cutting in the ground). This is why it’s important to know which side is the top. That will be the direction of growth.
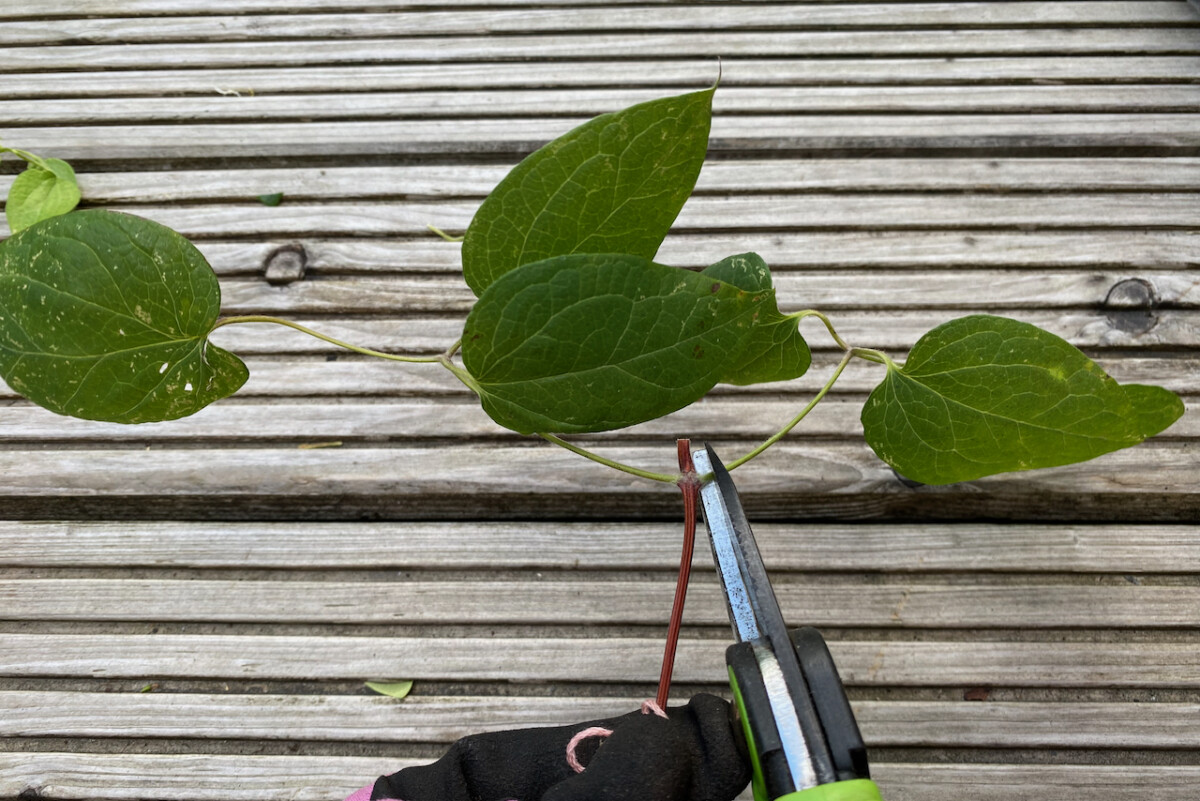
Starting at the bottom of your long cutting, trim about two inches (5-6 cm) below a node and about one inch (1.5 cm) above it. That’s your cutting. Continue taking more cutting from the same main vine until you get to the softer, younger part of the vine. That’s the part that you can discard since it will be too young to root.
Ideally, you should look for segments that have new growth on them or at least some signs of a new bud forming. Once the plant has rooted, new shoots will start emerging from these axils.
When you take your individual cuttings, make sure you only keep the ones that have firmer (but not overly rigid) stems. You’re looking for the semi-hardwood, so you’re avoiding both the hardwood at the bottom and the softwood at the top.
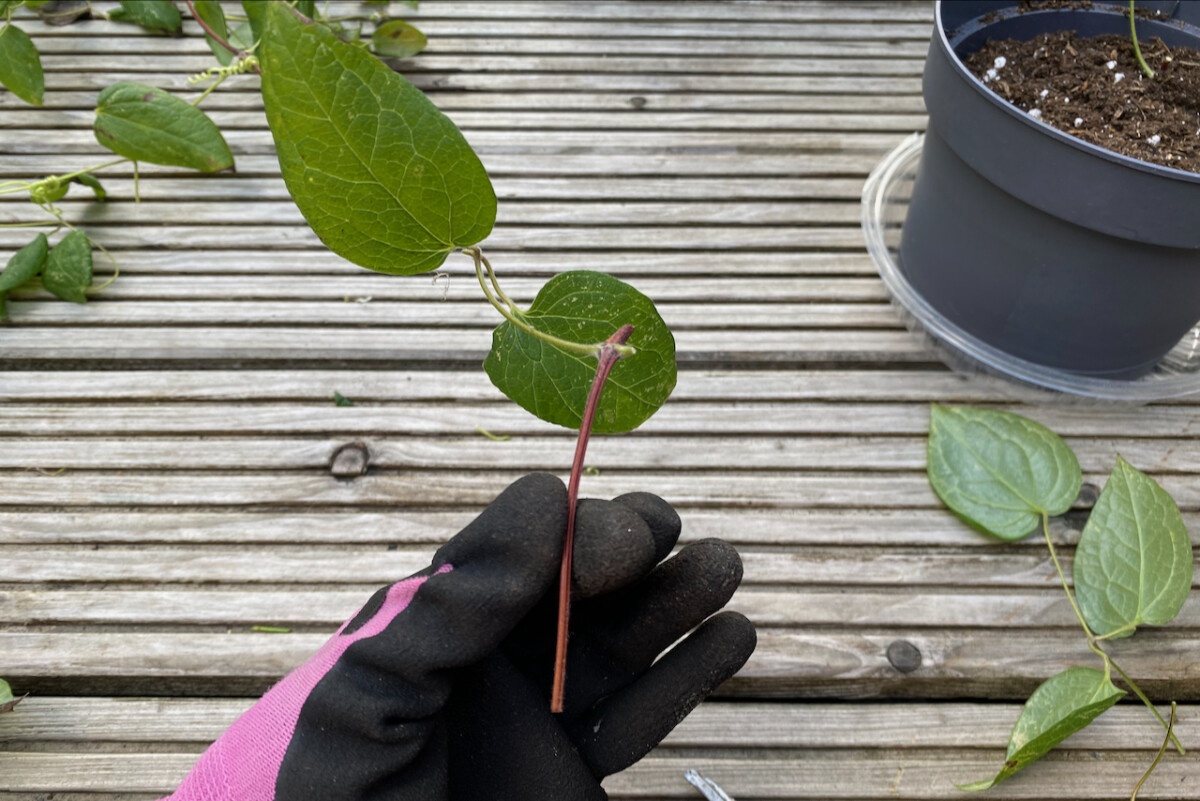
Step 3: Reduce the leaf surface of each cutting.
If you’ve read all my other tutorials on taking plant cuttings, you’ll know by now that this is almost a mandatory step.
There’s a very good reason why we need to reduce the leaf surface of cuttings – it lowers the surface available for water to evaporate from the cutting. Since the cutting is no longer attached to the mother plant and it doesn’t have roots yet, it will dry up very quickly if we allow it to lose too much water through leaf perspiration.
However, we still need leaves in order for photosynthesis to happen. So the solution is to only remove one of the leaves, keeping the one that looks healthier. That might not necessarily be the largest leaf.
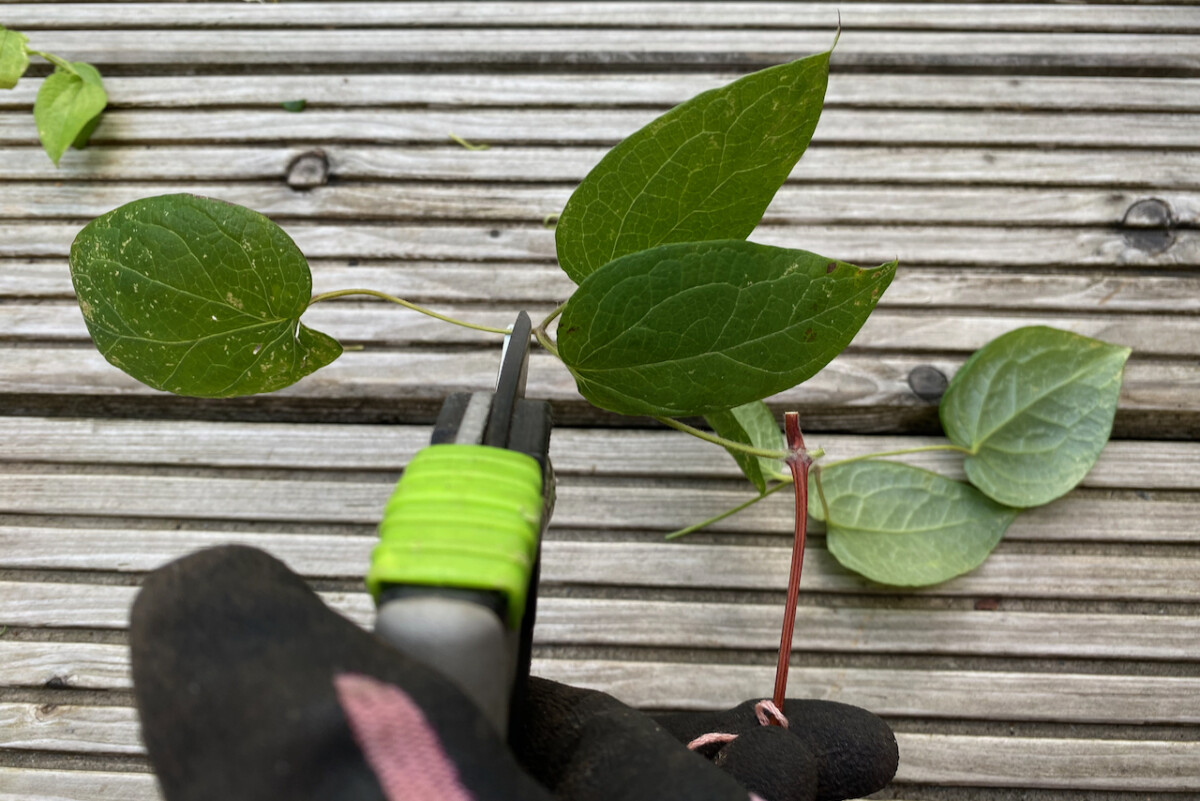
If the remaining leaf is still too large, you can also remove the middle leaflet. This will depend on what type of clematis you’re propagating.
When you cut off the extra leaf, make sure you don’t nip the bud growing next to it.
Step 4: Prepare your potting containers.
This year, I’m taking cuttings from two different types of clematis. For each variety, I’m planting all the cuttings in one larger pot.
As I’ve already mentioned, clematis has a low rooting rate, so it’s always good practice to account for that and take extra cuttings. I have about twenty cuttings total, so having twenty individual tiny pots would be too much of a hassle. That’s why I’m planting several cuttings together into larger pots.
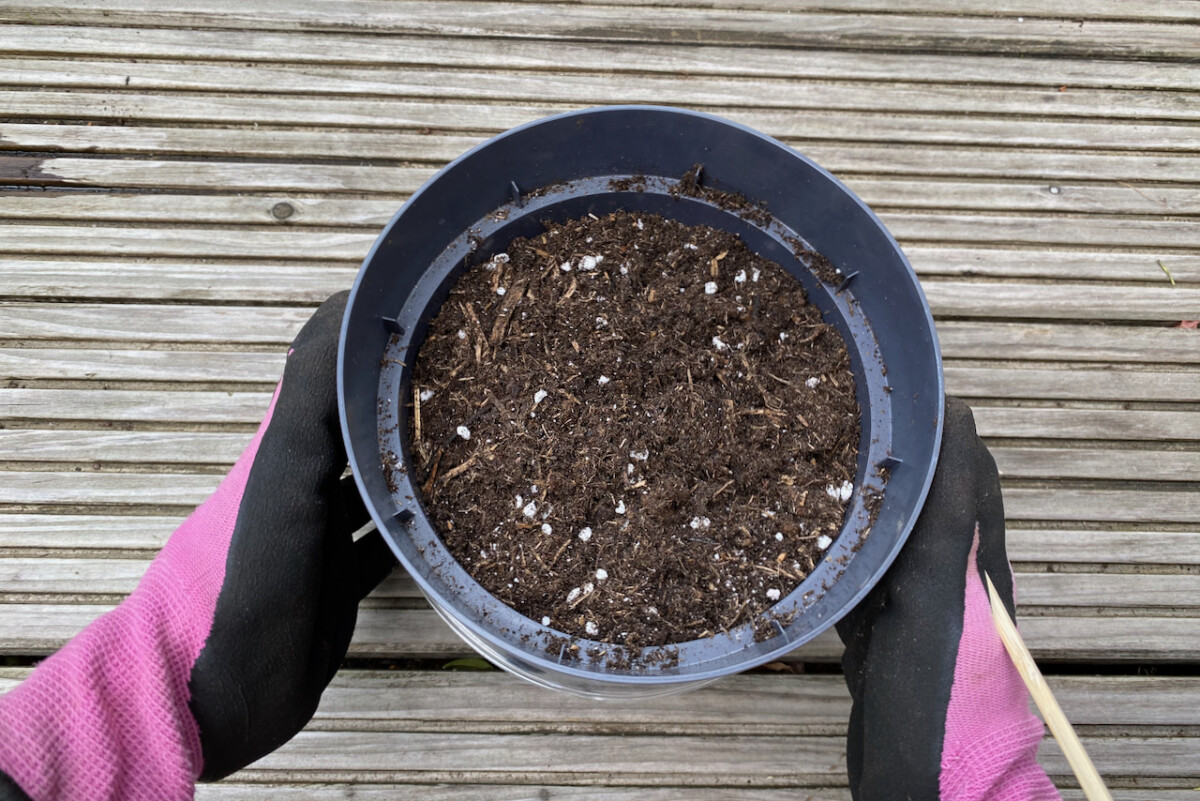
Another reason for the grouping is because more cuttings will absorb more water and hopefully self-regulate the moisture levels of the soil in the pot. Nevertheless, I won’t rely on this to happen. So I’m adding extra perlite to the bagged potting mix in order to improve drainage. A few other things you could add for this purpose are horticultural sand, bark or vermiculite.
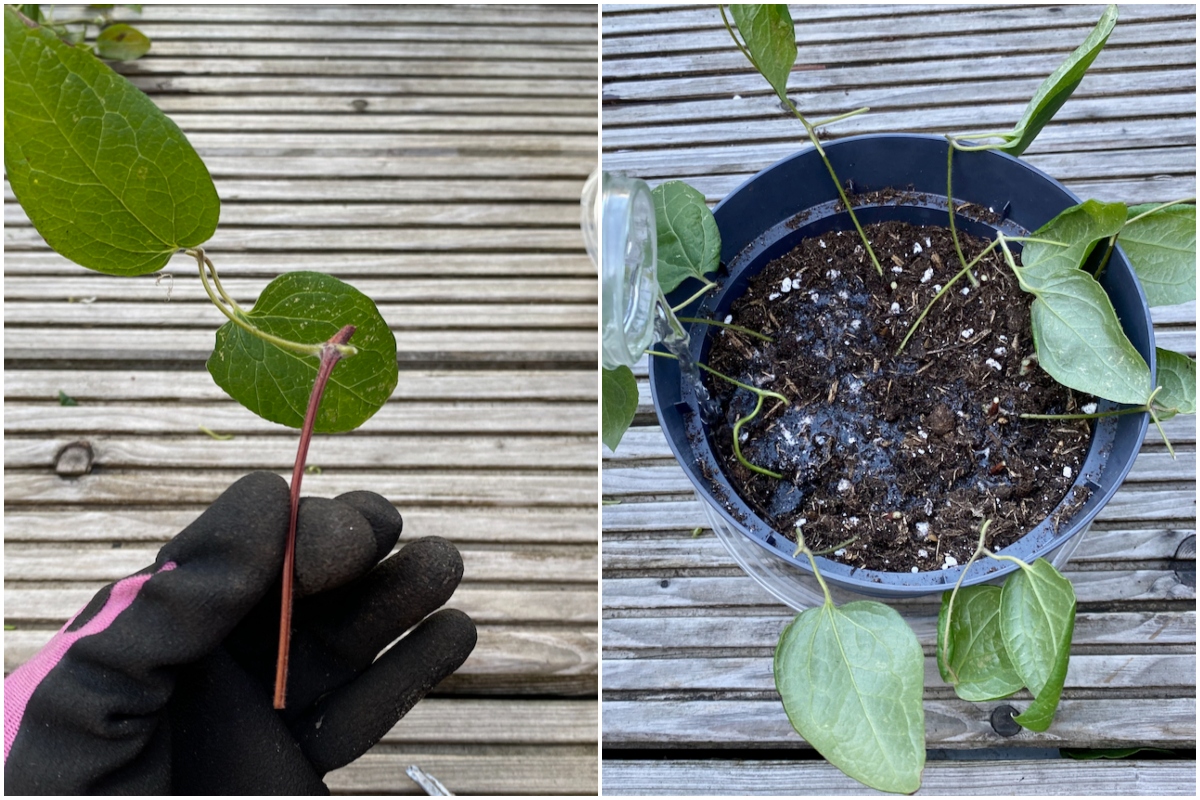
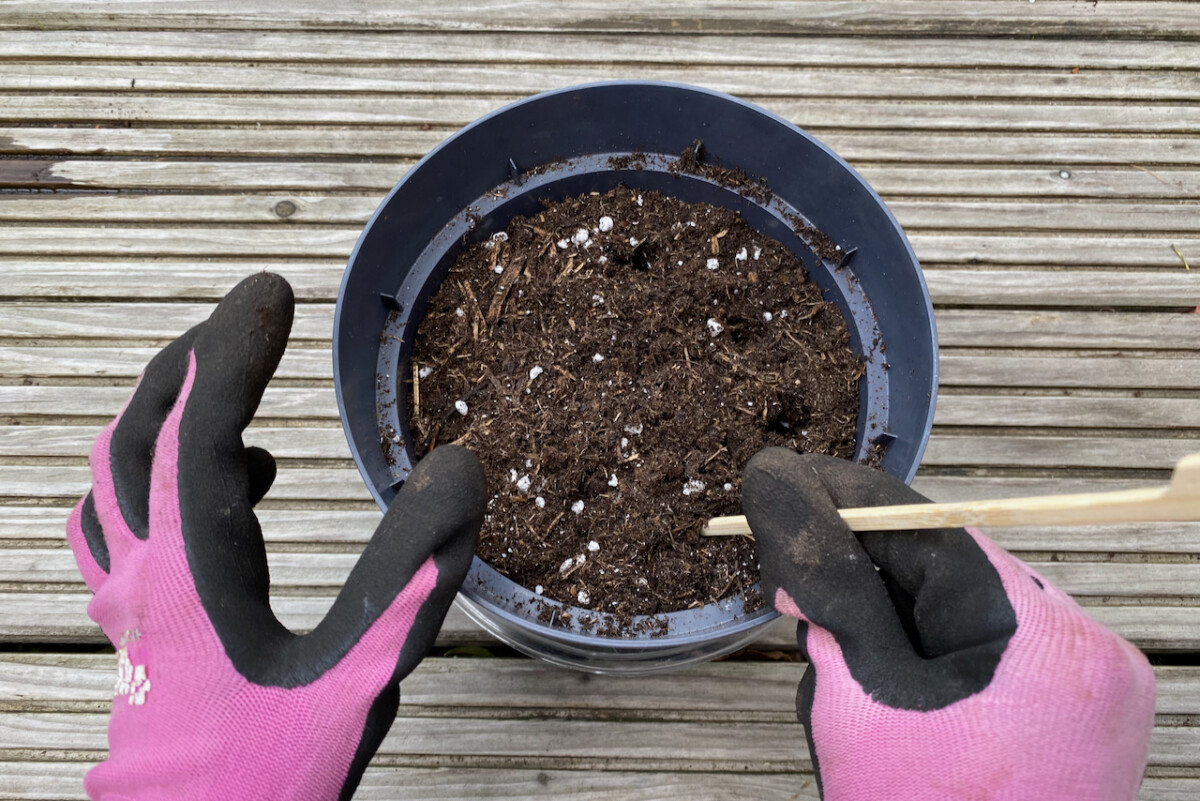
Step 5: Insert the clematis cuttings in the pot.
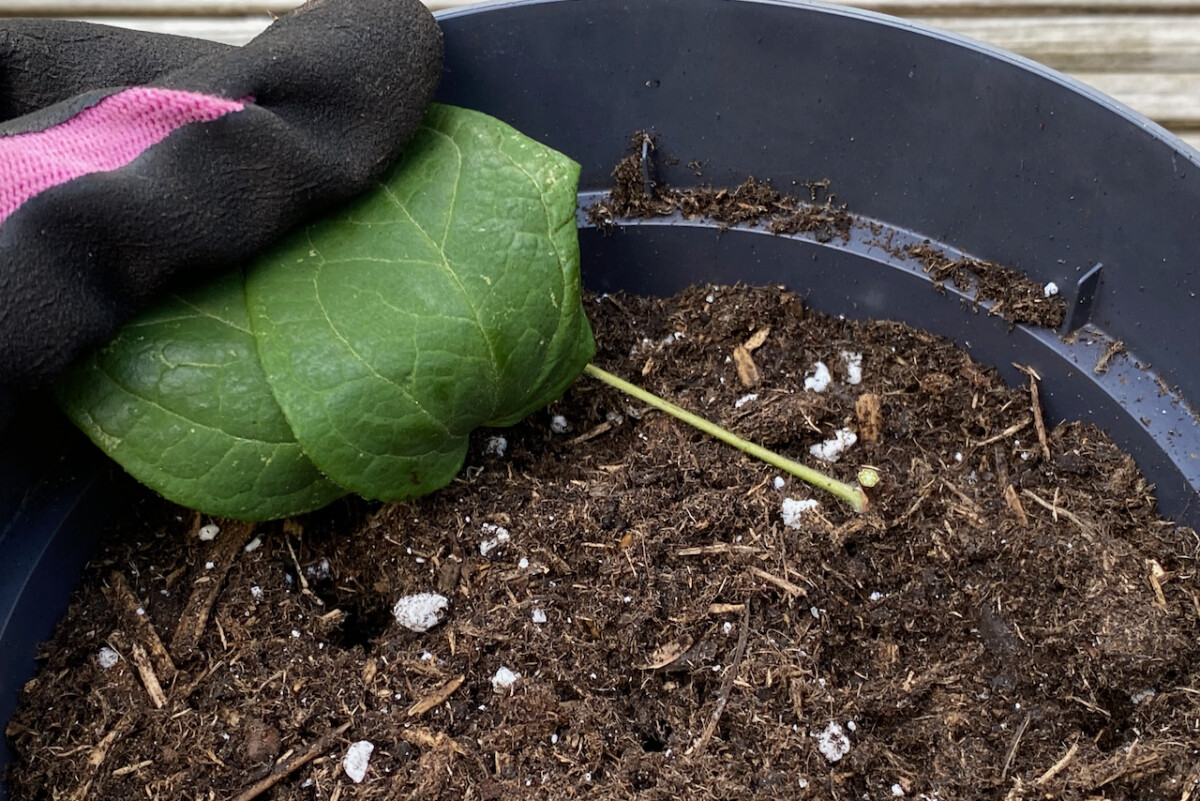
With any other cuttings, I would simply insert them into the ground. But clematis is quite fragile, so I prefer to make the holes first in order to protect the cutting. You can use a skewer or a pencil to make thin channels for the cuttings. Only then should you insert the cuttings, preferably along the edge of the container.
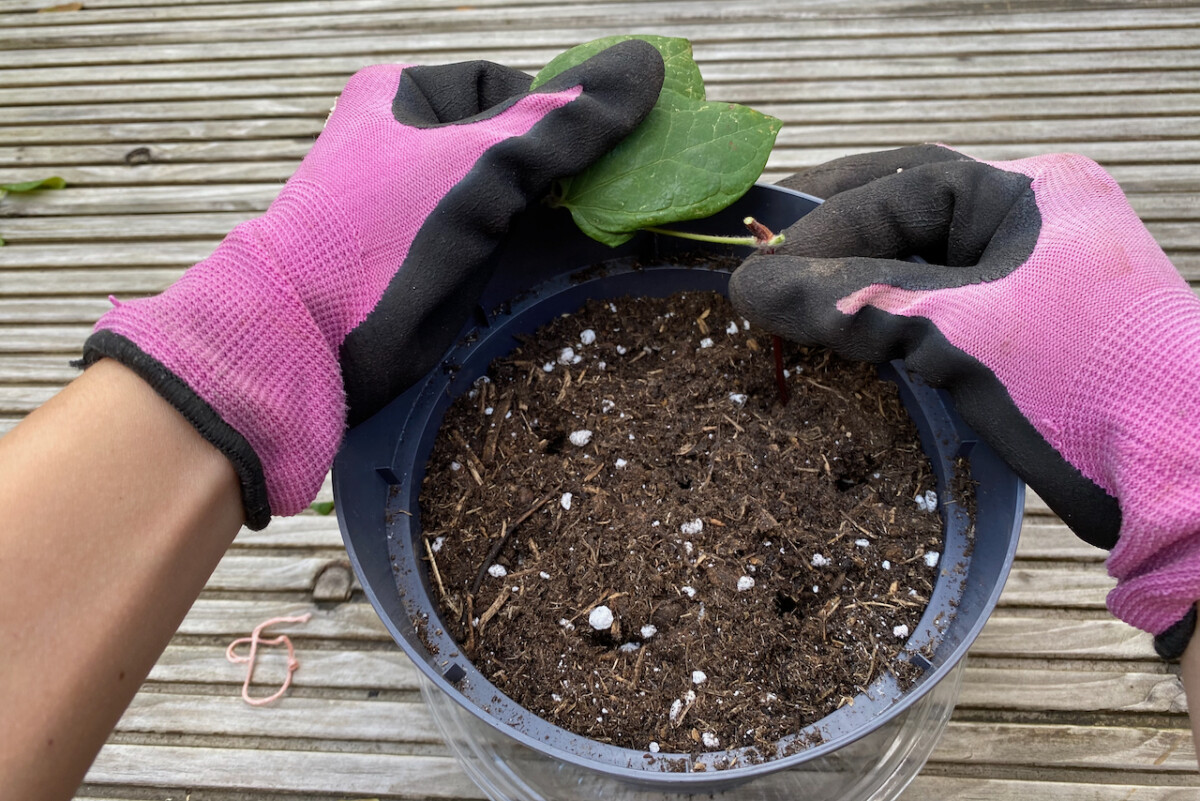
Always insert the cuttings all the way down until the leaf node touches the soil. It should touch the ground, but still be just above soil level. Whatever you do, don’t bury the leaf node. This is where the side shoots will start growing from.
If you need to, you can adjust the length of your cutting to that of the container. Start trimming from the bottom of the cutting until the node touches the ground.
Since you have only one leaf left on every cutting, you can insert it facing outwards to help maximize the space in the pot. I was able to fit around eight clematis cuttings in a two-liter pot.
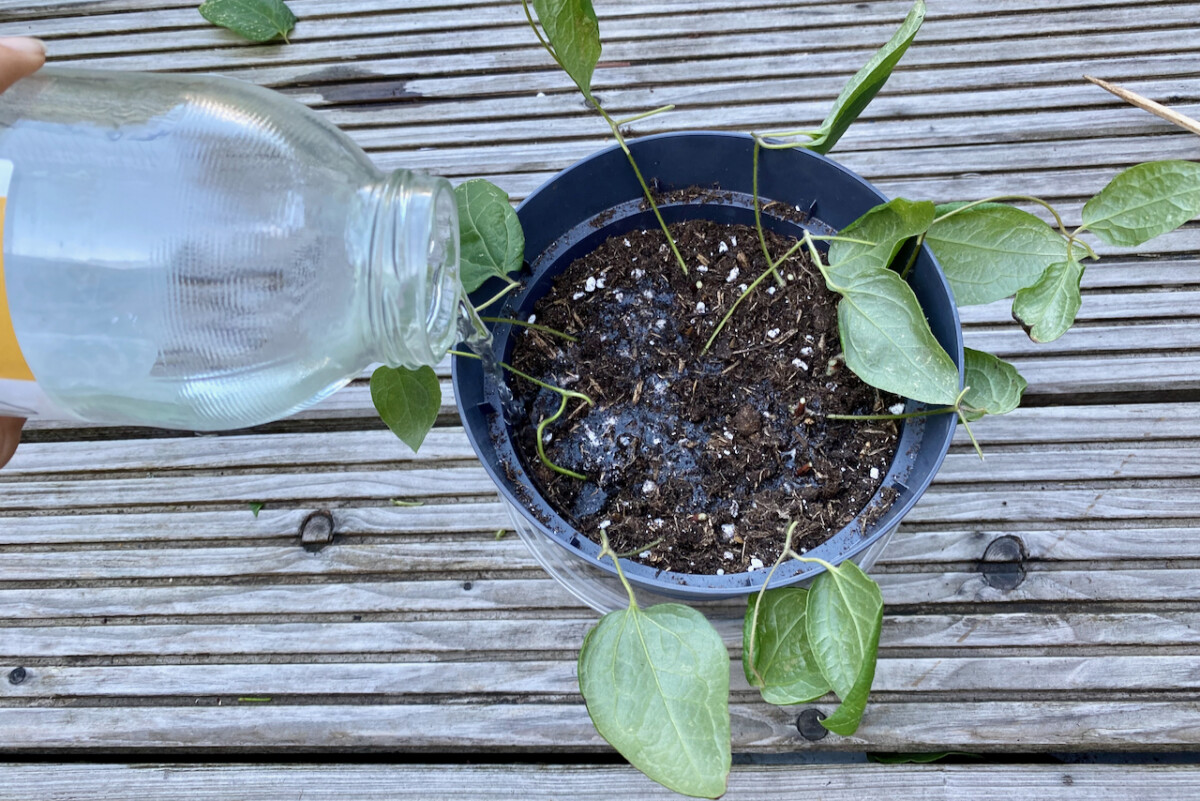
Finish the potting by giving everything a good watering to settle the stems into place. If the soil level has settled too low, you can top it up by adding more. Again, don’t bury the node.
Step 6: Find a good spot for your cuttings.
I’ve decided to keep these cuttings on my deck for at least the next three weeks. The weather is still mild, but it’s neither hot nor cold. Once it starts getting cold at night, I will place the containers inside my outdoor tiered greenhouse. And once it gets really cold, the greenhouse will move under shelter.
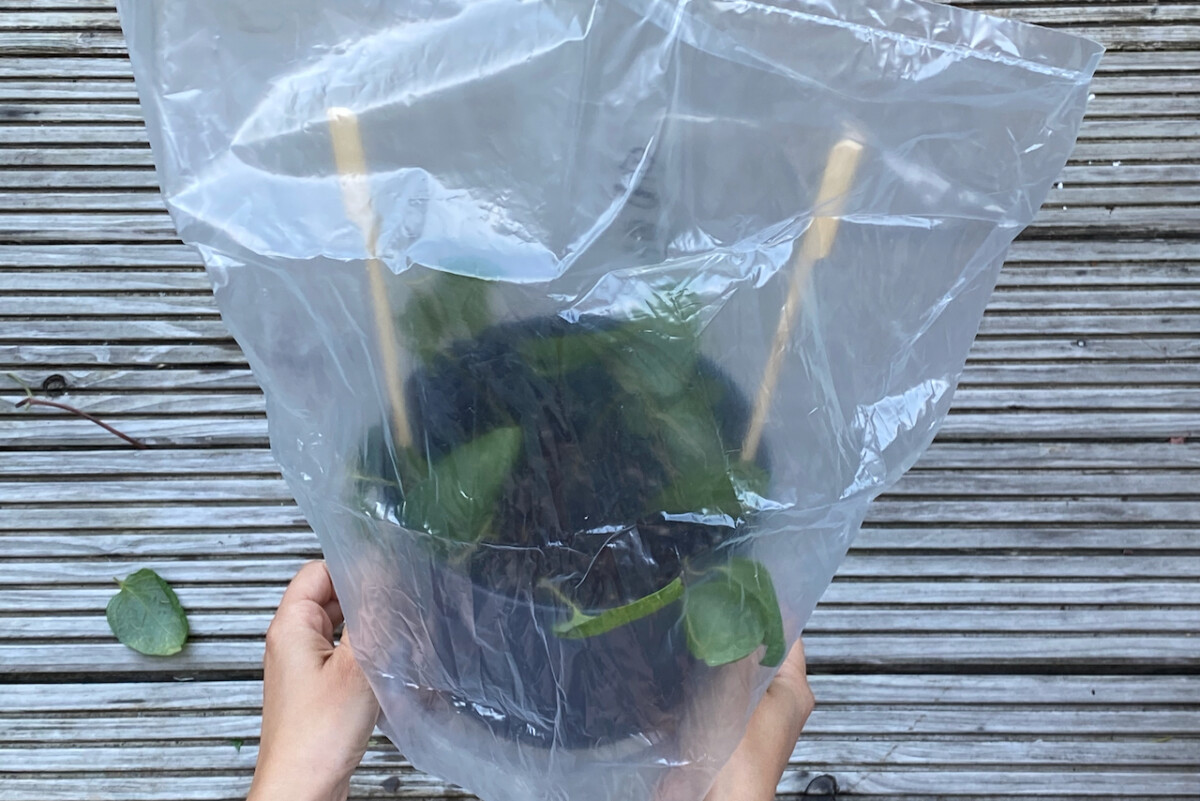
Because my cuttings won’t go in the greenhouse right away, I’m making each container its own greenhouse. I do this by placing some skewers around the pot to keep a plastic bag hovering over the container. This will help slow down moisture loss and keep an even temperature around the cuttings. Every now and then, I will take off the bag to allow the air to circulate around the cuttings.
In terms of light, the cuttings should be somewhere where they get good light, but not direct sunlight. Finding a place that has a constant temperature of around 68-77F (20-25C) will increase their chances of rooting success. If possible, keep them away from drafty windows and constant fluctuations in temperature.
Step 7: Plan for some clematis cuttings aftercare.
When it comes to cuttings, we know that proper aftercare plays an important part in rooting success. That is perhaps even more important for fragile and fussy plants such as clematis.
We need to keep clematis cuttings warm, but not hot, and moist, but not soggy. So watering them always becomes a balancing act when I really need to keep my overwatering tendencies in check. On the other hand, if I ignore the cuttings and allow them to dry out, it’s game over, I’m afraid.
In the beginning, I water the clematis cuttings every couple of weeks, but only if the soil is dry to the touch a couple of inches below the surface.
In my experience, it takes about two to three months to see new shoots coming out of the nodes. By this point, the plant should have already rooted, which may become obvious by tiny roots sticking out of the drainage holes of the pot.
Once you get new shoots growing, you can repot each cutting into its own individual container. This is another balancing act. If you wait too long before you repot, the roots of several plants will get tangled. If you repot too early, the roots are too young and might get damaged in the process. In any case, you should be ready to pot them up in spring. When you move the cuttings to their new home, make sure you plant them at the same level, with the leaf buds still above soil level.
When you do take cuttings, be prepared to have at least half of them fail to set roots. And even that is a conservative estimate. Plan accordingly and take extra cuttings. It’s not you, it’s the plant. Somehow clematis teaches us persistence and humility.
The good news is that, even if you’ve failed with some cultivars, you shouldn’t give up. Try propagating other cultivars and see what happens.