I don’t have room for more rhododendrons in my garden. There! I’ve said it!
Yet, I find myself taking rhododendron cuttings this August, just to have some backups. My usual modus operandi revolves around propagating plants from cuttings (such as jasmine and honeysuckle vines) in order to expand my garden on a budget. But with these rhododendrons, it’s different.
I have nowhere to put more rhododendrons … at least not mature ones. However, I’m still propagating them because I can easily go from rhodo heaven to rhodo zero over the course of a day. Back in March, I almost had that happen to my row of rhododendrons when a good portion of the fence that separates our yard from our neighbor’s came down in a storm.
It wasn’t a regular winter storm, but one of the ones that gets its own name and that just keeps howling for twenty-four hours straight, uprooting trees, pulling off gutters and knocking down fences.
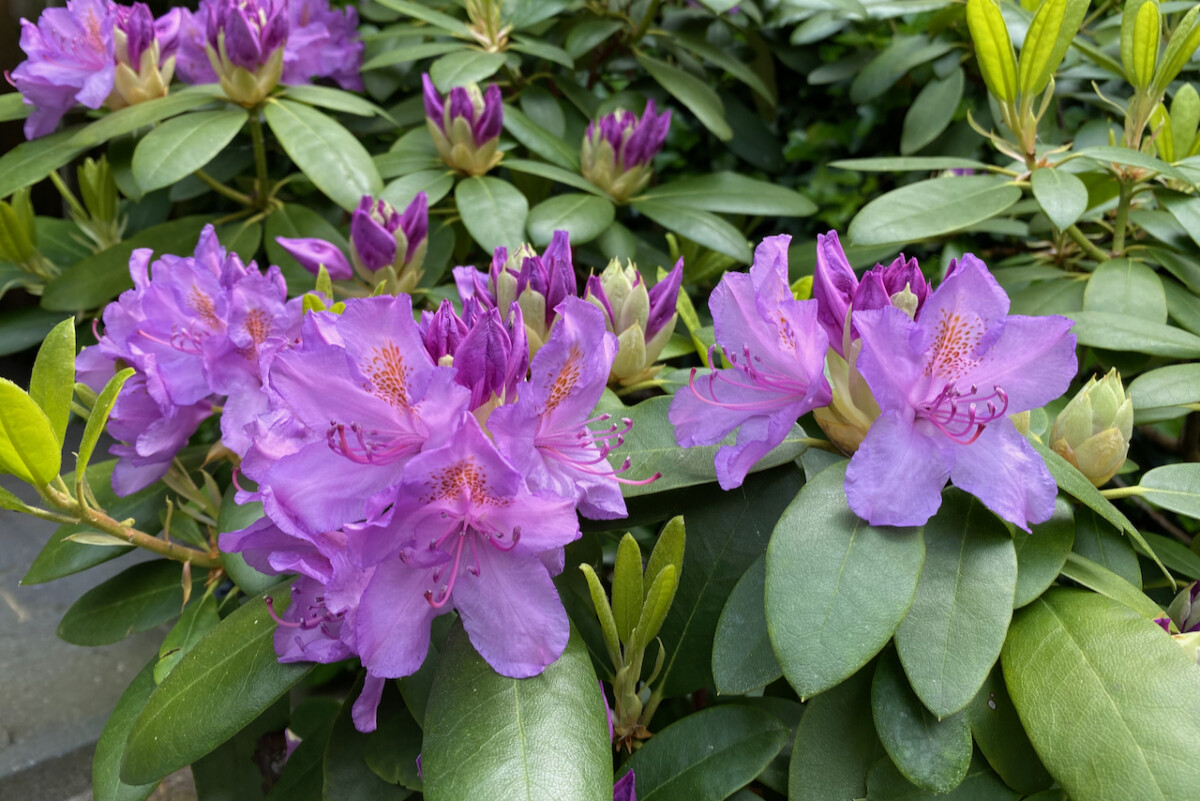
Luckily, it was just the fence that took the brunt of the storm in our yard. Unluckily, its fall was broken by a large rhododendron, a rose shrub and half a hydrangea. All of these mature plants were flattened unapologetically. The rose shrub looks beyond recovery. The hydrangea bounced back and is currently blooming profusely. Half of the rhododendron snapped off, leaving a large gap in the middle of the shrub. Even though this rhododendron isn’t a complete write off, it didn’t dare bloom this year.
So the first thing I did after we propped the fence back up was to write “take rhododendron cuttings” in my gardening calendar for August.
Why should I take rhododendron cuttings?
Truth be told, taking cuttings of your plants is a good practice whether you need backups or not. It’s a good way to save money and propagate plants that are the exact replicas of the ones you already have.
It’s also the “price” I pay for sentimentality. You’d better believe I’ll be taking as many cuttings as possible from this garden when the time comes to upgrade to a bigger growing space.
What’s the best time to take rhododendron cuttings?
In my experience, the best time to propagate rhododendrons from cuttings is late summer. Depending on the weather, that could be any time between the end of July to the end of August. The hotter it is, the later in the summer you can wait.
Taking cuttings at this time of year makes it easier to take care of them. The heat of summer is winding down by late August, yet we’re still a couple of months away from frost conditions. The nights are drawing in, but there’s still enough daylight to make a difference to plant growth.
Admittedly, it’s quite a narrow window, so set yourself a reminder or a calendar entry lest you forget about it in the middle of your summer holidays and bountiful harvesting.
7 Steps to Take Rhododendron Cuttings
Ready, steady, soak! Yup, that’s what you’ll have to do before you take any cuttings, especially if you’ve had a particularly dry summer. Give your rhododendron bush a good watering the day before you take the cuttings (or even a few hours before, if you’ve procrastinated too long.)
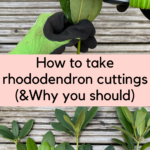
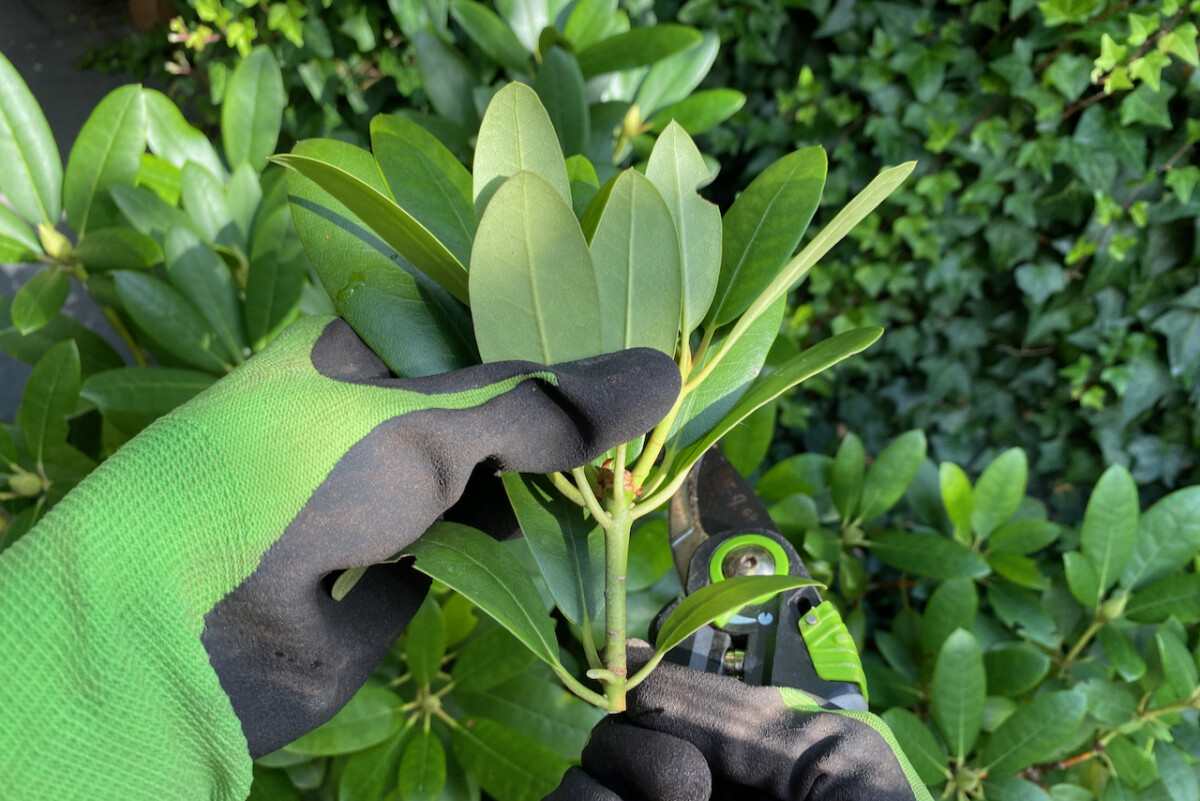
Step 1: Find the right rhododendron cutting.
In order to maximize your chances of propagation success, you have to start with the right plant material.
Find the semi-hardwood growth.
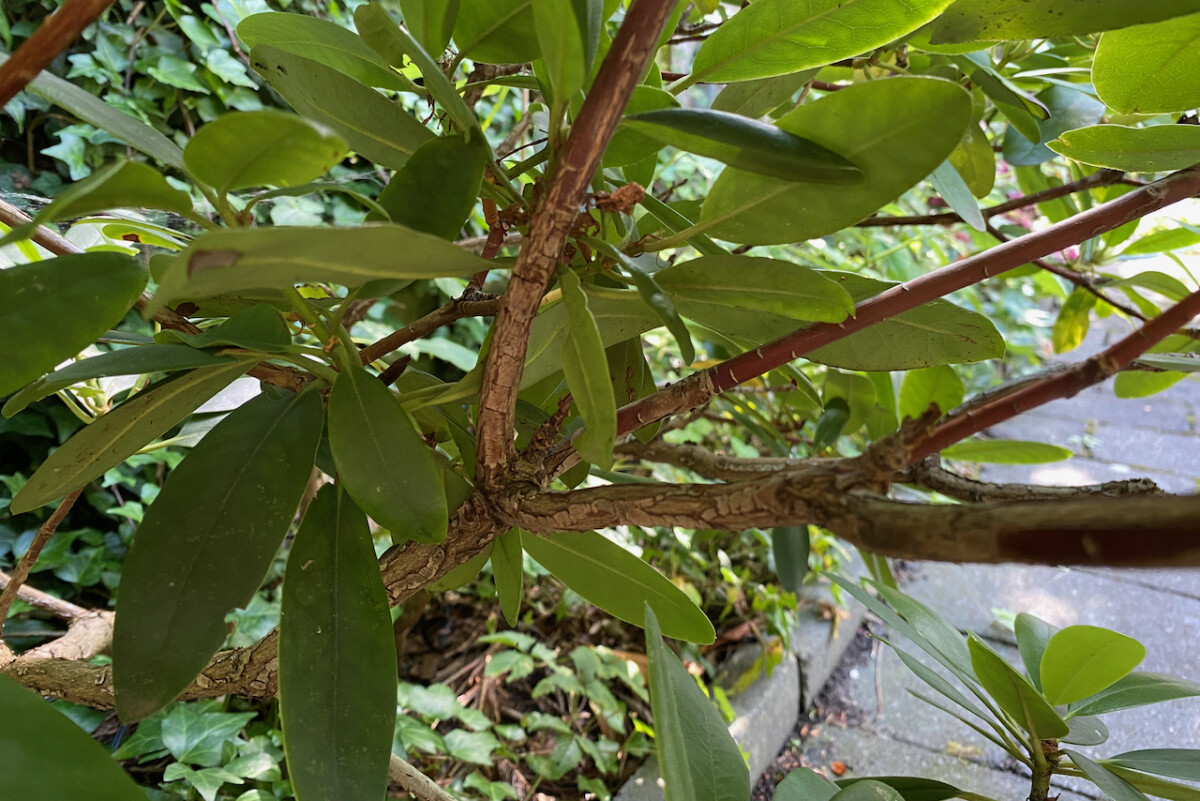
Ideally, a good rhododendron cutting will be a semi-hardwood stem. This means that you should not cut into old, rigid growth (hardwood), while at the same time avoiding cutting into really fresh, bright green growth (softwood). If you’re propagating during the time frame that I mentioned above, that shouldn’t be a problem, since most of the softwood should have turned into hardwood this late in the season.
You want to choose a piece that’s still flexible and pliable, barely starting to firm up. Looking for the leaf nodes that separate last year’s growth from this year’s growth is generally a good indication of where you can cut.
Choose a leaf bud, not a flower bud.
By this time in the season, your rhododendron will already be putting out new growth for next year. This process starts as soon as we prune off the dead flower trusses at the end of spring. Some of the new growth will turn into new leaves, while the rest will bloom into beautiful flowers.
Choosing a leaf bud cutting will increase your chances of rooting success. It’s quite easy to tell the difference between a leaf bud and a flower bud because the latter (the future flower) is significantly larger. This means the plant is poised to spend a lot of energy on blooming, so we’re better off avoiding this cutting.
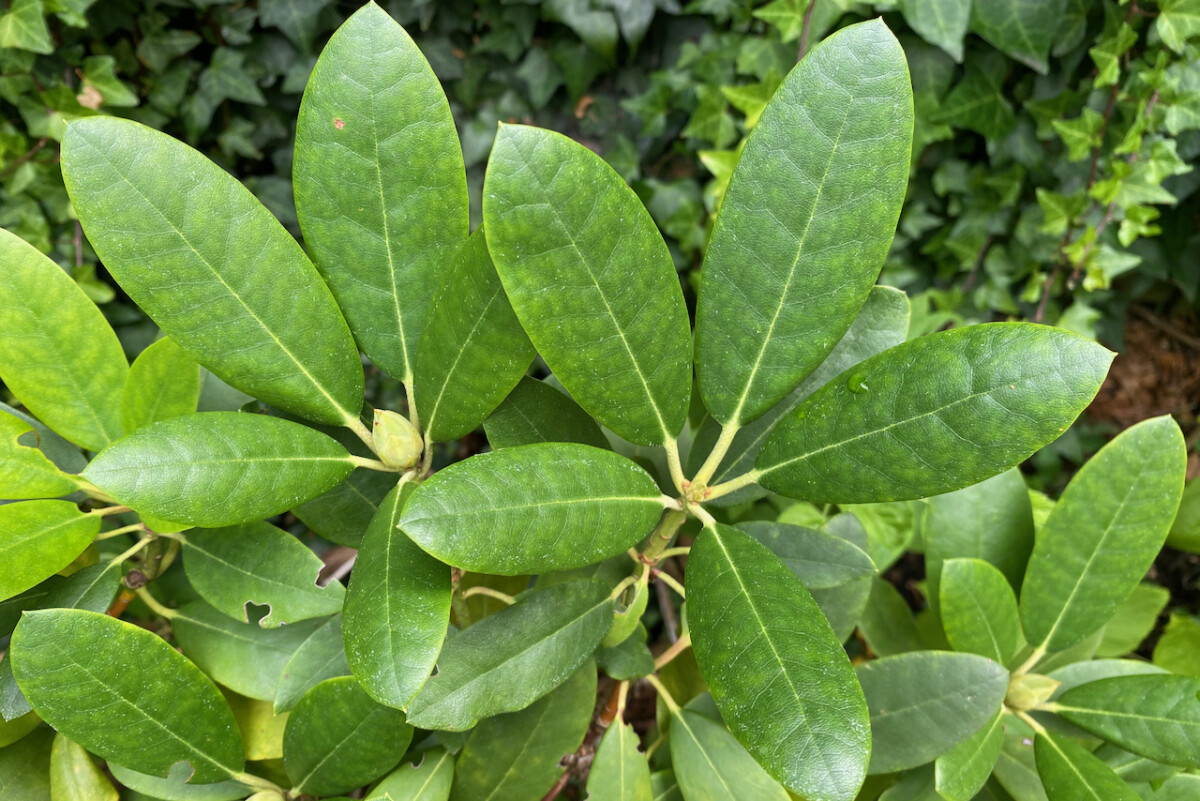
If all you find are stems with flower buds attached (lucky you!), you can take them as cuttings. But make sure you pinch the flower buds before you stick the cuttings in the ground. The flowering process will take energy from the root formation process.
If possible, choose cuttings from the middle of the shrub.
Depending on how large the rhododendron shrub is, you may have a lot of choices for stems to cut. In this case, I would recommend taking your cuttings from somewhere in the middle of the shrub. They’re not the strongest stems (the ones that had access to a lot of sun), but they’re not the pithy growth at the bottom. You don’t want the weakest growth, but you don’t want the most vigorous one either, since that’s more likely to be the flower bud carriers.
In the case of my flattened rhododendron, I didn’t have that many choices. This kind of shrub doesn’t fill up again once you prune it. So if you can use this opportunity to shape the shrub as well. Take your cuttings from a few different spots, in order to avoid leaving a noticeable gap in one place. For my healthy rhododendron though, I took cuttings from the middle of the shrub.
If you see a couple of shoots that are packed tightly together, you can cut off one of them in order to eliminate competition and increase airflow.
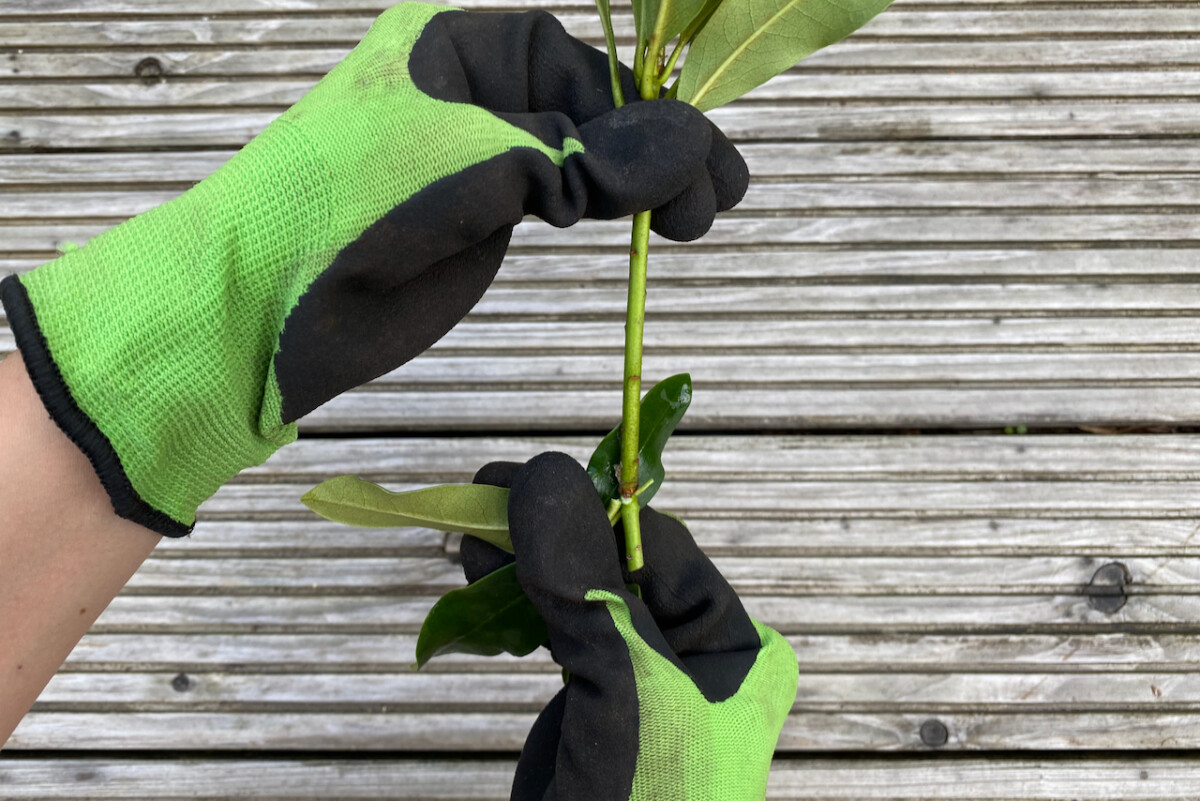
Step 2: Take your rhododendron cutting.
Time to make the cut for the branches that made the cut. Trim at a forty-five degree angle, right below a leaf node. This is where there is a higher concentration of natural rooting hormone that will increase your chances of success.
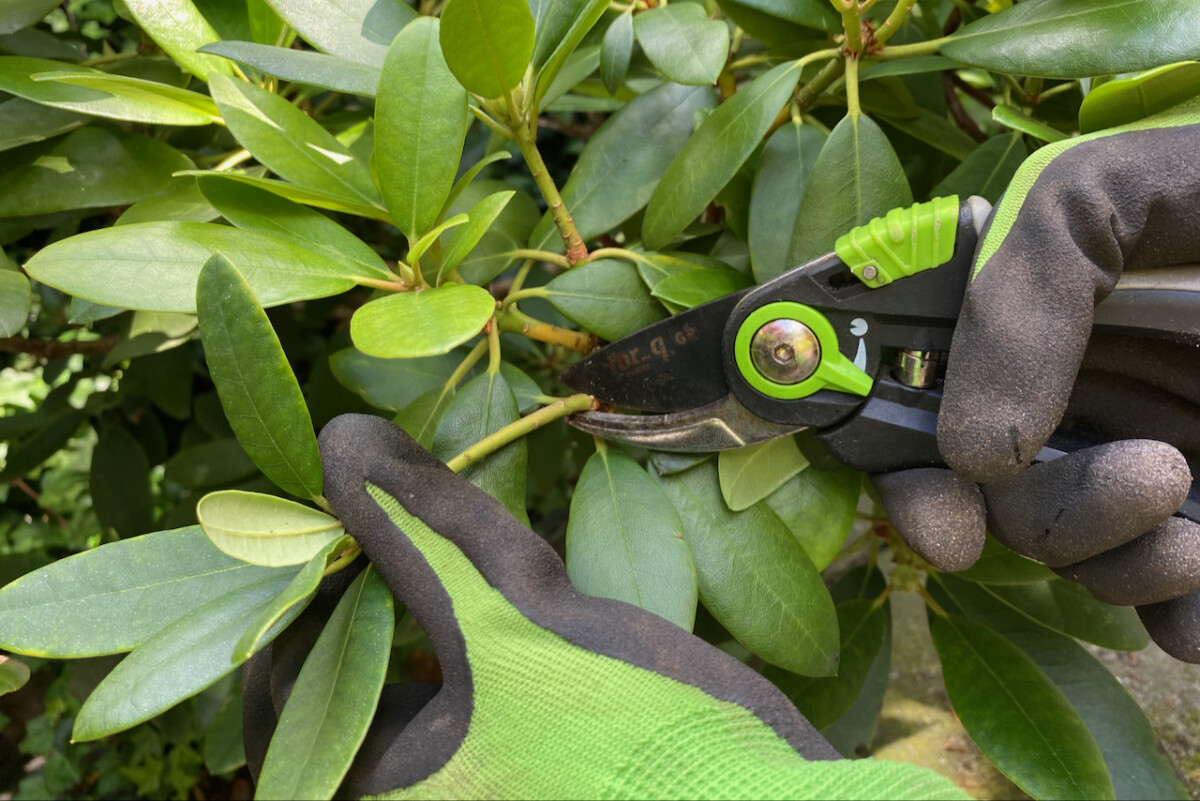
Generally, you can be pretty flexible about the length of the cut, as long as it has at least a leaf node along the stem. I aim for a cutting that’s about 4-5 inches long (10-12cm) from the cut right to the top of the leaves. Always make sure your cutting has at least a few leaves at the top that will continue to help with photosynthesis.
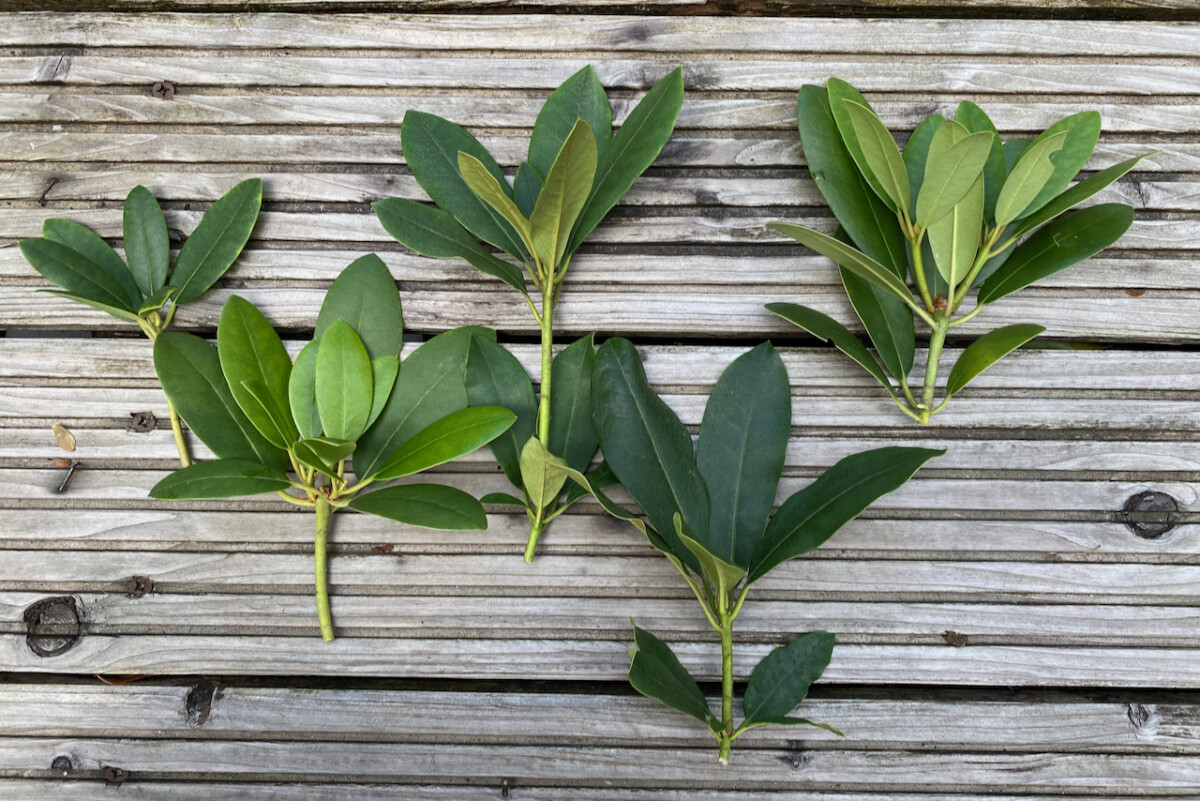
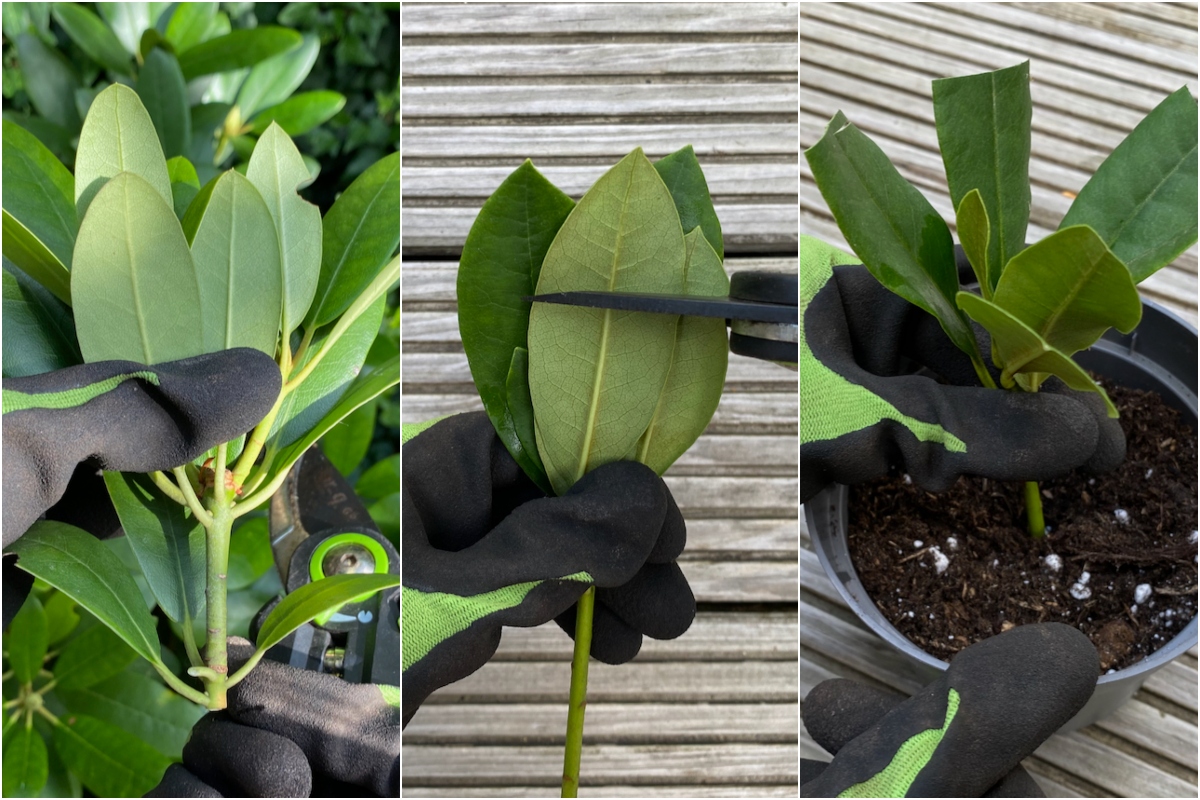
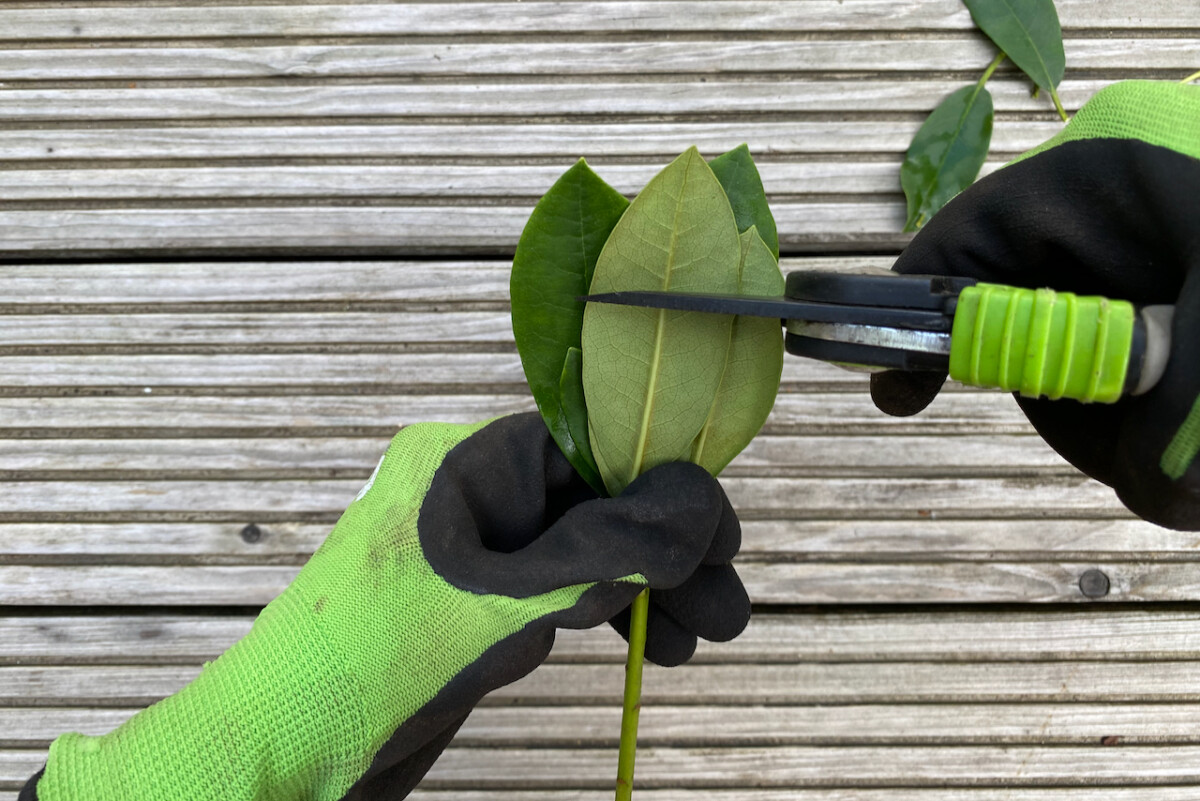
Step 3: Reduce the leaf surface.
Since the cutting can no longer rely on the main plant for moisture and nutrients, our next step will be to reduce evaporation. This is the reason why we’ll want to reduce the foliage surface. However, we still want to keep some leaves attached in order to help with photosynthesis.
Strip off the bottom leaves.
Since the leaves along the bottom of the stem will go below ground level anyway, there’s no reason to keep them attached. Hold the stem with one hand, then firmly pull the bottom leaves off and compost them.
Reduce the surface of the rest of the leaves.
Even after you do this, you may still be left with a good amount of leaves. You can reduce leaf surface even further by cutting the remaining foliage in half. Fold it in place, as you would close a fan, then snip off about a third (for smaller leaves) to a half (for larger leaves) from the top.
For some large-leaved rhododendrons, you might need to remove even more leaves.
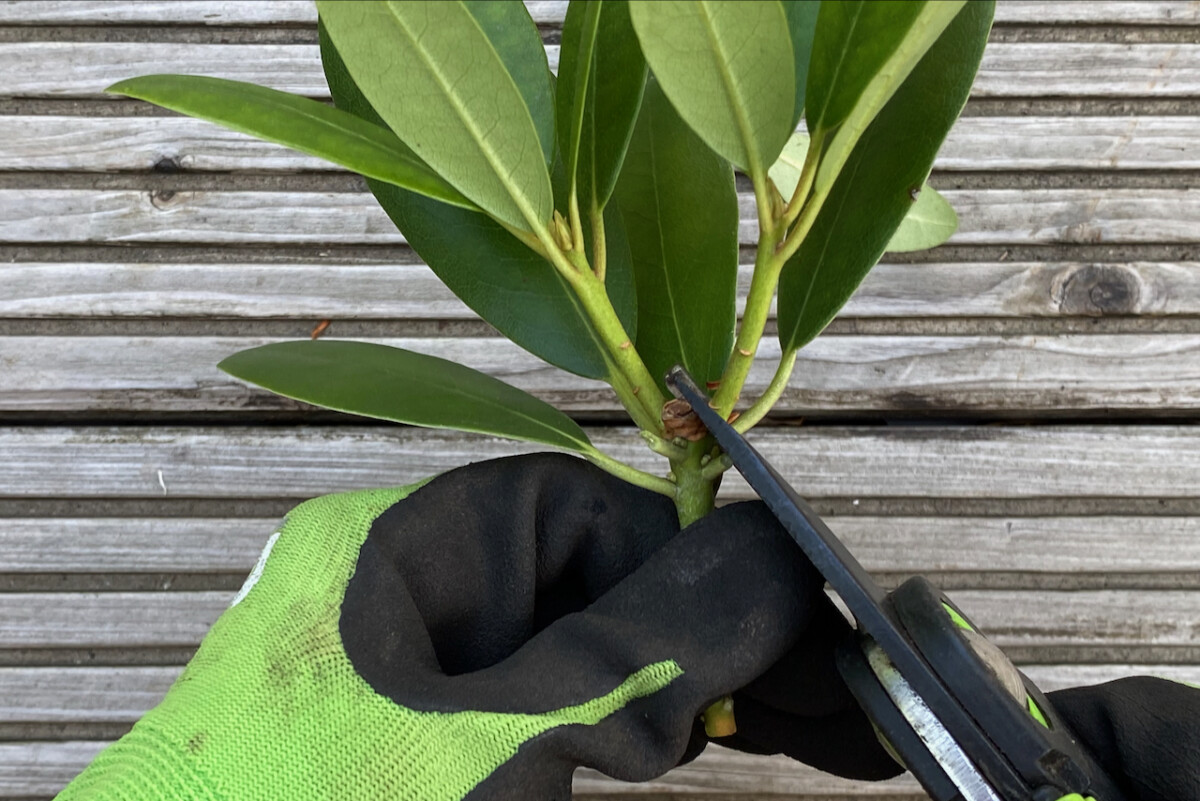
Keep the strongest piece of growth.
Sometimes, it may happen that your cutting has a bifurcation with two new stems growing from the main stem. In this case, the best practice is to choose the one that looks the strongest and turn that one into the main growth on the principal stem.
Simply remove the other shoot from the point where it originates. If the stem of the shoot that you’ve removed is long enough, you could try to treat it as its own cuttings and keep following the steps in this tutorial. But if it looks too feeble, or if simply you don’t have the space for it, go ahead and compost it.
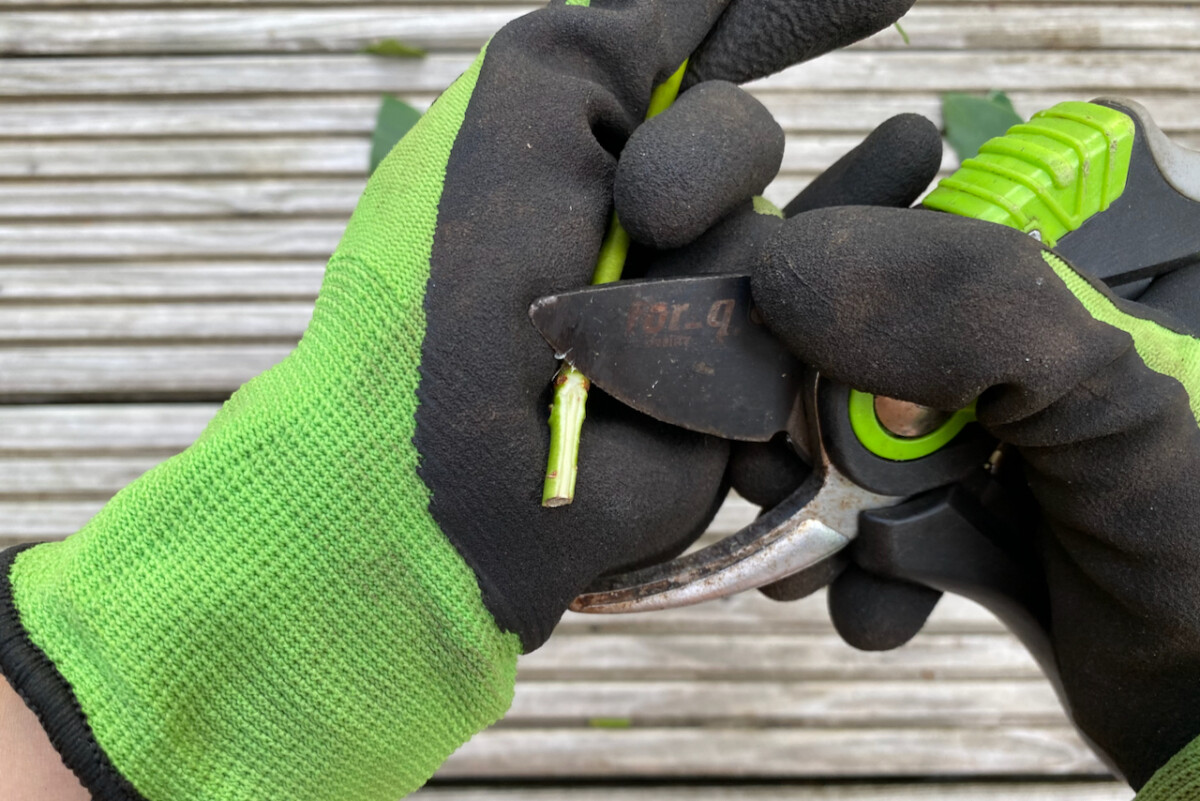
Step 4: Scar the cuttings.
Next, you want to scar the surface of the stem in order to expose the cambium layer. I usually do this with most of my cuttings and I’ve found that it increases the rate of success significantly.
Scrape off the first layer at the bottom of the cutting with a pair of secateurs or a knife. Make sure you’re wearing protective gloves and always position the blade away from you for safety.
At this point, you could dip the bottom of the cutting in rooting hormone before you insert it into the ground. I found that using enriched potting soil has a similar effect, so I don’t buy extra rooting hormone for my cutting. I would use some, however, if I was propagating cuttings later in the season, just to speed things up.
Step 5: Prepare your potting mix.
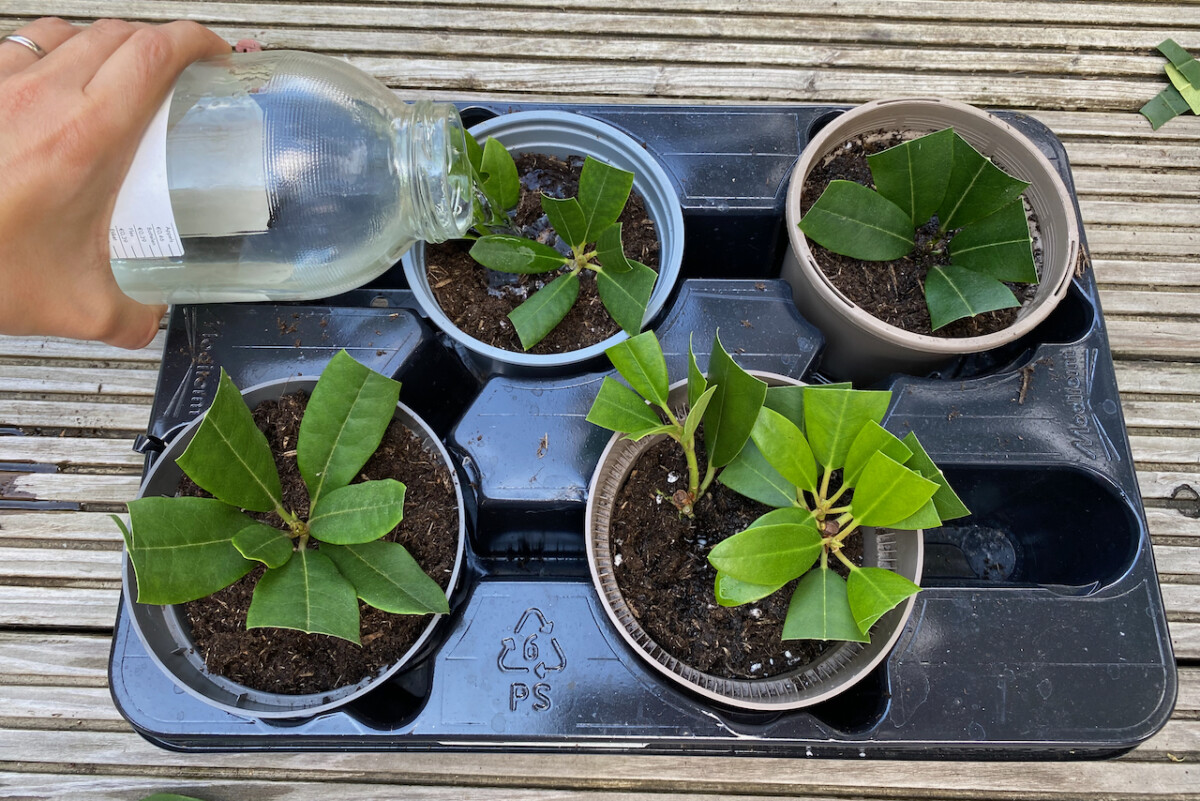
Time to put these cuttings in the ground. I’m propagating six cuttings (from two rhododendrons) spread across four smaller pots. If you don’t have the space for this many pots, you could stick them all in a larger pot.
The size of the pot is not that important, as long as it’s deep enough for your cutting to fit in upright without sticking out too much. Remember to always choose potting containers that have drainage holes.
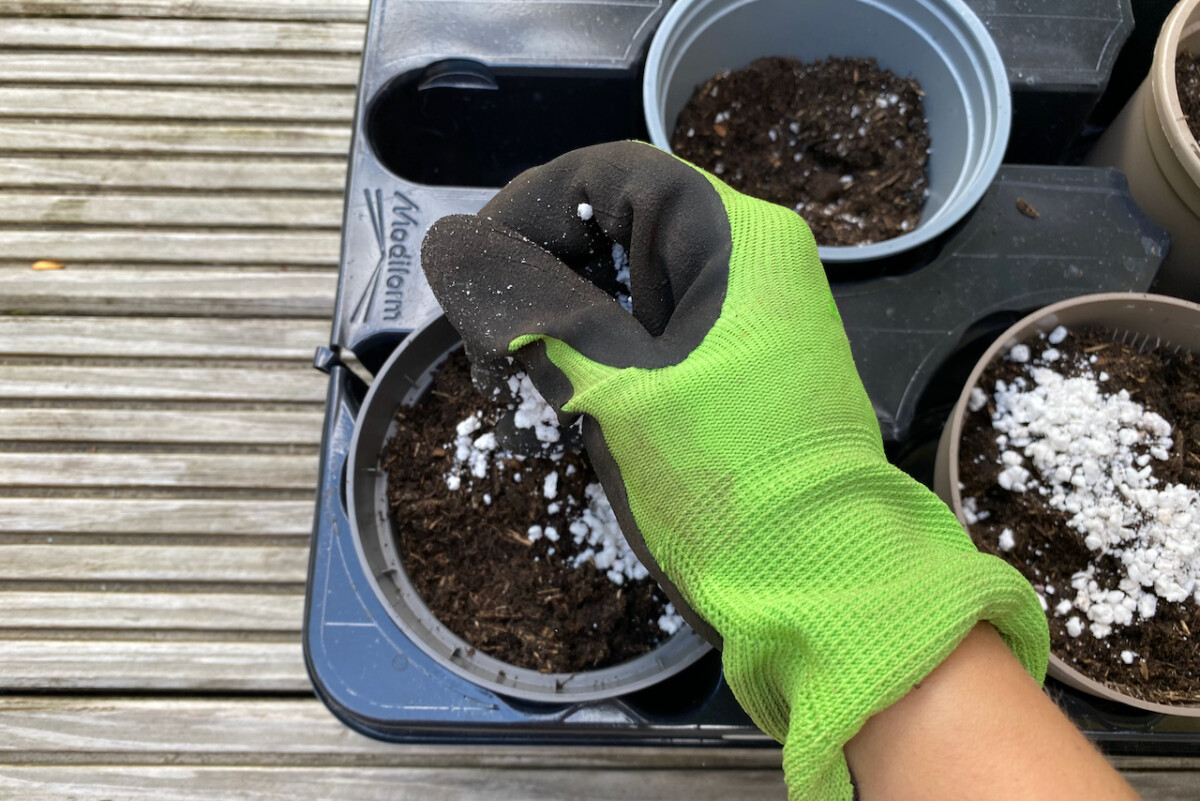
I use a mixture of bagged potting mix to which I add about twenty-five percent perlite. Even though the mix already contains some bark, I find that adding materials that help with drainage helps prevent too much water retention. If you don’t have perlite, you can use bark, pine needles, grit or horticultural sand.
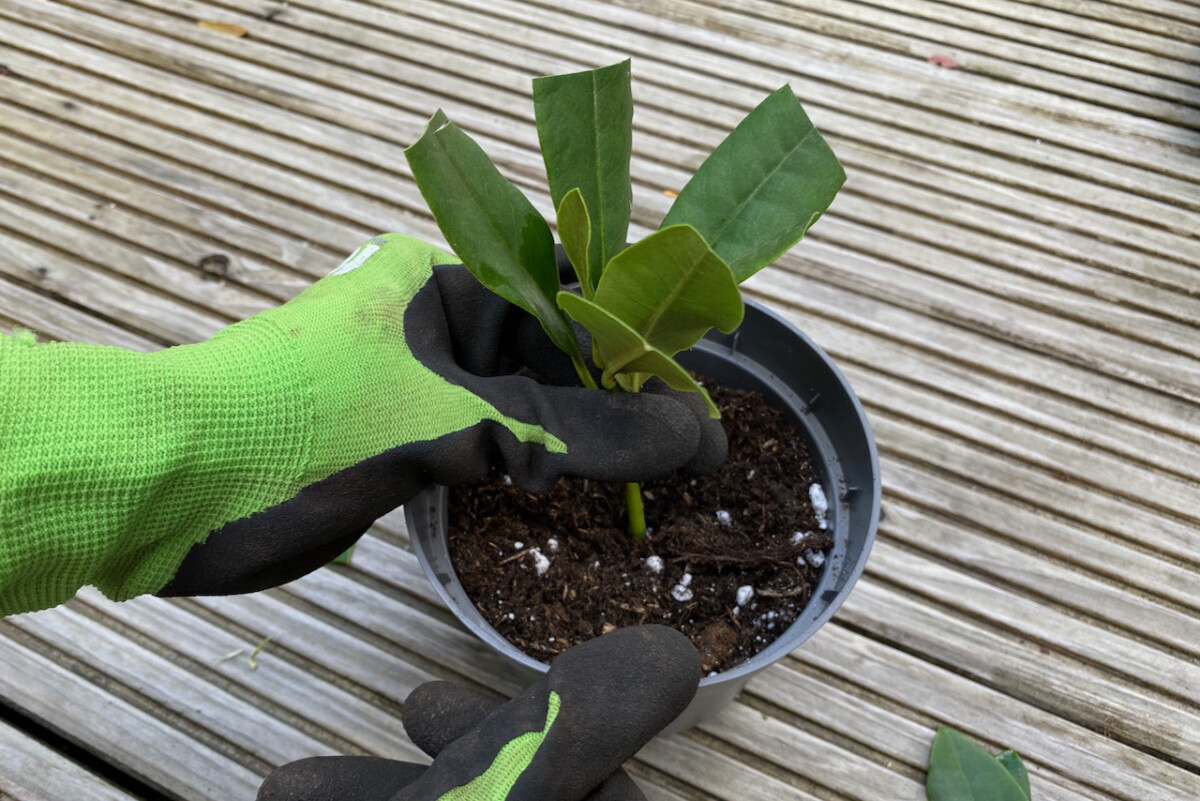
Step 6: Plant and water the cuttings.
Stick the cuttings in the ground and give them a good soak. Once the potting mix has settled after watering, you can top it up again. If you’re propagating cuttings from different varieties of rhododendron, don’t forget to label them.
The next part is optional, and it will depend very much on where you keep your cuttings. If you plan to keep them outdoors, you have to prevent evaporation. You can do this by creating an ad hoc greenhouse right over the top of the container. Drape a plastic bag over the top of the pot and use a few skewers to keep it in place. You can also secure it with a ribbon or an elastic band if needed.
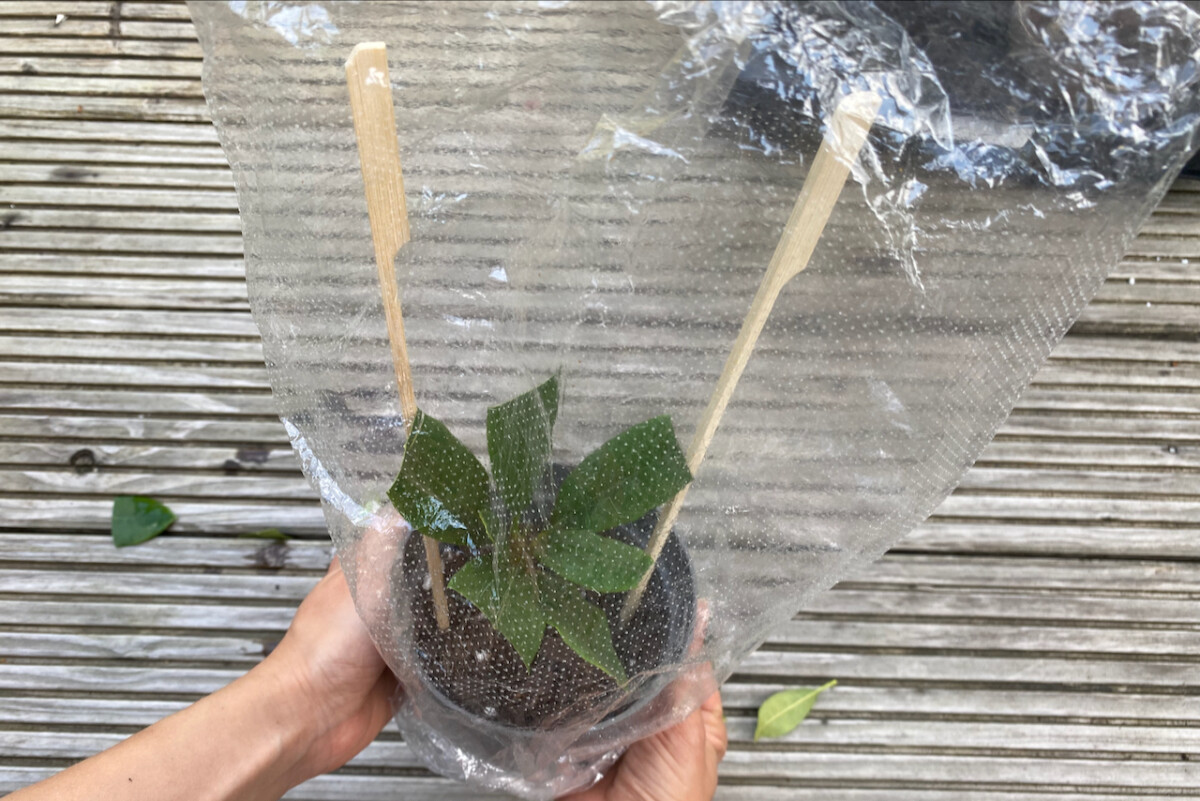
You can leave the cuttings outdoors, as long as you keep them in a shaded spot. Remember that they don’t have roots yet, so they cannot handle the moisture loss that comes with full sun.
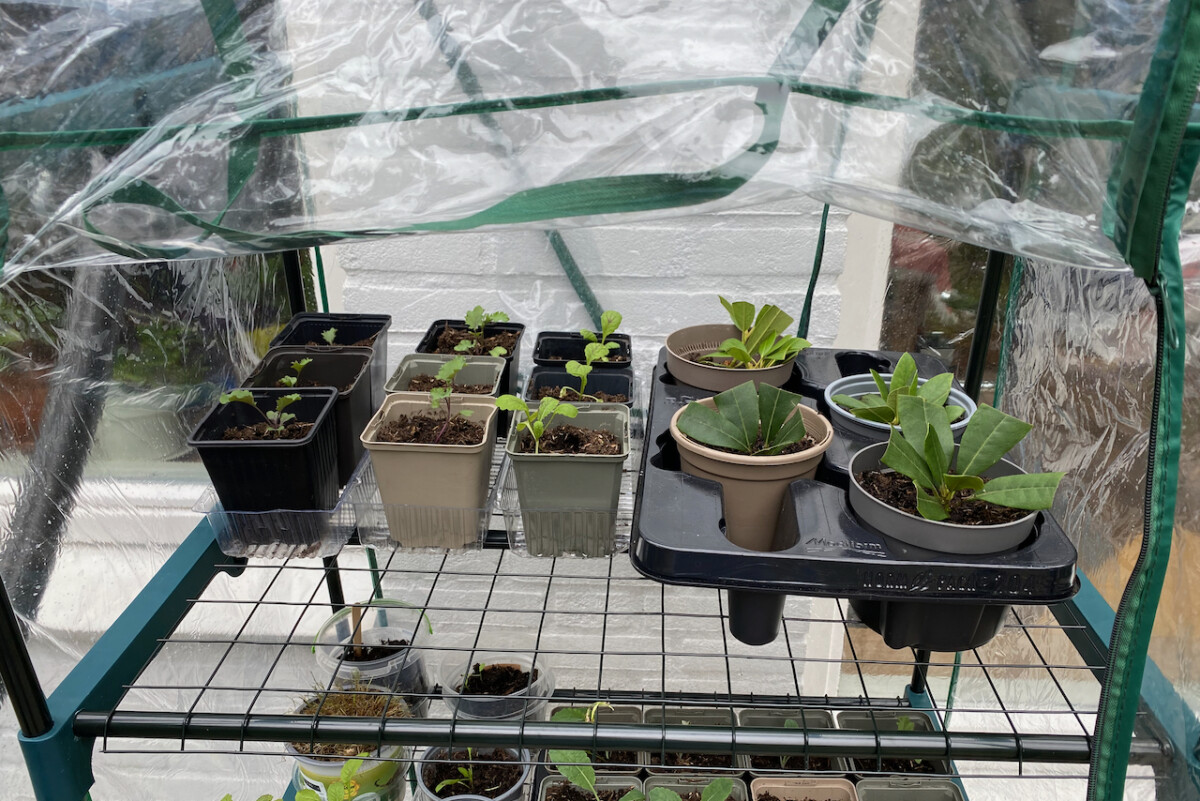
I will keep my tray of cuttings outdoors, but in a small greenhouse frame. I keep it ventilated during the day, but I zip it up at night in order to maintain a constant temperature of around 68-77F (20-25C), at least for the first months.
Step 7: Don’t forget the aftercare.
In the beginning, I check the cuttings every week and water them accordingly. But only if they need it. You could go a couple of weeks between watering sessions, as long as your cuttings aren’t getting full sun. I try to remember to rotate the pots whenever I water them too, in order to encourage growth that’s evenly spaced.
During the winter months, you can keep your cuttings in an unheated greenhouse. They can be a bit cool, but not freezing, and definitely not exposed to the elements. I will keep mine in the same tiered greenhouse, but I’ll bring the structure indoors.
It takes about three months for a root structure to form, by which point you’ll start noticing the roots coming out of the drainage holes. At this point, you can repot each cutting them into its own pot if you’ve been growing them in a communal container.
If it all goes well, you should expect to be transplanting your rhododendron cuttings into the garden this time next year. But don’t be disappointed if your new baby plant doesn’t bloom for a few more years. That’s a good thing! It means it’s focusing its energy on growing a root structure and getting established.