Under the right conditions, bougainvillea can grow out of control. The frequent pruning they require throughout the growing season provides many opportunities to propagate bougainvillea from cuttings to grow additional plants.
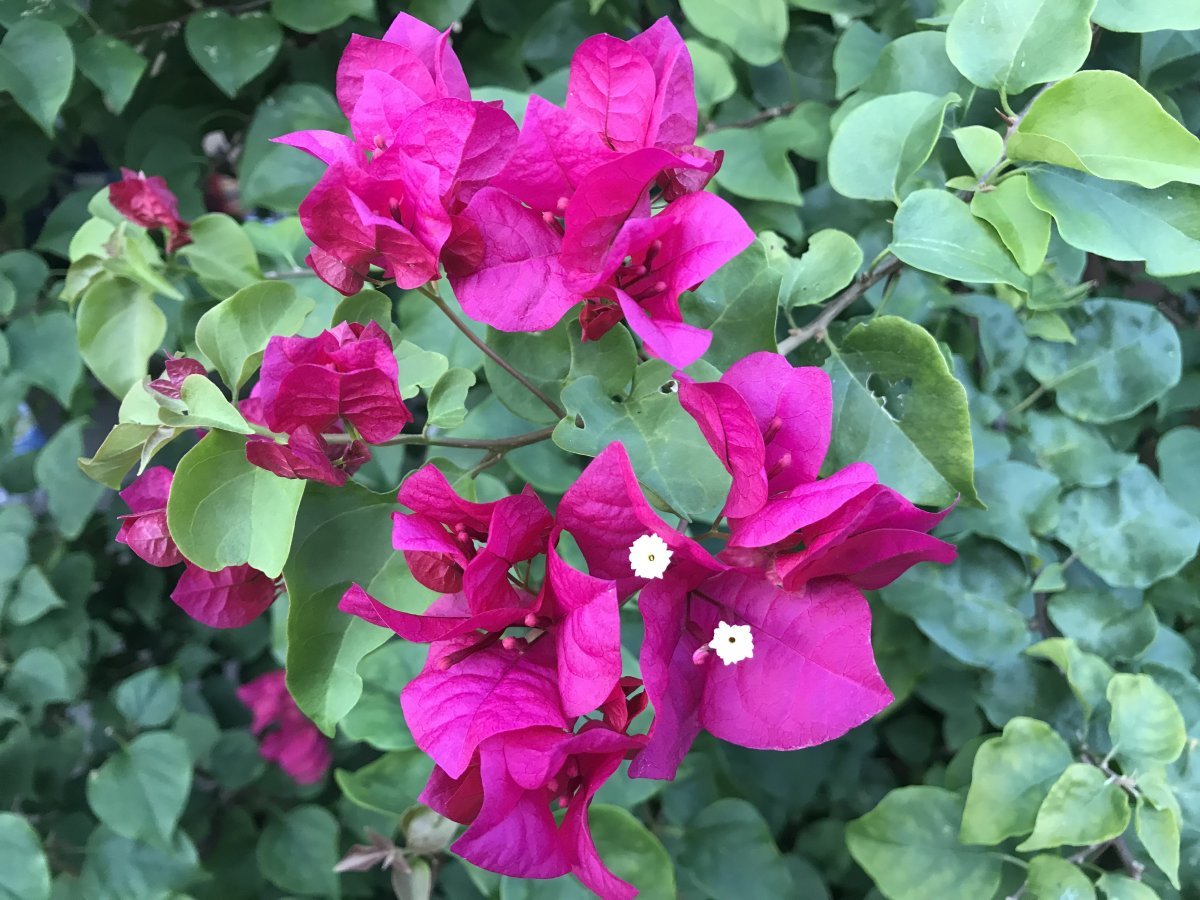
Bougainvillea is a popular ornamental plant in tropical and sub-tropical landscapes. While those in temperate climates can rely on roses for thorny climbers, gardeners in hot and humid regions often use bougainvillea in their place. Like climbing roses, however, bougainvillea can also become a dangerous nuisance when they grow into pathways and snag passersby.
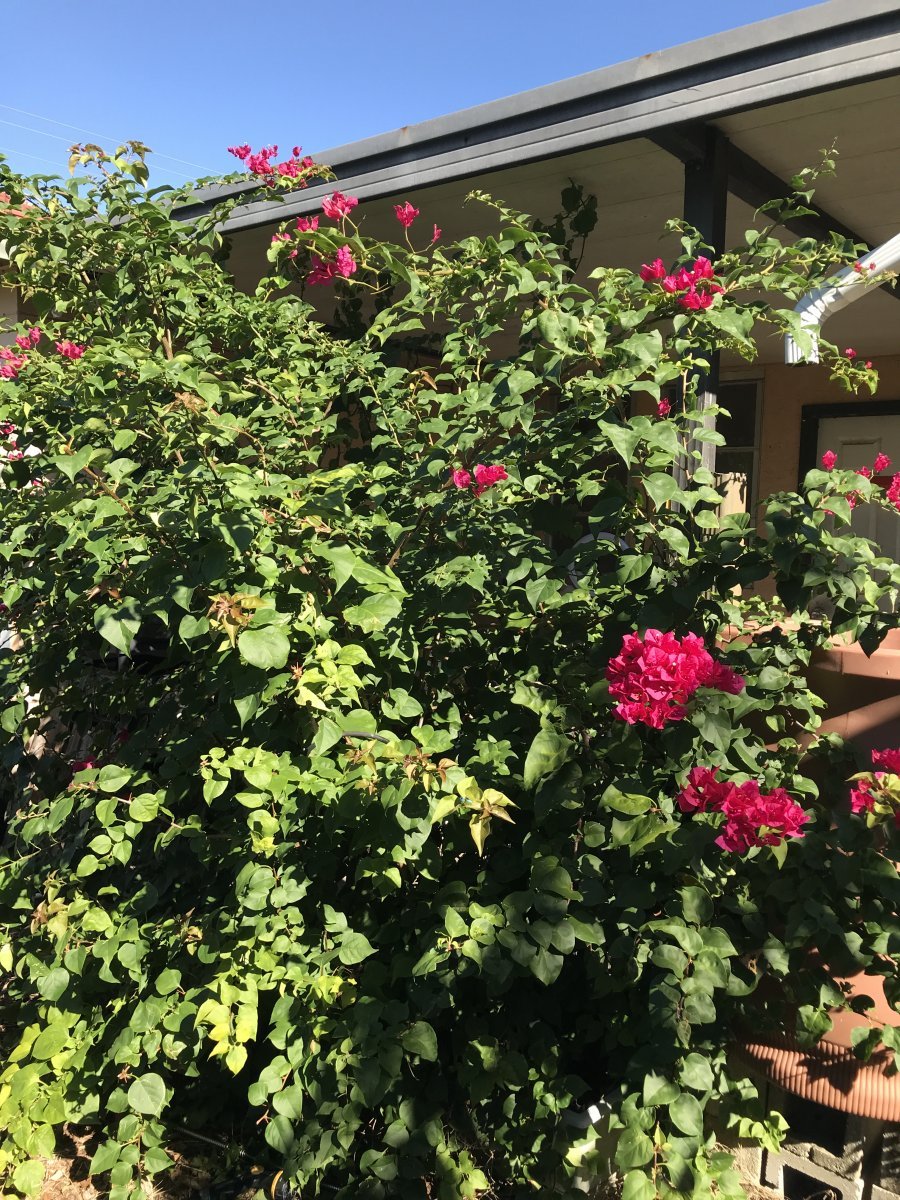
I’ve been promising myself that I’d cut back the enormous specimen near my back porch for months. While I appreciate that it provides some much-needed shade in the summer, I can’t recommend trying to push past it in a hurry.
In fact, my doctor even commented on the many scratches all over my arms during a recent checkup. She said it reminded her of when she had a bougainvillea in her garden.
Guilty as charged!
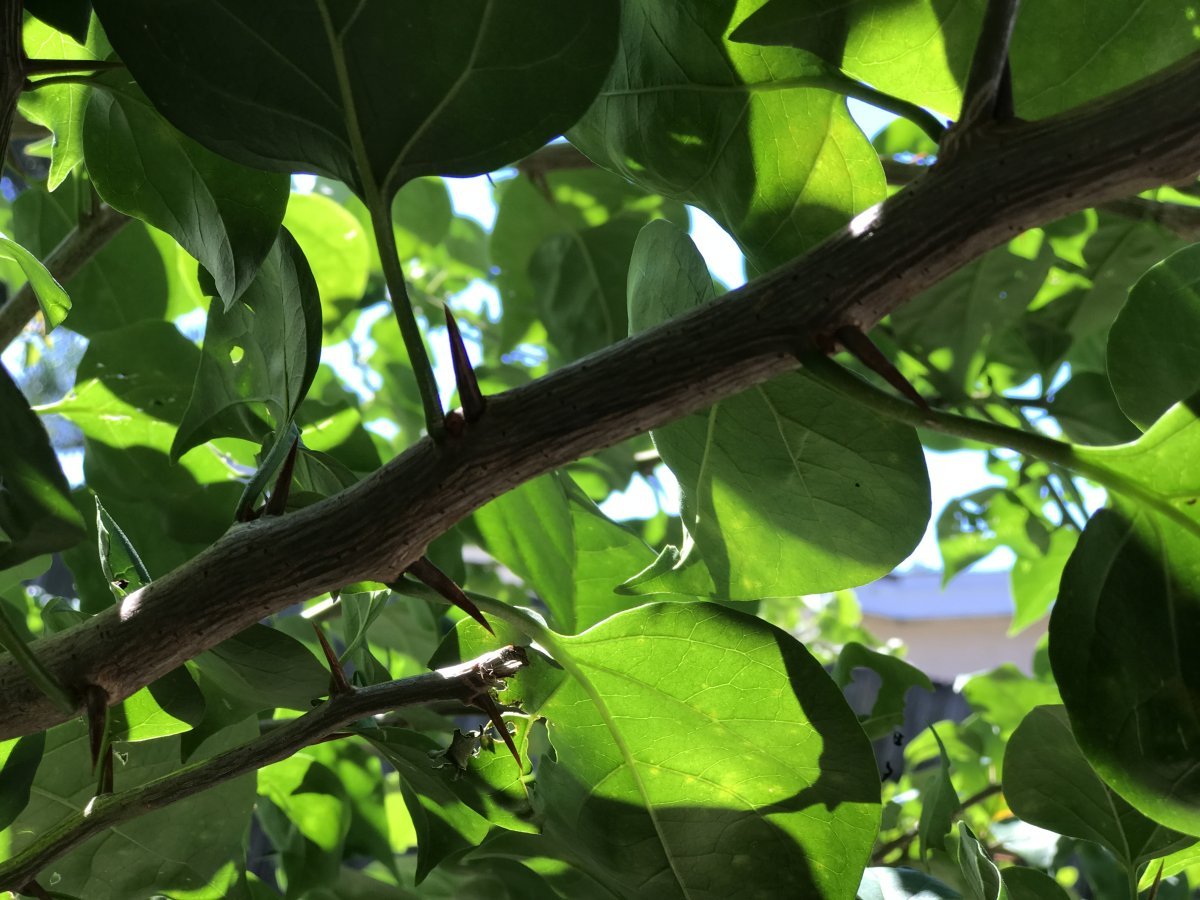
I’ll admit that one of the main reasons I’ve put off giving it a good prune is because it can be a painful process. It wields inch-long thorns that would deter any gardener. There were no such reservations when it came time to take hibiscus cuttings.
I also wanted to wait until conditions were right to propagate bougainvillea cuttings. I have some bare spots around the palm trees in the front of the house to fill.
The other reason I’ve avoided pruning it was that we’ve been in a drought all year. Normally, I would be able to propagate bougainvillea from early spring through the summer, and well into late fall. Lack of rain, however, has stressed even my most established flowering bushes. I didn’t want to add another stressor to the mix.
Even in a subtropical climate like mine, autumn brings cooler weather and this year, some much-needed rain. So, this dangerous character is getting a hard prune, and I’ll be taking some bougainvillea cuttings.
Why Propagate Bougainvillea Cuttings
I love flowering shrubs and bushes. They’re a great option for any gardener in a hot climate because they provide so much beauty in the garden with so little work.
The secret to a low-care landscape plan is using the right plant in the right place, and I propagate bougainvillea as a cheap and easy way to add color and height to my front garden.
Bougainvillea sprawls and climbs without the need for extra fertilizers or regular irrigation. This means less nitrogen runoff into the waterways and less impact on the environment.
Bougainvillea offers great beauty without demanding very much at all.
When to Propagate Bougainvillea From Cuttings
I own a small backyard nursery, and these plants are much in demand in my local area. So, I’ve experimented many times with the best time of year to propagate bougainvillea.
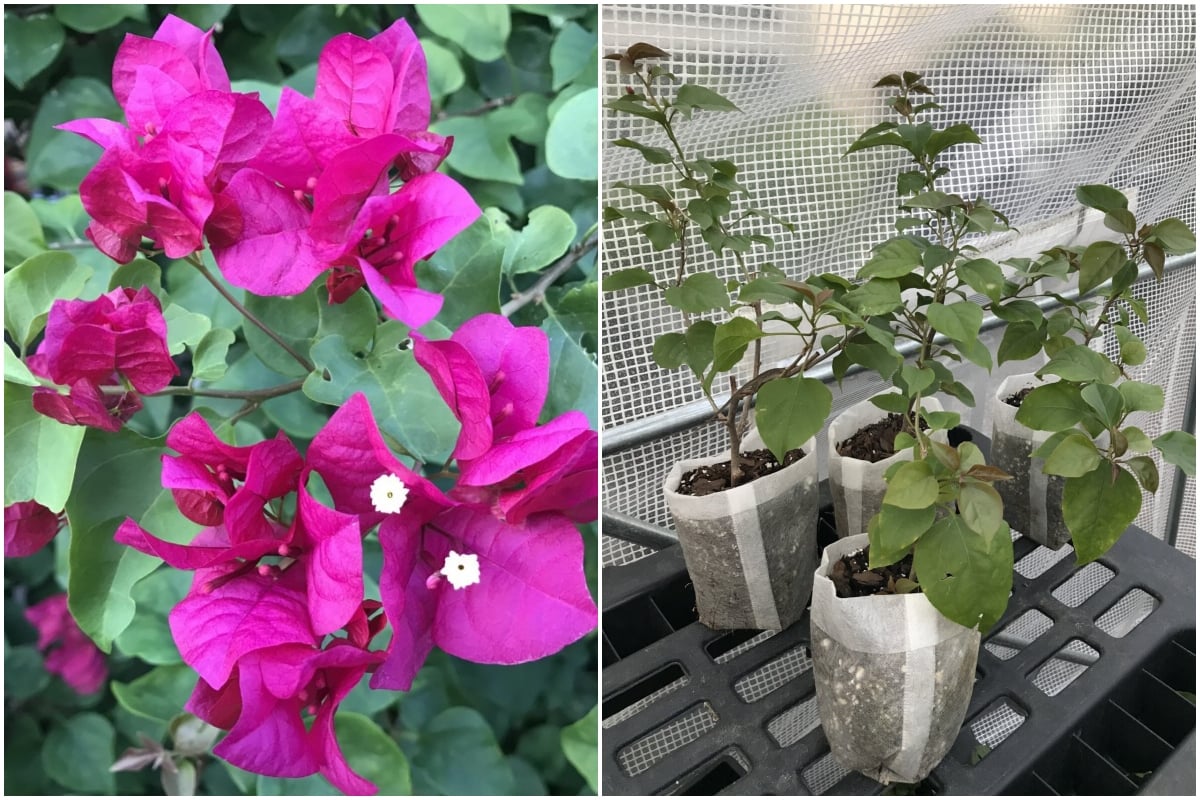
I’ve found that semi-hardwood cuttings at any time of the growing season work most reliably. These cuttings take longer to leaf out, but once they do, they’re less likely to fail once transplanted.
In the past, I would propagate bougainvillea cuttings any time from early spring to late fall without success as long as I stick to semi-hardwood cuttings.
This year, though, summer temperatures reached record levels. We had many days with the heat index at 107°F (+41°C). My cuttings literally cooked in their pots. So, I’ll be sticking to early spring and fall to propagate bougainvillea in the future.
How Long Does It Take to Propagate Bougainvillea Cuttings
The length of time it takes for bougainvillea to root can range from 6 to 12 weeks, depending on the ambient temperature and humidity. Bougainvillea cuttings root in 6 to 8 weeks when temperatures remain between 80°F and 90°F (26°C to 32°C). It may take up to 12 weeks with cooler temperatures.
How to Propagate Bougainvillea in 13 Easy Steps
Working with any thorny plant is never really easy, so it’s best to have everything laid out and ready before taking the cuttings.
1. Examine the mother plant
The first step is to make sure that the mother plant is healthy and in good condition. I normally take cuttings from ornamentals after a heavy rain. This time, I watered the bush deeply the afternoon before.
Part of my hygiene routine as a licensed grower is to take cuttings at least 1 foot (30 cm) from the ground level. This reduces the chance of soil-born diseases infecting the propagation pot.
My killer bougainvillea reaches above the 9-foot (3-meter) porch roof, so I have plenty of clean material to work with.
2. Gather your materials and supplies
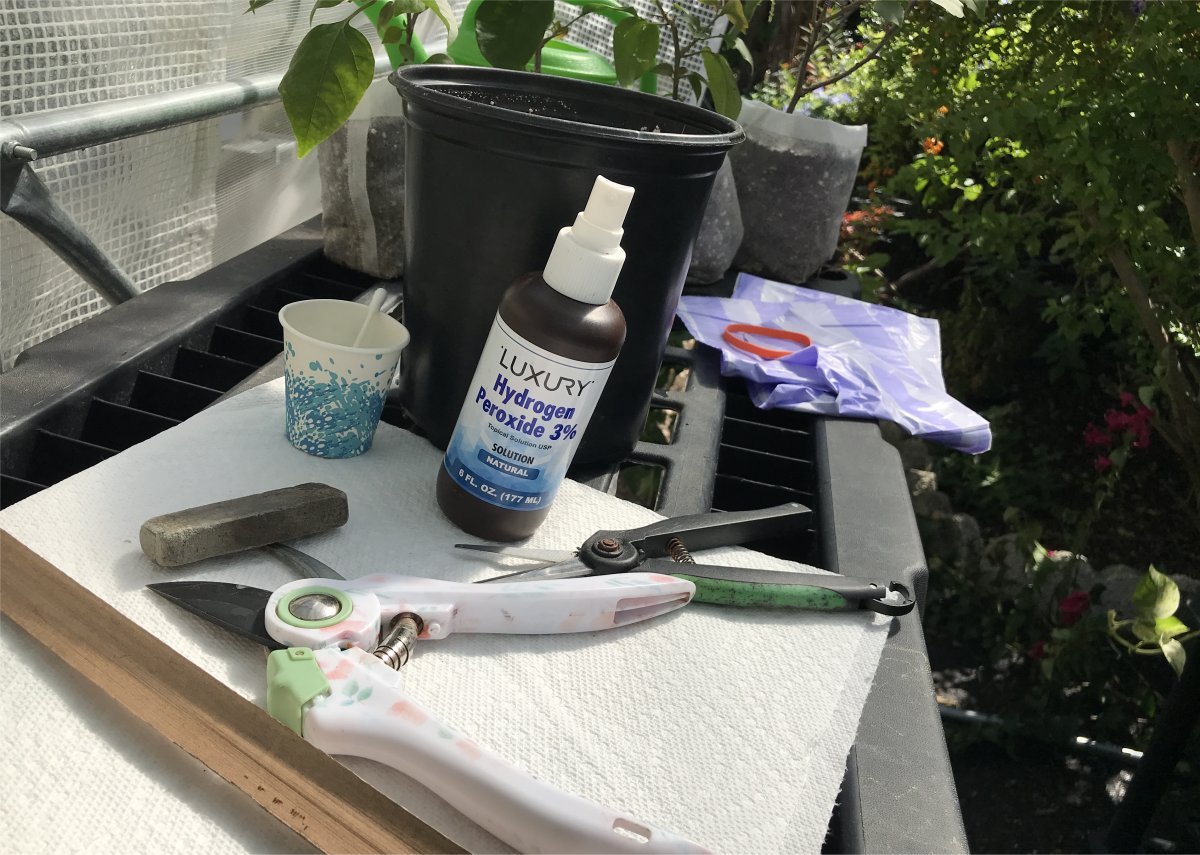
Once you’ve ensured the mother plant is fit to provide cuttings, gather your tools and materials.
You’ll need:
- A growing pot with draining holes
- Sticking mix or rooting medium
- Pruners
- Snips
- Antiseptic
- Rooting hormone
- Water
- Plastic bag
- Rubber band
I normally use a black grower’s pot to propagate cuttings. It absorbs more sunlight and stays warm, which stimulates root growth.
For sticking mix, I use one part coconut coir to one part coarse perlite. To prepare to take cuttings, I water the mix well in the black nursery pot to saturate it and allow it to warm up in the sun while I take the cuttings.
Before starting your cuttings, sharpen your pruners and snips and disinfect them thoroughly. Hydrogen peroxide is my garden go-to, but rubbing alcohol and household bleach are equally effective.
3. Plan your prune
Bougainvillea readily sprouts several new shoots from where you take your cuttings. So, try to imagine how those shoots might grow in the future. If possible, take your cuttings where you want the plant to produce new shoots.
You may need to prune back further, closer to the main trunk, to avoid awkward growth in the future. You can take cuttings closer to the trunk to prevent stimulating unwanted new growth in the mother plant. You’ll just have to trim those longer branches down to size.
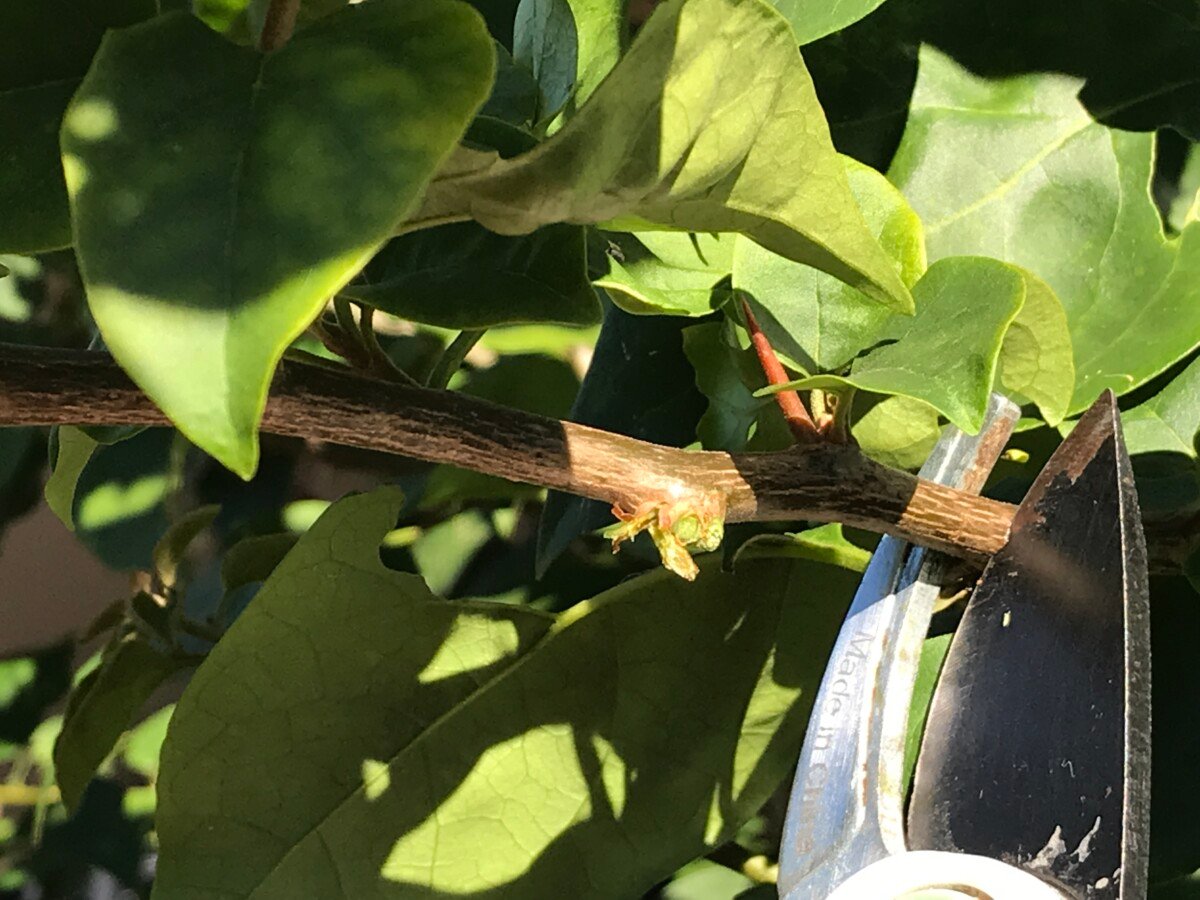
4. Take your cuttings
Take your first cuttings right above a leaf node. This will encourage future branching. Most of all, it will prevent killing off the host branch and reduce the chance of disease.
Place your pruned branches cut side into a bucket of water. While I would normally recommend placing cuttings into a sealed plastic bag, the long thorns on bougainvillea make it difficult to maneuver the process safely. Best to work fast and only cut as much as you can pot up right away.
5. Trim your cuttings
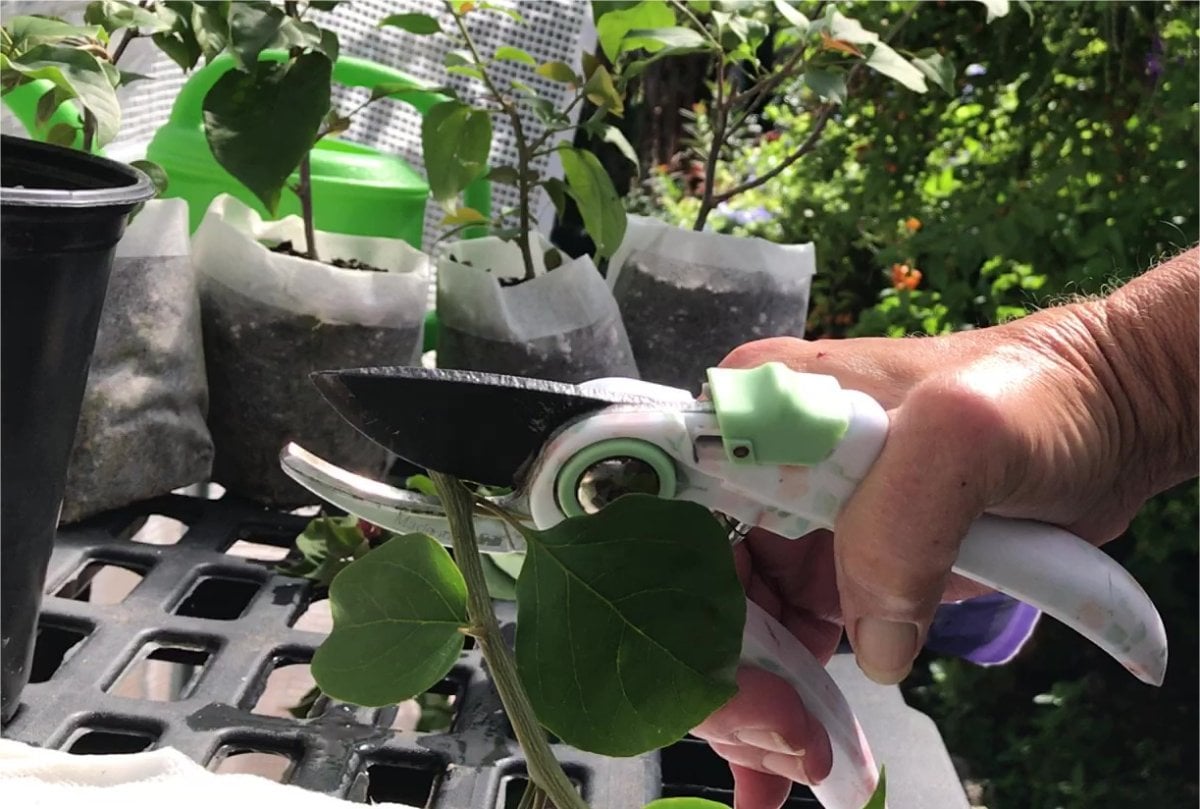
Take your cut branches and find sturdy semi-hardwood lengths of at least 5 to 6 inches (12 to 15 cm).
Trim the bottom of the cutting below a leaf node and trim the top right above a leaf node.
6. Prepare the cut ends
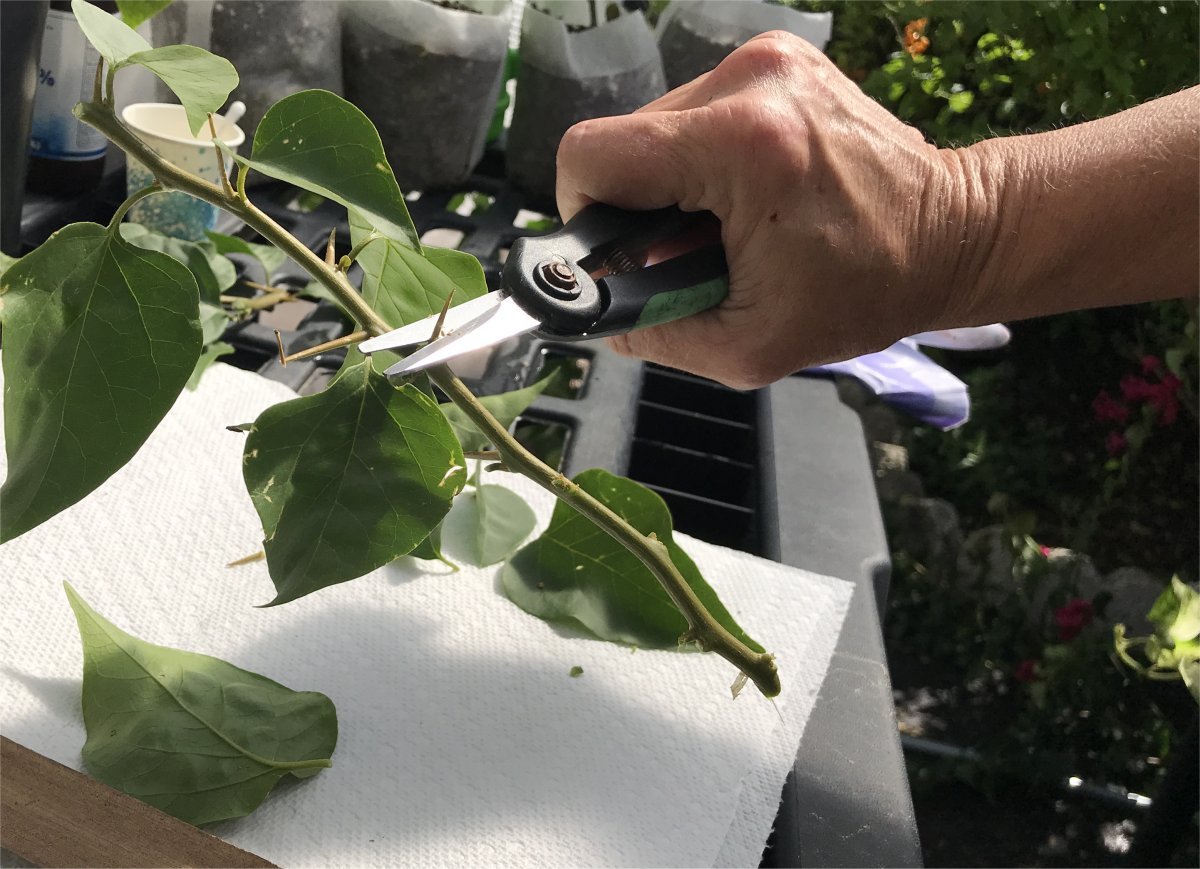
Remove all but the top two or three leaves from your cutting.
Gently and carefully scrape off the outer cortex of the lowest 1 to 2 inches (2 to 5 cm) of the stem to expose the cambium cell layer. This layer produces new growth that becomes roots under the right conditions.

Apply a small amount of rooting hormone. These are synthetic or naturally derived auxins, which are plant growth hormones.
7. Place your cuttings
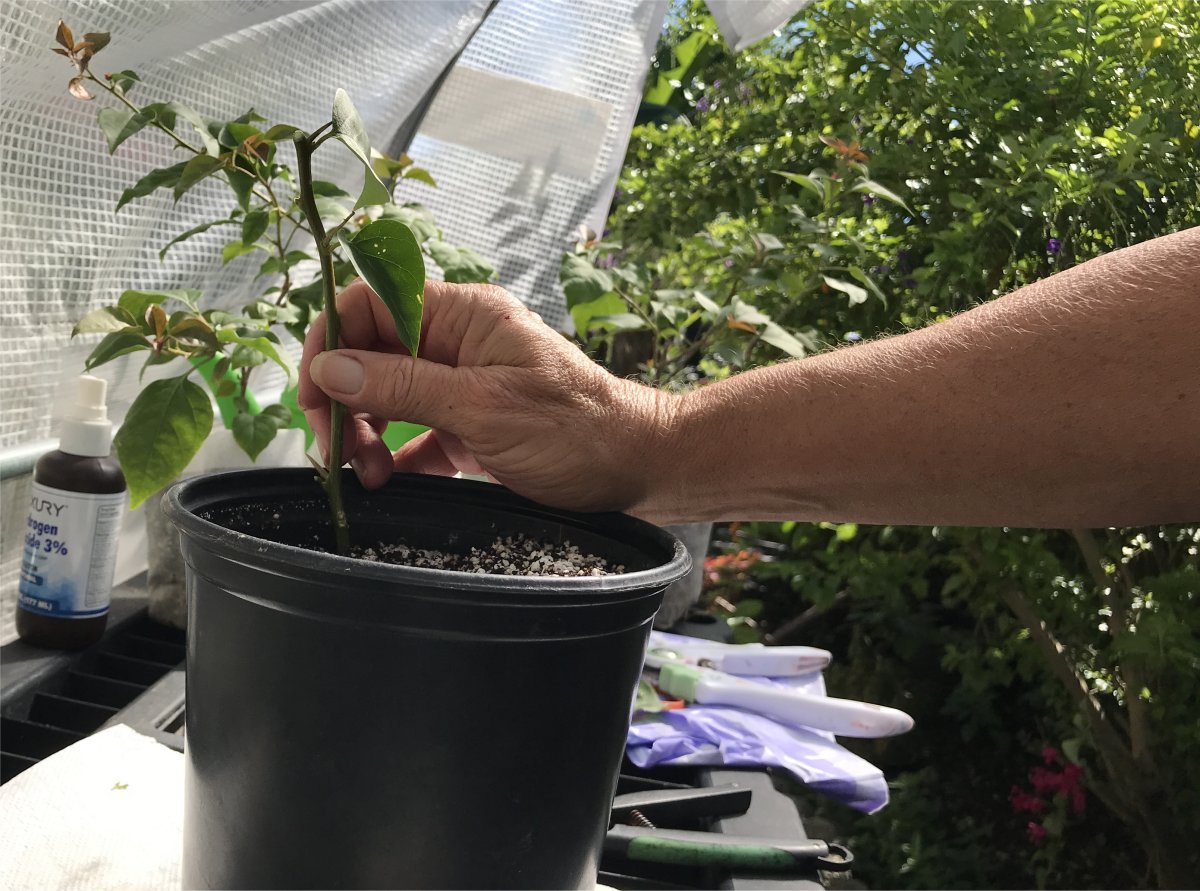
Place your plant cuttings around the outer edge of the grower’s pot.
I have experimented with placing each cutting in the center of its own small pot, but I’ve found that placing them around the outside edge of a larger pot delivers a better strike rate for me. I suspect it’s because the outside edge of the pot is much warmer, which positively stimulates root generation.
8. Water your cuttings
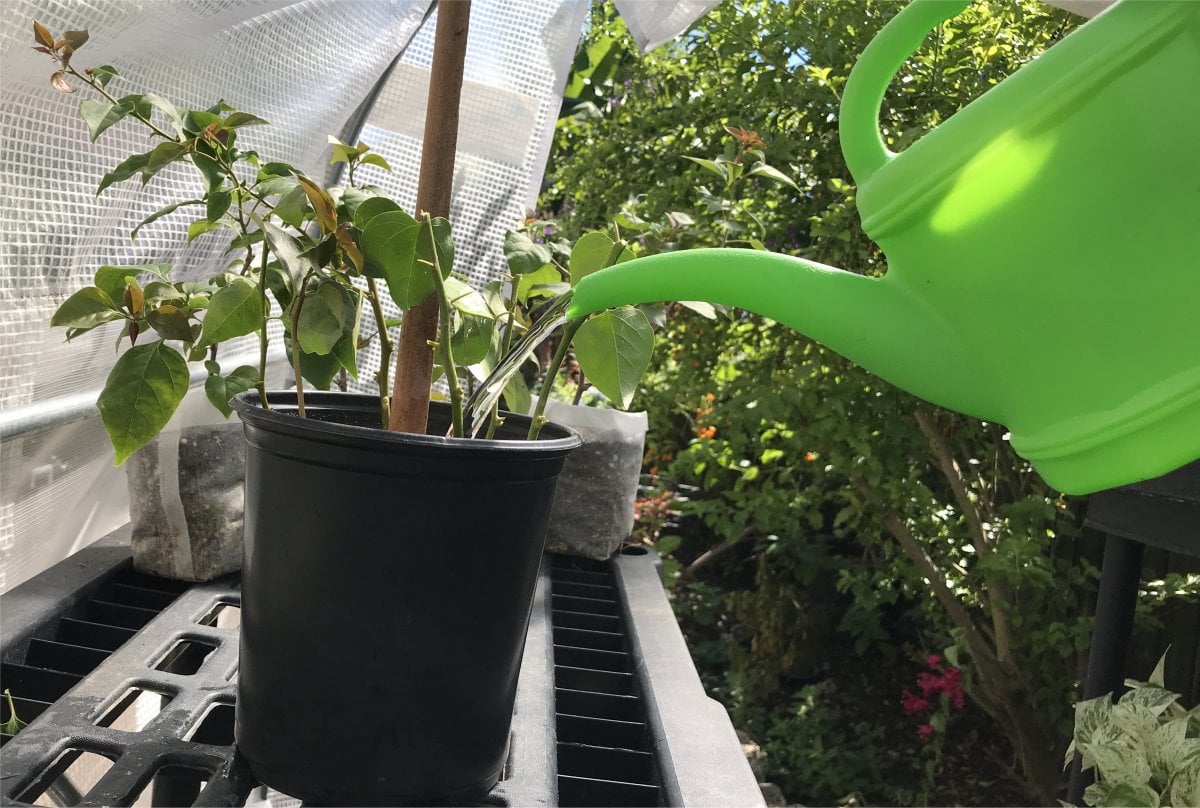
Even though the sticking mix was damp before you started, it’s a good idea to give the pot another good watering. You don’t want to disturb them for several weeks at first, so make sure they have enough water to last.
9. Cover your cuttings
After placing cuttings about 2 to 3 inches (5 to 7 cm) apart along the outside, cover the pot with a plastic bag. This creates a mini-greenhouse that retains moisture inside the pot.
Before securing the plastic bag, place a clean stick (such as bamboo) in the middle of the pot to keep the plastic up off the remaining leaves. Condensation collects on the inner surface of the bag, and the leaves can develop rot from contact, which spreads to the cuttings.
This also prevents them from being damaged by contact with cold, wet plastic should the temperatures drop below freezing overnight.
Secure the bottom of the plastic bag with a rubber band or some twine to provide a tighter seal.
I use a semi-transparent kitchen bin liner for the plastic bag, which diffuses our harsh subtropical sunlight without sacrificing warmth. I also use dried palm frond stems in my pots as supports. They don’t compost readily and it’s a good way to recycle them.
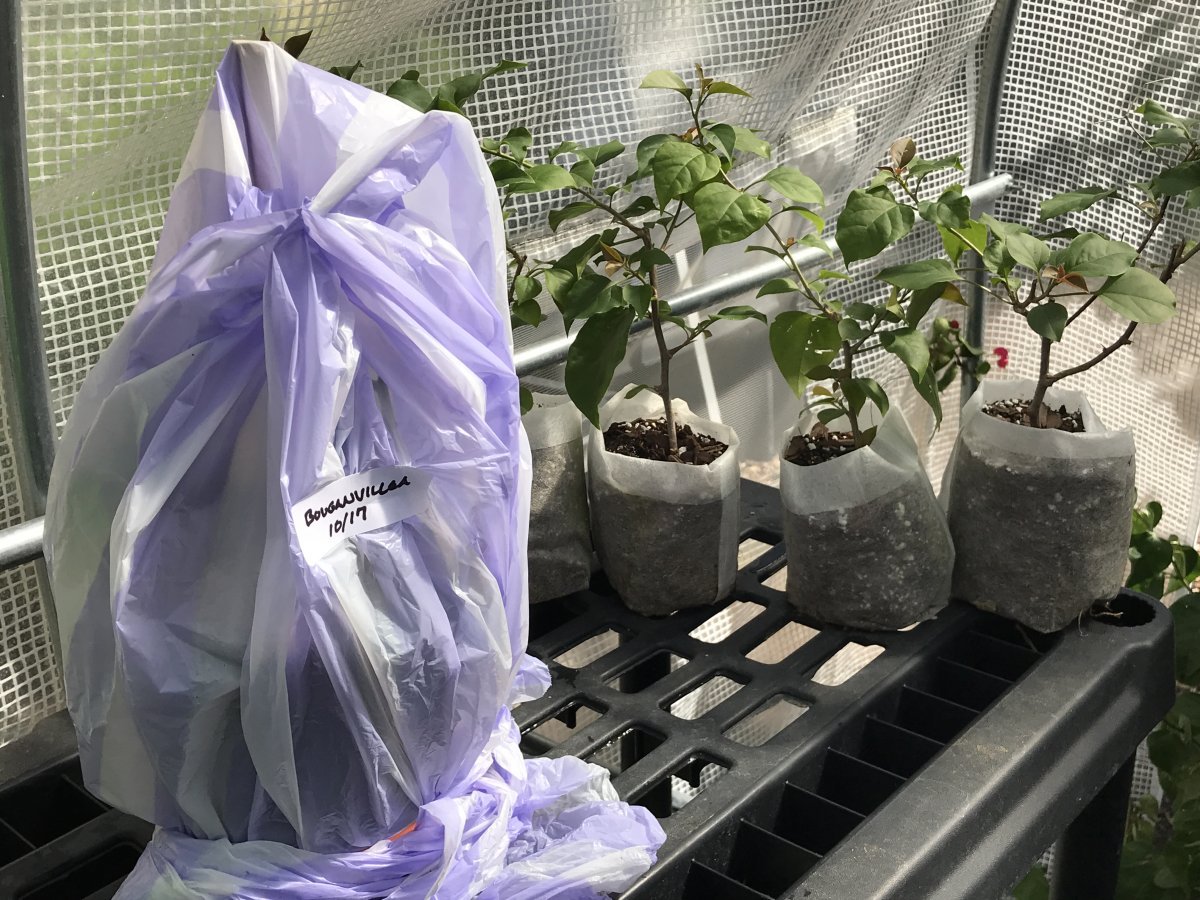
10. Label your cuttings
If you’re trying to propagate bougainvillea cuttings from different varieties or colors, it’s a good idea to label them clearly. I always add the date as well so I know when to check on them again.
11. Place your pot in an ideal location
To propagate bougainvillea from cuttings, warmth is the key to success. For a plant of tropical origins, a temperature of around 75°F to 80°F (24°C to 27°C) is ideal. Place your covered pot of cuttings in a warm spot in the garden or greenhouse with diffuse sunlight.
If fall temperatures become winter temperatures, bring them indoors and place them near a large window. If ambient temperatures fall below 40°F (4°C to 5°C) at night, place them in a sunny spot indoors if possible.
12. Air out and water
Resist the urge to uncover your cuttings too soon. After a week or two in their pot, provide them with a little fresh air. Simply remove the plastic bag and let them breathe for an hour or two.
It’s also a good time to make sure they’re staying moist and to water them if necessary.
Return the plastic bag and secure it tightly. Afterward, check on them biweekly to remove any failed cuttings and add water if required.
13. Check progress
After the fifth or sixth week, check for rooting by very gently tugging on each cutting. If they put up any resistance at all, then it’s a sign they are rooting.
Once your cuttings have started to develop new growth, you can remove the plastic cover. This is unlikely to happen before the following spring in temperate climates. However, in subtropical or tropical climates, this may happen as soon as 12 to 14 weeks.
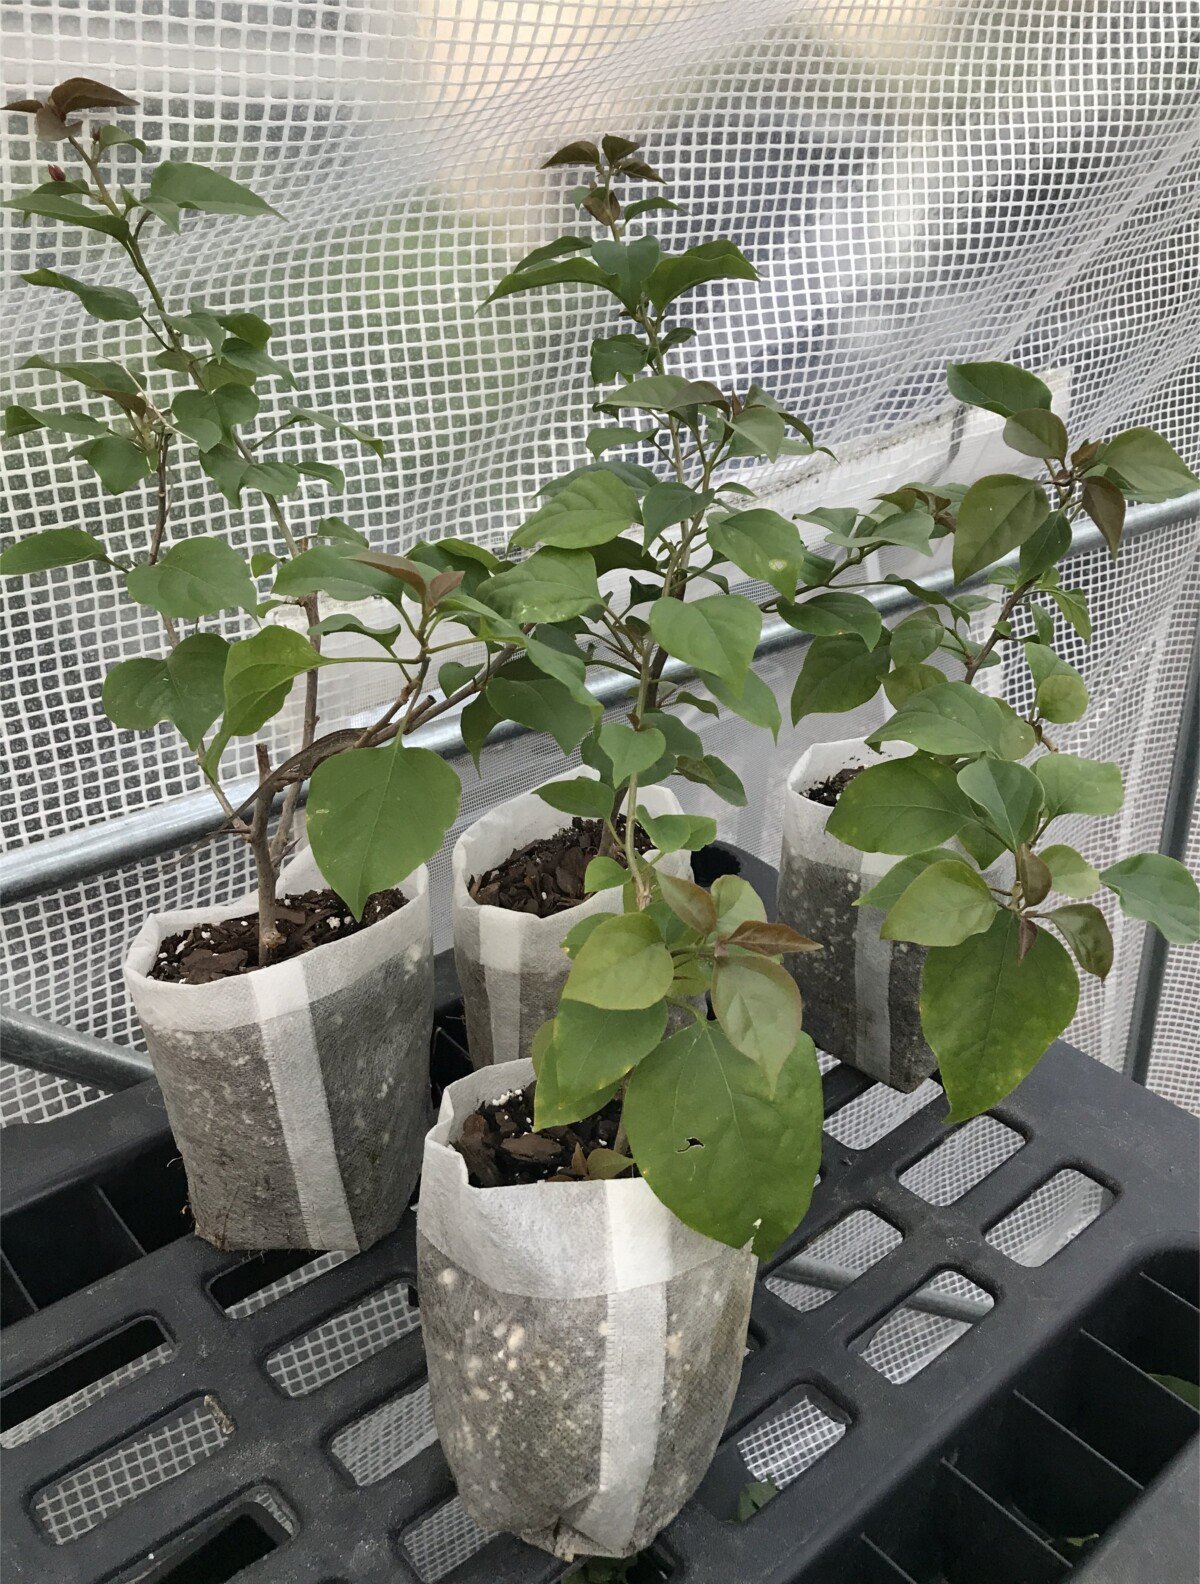
Once your bougainvillea plants begin leafing out, you can carefully transplant them into their own containers using a richer potting mix.
13. Baby your new plants
Protect your new bougainvillea plants over the coming winter months. They’re especially vulnerable to cold when young, so keep them in a greenhouse or sunny spot indoors until spring.
Using Your New Bougainvillea Plants in the Garden
It takes a little patience, but it’s definitely worth your effort to propagate bougainvillea from cuttings.
For those in temperate climates, bougainvillea delivers a bright tropical punch of color. They really set the mood in containers around a pool deck or outdoor entertaining space. They’re also quite stunning when trained to trail from hanging baskets. Keeping them in containers allows you to move them indoors when temperatures drop below 50°F (10°C).
Gardeners in subtropical climates who want the drama of climbing roses without the extra work find bougainvillea makes the perfect substitute. If they propagate bougainvillea from cuttings in the fall, they can transplant them into the garden in early summer the following year.
Bougainvillea are showstoppers in the landscape that provide shelter for nesting birds along with nectar for pollinating insects. They’re also easy on the environment, with little need for extra fertilizers, anti-fungal treatments, irrigation, or fuss.