If you’re looking for a low-maintenance houseplant that offers plenty of rewards, Chlorophytum comosum is your answer.
Also known as Spider Plants, they do not attract or house spiders (thankfully), but are named so because of their spidery plantlets that shoot off from the parent plant.
These plantlets are also the reason the Spider Plant is one of the easiest, if not the easiest, houseplants to propagate. Rather than taking a stem cutting and hoping for the best, or snipping off leaves and trying to get them to root, the Spider Plant does all the work for you.
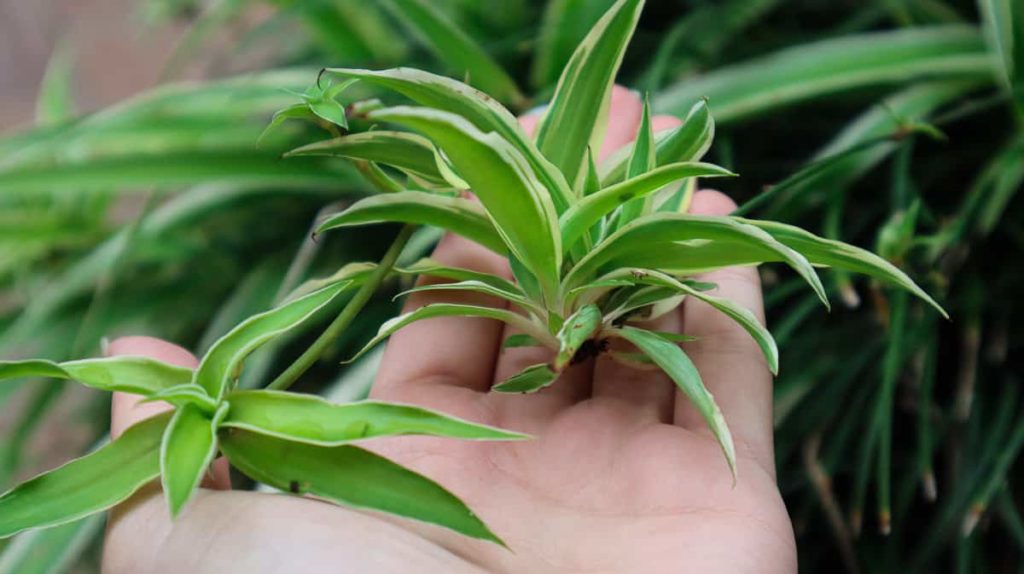
Chlorophytum comosum propagates by producing babies along protruding stems that hang off the plant.
With plenty of leaves (and even some roots if you’re lucky), these miniature Spider Plants can turn into fully grown ones remarkably quickly. All you need to do is plant them in individual pots and watch them grow.
When To Propagate
As soon as you see fully-fledged Spider Plant babies hanging off a stem, you can start the propagation process. However, it’s best to propagate in either spring or summer for the quickest root growth.
It can take a plant a few years to start producing babies, so don’t worry if it doesn’t happen straight away. Runners will also only develop in the right conditions – bright indirect sunlight and regular watering. Fertilizing your plant in early spring can also promote the growth of plantlets.
In spring and summer, depending on the plant and region, your spider plant will produce long stems with small white flowers on the end. This indicates the plantlets will soon develop.
Don’t remove them from the parent plant immediately as they need to gather nutrients from the parent plant before establishing themselves on their own. It’s best to wait until you see small aerial roots develop around the base of the plantlet, indicating it is ready for propagation.
You can also leave the plantlets on the plant for a longer period until you are ready to propagate. They will continue to grow and obtain nutrients from the parent plant until you remove them.
When planted in a hanging basket, these babies cascade over the sides and make your Spider Plant an interesting décor feature.
How To Propagate Spider Plants
Prepare Your Tools
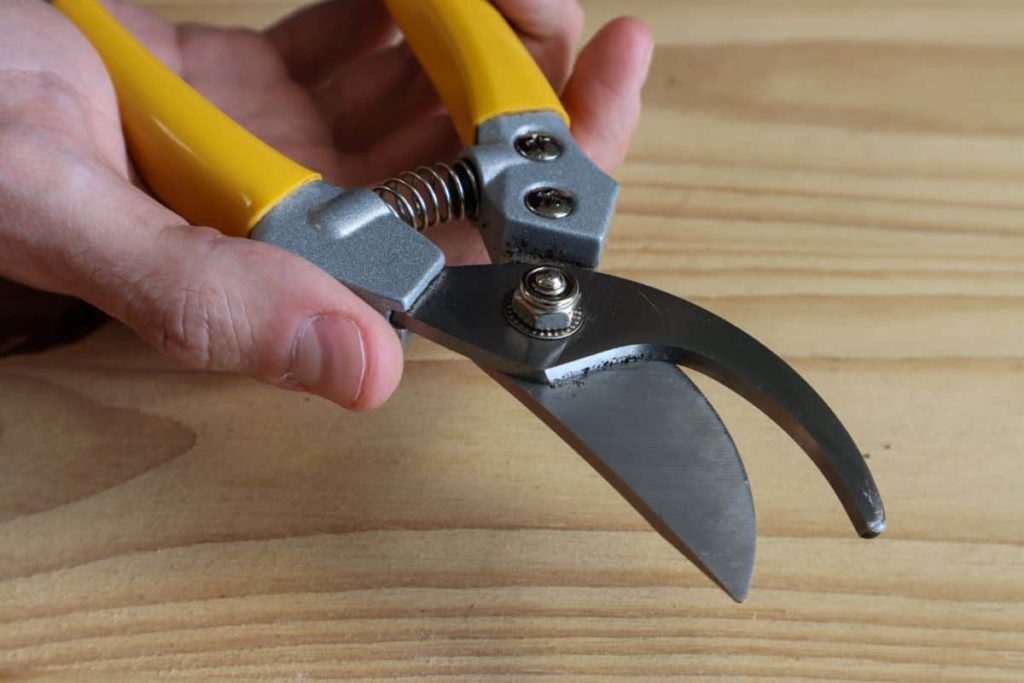
Before you get started, you’ll need to get your tools ready for propagation. This doesn’t only include gathering them, but also cleaning them to ensure you don’t transfer any bacteria or germs to the babies or to the parent plant.
Start by cleaning your shears or scissors with a 5% bleach solution. This will remove anything harmful that may have stuck around on your shears from previous use. You should also clean any pots or glasses thoroughly, especially if they have been previously used for other plants.
When propagating in water, any regular glass is suitable. However, using a specialized propagation station is even better, especially when it comes to design. These glasses turn the process of propagating into a decorative feature and provide plenty of space to grow even more plants.
When rooting in soil, a small plastic or terracotta pot is sufficient for the first few months of growth. As the plant roots, it can be moved to a larger, more permanent pot or hanging basket with refreshed soil.
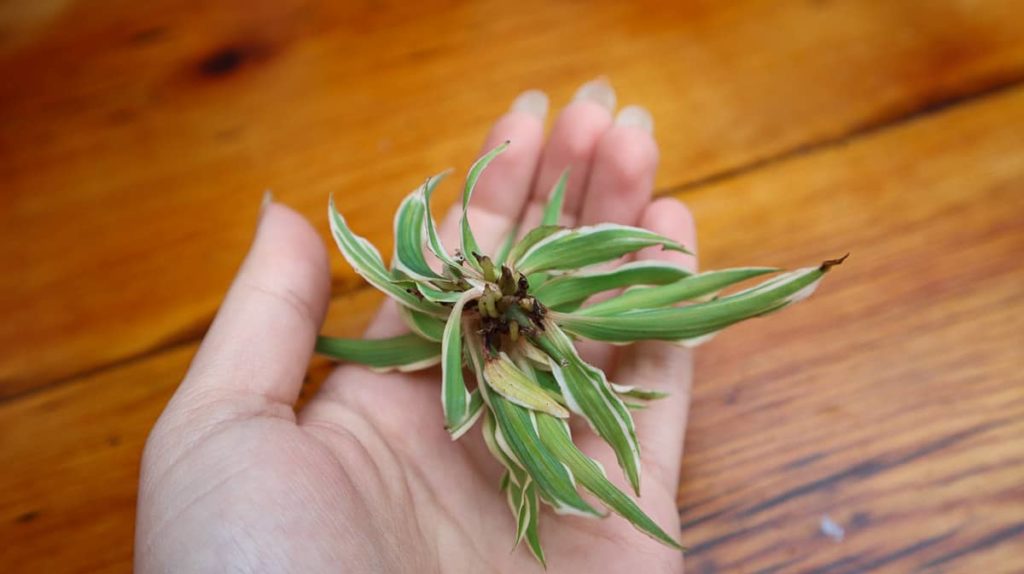
Remove The Plantlet
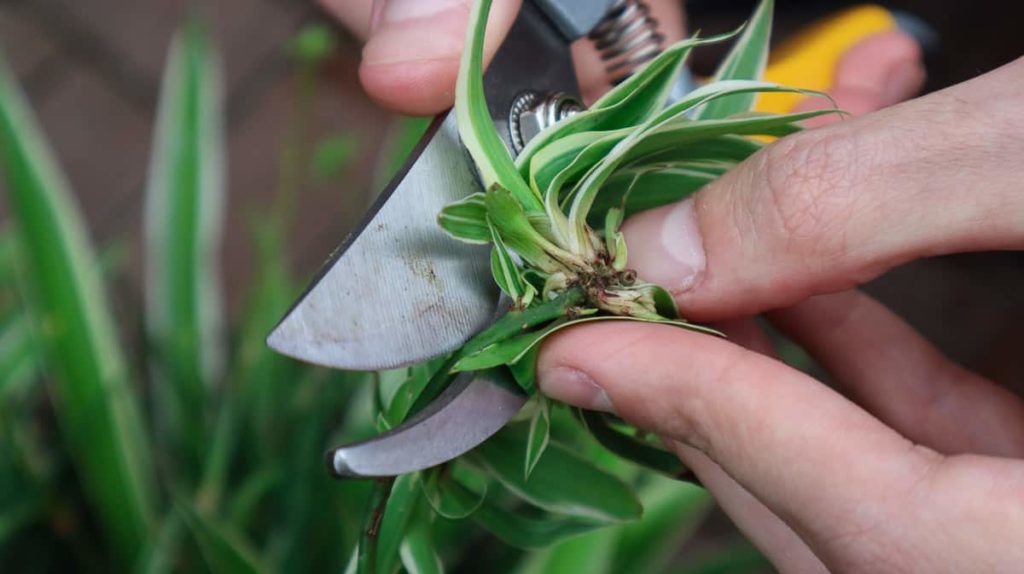
With tools cleaned and sharpened, it’s time to get propagating. To start, the process is as simple as trimming the existing babies from the runner stem. Each plantlet needs to be removed just before the base where the aerial roots emerge.
If there are multiple plantlets along the stem, remove the entire stem and cut off each individual plantlet. If you just want to remove one or two, cut them off the ends right below the base.
Healthy plants may still produce more babies so the stem can be left on the plant. Alternatively, for a cleaner look, you can remove it at the base of the plant.
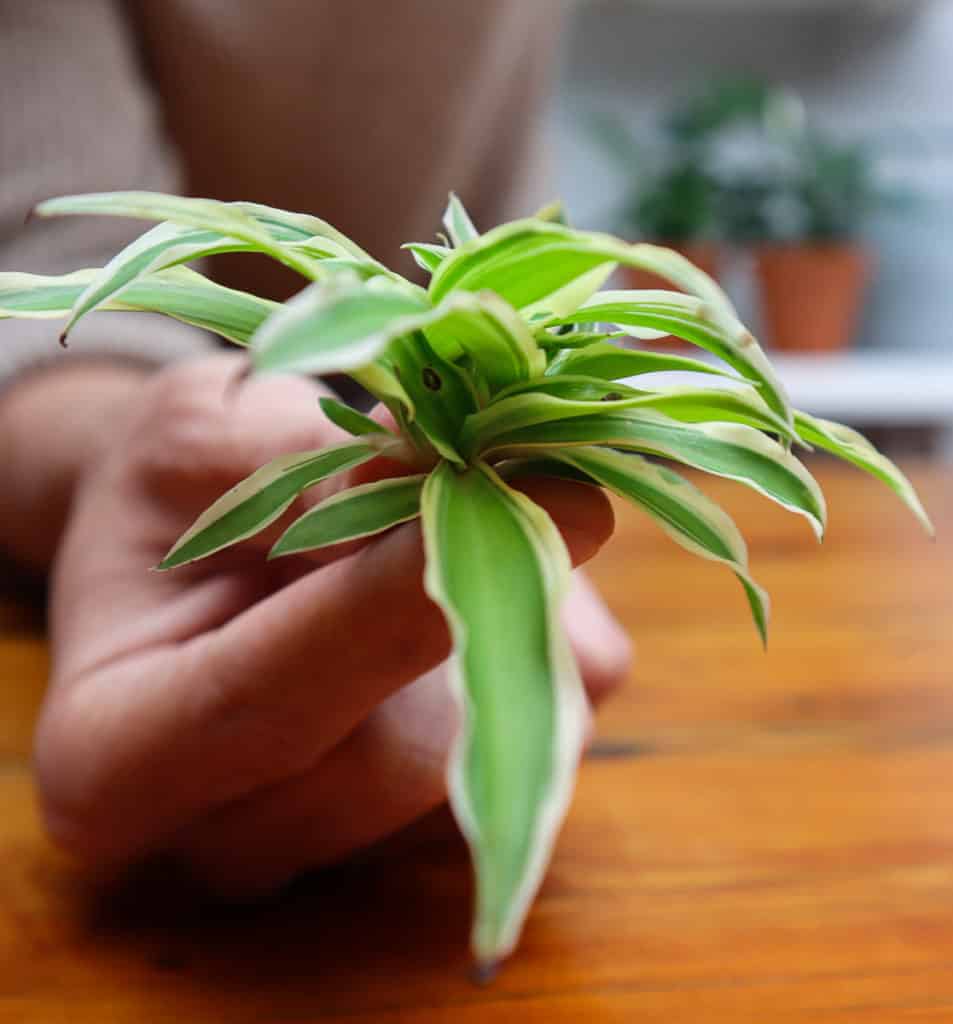
Cut off any stems left around the base until you have a standalone plantlet. Be careful not to cut too close to the base to avoid damaging the roots. Any long pieces of the leftover stem will simply rot in the water or soil, so it’s best to remove them completely.
Rooting
Root in water
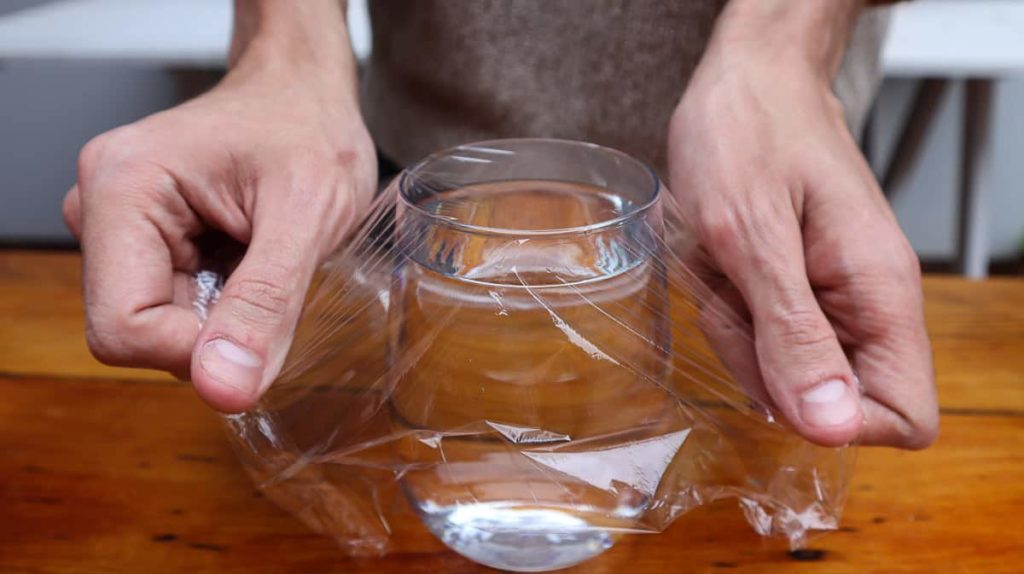
For the simplest propagation method, toss the plantlet in a glass filled with filtered water up to where the roots sit and leave them to grow. If your glass has a wide opening, cover it with plastic wrap first so only the roots rest below the waterline. Any foliage left sitting in the water will rot.
You will need to top up the water frequently to cover the roots. Change the water entirely every couple of days for a fresh supply.
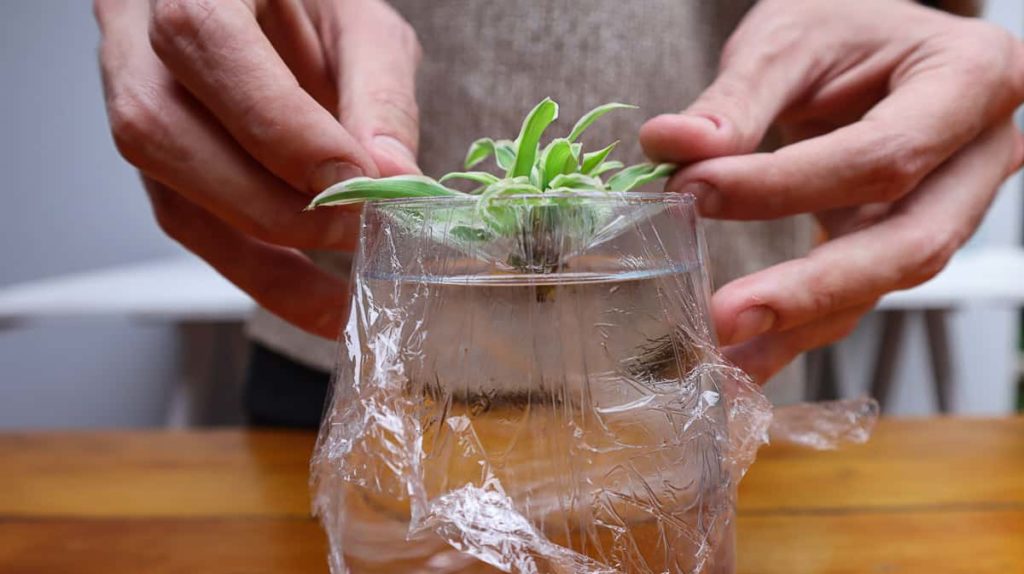
Long roots should develop within a few weeks, after which point they can be transplanted into soil.
While the plantlets will survive in water for a while, it does not contain the nutrients needed to grow the plant and cannot live in the water forever without fertilizer. The longer you leave the baby in water, the harder it will be for the roots to acclimatize to soil conditions. So, it’s best to transplant when the roots are around two inches long.
Rooting in water provides the quickest results. Plus, you get to watch the root growth firsthand.
However, it does not produce the most reliable results. The roots the plantlet develops in water are far more delicate than those it would produce in soil, leading to potential problems with growth early on after transplanting.
Ensure you don’t leave the plant in water for too long, or simply skip the water rooting altogether and go straight to soil.
Root in soil
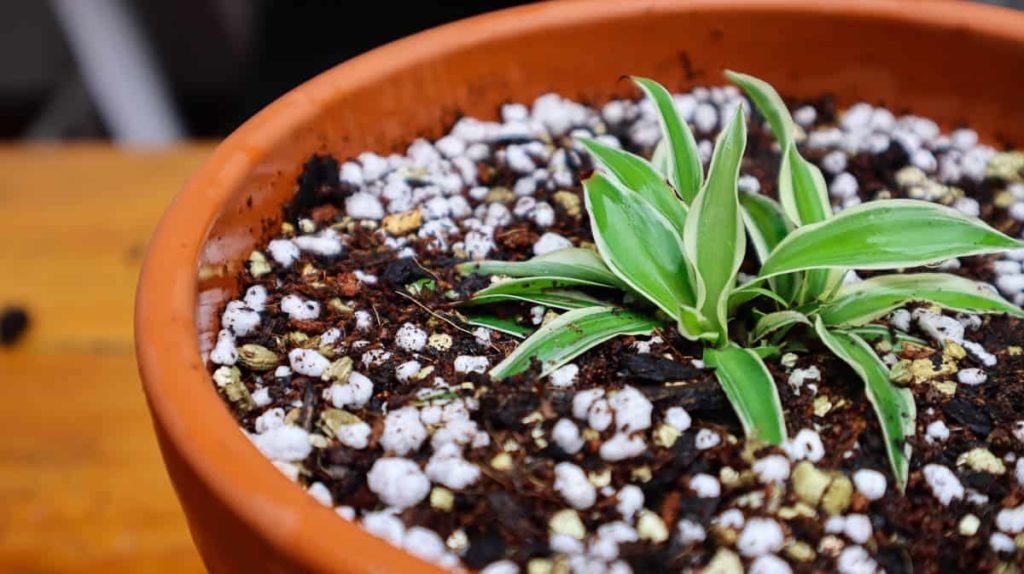
To replicate natural propagation and develop the strongest root systems, rooting in soil is best.
A light propagation medium is needed to promote strong root growth and avoid rotting the new, delicate roots.
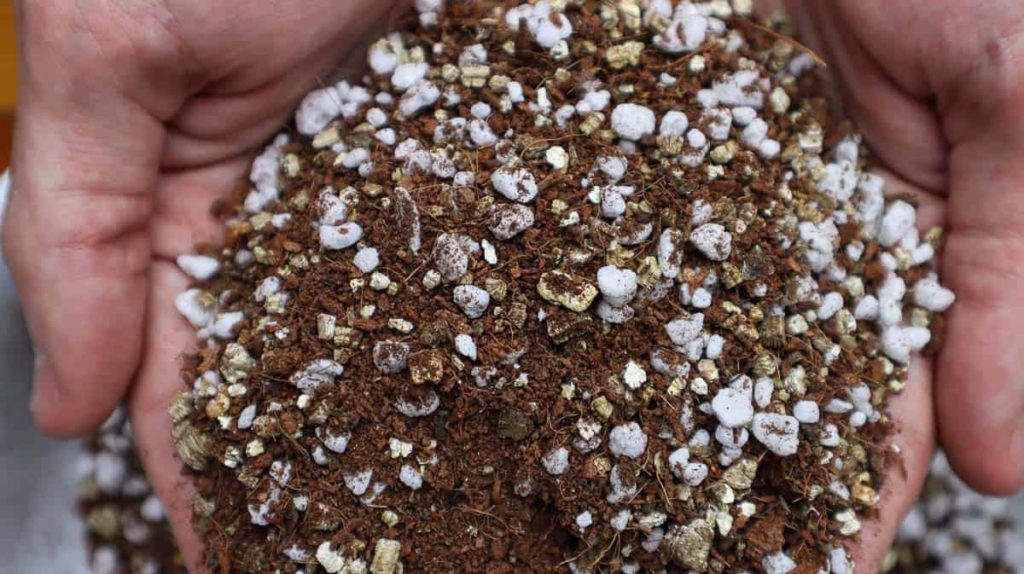
To meet these criteria, it’s best to make your own propagating mix by combining coconut coir (or peat moss), perlite and vermiculite for increased aeration and improved drainage. This will stop water from pooling around the roots and will provide enough space between the soil particles for the roots to grow without too much resistance.
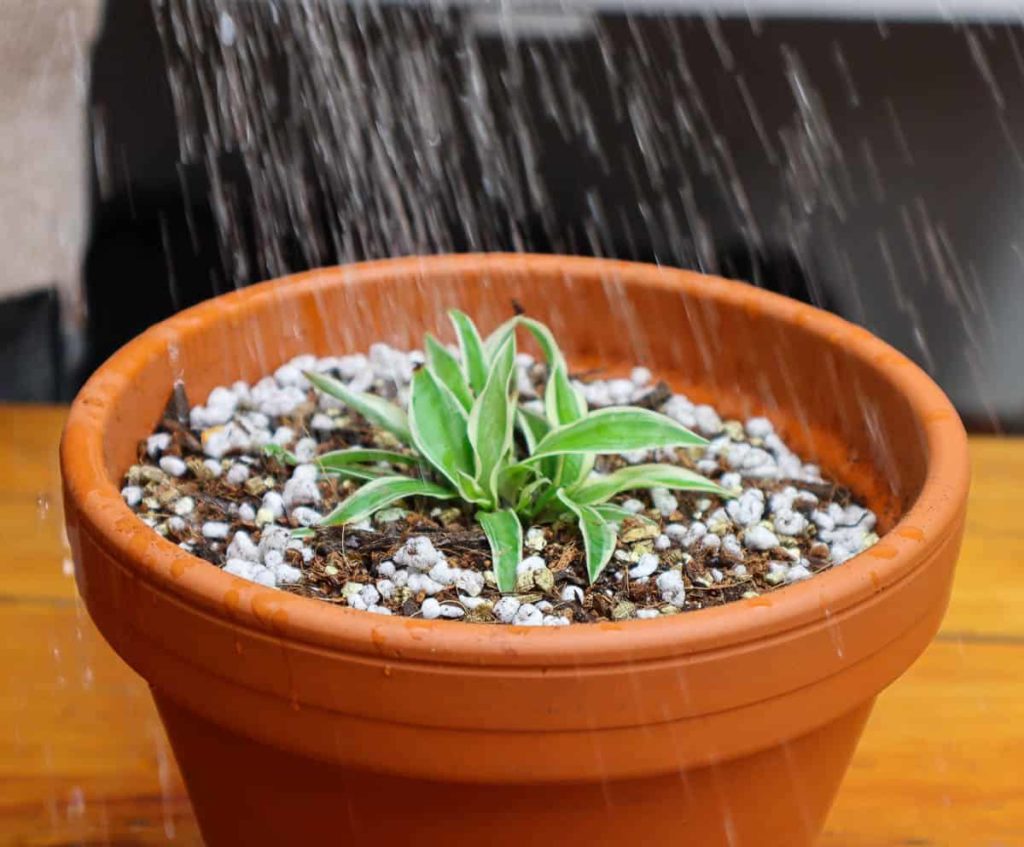
Fill a small pot with this propagating mix and plant the baby in the pot, burying only the base of the plant in the soil and leaving the foliage above the soil line.
Water thoroughly after planting to encourage new root growth. It may take longer to root this way, but the roots that do develop will be far stronger.

After a couple of months, move the plant to a larger pot or hanging basket filled with potting mix amended with coconut coir and perlite. Plant several into one larger pot to fill out the container.
If you want to skip the transplanting stage, you can plant babies in this potting mix straight into a larger pot. Root growth might not be as strong but it does limit potential problems when transplanting later on.
In this case, group several plantlets together into one pot, spacing them evenly. The foliage from each plantlet should fill out and cascade down the sides as it grows, rather than looking sparse on its own in a large pot.
Care
When rooting in water, ensure the glass and water are always clean for healthy root growth and disease prevention. When rooting in soil, keep the soil moist but not waterlogged until new growth develops. Keep the pot or glass in a bright spot with plenty of indirect sunlight to promote quick root growth.
Once transplanted, your new plants should develop their own babies after a few years, starting the cycle of propagation all over again.