Mistakes in gardening are like aphids. They may ruin your day temporarily, but as long as you aren’t bothered too much, the problem will solve itself. I’ve come to accept mistakes when I’m gardening. I make them every season – never intentionally – and almost always learn a great deal.
Since I’m starting to turn my attention to my fall garden this month, naturally I’m thinking of propagating plants, either by taking cuttings or by division. And since I’m nothing if not honest in admitting my mistakes, I’ll give you a brief intro to all the blunders I’ve made (and some that I’ve managed to avoid in the nick of time) when I took and cared for plant cuttings.
Here are some common mistakes to avoid when you propagate by cuttings:
Mistake #1: You’re taking the wrong kind of cuttings.
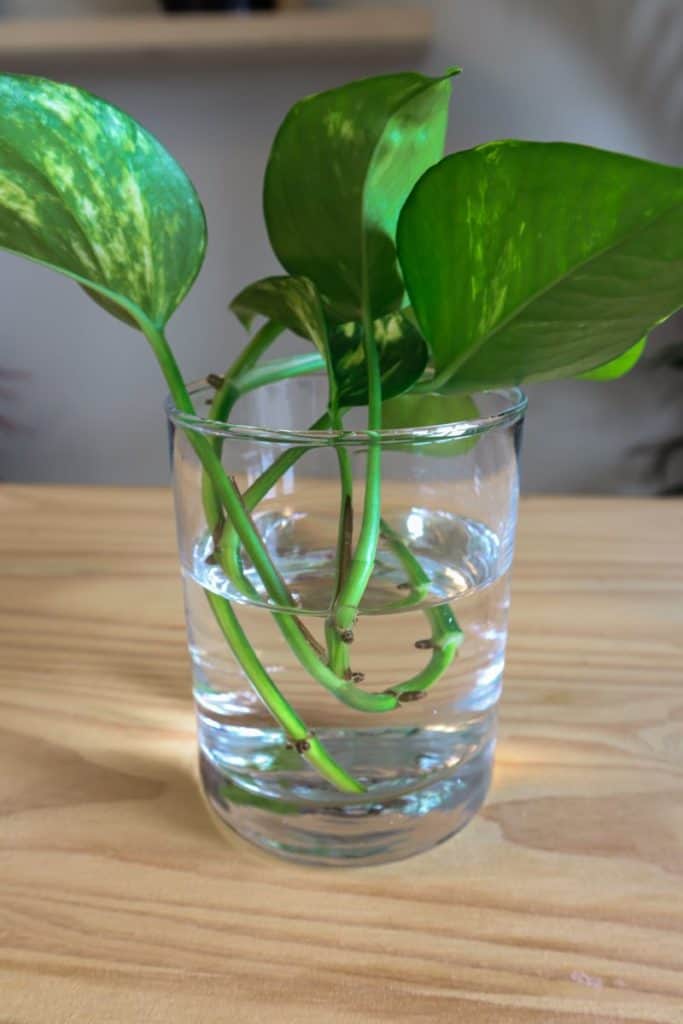
Those of us who keep houseplants – it’s physically impossible to garden and not have at least a houseplant – know how easy it is to take a cutting. Just cut a bit of pothos stem with a leaf node attached, stick it in water, and rejoice in the fresh roots that are quick to grow.
It’s a bit more complex when it comes to garden plants.
To keep it simple, there are three different types of cuttings you can take, depending on what stage of growth and what season you’re taking them in.
Softwood cuttings are available for taking in late spring and early summer. With this method, you are using new growth (current year’s growth) to make more plants, so it does come with a sense of instant gratification. I wrote an entire guide on how to take softwood cuttings and what plants work best for this method.
Semi-hardwood cuttings are older than softwood but younger than hardwood. They are still the current year’s growth, but older growth that we usually take in late summer. Semi-hardwood cuttings have a soft growth at the tip, but a hardening growth about six inches below. It’s this material that makes the best cuttings.
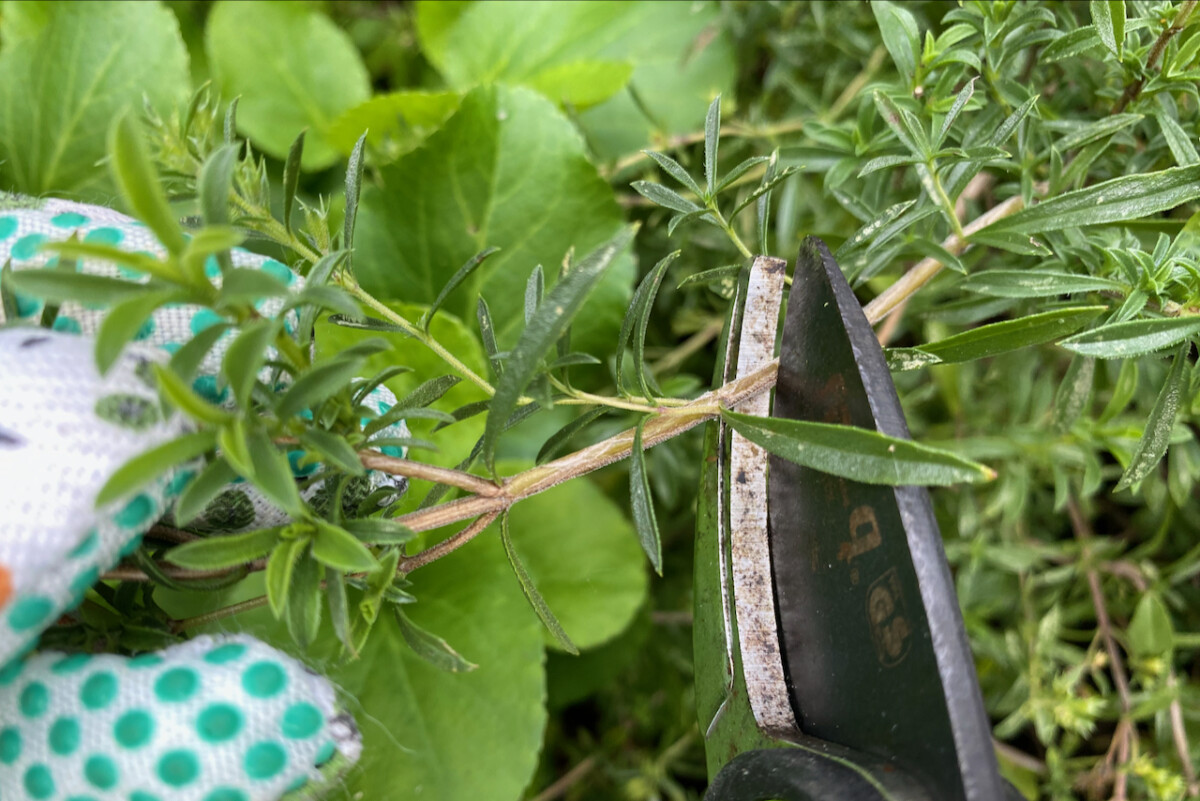
Hardwood cuttings require a bit more patience, but in my experience yield the highest rate of success. These are cuttings of old wood that we take in the fall. Again, I’ll point you to a tutorial I wrote last November about the best plants to take hardwood cuttings from and how to do it.
So where is the mistake?
Some plants, such as star jasmine, will grow well from hardwood and semi-hardwood cuttings. Others will generally grow better from softwood and semi-hardwood cuttings.
My point is that some plants will happily grow from more than one type of cutting, but you have to know ahead of time if they do so as to avoid disappointment. It’s impossible to include a comprehensive list of which is which, so before you take cuttings from a plant for the first time, research what type of cuttings it grows best from. Sometimes, there may only be one correct answer.
Mistake #2. You’re taking cuttings at the wrong time of year.
From the list above, you may have noticed that taking cuttings can be a year-round affair, starting in spring and extending all the way into late fall. So while I can’t say that there’s a wrong season for taking cuttings, I will say that there’s a wrong time of year: in the middle of summer, especially if you’re going through a heatwave.
Remember that cuttings don’t have roots to absorb the moisture they need. And even if we reduce the surface of the leaves to reduce evaporation, that may not be enough moisture loss prevention during a hot summer. The plant will just shrivel up and die without much recourse. So avoiding taking any cuttings during the summer months is your best bet.
The good news is that a lot of ornamental plants are in bloom during the summer. And since we shouldn’t take cuttings of blooming stems to propagate, there’s very little temptation to do so in the summer anyway.
Mistake #3: You’re not taking enough cuttings to maximize your chances of success.
This is a mistake I’ve made multiple times before I learned my lesson. It’s easy to be overly optimistic and count every cutting you take as a new future plant. But it’s only a possible future plant. And I guarantee you that, unless you have the optimal conditions and the world’s greenest thumb, you will not have a one hundred percent chance of success. Something will go wrong – whether it’s one of the mistakes on this list or something completely out of your control.
So my advice is to hedge your bets, play it safe and take extra cuttings. How many extra cuttings depends on your level of risk and your experience. I skew pessimistic, so I aim for at least double the cuttings. If I’m honest, if I get one grown plant out of three cuttings, I’ll consider it a success. And for plants that are notoriously hard to start from cuttings, such as clematis, I’ll aim for a twenty percent success rate.
Your rate of success will improve significantly if you have the right growing conditions, such as those enjoyed by commercial growers. I’m talking about a bright, climate-controlled greenhouse equipped with heated mats to place your cuttings on, an intermittent mist system that disperses just the right amount of humidity and fans that keep the air moving.
Mistake #4: You’re not planting the cuttings right away.
This is another one that I’ve been guilty of in the past. I would visit friends and family, take healthy beautiful cuttings from their gardens, then proceed to procrastinate on getting them back in the ground.
If you can’t plant the cuttings as soon as you take them, you MUST store them in a sealed plastic bag or a closed jar, and preferably wrap them in a wet paper towel. Otherwise, they lose too much moisture and all you’re left with are wilted leaves.
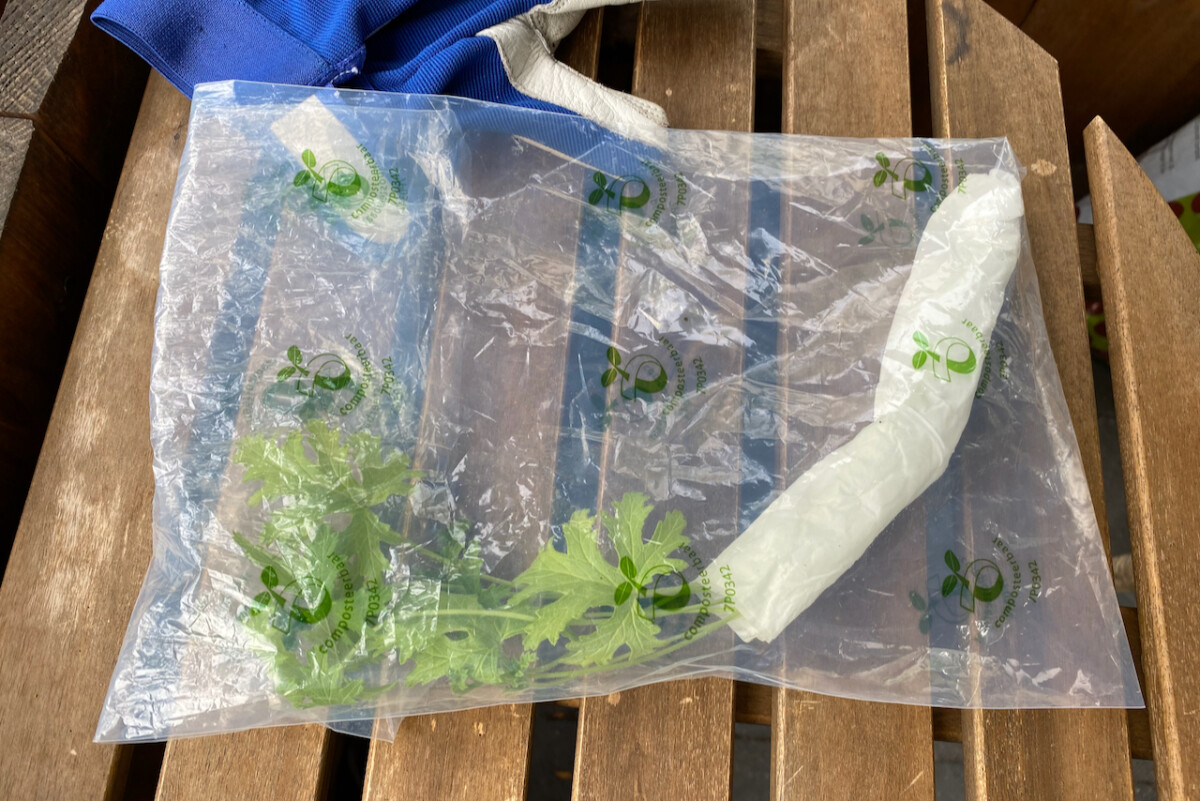
I’m still bitter about this one particular trip to my mother-in-law’s from which I brought back a handful of cuttings from her established garden. As it happens, I was so exhausted by the time we got back home that I just left them in a pile on the patio table for the entire weekend. Not a single cutting took, even after I put them in pots and went through the right motions. I had just missed the right timing, and I still remember this mistake almost ten years later.
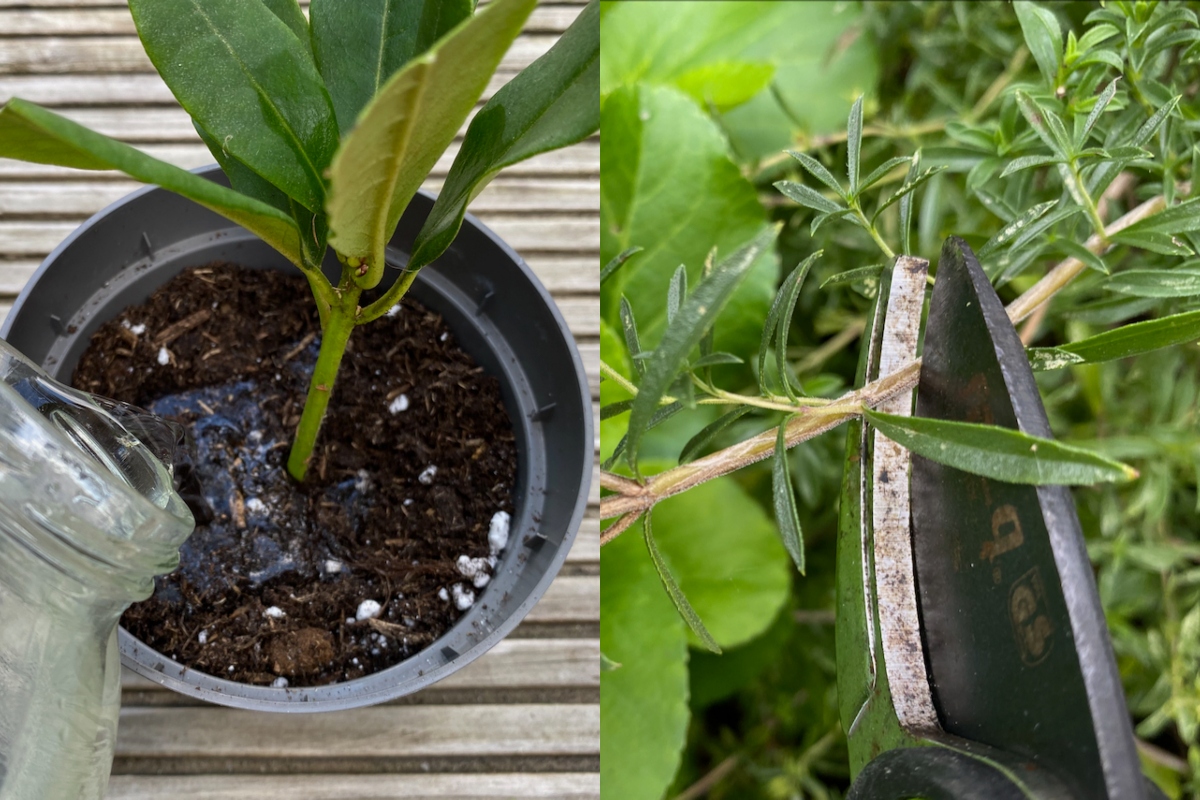
Mistake #5: You’re using soil that retains too much moisture.
The easiest shortcut you can take when you’re planting cuttings is to use soil from your garden. After all, if it’s good for the plants in your garden, it’s a good medium for the cuttings to grow roots in, right? It’s not as straightforward as that.
Garden soil is great because it retains water in the garden, but this much moisture will cause the cut plant to rot before it starts forming baby roots.
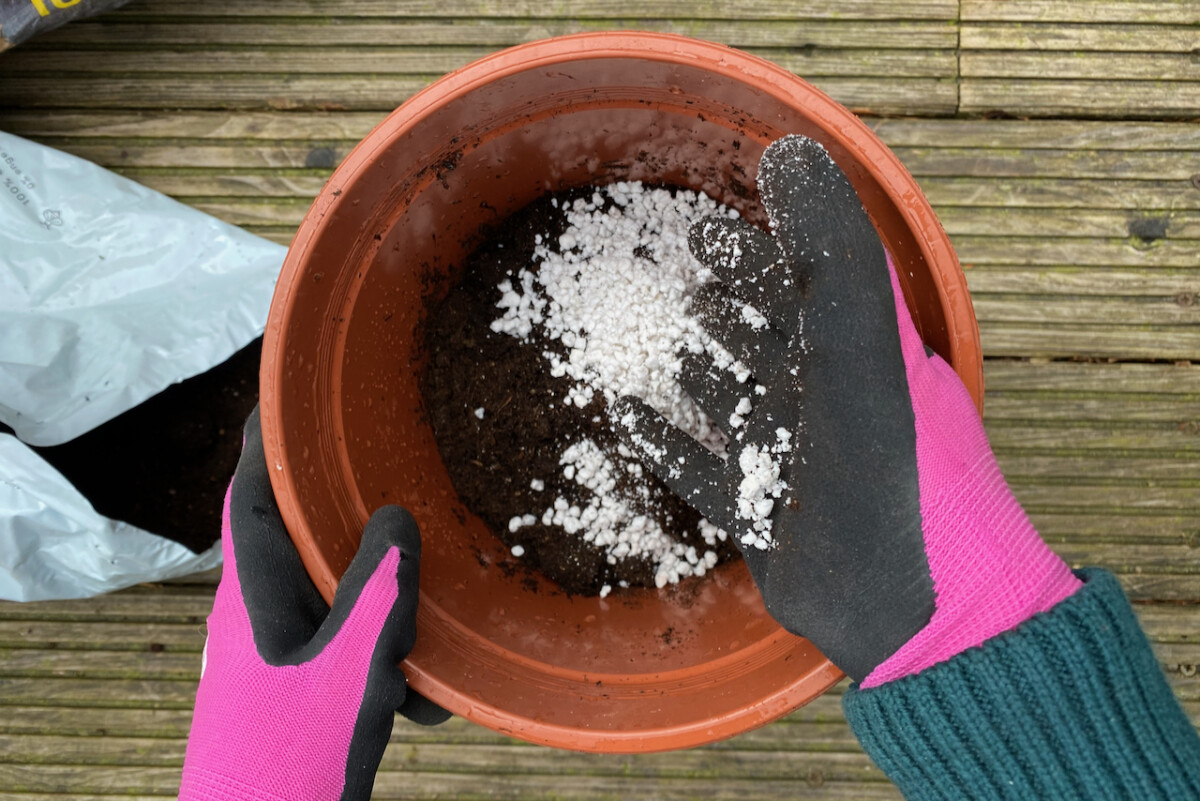
Every time I take cuttings, I stick them in fresh potting soil with a handful of extra perlite, horticultural sand or coco coir. These additions help aerate the soil and retain less moisture than garden soil or regular potting soil.
Mistake #6: You’re watering your cuttings too much.
Let’s say you used the right soil with the perfect moisture retention properties. Now the trick is to refrain from watering it too often. Remember that the new cutting doesn’t yet have roots to absorb all the moisture. If the soil looks like you could squeeze water out of it like it’s a sponge, then it’s too wet for cuttings and your new plants will rot.
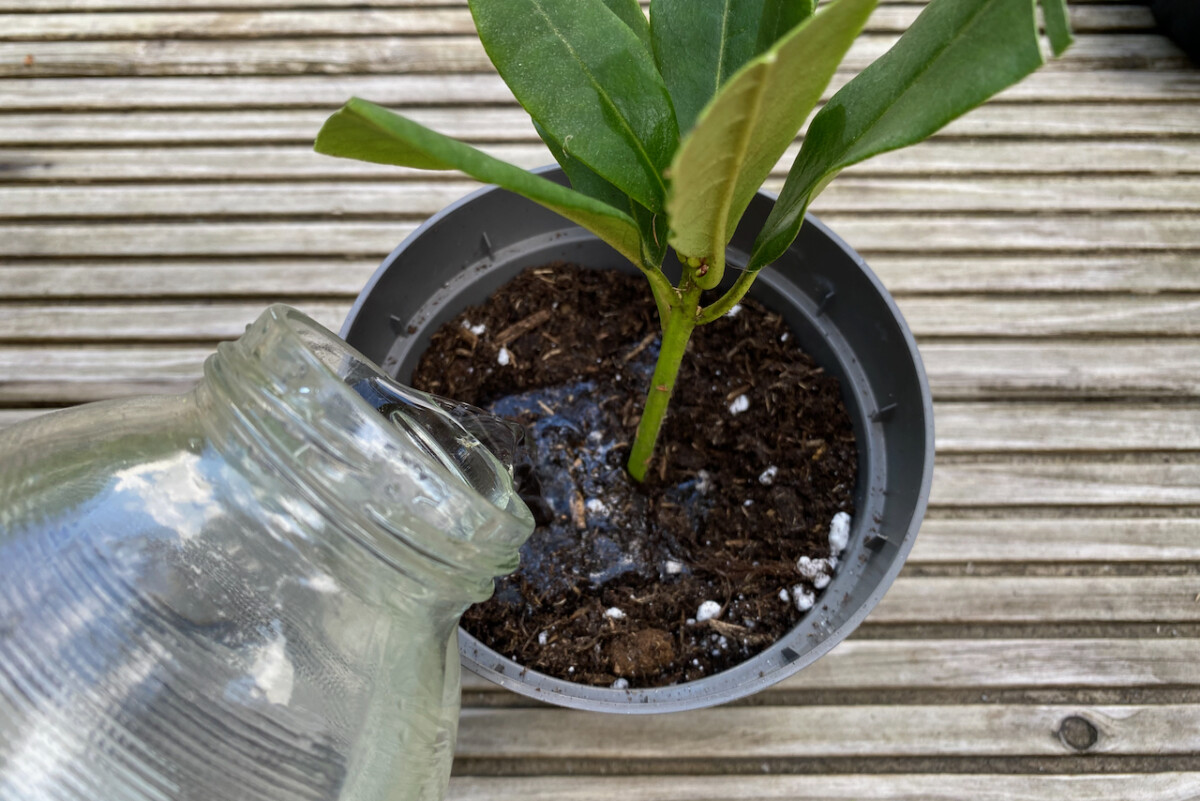
Even when the baby plant starts growing roots, don’t overwater them. At this point, they don’t have fruit to need the water or enough leaves to help perspire the water out of the plant. Keep the soil relatively moist, but not drenching wet.
Mistake #7: You’re not doing any aftercare.
If you think your job is done once you’ve plopped the cuttings into the ground, I’m sorry to be the bearer of bad news. You’ve just sown the seeds of a new plant, so to speak, but you still need to nurture it. It’s this step that can make or break your success rate.
First, you need to keep the cuttings at the right temperature. This is especially important for semi-hardwood or hardwood cuttings that you take in the fall. It’s better to keep your cuttings in a warm environment of around 65F (18-20C). That’s not always possible, of course, and you should be safe with a fluctuating temperature, as long as it doesn’t dip below 50F (10C). This often happens starting in October in my area, so I have a backup plan that involves my trusted mini-greenhouse.
Another part of aftercare is making sure that the cuttings are getting enough light for photosynthesis, but at the same time they’re not left scorching in the sun. Place your cuttings in part shade and rotate them every couple of weeks to make sure that they’re growing evenly.
Mistake #8: You’re not keeping the right humidity around the cuttings.
Just like making sure you’re not overwatering or underwatering the plant, getting the humidity right is also a balancing act. When you first plant the cutting, it’s a good idea to either keep it in a propagator or to make a sort of cloche to protect the plant material from drying out too quickly.
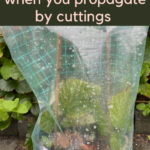
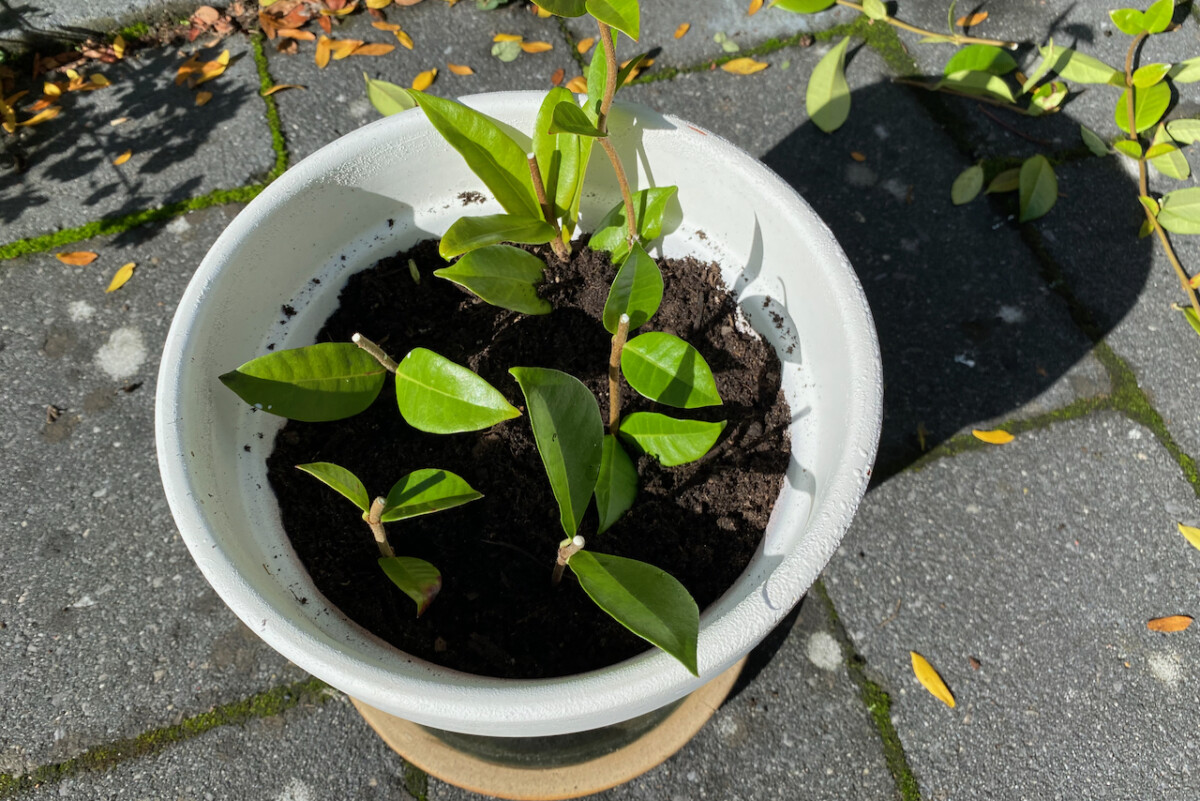
I usually use a plastic bag propped up by chopsticks that keep the bag hovering above the plant. But you can also use a plastic bottle or jug with its bottom removed.
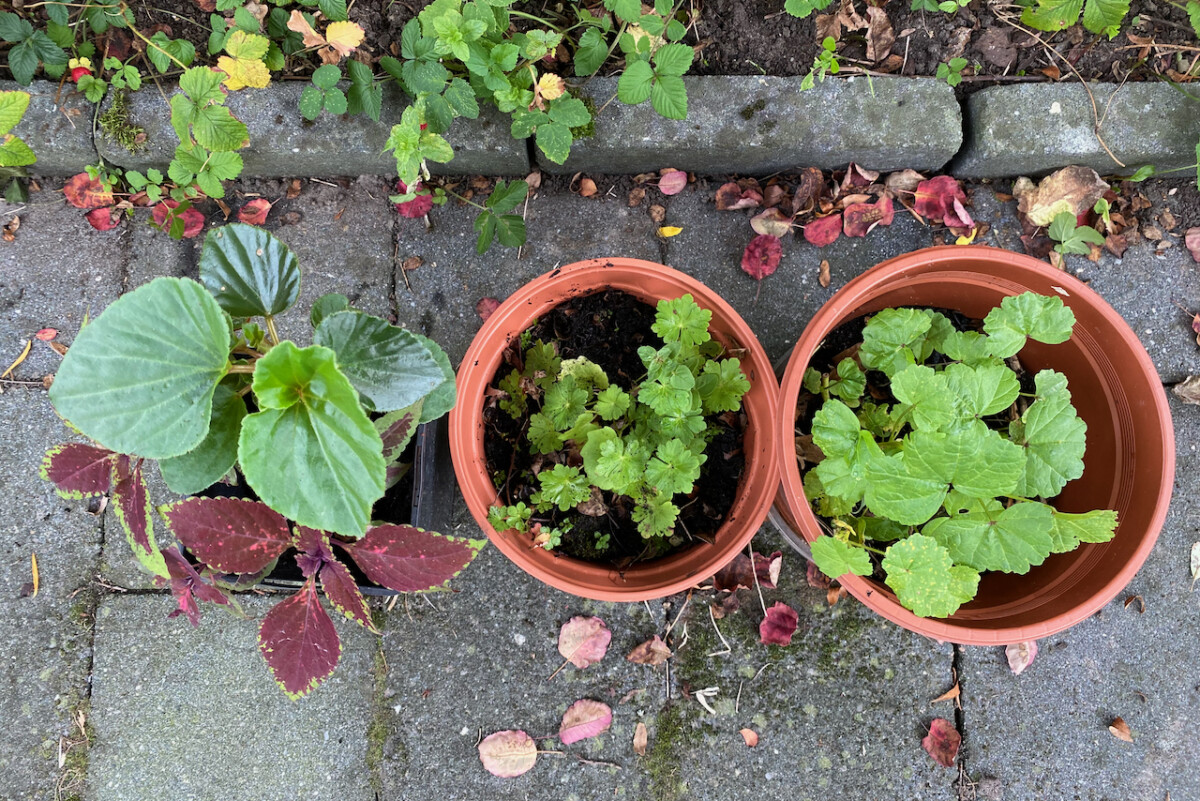
Now here comes the balancing act. Can you spot what’s wrong with the image below? And more importantly, can you guess the consequences? This is my latest mistake, one I made not because I didn’t know any better, but because I was simply balancing too many items on my to-do list.
There’s too much condensation around the cuttings because I forgot to remove the plastic bag to allow some airflow. The result is easy to guess, though hard to accept. All the leaves have developed black moldy spots. Luckily, this was one of two large pots with multiple cuttings in it. I had already moved the other pot indoors, so I’m happy to say that my effort was not in vain with this one. Still, lesson learned! Keep it humid – but not too humid – around your cuttings.
Propagating by cuttings is the easiest method to multiply your plant collection for free. I think it’s worth risking mistakes because, more likely than not, you’ll end up with new plants anyway. Gardening is a forgiving pastime like that.