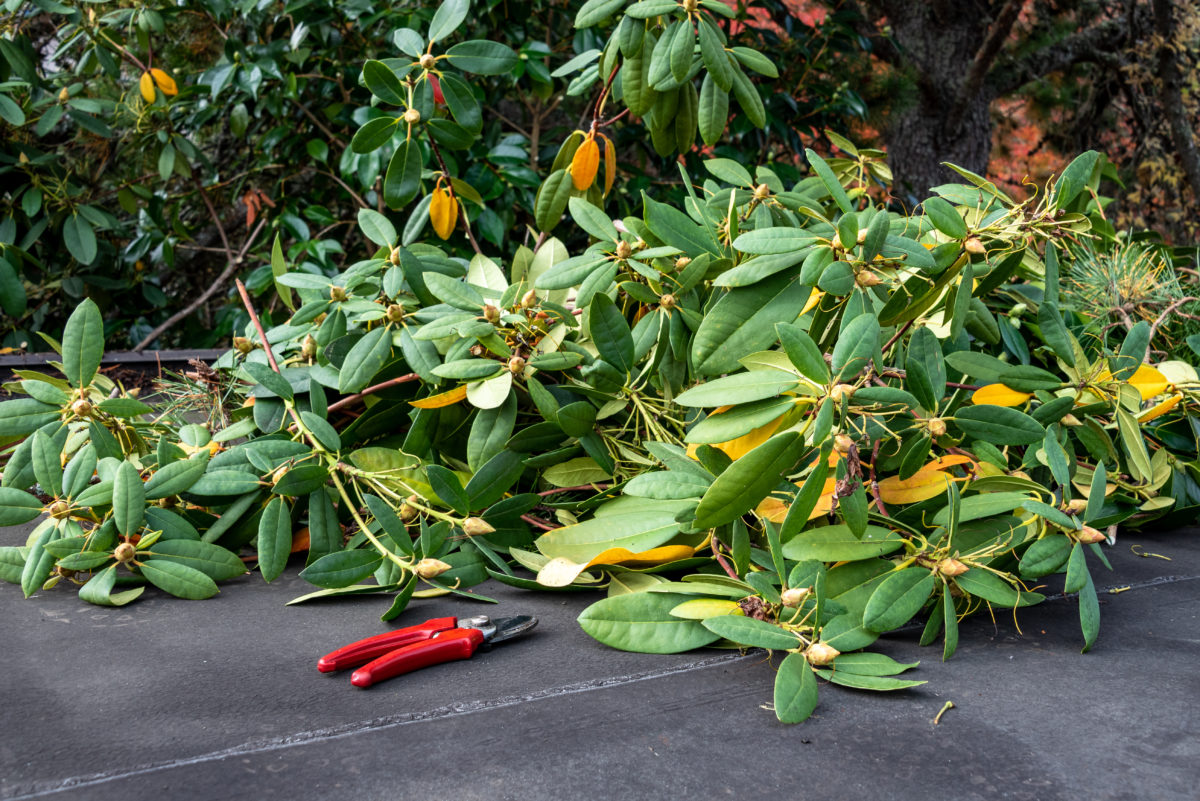
With the garden slowing down in anticipation of the winter months and my bulbs firmly in the ground waiting for spring, I’m now turning my attention to propagating ornamental plants from cuttings.
I prefer propagating plants in the fall over spring propagation for a few reasons – I have more time available in the fall (as opposed to spring madness, when I’m in full seed-starting mode); I also have more empty pots after all the annuals plants have been pulled out; and most plants have lost their leaves, which makes it much easier to see what you’re doing when you take cuttings.
But the main reason why I prefer fall propagation is because this is when I get to take hardwood cuttings.
So far, growing new plants from hardwood has been the most successful method for me. Hardwood cuttings are strong enough to sustain new growth and generally thick enough to withstand cold weather. However, in my experience, propagating from hardwood cuttings does require a bit more patience since it takes longer for them to develop a root system and show new signs of growth.
Keep in mind that the source plant should still be actively growing when you take your cutting. Sure, the growth does slow down with the onset of lower temperatures, but most plants will still be in active growth until frost hits. If you’ve missed this natural deadline, it’s better to wait until spring before you attempt to take cuttings.
Here are ten plants you can propagate for cuttings (both hardwood and semi-hardwood) in the fall.
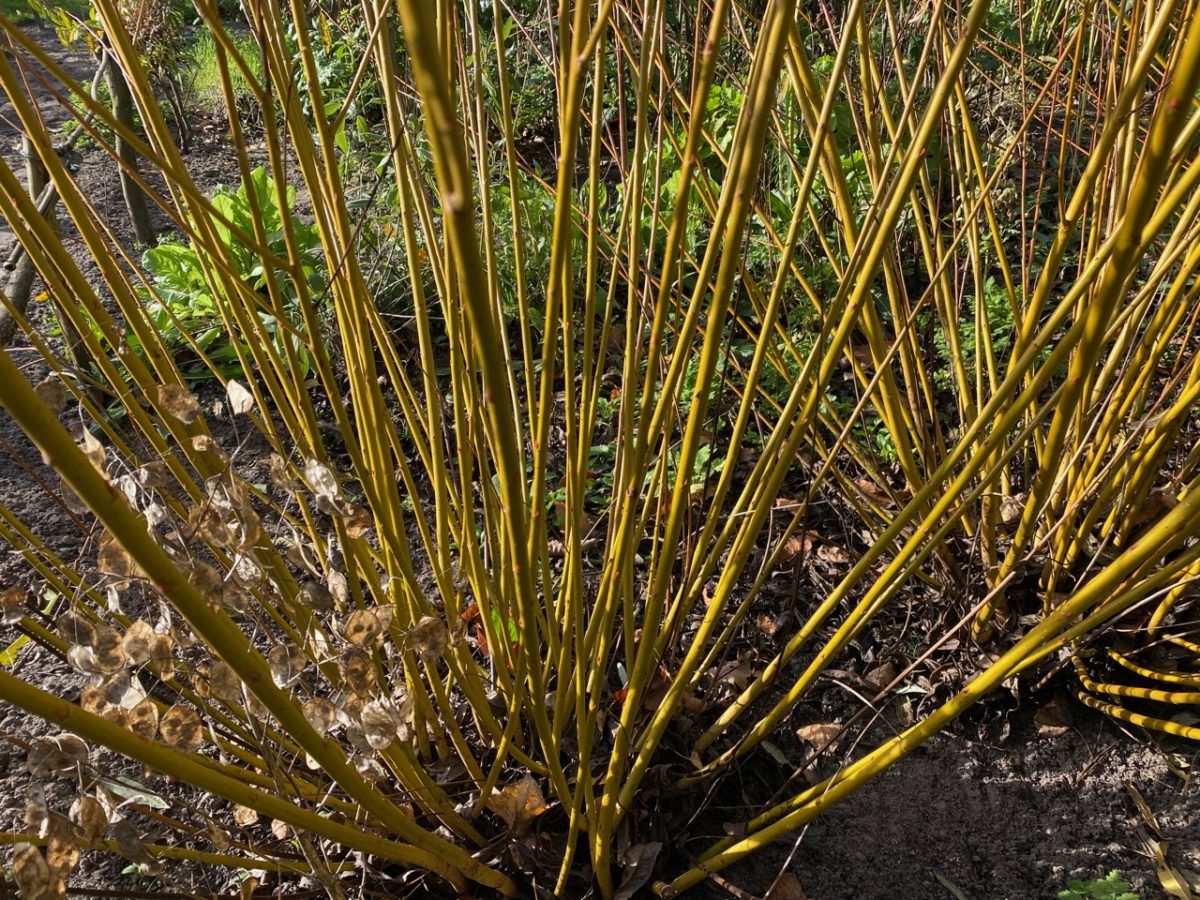
1. Gold flame bush (Spirea japonica)
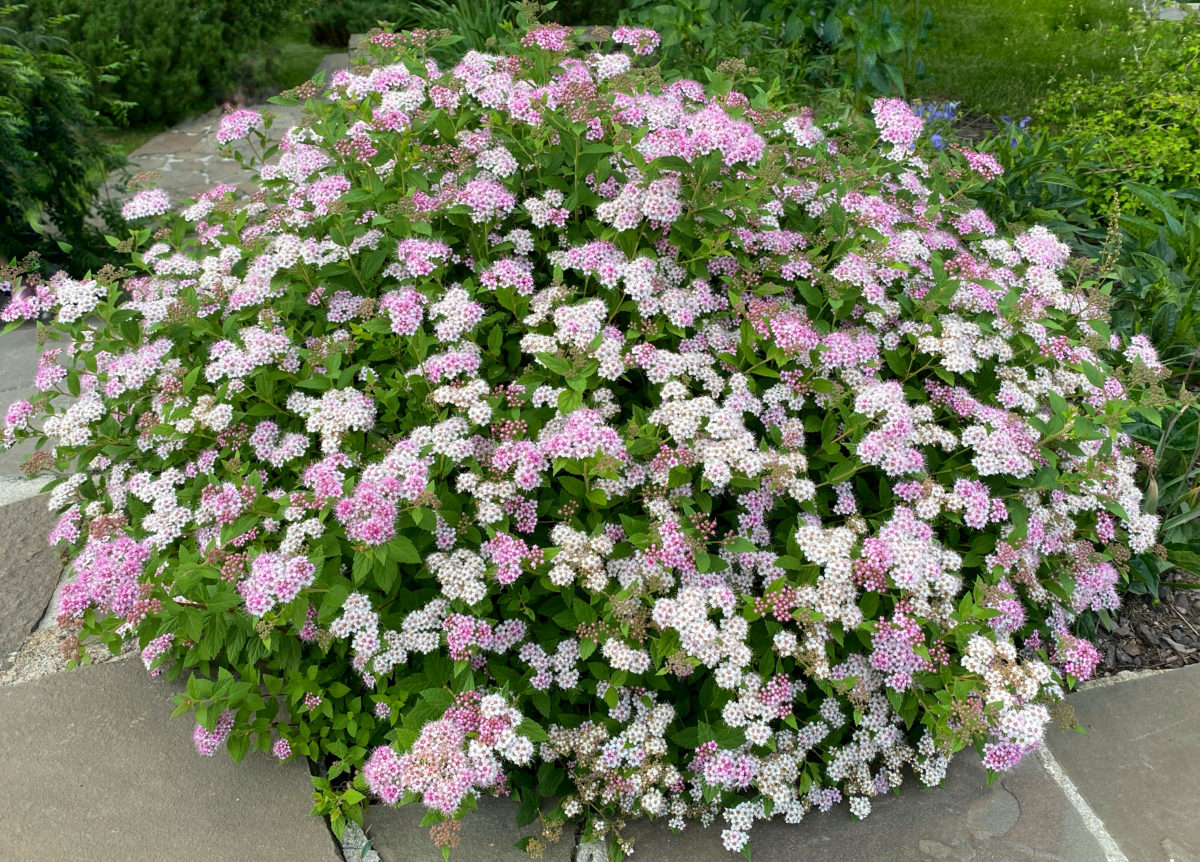
I’m starting with Spirea japonica (the gold flame bush) because I’ve literally been propagating it on the day I started writing this article.
I like to think of this Spirea variety as a reverse plant – in spring, it fills up with a golden crown of leaves; it then turns rusty red in the summer, when it also blooms into bright fuchsia bouquets. The foliage then transitions to green and lime-green in the fall and it finally falls in the winter.
If you want an ornamental that goes against the grain in every season, in the most charming way possible, get a Japanese spirea.
You might remember this colorful perennial from my article on plants you should never prune in the fall. Like most of the plants on this list, it will not object to having a few cuttings taken off. This technically doesn’t qualify as pruning, right?
The leaf nodes are very close together on the stems of the Spirea japonica (about 1-3 inches), so getting a good amount of them underground shouldn’t be a problem.
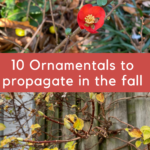
2. Forsythia
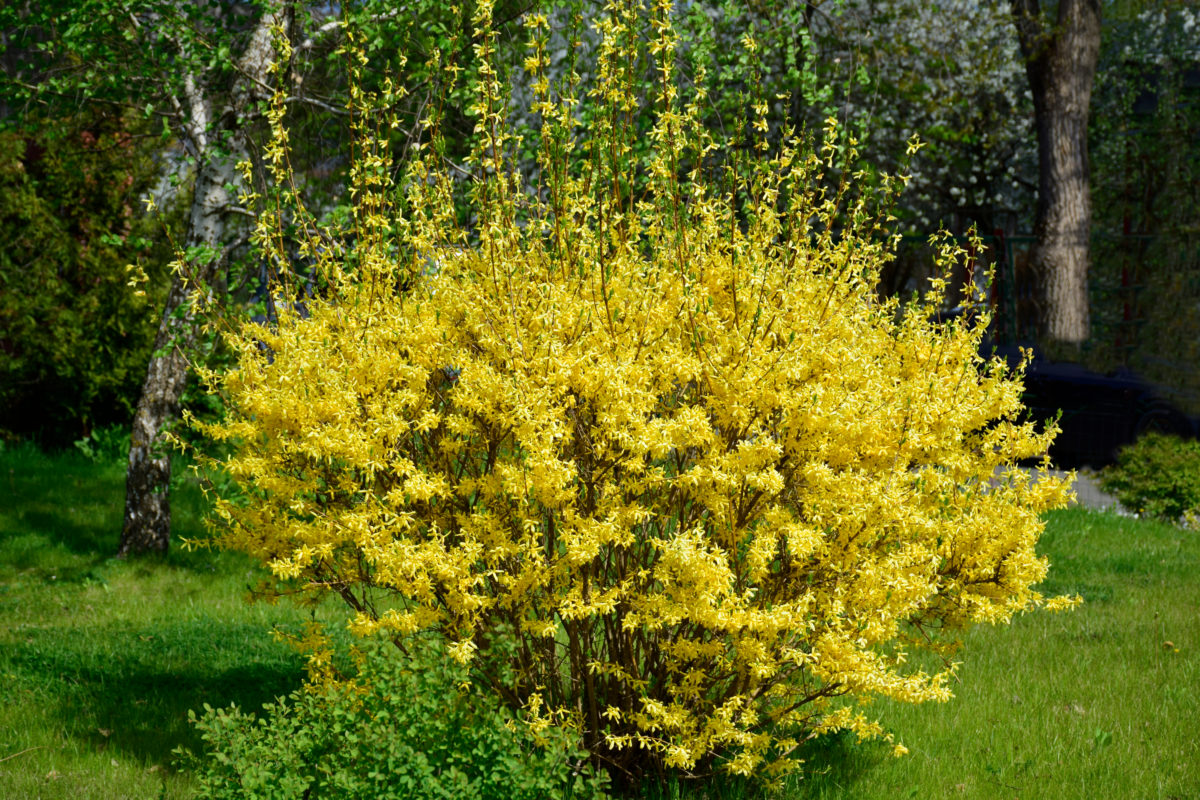
The moniker “the harbinger of spring” is usually reserved for snowdrops, crocuses and other early spring bulbs. But I think forsythia also deserves this nickname. It is one of the first ornamental plants to flower, sometimes coming into full bloom as early as February. Its bright yellow clusters of flowers are a sight for sore eyes after the gray and gloom of winter.
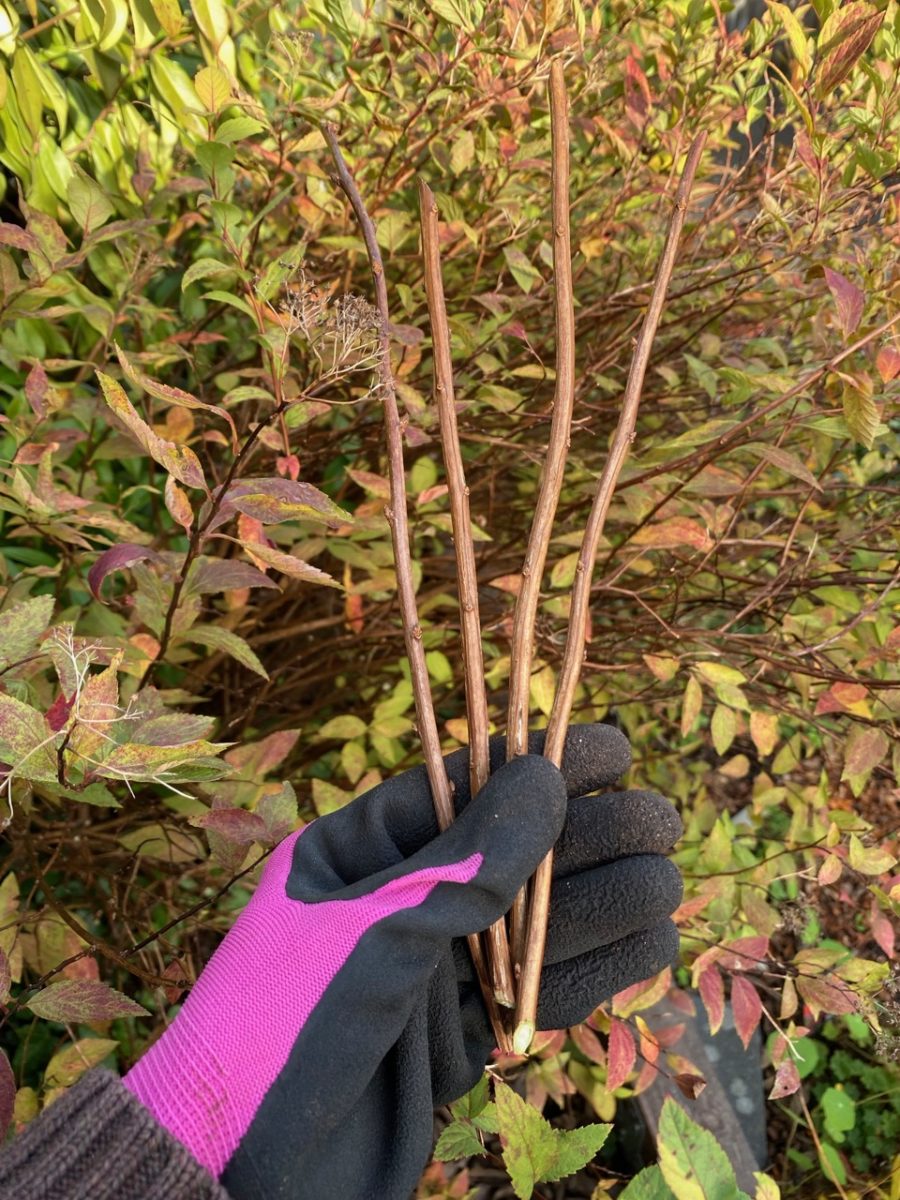
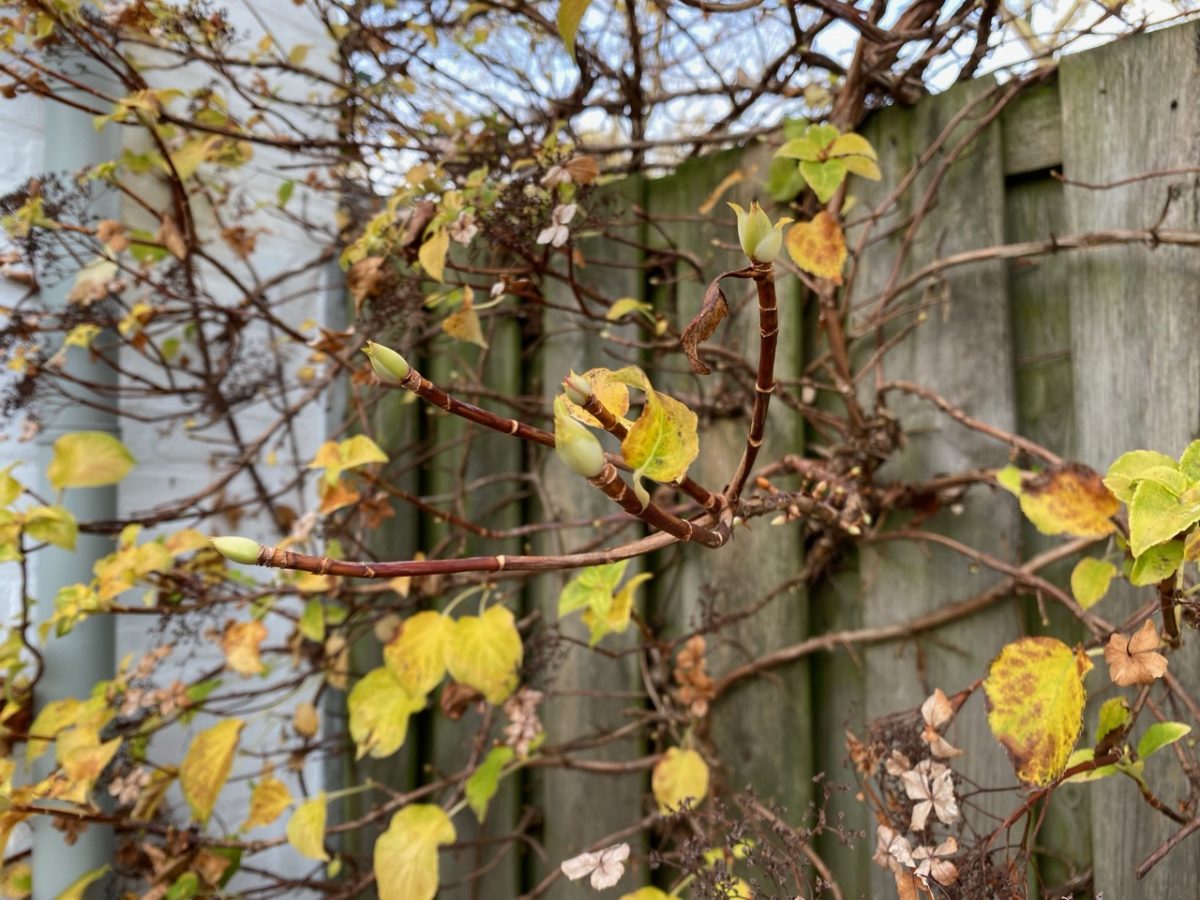
A forsythia cutting taken in the fall will probably not bloom much the following spring. But that doesn’t mean it’s dead. Keep caring for it throughout the spring and summer (paying particular attention to keeping it properly watered) and it will reward you with new growth on its second spring anniversary.
Have a look at the forsythia I propagated (photo above). You can already see the buds getting ready for next year. I’ll transfer it to the garden as soon as the weather warms up in spring.
3. Climbing hydrangea (Hydrangea anomala)
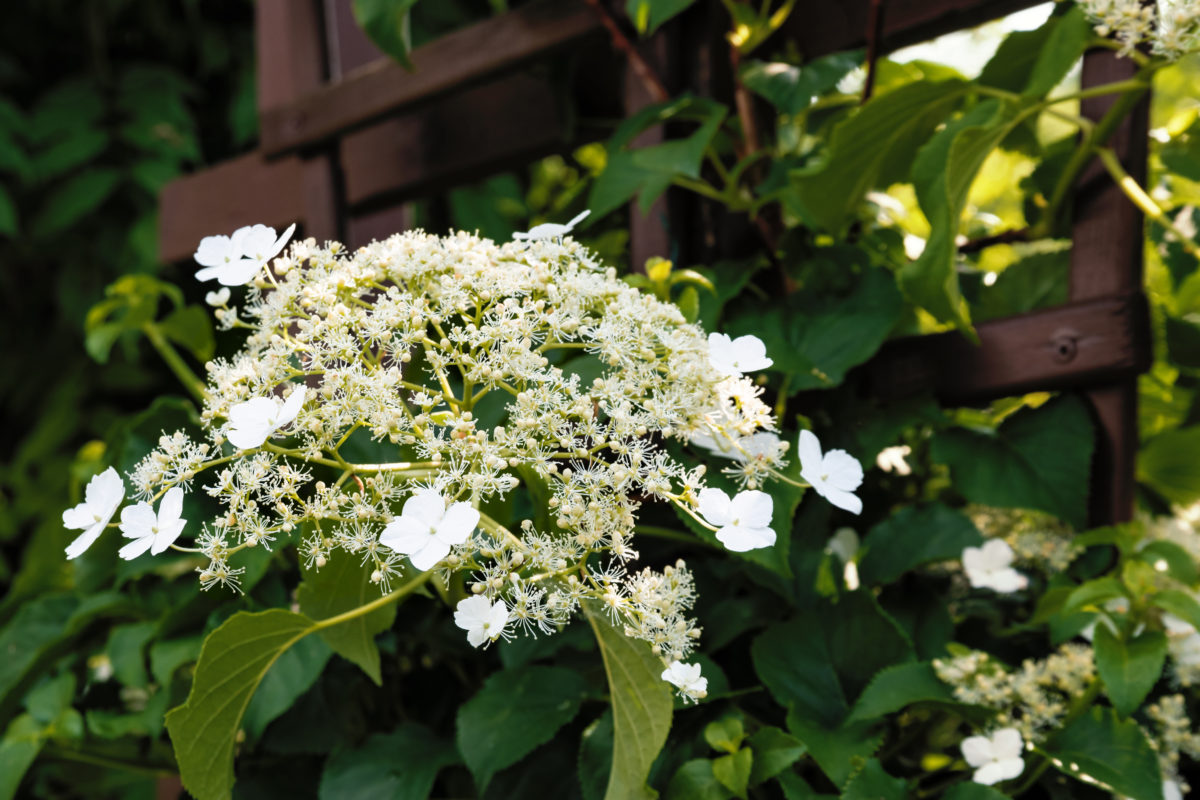
There are a lot of hydrangea varieties and what seems like an infinite number of cultivars. Bush hydrangeas are best propagated from semi-hardwood cuttings in late summer and early fall. Have a look at Madison’s tutorial for a step-by-step guide if you want to expand your bush hydrangea collection.
But I’m here to plead the case of the underrated (thus underutilized) climbing hydrangea. It’s everything you want in a hydrangea, minus all the fuss and finicky quirks of its colorful cousin. It is drought-resistant, can grow in part shade, and can be used as an alternative to super invasive climbers such as wisteria.
When it comes to propagation, it’s just as easygoing. As I was rearranging a corner of my yard last fall, I had to trim back a few stems. I just stuck them in a pot to see what happens (typical gardener behavior) and didn’t pay it much attention over the winter. Come May, the cuttings were already growing new leaves and buds. Now this is what I call easy gardening.
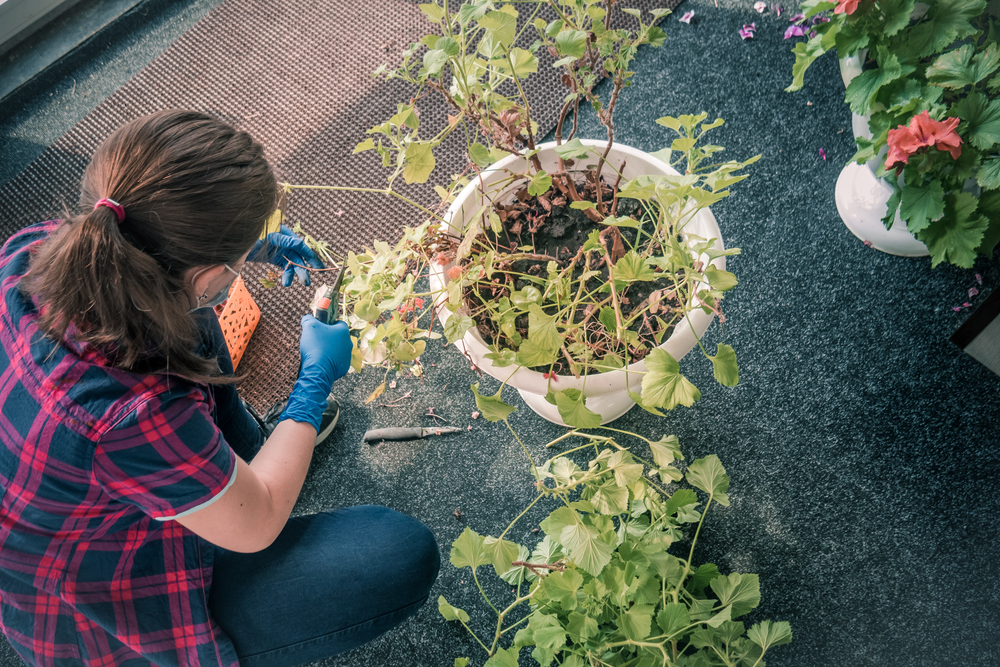
4. Pelargonium geraniums (Pelargonium)
Unlike all the other plants you’ll find on this list, non-hardy geraniums need to be trimmed because they’re not cold hardy. Simply take your cuttings in the fall, pot them up and bring them indoors.
If your garden plants don’t make it through the winter (and they probably won’t if you get prolonged ground-level frost), then you have a few spare ones to transplant into the garden when the weather warms up again in spring.
I dedicated an entire article to taking pelargonium geranium cuttings to overwinter, so have a look at this guide for more details.
Regular geraniums (the hardy variety) can also be propagated from cuttings in the fall, although root division is a more common (and faster) way of multiplying these plants.
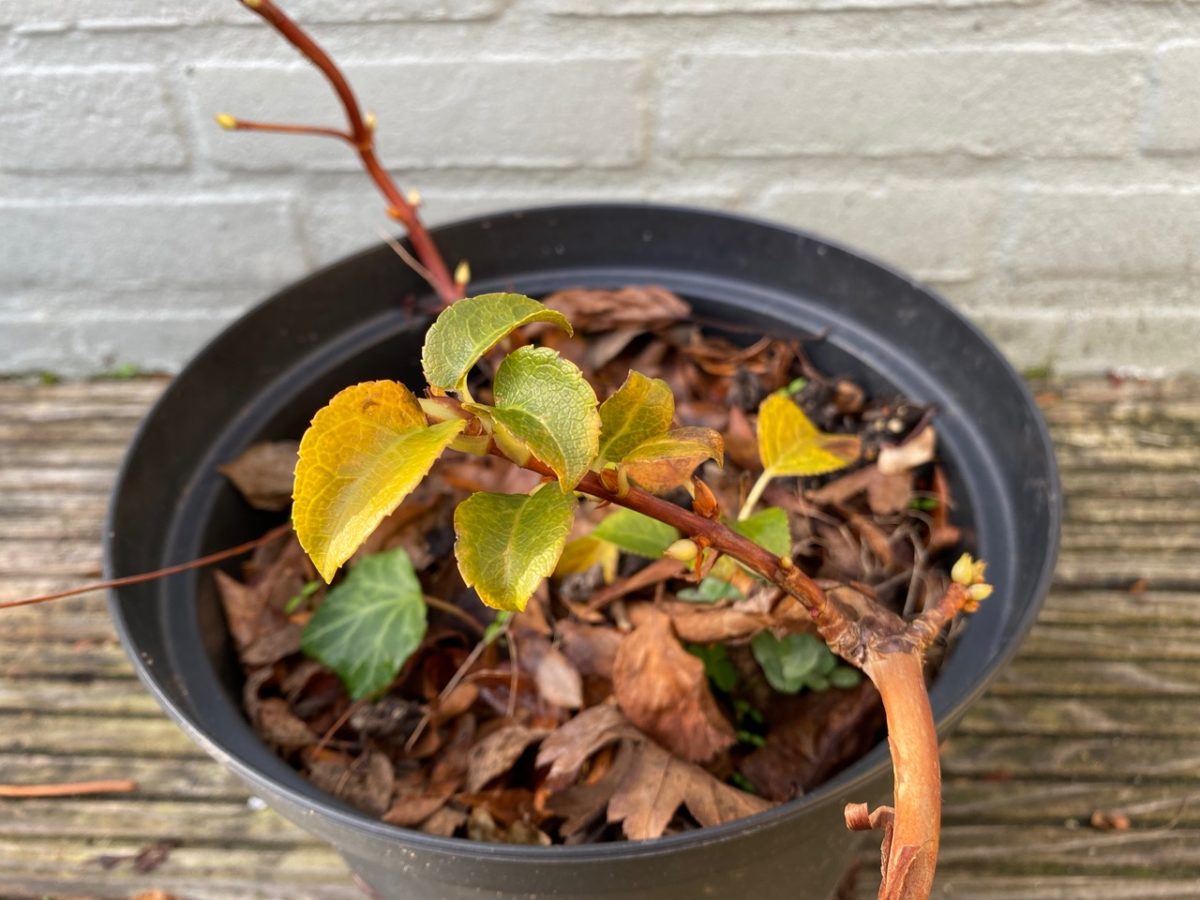
5. Star jasmine (Trachelospermum jasminoides)
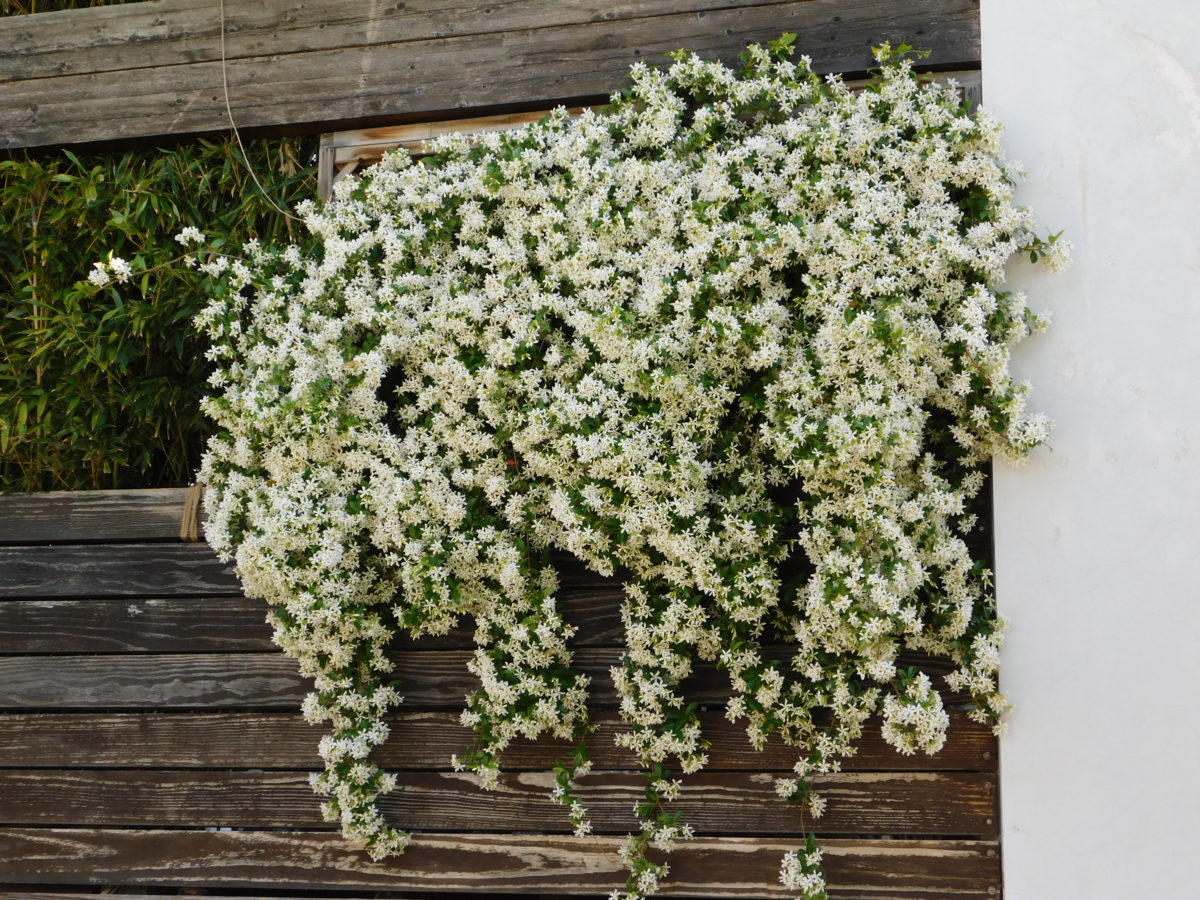
I have a mature star jasmine vine in my backyard that could do with a bit of trimming. But I also have a frugal mindset and a stubborn ”no plant wasted” philosophy. So I decided to combine the two and turn the trimming stems into new plants.
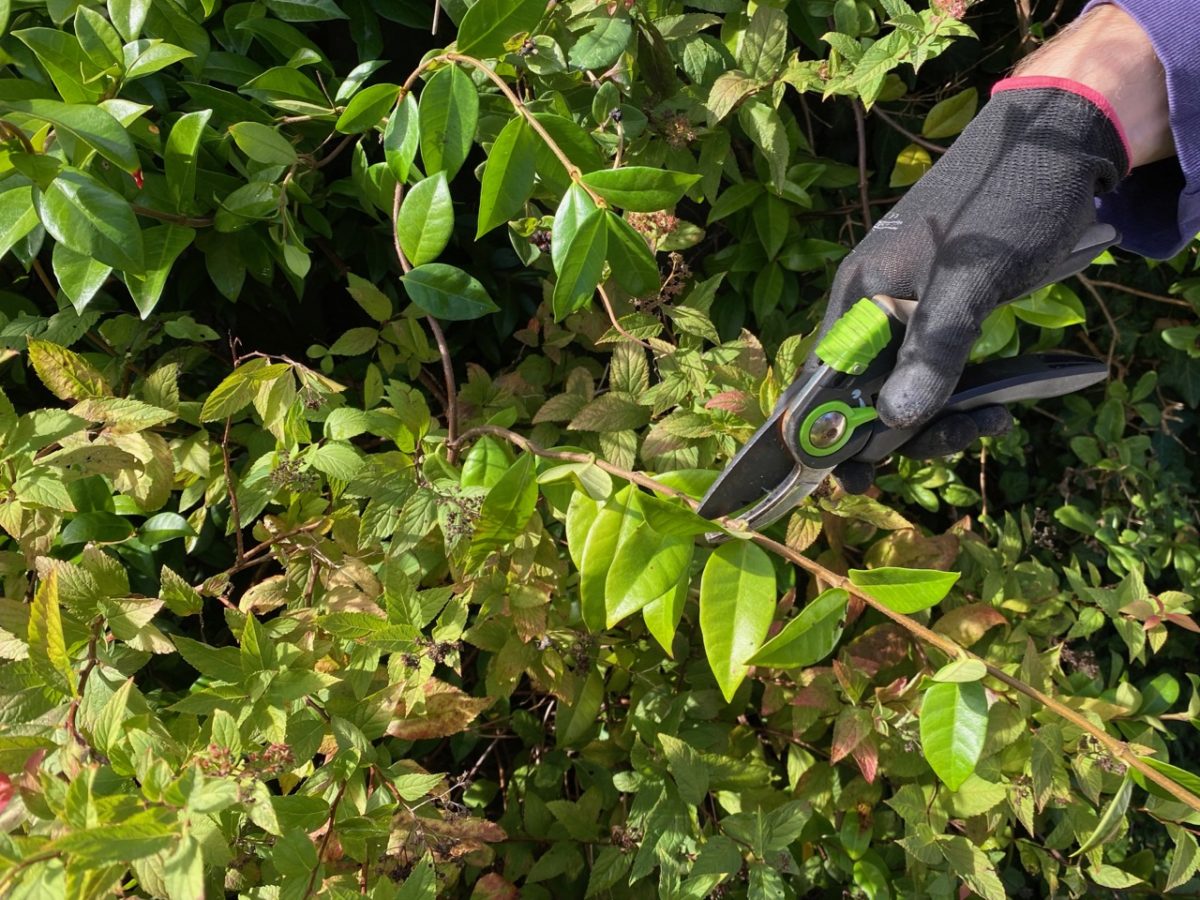
I’ve already written a tutorial on how to propagate star jasmine. But one extra detail worth mentioning is that, even though star jasmine has mostly evergreen foliage (at least in my gardening climate), if you decide to keep some leaves attached to the cuttings, this foliage will turn rusty red.

That’s perfectly normal and won’t interfere with root formation in the cuttings. In fact, after I took this photo, I did a little resistance test (gently tugging at the stems to see if they slide out easily) and it seems there are already roots growing from them.
6. Viburnum
Some viburnum are deciduous (such as the wonderfully fragrant Viburnum bodnantense) while others are evergreen (for example, Viburnum tinus). Some are grown for their rich flower display, while others host a veritable festival of berries in the winter.
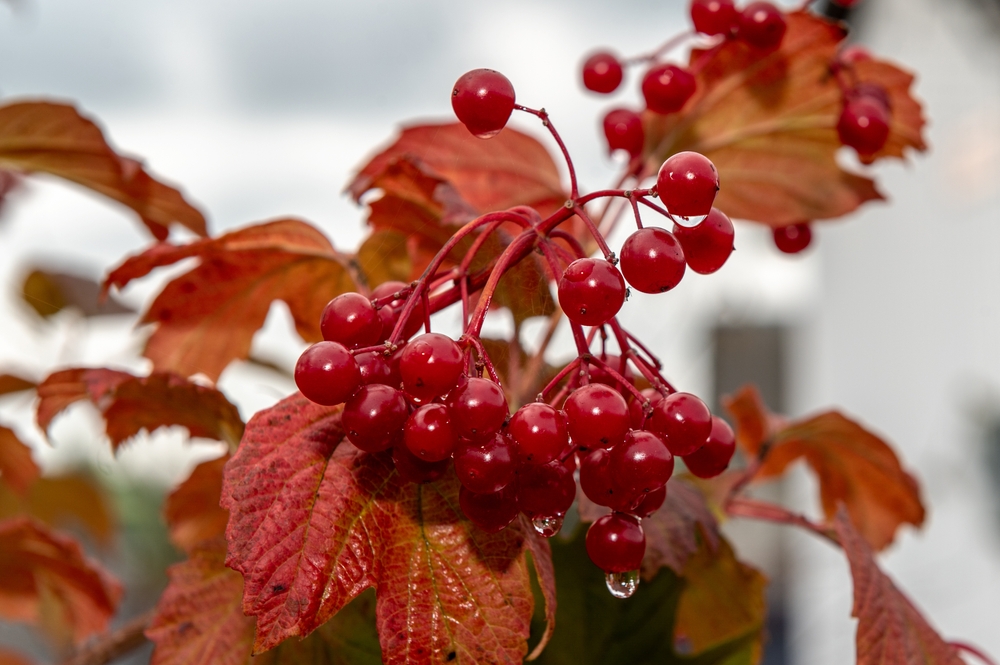
No matter which of the 175 viburnum species you choose, you won’t have a hard time with this shrub. It’s one of the toughest perennials that you could grow.
You can propagate fragrant viburnums from softwood cuttings in late spring and semi-hardwood cuttings in the summer. But if you’ve missed the propagation boat, they’re just as easy to propagate from hardwood cuttings in the fall.
Other than using strong straight twigs for propagation, there are no other tricks to taking viburnum cuttings.
7. Abelia
Abelia is an old-fashioned favorite that is certainly having a comeback. This glossy shrub, which has been enjoying waves of popularity in the US South, is now being discovered by gardeners in other parts of the country.
What’s not to love? The blooms attract bees and butterflies and the leaves and bark are deer-resistant. There’s a cultivar for every taste and every location – from compact varieties that can be grown in pots to taller ones that can be used for hedging and privacy structures, to low-growing abelia with a mounding habit that can serve as a pollinator-friendly ground cover.
A very popular variety in the United States seems to be Abelia grandiflora.
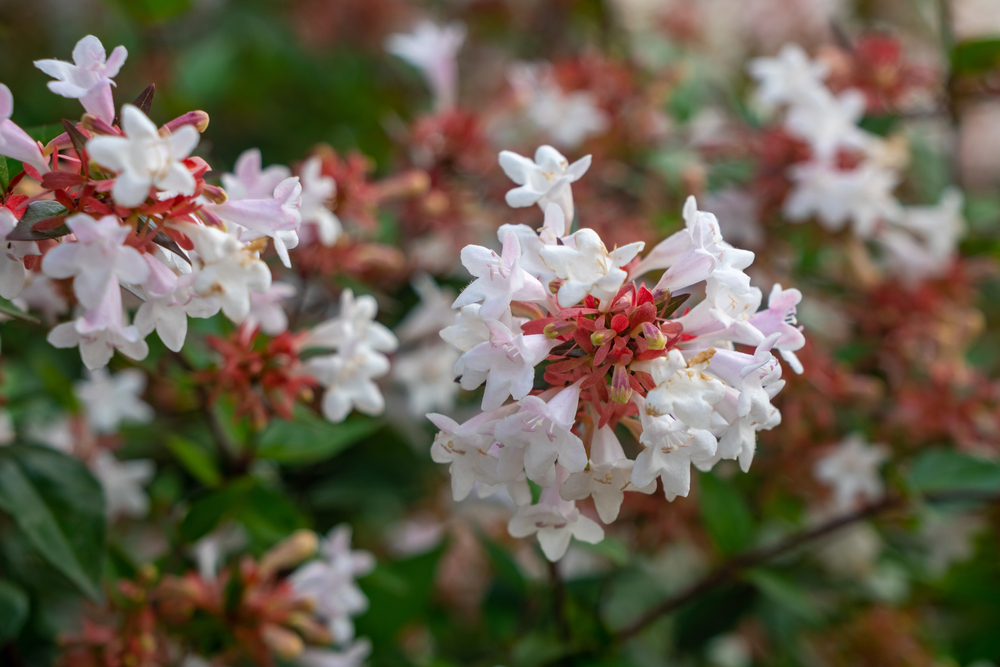
Due to its native habitat, abelia likes heat and humidity, so the cuttings will need a bit of heat to get started. You can place them in a heated greenhouse or bring them indoors over the winter months. You can also protect them with a glass cloche or improvise a mini-greenhouse using an upside-down jar or plastic bottle.
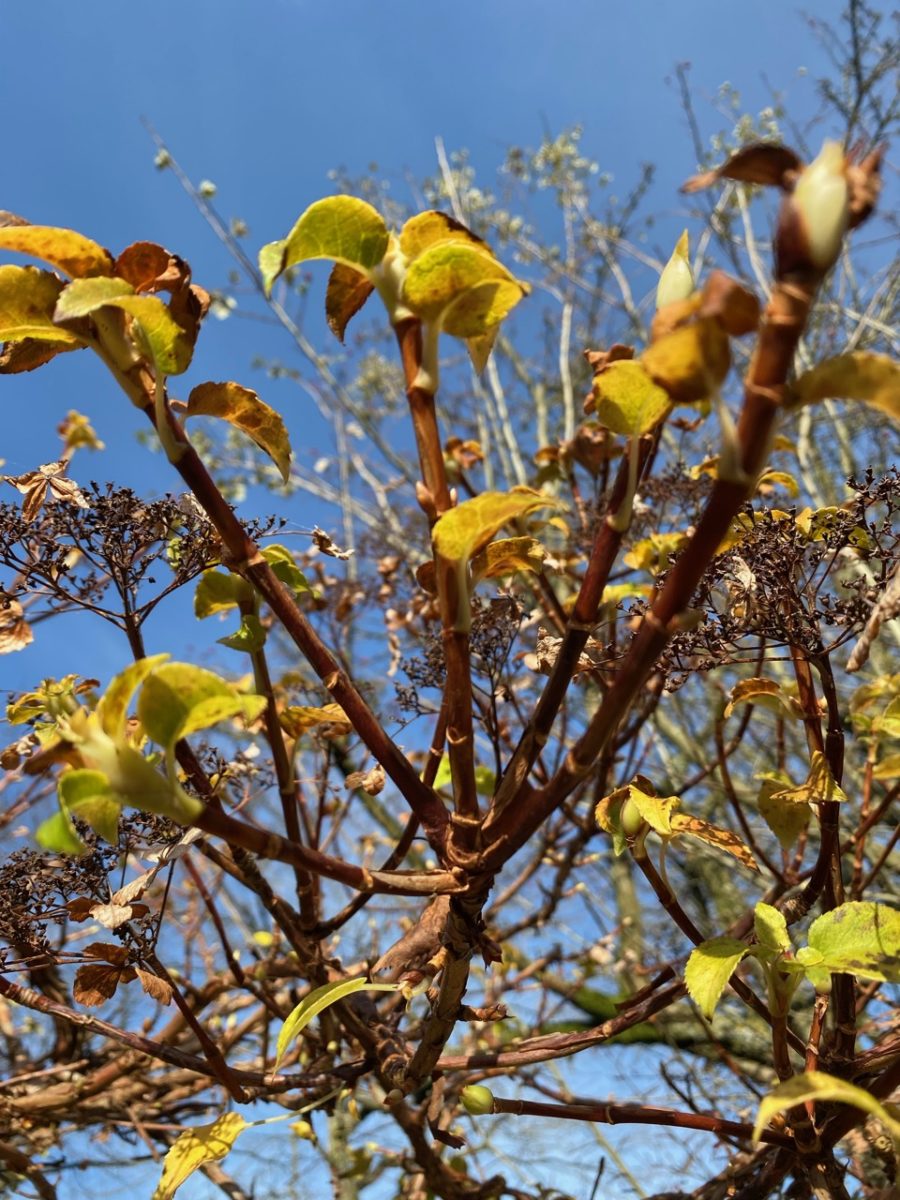
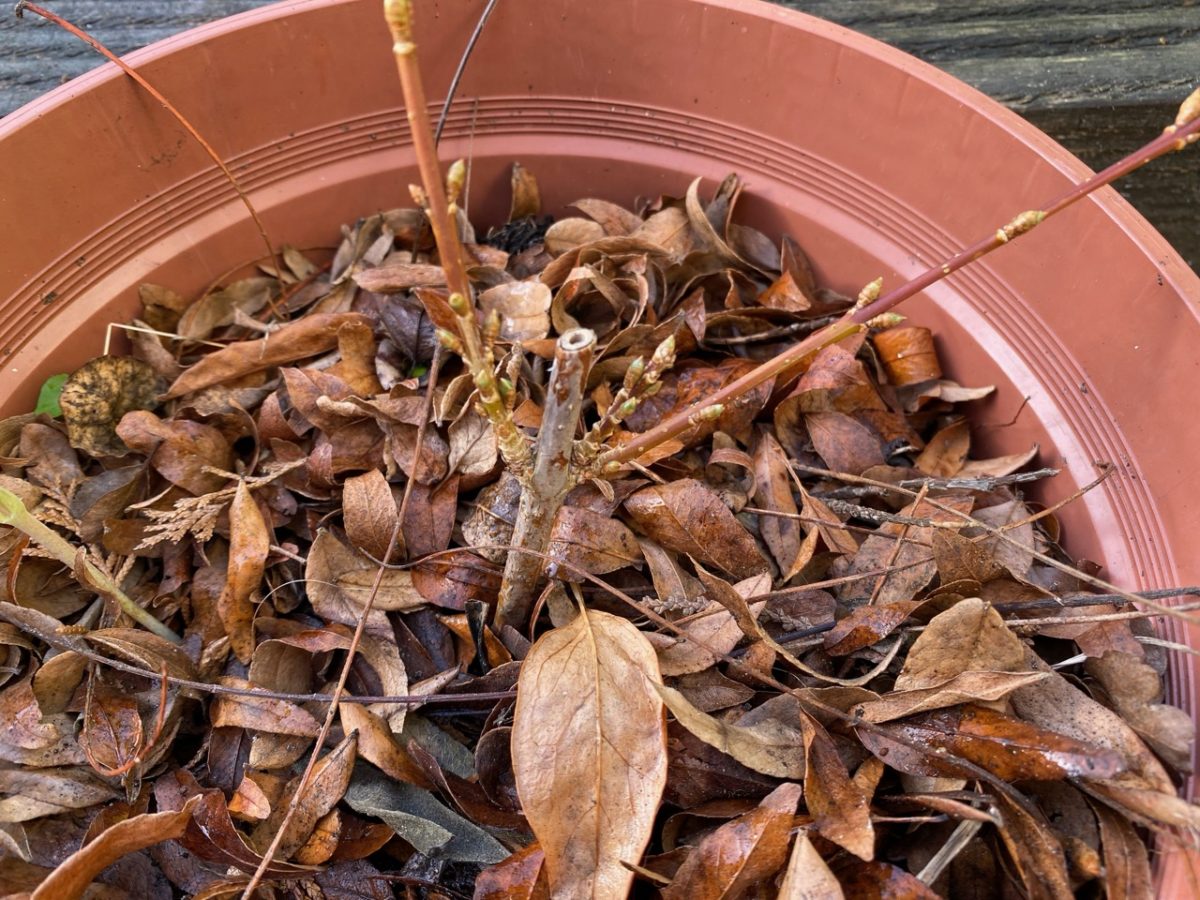
8. Dogwood (Cornus)
Dogwood bushes offer the trifecta of landscaping – flowers in spring, berries in the fall and colorful glossy stems in the winter.
The burgundy stems of the Siberian dogwood (Cornus alba ‘Sibirica’) pictured here are particularly stunning when covered in a flurry of snowflakes.
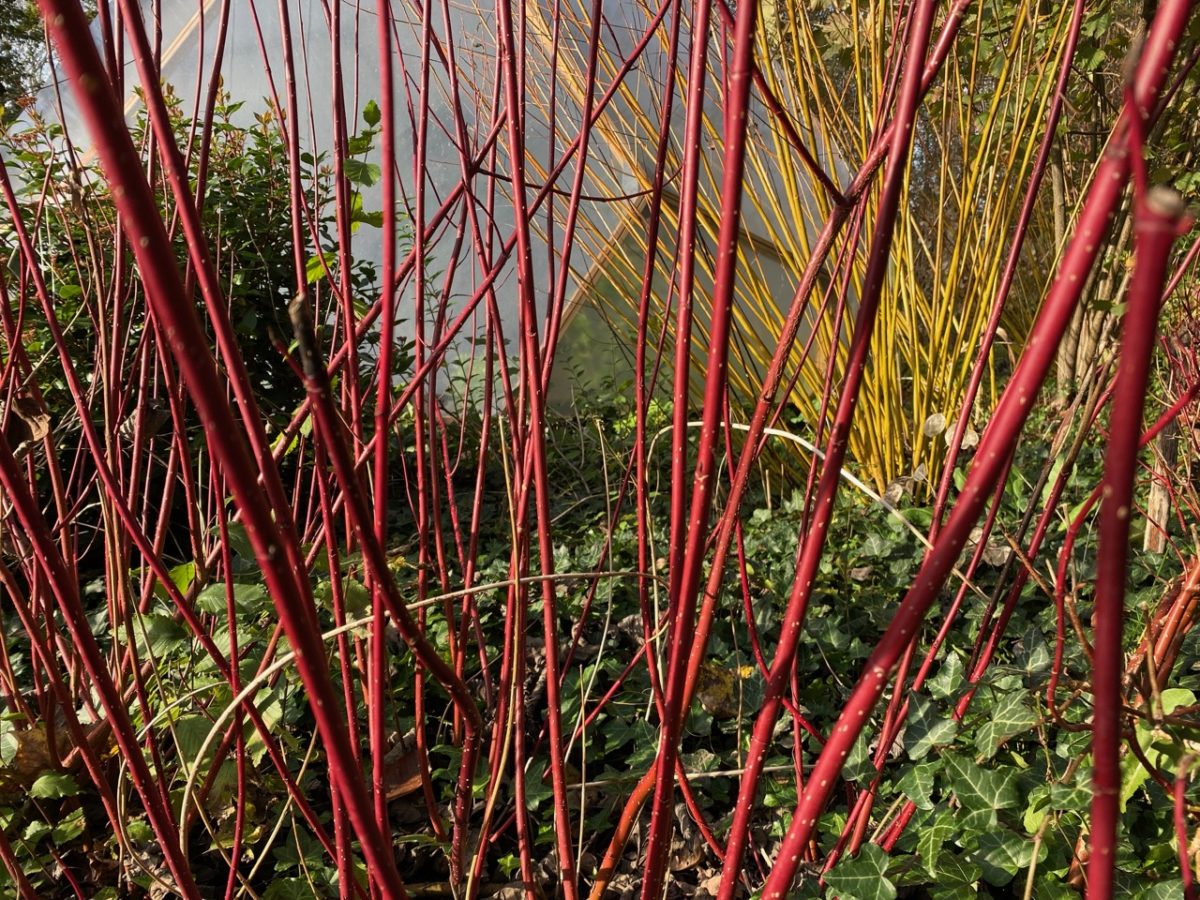
You can propagate dogwood via hardwood cuttings in the fall or from softwood cuttings the following May. I’ve watched some tutorials in which gardens were sticking the cuttings directly in the ground. I think it’s better to root them in a pot first in order to control soil moisture better.
9. Japanese kerria (Kerria japonica)
You may know it as “bachelor’s button”, “miracle marigold bush” or “Japanese rose”. This yellow flowering shrub is, in fact, part of the rose family (Rosaceae).
Japanese kerria can be propagated from semi-hardwood cuttings in the summer once the blooms are gone, or you can wait until fall to clip the cuttings.
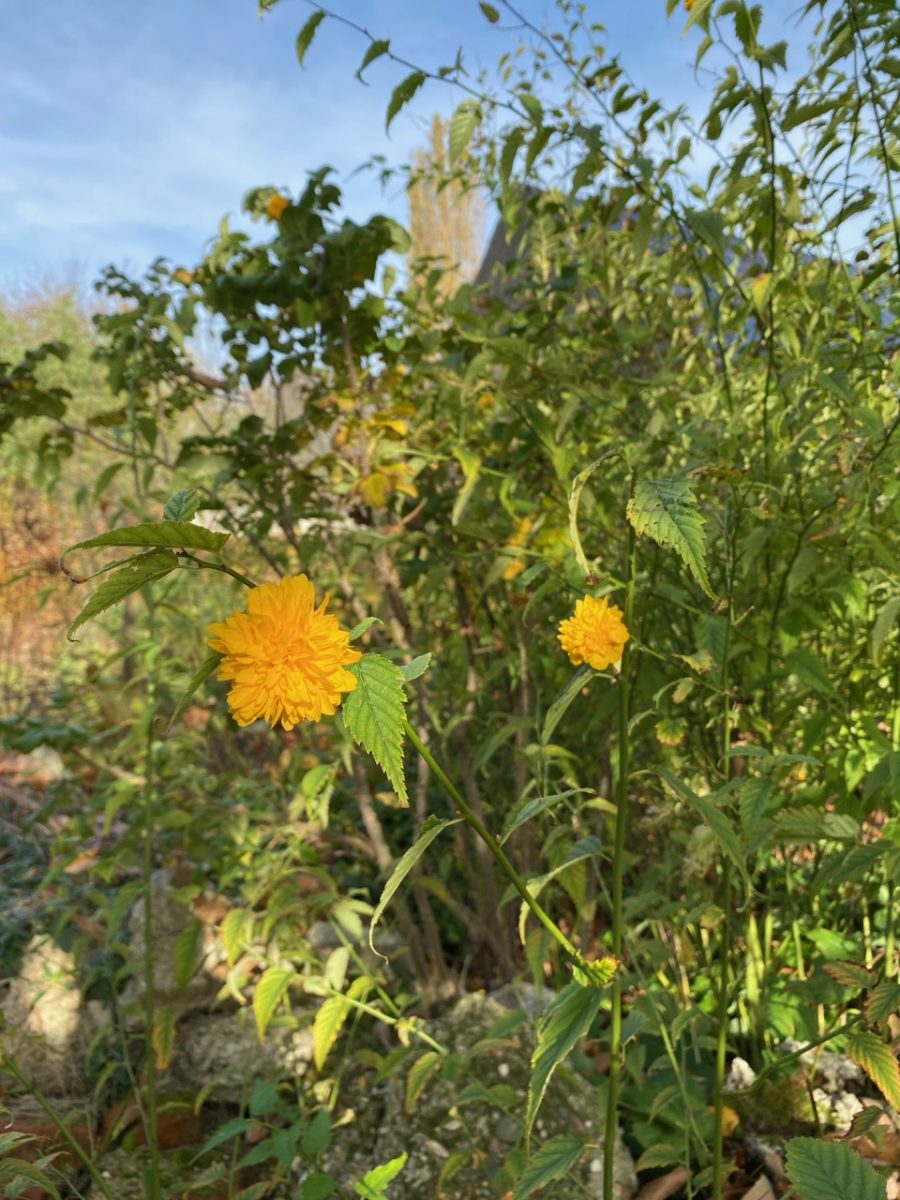
As you can see, there are still some blooms on this kerria in mid-November, so don’t worry if you have to remove some while you take the cutting.
The stems of this shrub will stay green year-round, so again, don’t wait for the stems to look woody before you take your pick.
10. Flowering quince (Chaenomeles japonica)
Another member of the rose family, flowering quince has nothing to do with the edible quince tree. This compact shrub does produce edible fruit, although it is quite bitter and needs to be processed in jams and jellies to make it palatable.

This shrub can be propagated from softwood cuttings (in which case, top cuttings perform better than base cuttings). It can also be propagated from hardwood cuttings, but in this scenario you should use base cuttings instead of top ones. You have to keep the soil moist, but not waterlogged, and keep the cuttings in a sheltered location over the winter.
I know I’ve been mentioning hardwood cuttings a lot in this article, assuming that our readers know what that means. But if you’re a newbie gardener, or simply want a refresher crash course, here’s the easiest way to propagate from hardwood cuttings.
How to Take Hardwood Cuttings
Take the right cutting.
Choose stems that are straight and relatively rigid. Make sure to take more cuttings than you need, since the rate of propagation rarely goes up to one hundred percent.
One tip that I follow is to take cuttings from different parts of the plant, or even from different plants when I have multiples of the same.
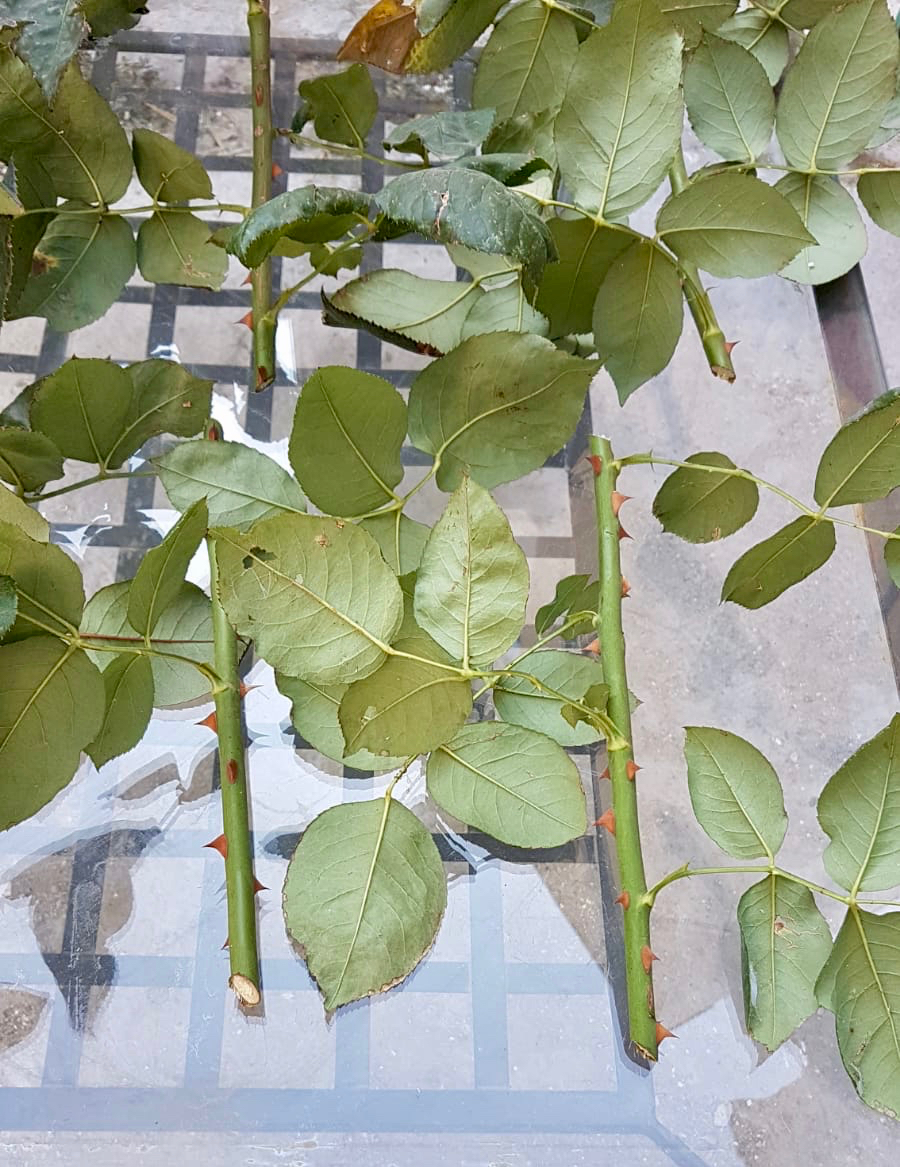
The best length for a hardwood cutting varies between 5 and 12 inches (roughly 12 to 30 cm). You can also take a longer cutting and divide it into shorter individual stems. The reason for this recommended length is purely practical. The longer the pieces, the taller the propagation pots need to be; and tall pots need to be filled with more potting medium which, in turn, will retain too much water.
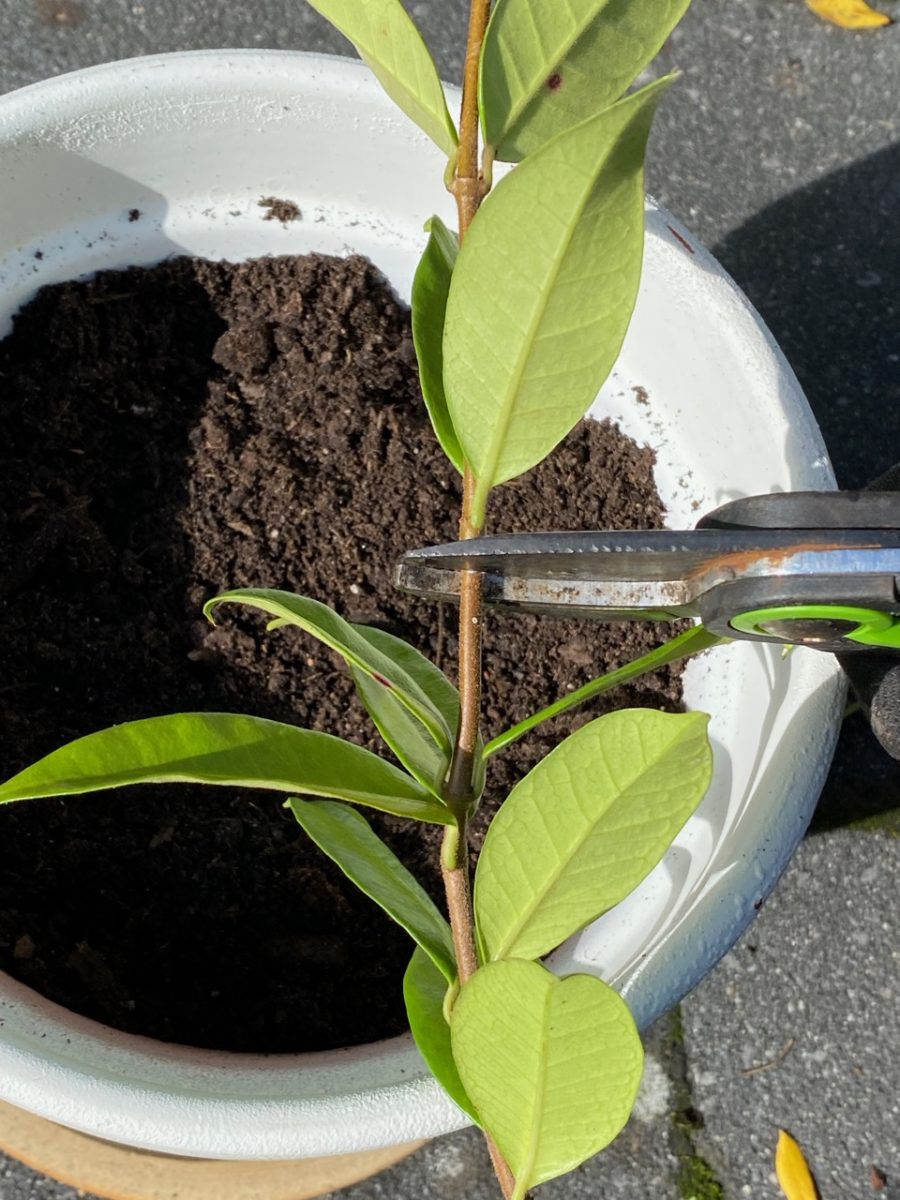
You usually want to cut below a (bud or leaf) node, since this is what you’ll be sticking in the ground. Cut just above a node at the top. Make a sloping cut at the top in order to encourage rainwater to roll down the stem, rather than pool on the cutting.
Some gardeners mention making the top cut sloping and the bottom cut straight across the stem. This will make it easier to tell apart the top end from the bottom once you’ve removed the leaves in preparation for planting. That’s because you’re supposed to plant your cuttings in the same direction they were growing on the mother plant.
I don’t worry about this rule too much because I find I’m always able to tell which side is up by looking closely at the way the nodes are pointing. So I just end up taking sloping cuts at both ends.
Choose the right growing medium.
Some gardeners plant their cuttings straight into the ground. Others dig planting trenches and line up the cuttings (about 10 inches apart, 25 cm) to start growing roots in this temporary holding spot.
If trenches work for you, that’s great. But keep in mind that if you have a small garden, trenches will take that space out of commission for at least six months to a year. It’s also trickier to keep cuttings in trenches well-watered when you get a droughty heatwave in the summer.
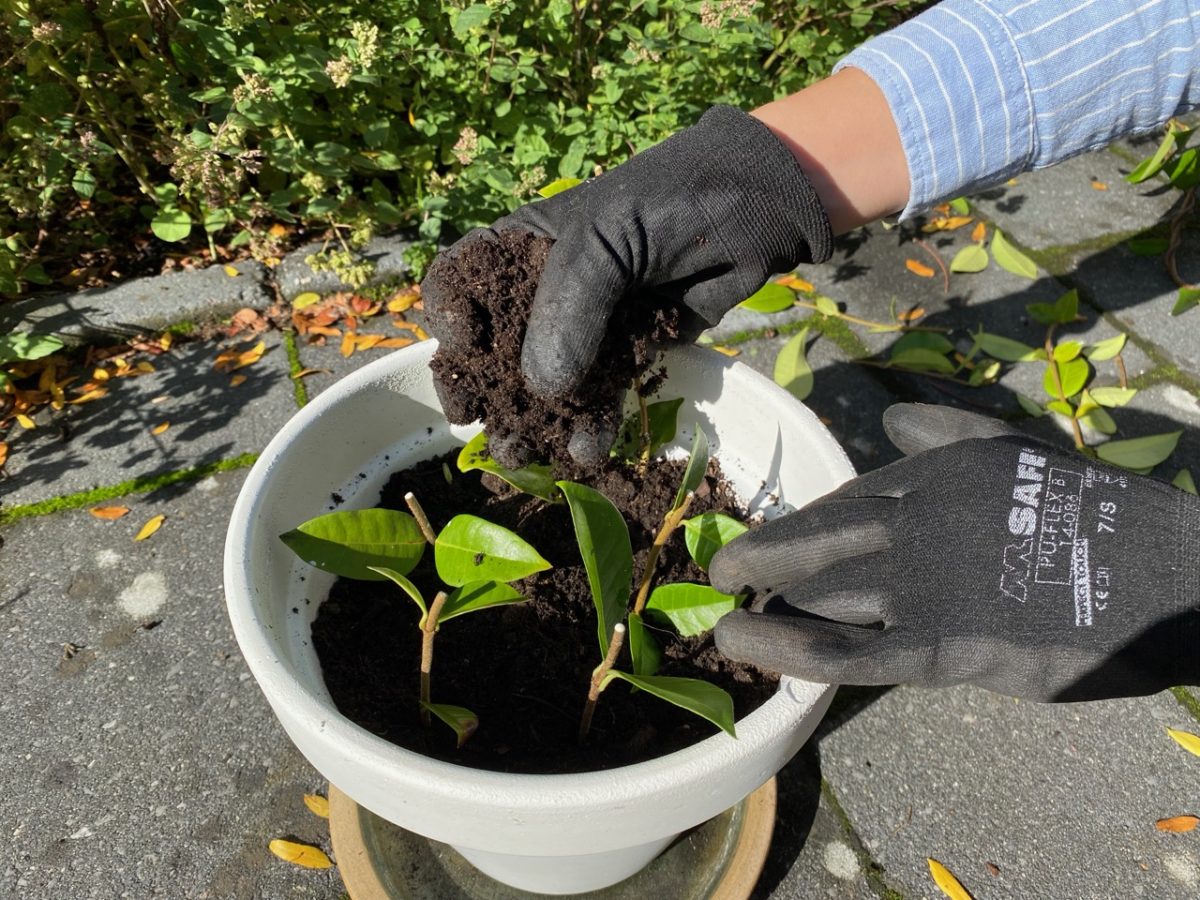
I prefer to use potting containers with drainage holes for my hardwood cuttings propagation. Gardening compost will be too heavy and retain too much water all by itself. So I mix in about a quarter of either horticultural sand, pine bark or perlite to give the cuttings some room to breathe underground.
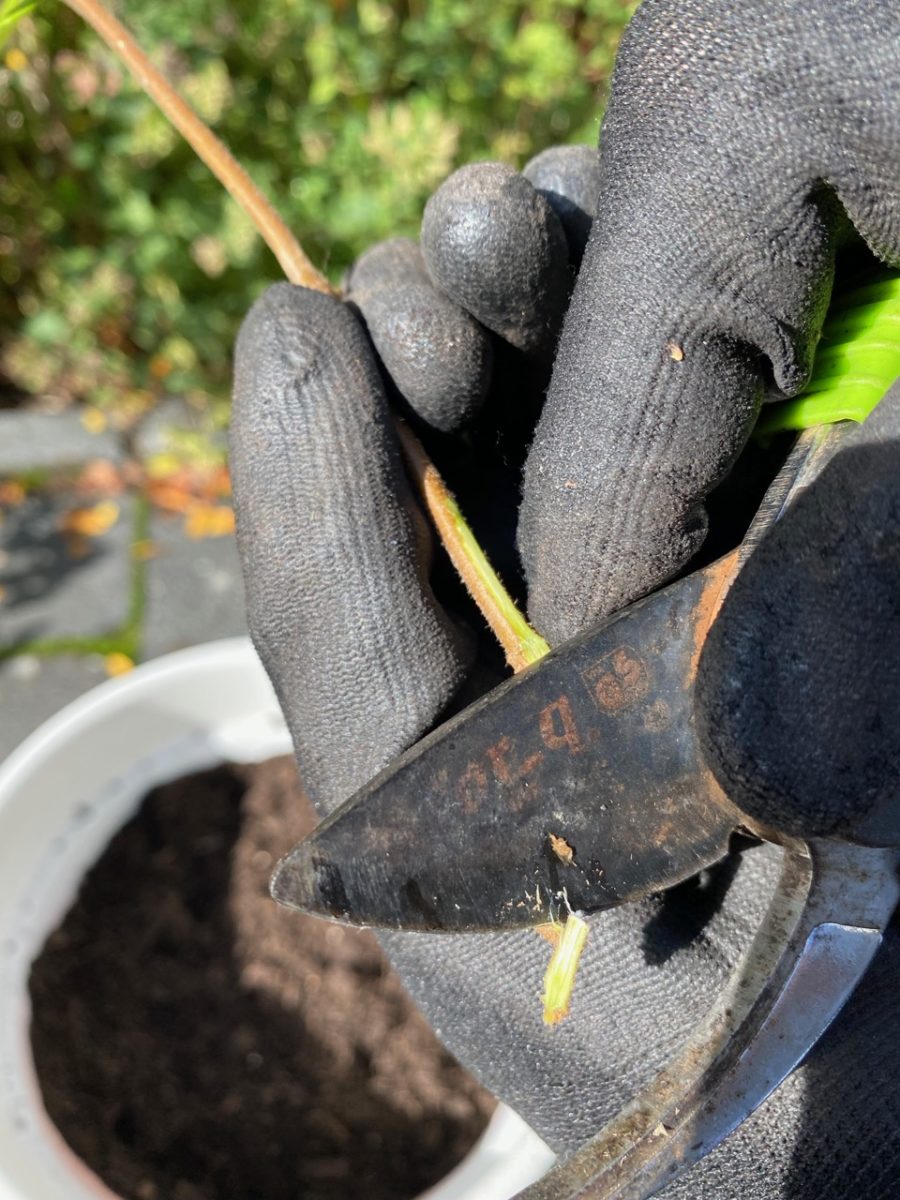
To increase my rate of rooting success, I usually score my hardwood cuttings by scratching a little bit of the protective layer off the stem to expose the cambium underneath.
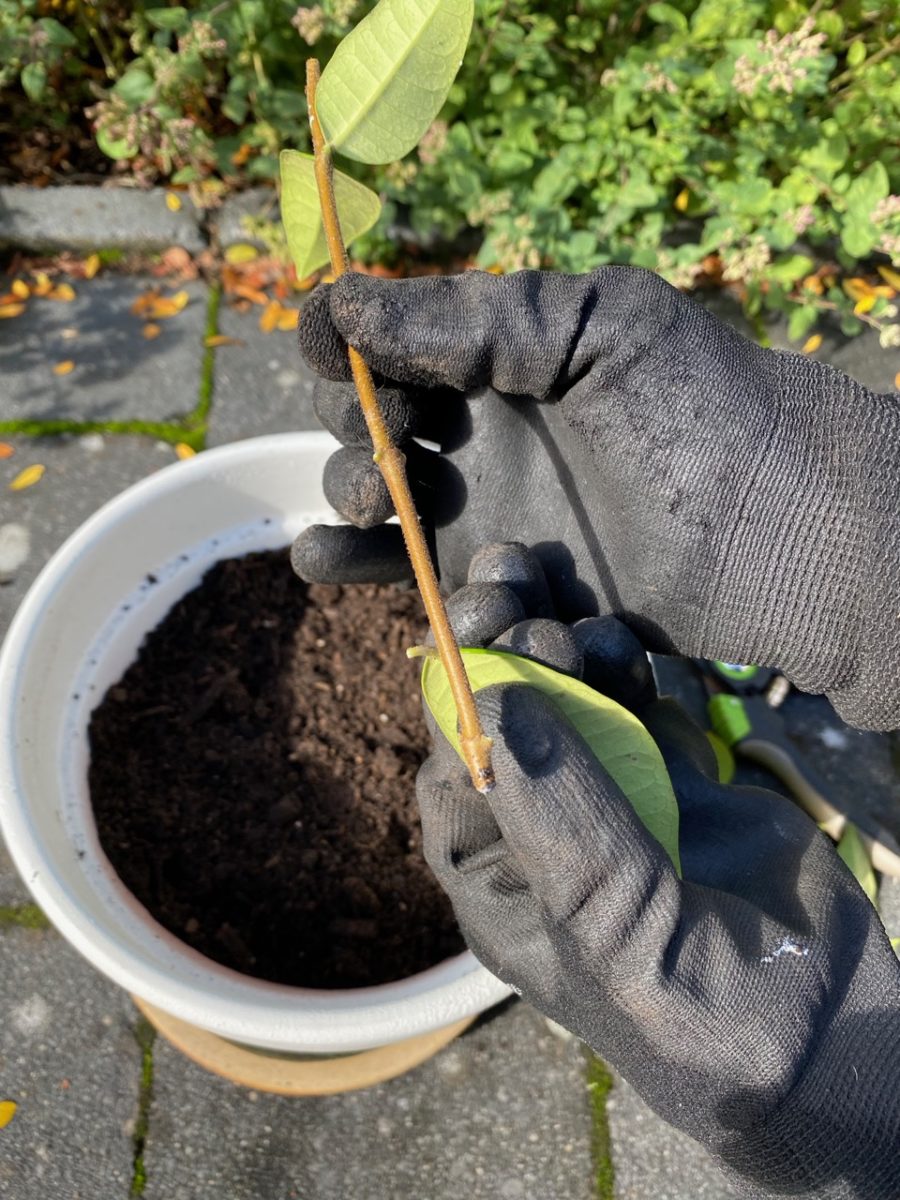
I then stick the cuttings upright in the soil. You can leave about 3 to 6 inches exposed, so ideally you want the cutting to be immersed at least halfway, or even a third of the way. I try to fit as many cuttings as I can in the same pot, spacing them about 2 inches apart (5 cm).
If the weather is still nice in the fall, I leave the cuttings container outdoors on my patio, in a sheltered location against a wall of the house that’s heated from the inside. Once the temperatures drop below freezing, I will move the cuttings to a sheltered location in my shed (next to a window). A greenhouse or a sunroom would also work for overwintering cuttings.
I periodically check on them to make sure the soil doesn’t dry out. Once spring is on the way and the danger of a hard freeze has passed, I will move the pots back outdoors.
By that time, I have a pretty good idea of which cuttings have rooted. Live cuttings will put out new leaves in the spring. The cuttings that didn’t take will just look like shriveled up sticks, so I’ll just remove them from the pot.
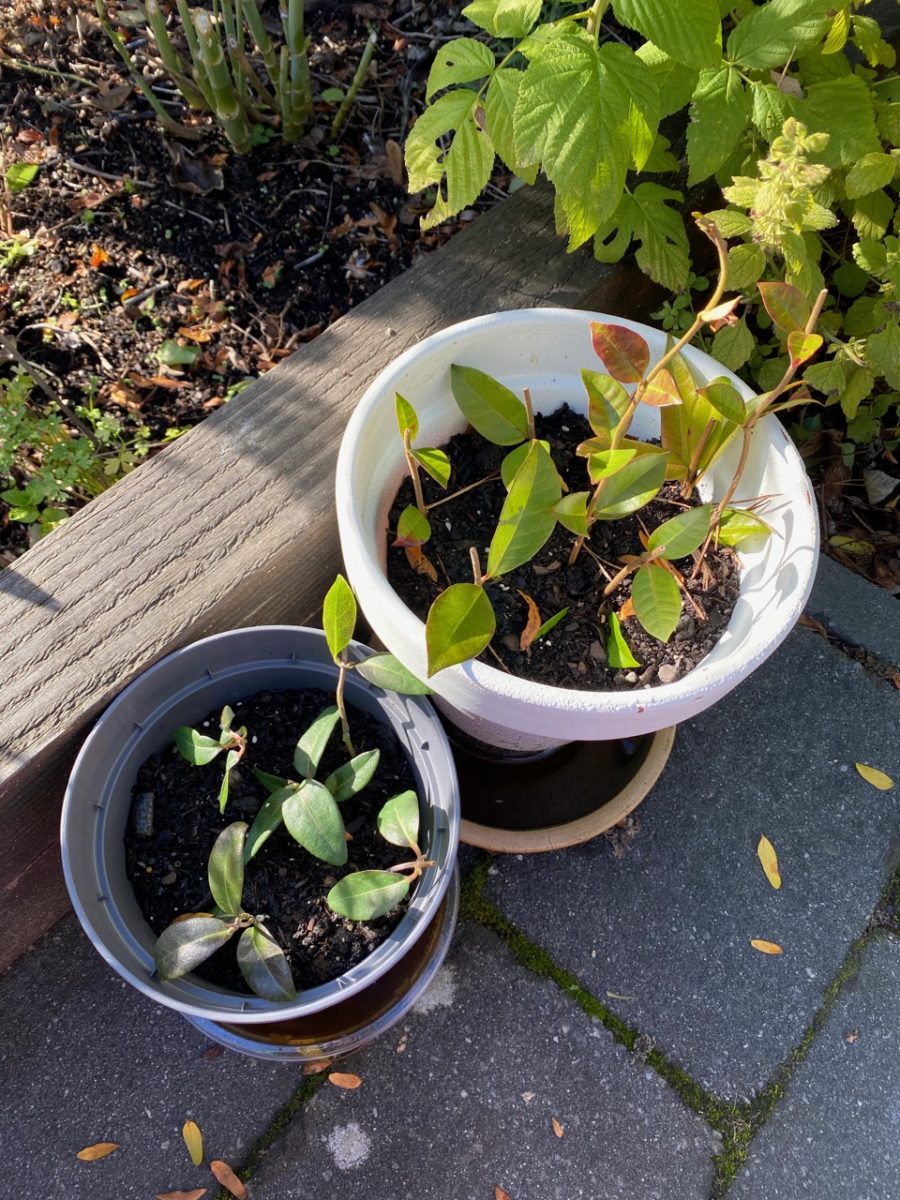
At this point, you can either let the new plants continue to develop in the same container, pot them up separately (or in bunches of two or three), or move them to their final location in your garden.
Elizabeth at Rural Sprout has also written extensively about taking hardwood cuttings, so have a look at her guide for even more tips and tricks (including how to make your own rooting hormone) to increase your chances of success.