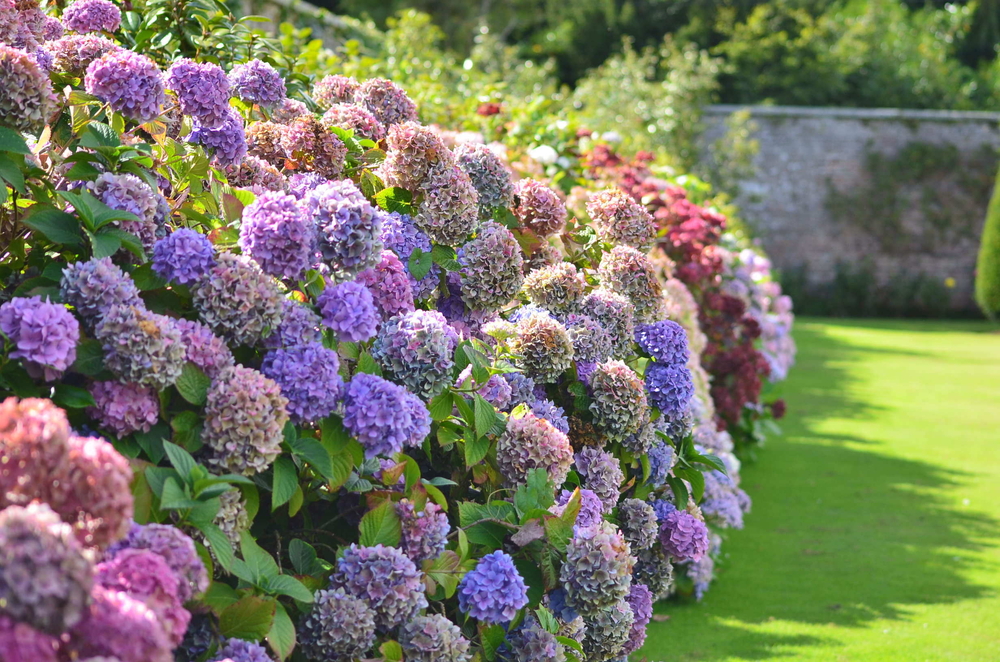
Every flower gardener has to try growing hydrangeas at least once in their life.
These plants, traditional garden staples, are once again booming in popularity, thanks to the massive clusters of flowers in a range of stunning colors.
There is nothing quite like a long row of hydrangea plants, all in flower and covering your garden with color. But, buying enough plants to make that impressive display can be costly.
Instead, purchase one plant, or use a friend’s established hydrangea collection, and propagate your own.
Propagating hydrangeas from cuttings is incredibly easy and has a high success rate for a woody plant. Just like propagating lavender or rosemary from cuttings, all you need are some sharp shears, rooting hormone, and a healthy plant to get started.
About Hydrangeas
The hydrangea, also known as hortensia, is a genus of plants with over 75 species. They are native to Asia and the Americas, with most species originating from eastern Asia.
Hydrangea is from the Greek for ‘water vessel’, named due to the appearance of the seed capsules of the plant. The other common name hortensia is in honor of Nicole-Reine Hortense Lepaute, French astronomer and mathematician.
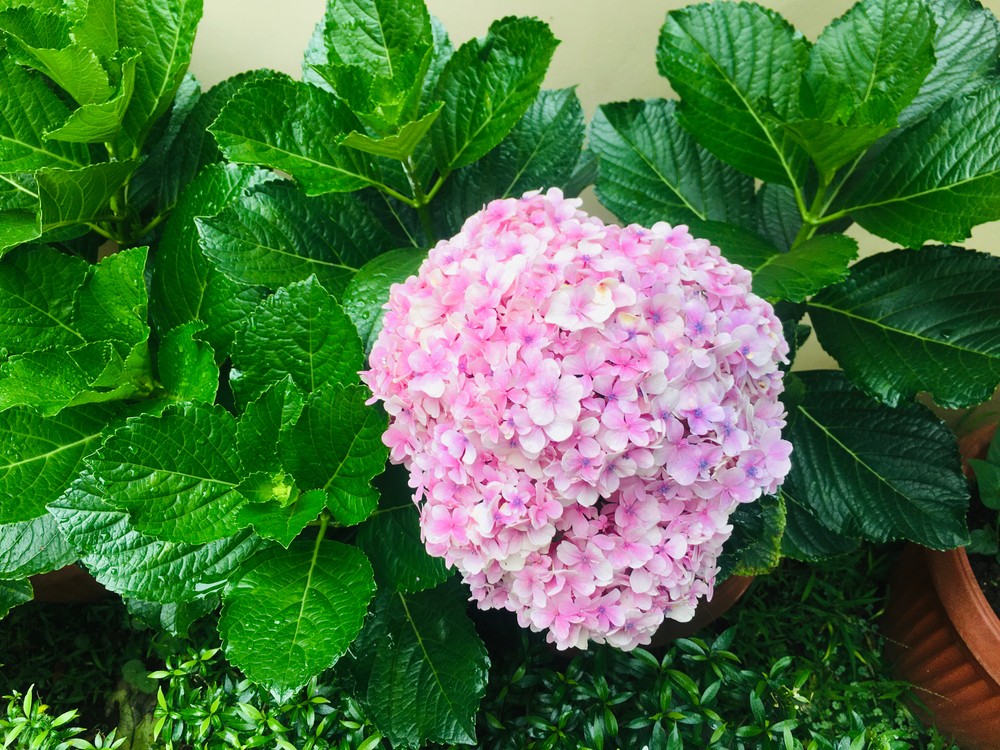
Hydrangeas are cultivated as ornamental plants around the world. While there are many different species, the most commonly cultivated type is Hydrangea macrophylla, also known as the mophead hydrangea.
There are more than 600 cultivars of this incredibly popular species, featuring massive flowers and stunning colors.
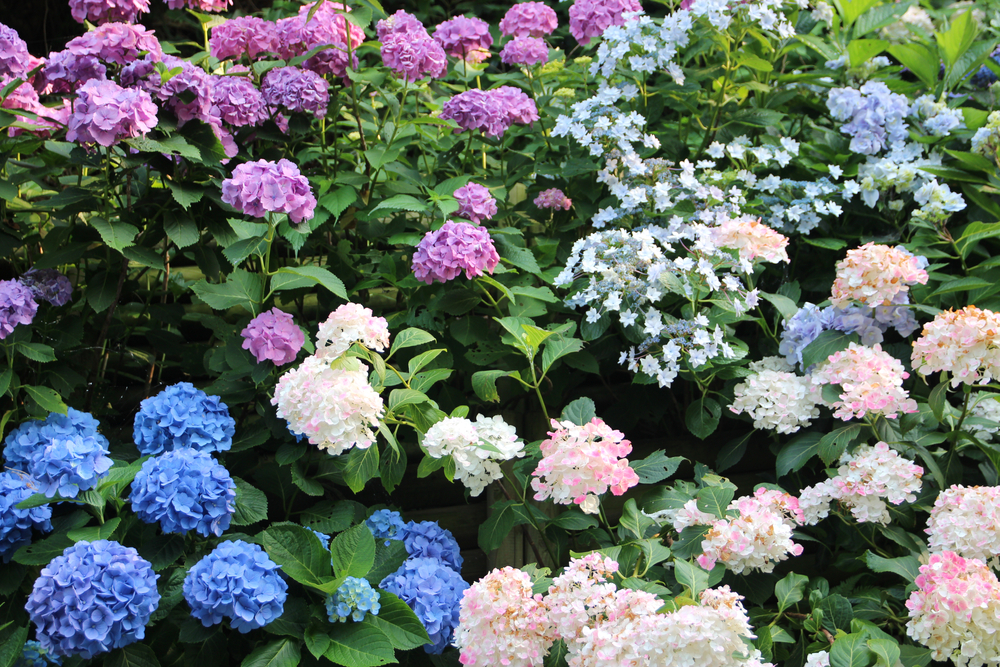
Each species has a slightly different growth habit and blooming time. It’s important to understand what type you are dealing with before you get started in order to provide the best care. Some other hydrangea species include:
- Hydrangea mycrophylla (Bigleaf)
- Hydrangea paniculata (Panicle)
- Hydrangea quercifolia (Oakleaf)
- Hydrangea arborescens (Smooth)
No matter which species you choose, they are all easy to propagate with high chances of success. They can be propagated in spring, but for most species, cuttings are best taken in autumn after flowering.
Here’s how to get started.
7 Steps To Propagate Hydrangeas From Cuttings
1. Prepare The Soil
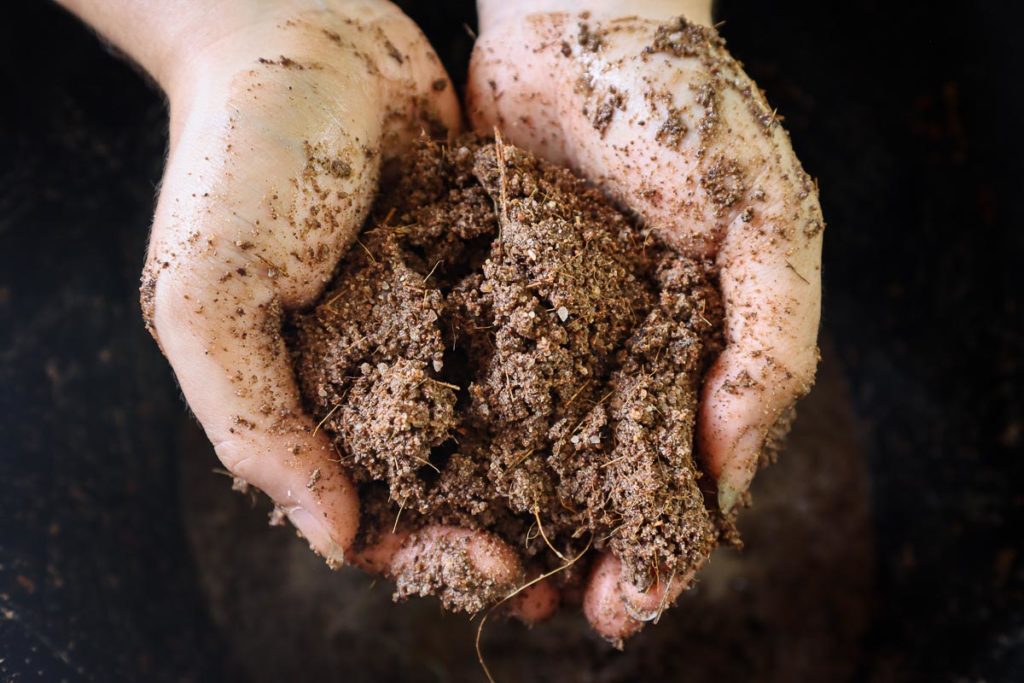
Soil is an often overlooked but all-important part of propagating, especially when it comes to softwood or hardwood cuttings. It needs to be well-draining to avoid rotting the stems but retain enough moisture to promote root growth.
Hydrangeas can be propagated in a high-quality, well-draining potting mix if you have some on hand. But, to provide the best environment for your cuttings, it’s far better to make your own soil mix.
A combination of equal parts coconut coir and river sand is ideal for any softwood or hardwood propagation. The coconut coir retains moisture while the sand improves drainage.
You can replace coconut coir with peat moss if you already have some available, and river sand with perlite or another material that improves drainage.
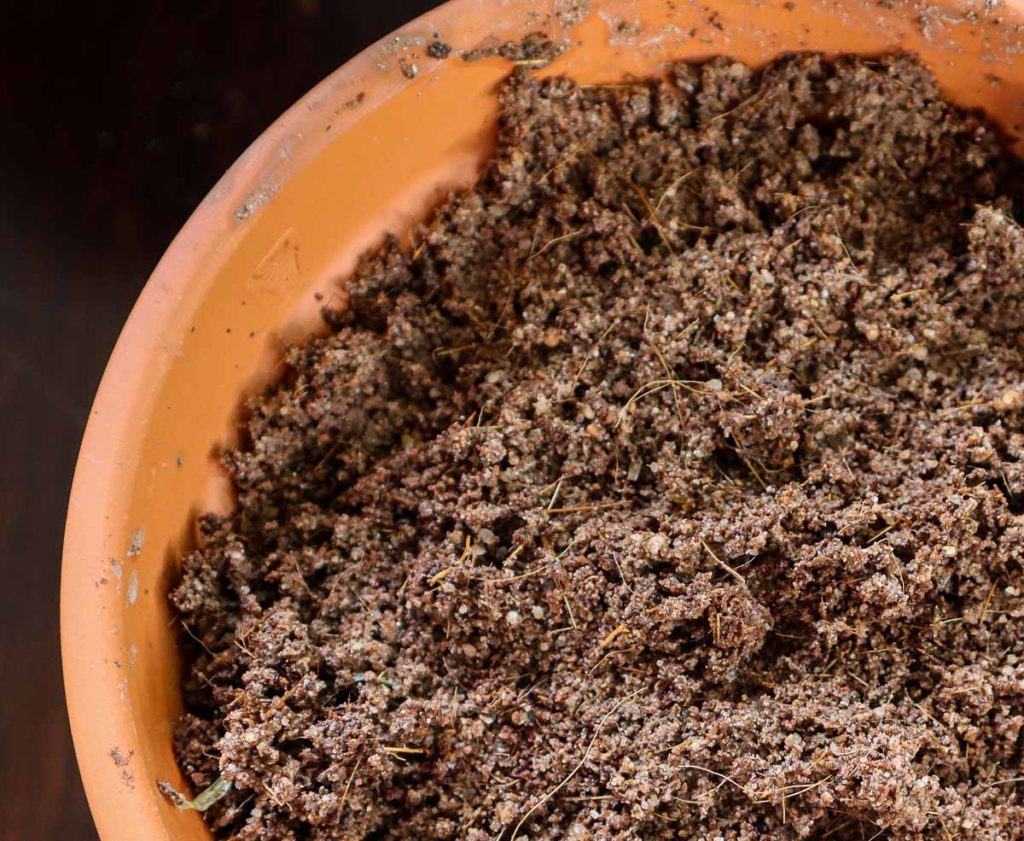
Mix the soil thoroughly and add it to a medium-sized pot with enough depth to hold the cutting. Water the soil before planting to pre-moisten it and avoid washing away the rooting hormone later on.
2. Choose A Stem
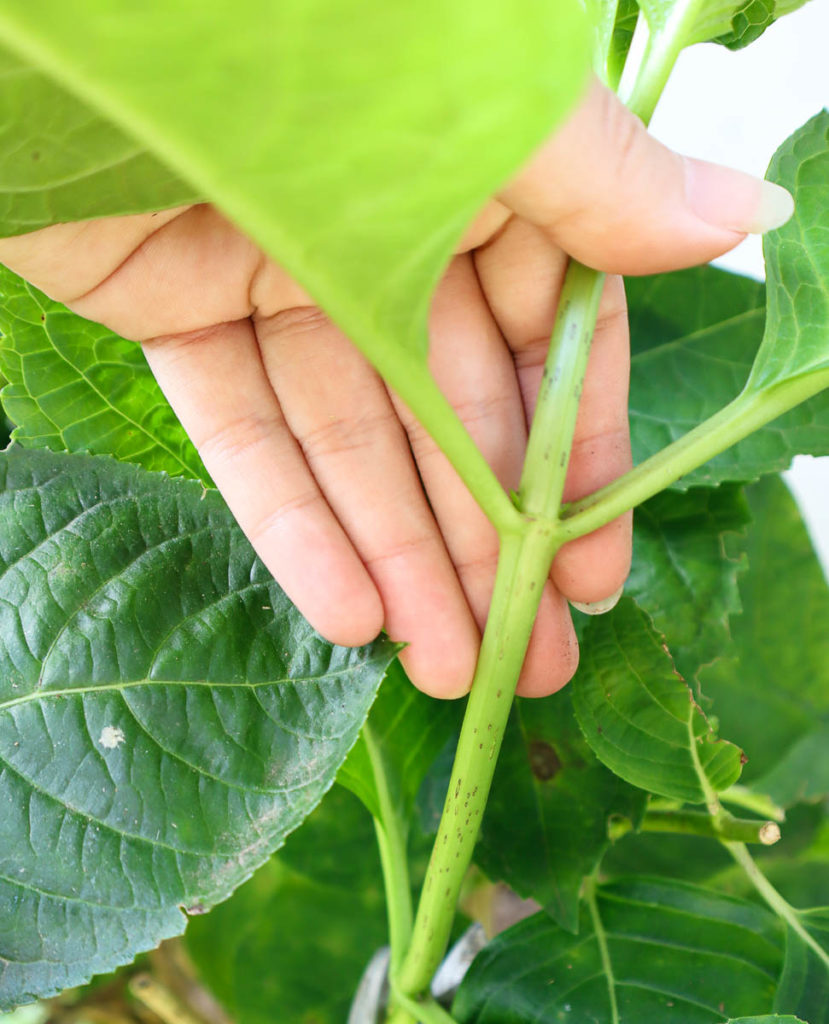
Next, take a look at the parent plant and locate the perfect stem. It should be a minimum of 6 inches long with light green, new growth. Don’t choose a stem with last season’s woody growth as it is far less likely to develop roots.
It’s also preferable to choose a stem that hasn’t flowered this season, although that is not a necessity. Avoid any stems that are currently flowering too, as this will draw energy away from root development if the flowers are not removed.
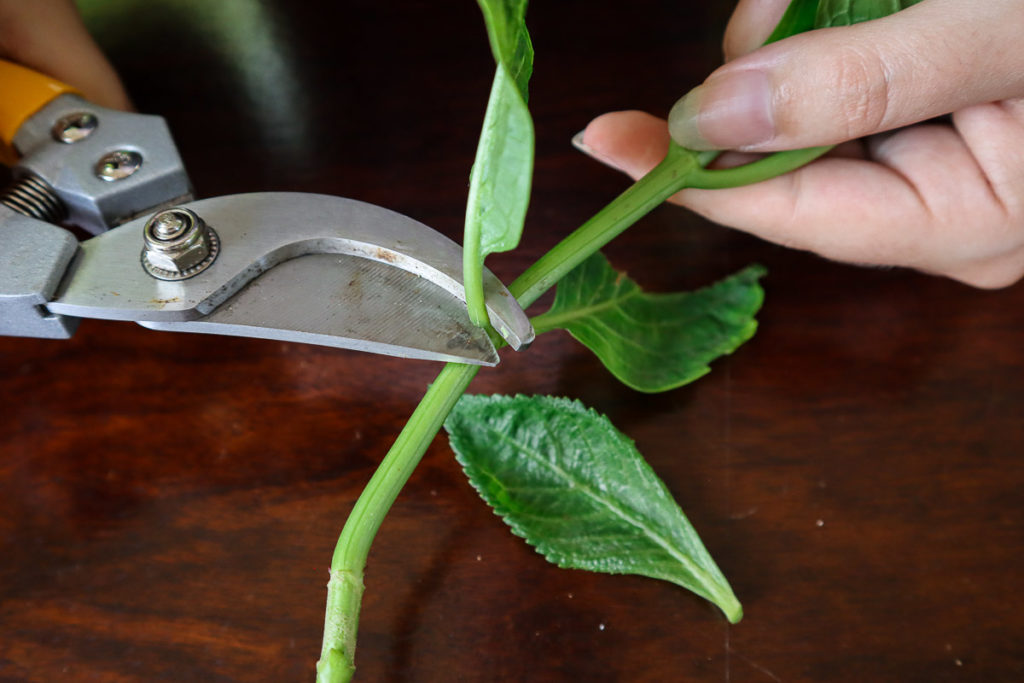
3. Make A Cut
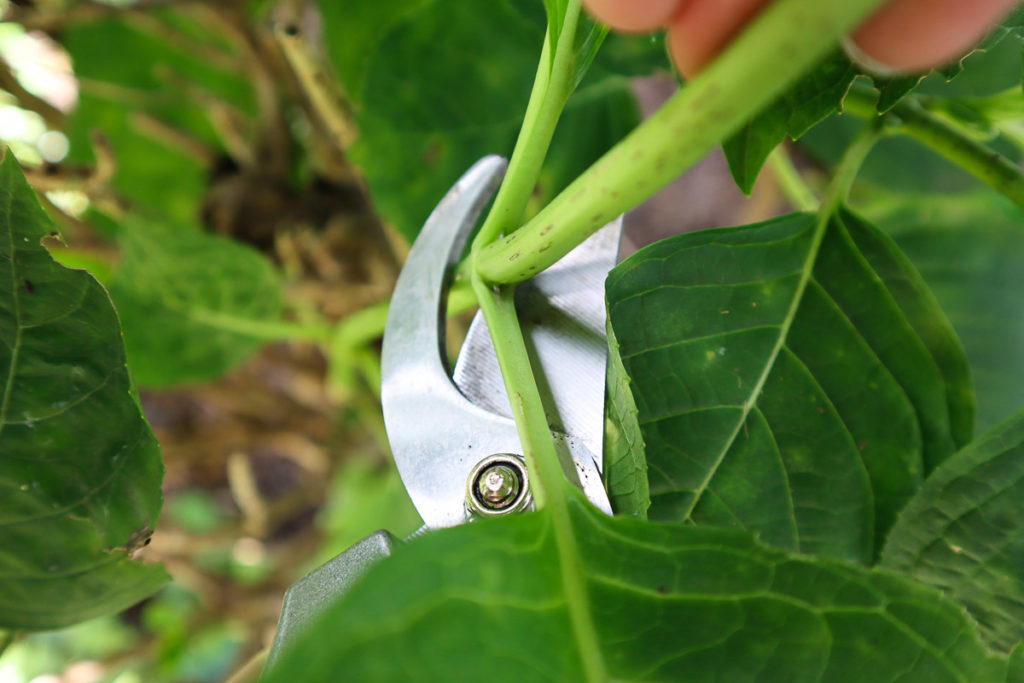
Grab a pair of sharp pruning shears. Clean them before you make any cuts with a 5% bleach solution to remove any potentially harmful germs and bacteria. This will stop any disease from transferring to your cutting or to the parent plant.
Cut a section of your chosen stem a minimum of 4 inches long with several nodes. The nodes are the points where the leaves emerge along the stem. You need at least one node at the very end of the cutting and one set of leaves at the top, but more nodes will give you a greater chance of rooting.
Make a cut at a 45° angle just below one of these nodes, but not too close to avoid damaging it. This is the point where the new root growth will develop.
4. Remove And Trim The Leaves
Remove any leaves from the bottom section of the cutting, leaving one set at the very top. Trim them off with shears rather than removing them by hand to avoid damaging the nodes.
Don’t leave any leaves on the bottom half of the cutting as this will be buried underneath the soil and can attract disease.
Ensure there are at least two leaves on the top set remaining. Then, cut those leaves in half horizontally.
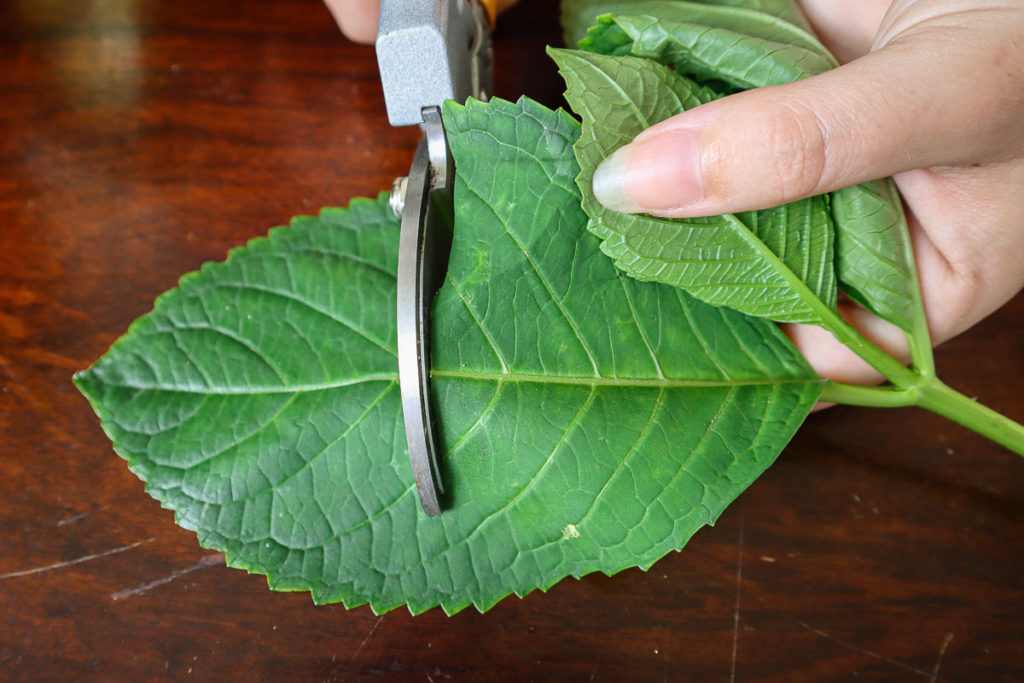
This reduces strain on the cutting by limiting moisture uptake, allowing the plant to focus on producing roots instead.
5. Dip In Rooting Hormone
Rooting hormone, typically available in powder form, is a substance that stimulates root growth in cuttings.
While it’s not an absolute necessity, it does greatly increase the chances of rooting in softwood and hardwood cuttings. It also limits your chances of disease, which can frequently attack open and vulnerable growth in the soil.
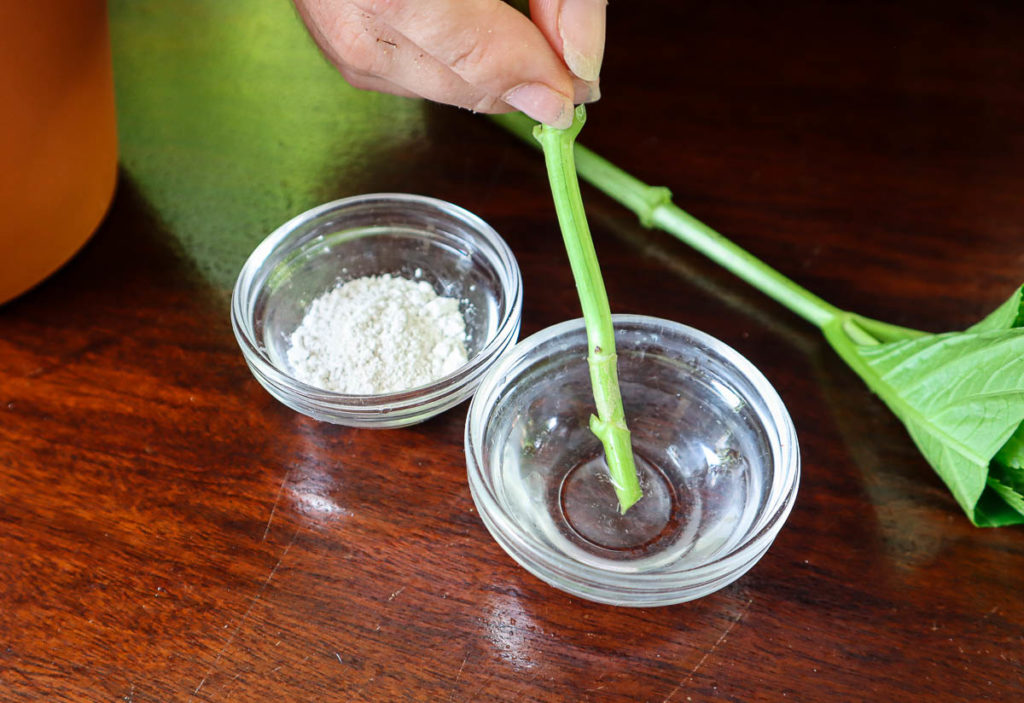
Remove a small amount of powder from the container and place it in a separate bowl. Dip the end of your hydrangea cutting into some water and then into the powder, ensuring the exposed section is covered.
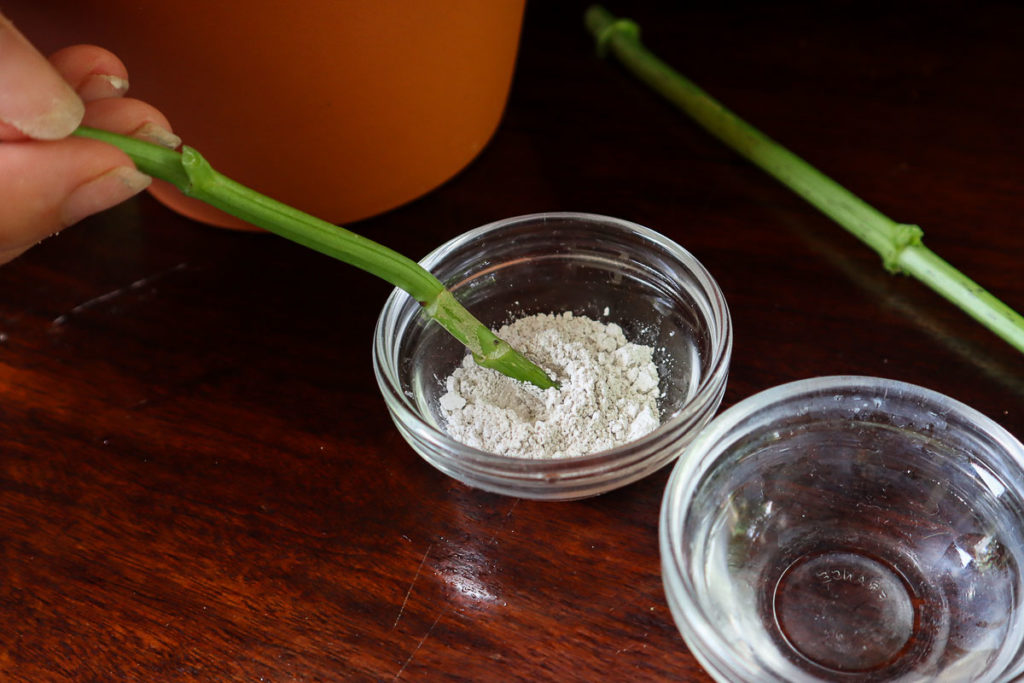
Don’t dip the cutting straight into the container as this can result in contamination, making the rest of the powder unusable. For the same reason, discard any leftover powder rather than put it back into the original container when you’re finished.
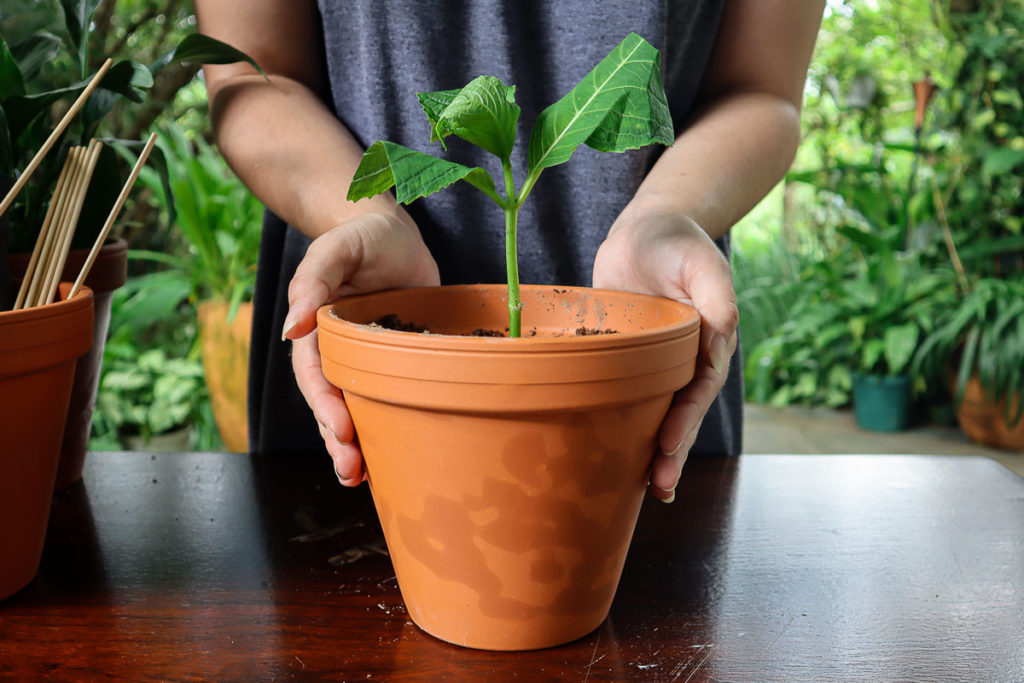
6. Plant The Cutting
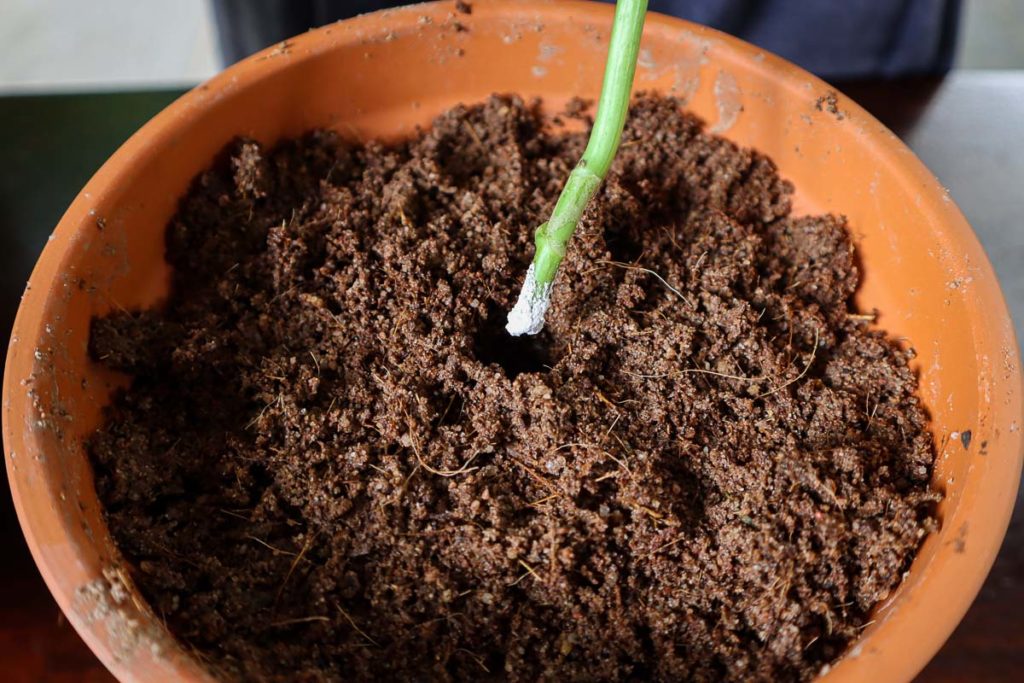
Grab your pot filled with soil mix and make a hole with your finger in the center. Adding the hole beforehand stops any rooting hormone from being removed from the end of the cutting as it goes into the soil.
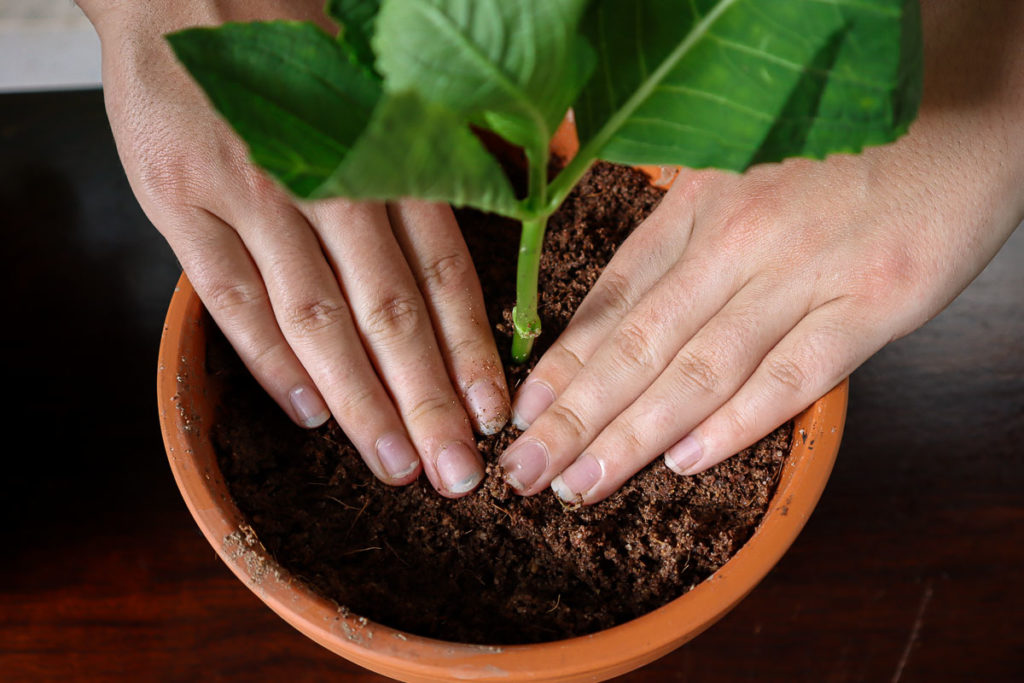
Bury the bottom half of the cutting and press the soil around it to anchor it in place. If your soil has been sufficiently premoistened, you don’t need to water after planting.
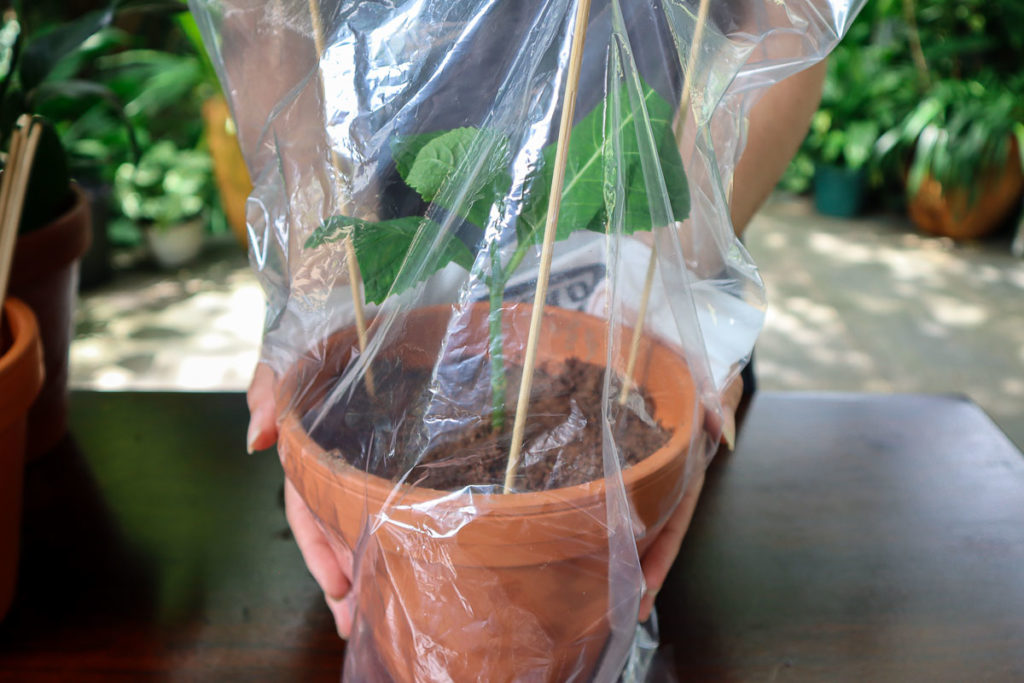
7. Cover In Plastic
Hydrangeas need warmth and high humidity to develop roots. You can create this environment around the plant by placing a clear plastic bag over the pot. This also seals in moisture, extending the time it takes for the soil to dry out.
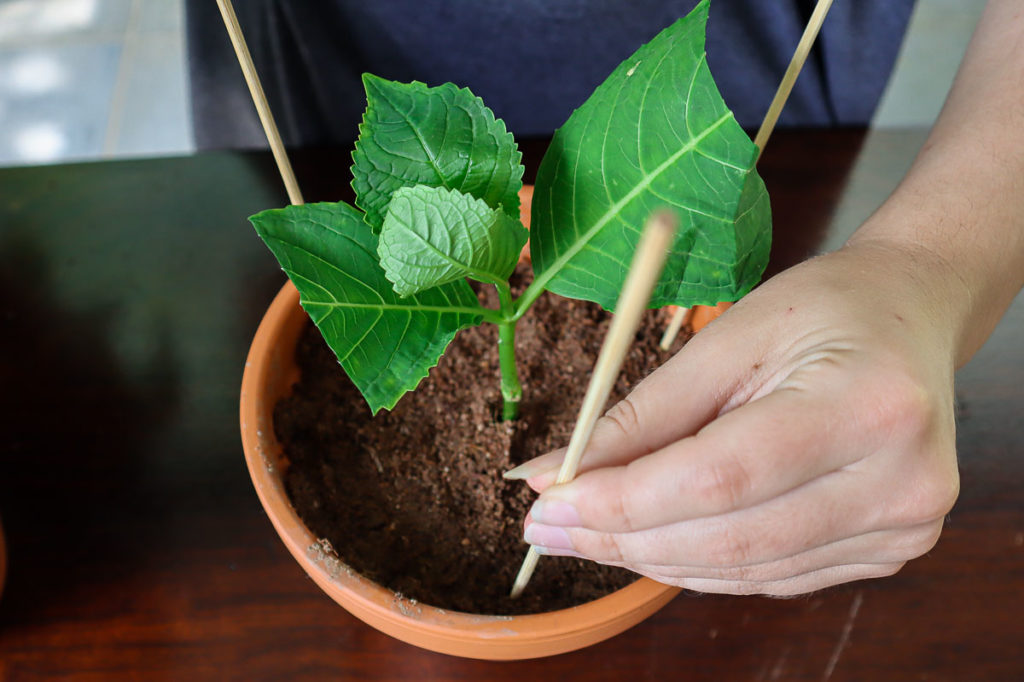
Grab a few skewers or sticks and place them around the edges of the pot so the height is just above the cutting.
Then, place a clear bag (sandwich bags are suitable) around the pot to rest on the skewers. This will keep the plastic off the cutting completely, preventing rotting by stopping any moisture on the sides from resting on the leaves or stem.
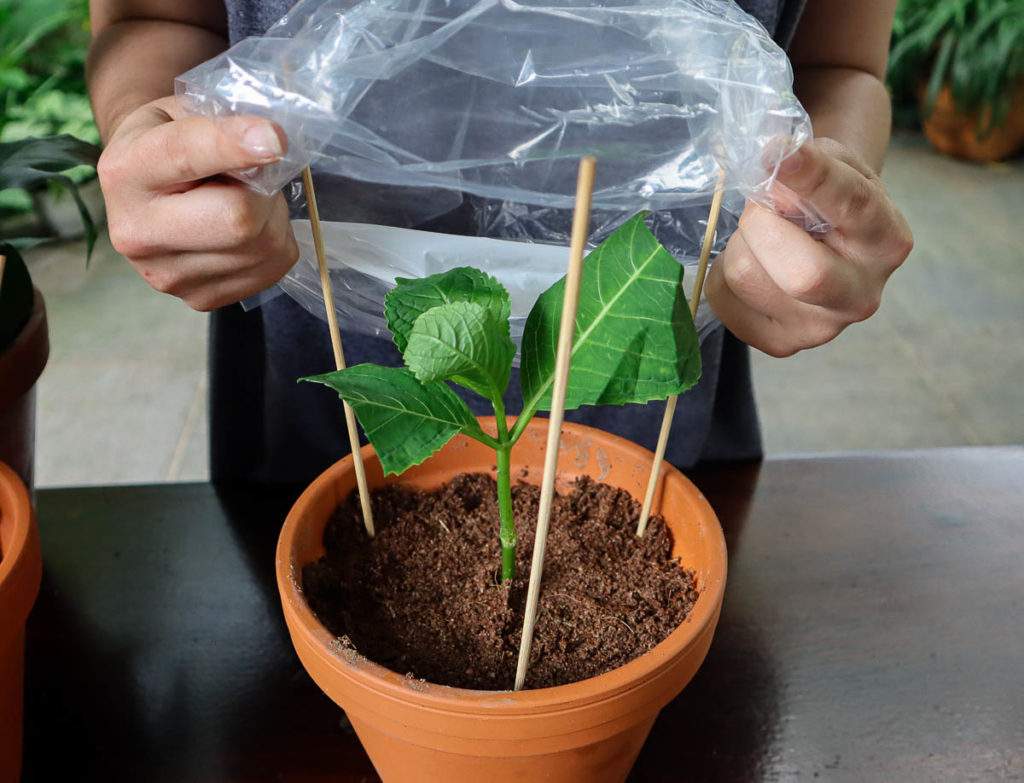
You can secure the plastic with a rubber band around the pot, but this does make it more difficult to remove later and limits airflow. Instead, place your pot in a warm spot away from any wind or direct sun as this can burn the leaves through the plastic.
Post-Planting Care
Keep the soil moist by misting regularly and adding water if it starts to dry out. Don’t overdo it as the stem can quickly rot in cases of overwatering.
After about 3-4 weeks, small roots should have developed. You can test by pulling gently on the cutting – if there is some resistance, there is root growth. Remove the plastic bag and continue to keep the soil moist, keeping the pot in a shady but warm area.
You can keep your cutting in the same pot or transplant it into a larger one if you think they need more space. Once the roots are established and strong, you can keep your hydrangea in its pot until you are ready to move them into the garden.
It really is that simple. With a few tools and a bit of patience, you can have an extensive hydrangea garden at practically no cost.